
Handmade Wool Advent Calendar
WonderFil Specialty Threads
Today we’ve got a fun handmade craft for you and your family to enjoy the upcoming Christmas season with. Using these pre-cut wool kits designed by Sue Spargo and a few extra supplies, you can create this cute advent calendar! You can follow along with our free downloadable pattern here: https://bit.ly/2CJqG1x
Want to have some company while you sew? Watch our YouTube video while you work!
We’ve chosen these 3 kits, Butterfly, House, and Bird and Tree, and rearranged the patterns into a Christmas theme. If you want to know more about these pre-cut wool kits, you can watch our in-depth video about them here: https://www.youtube.com/watch?v=qeNFMGEx4gg

For our project, we used Butterfly #2, House #2 and Bird and Tree #4. You can shop for these pre-cut wool fabrics here: https://shopwonderfil.ca/product/sue-spargo-pre-cut-wool-kits/
We’ve listed which colourway we used for each kit, but you can select yours to suit your own home and style.
To make some of the pockets in the calendar, remove the 6 inch by 6 inch background fabric included in the 3 pre-cut wool kits. Cut it into quarters so there are four three inch squares. Do this with the other two kits, so there is a total of twelve three inch squares.

However You’ll still need more pockets so we’ll need to cut more pieces from other sheets of wool. I’m going to cut 10 pieces of 2.25 inch squares. And one single 4.5” square. You can mix and match your colours to coordinate with the wool from the kits.

Need some extra wool? You can find the perfect colour to match your home and aesthetic in this collection! We’re using the Grey pack for our project. You can shop the Sue Spargo wool packs here: https://shopwonderfil.ca/product-category/woolfabric/wool-packs/
Now we’ll need to cut the numbers for the pocket. Use the pattern included in the free printable download to cut out your wool pieces.
Finally, you’ll need a background fabric cut at 22 inches by 26 inches. We’re going to be using a yarn dyed cotton fabric, but you can use whatever you think would complement the wool fabric.

Now that everything is cut out, lay the pieces out on the background fabric and arrange them where I want them. When you’re happy with the positioning, pin the pieces in place. At this point you can raw edge appliqué the numbers to the squares.

We’ll be using this 12wt low lint cotton thread called Spagetti. It’s a thicker thread that will pop and look more decorative when used as a topstitch, while the cotton material blends nicely against the wool. For ours, we used Spagetti in the colour Charcoal, or SP202. You can find this specific colour here: https://shopwonderfil.ca/product/sp202-charcoal

Are you feeling a bit more like sitting around with the family, a hot cup of cocoa and having a hand appliqué party? This wool appliqué tutorial by Sue Spargo is a helpful tool If you’re just getting started, or are unsure how to teach new young sewers. https://mailchi.mp/suespargo/creative-classroom-k3whr9ydmw
After each number is appliquéd to its box, pin it back where it belongs on the panel.
You can now begin stitching your boxes down. Using the same Spagetti thread, sew along the left, bottom, and right sides of the squares while leaving the top open to create the pockets that will hold your small treats.

You’ll also want to appliqué the wool pre-cuts down at this point. Remember to start with the piece that will sit at the very back and move your way forward to the pieces that will sit at the front.
Now that all of the pieces are appliquéd in place, you can add hand embroidery stitches to spruce it all up.

This is an 8wt perle cotton thread called Eleganza, which is perfect for hand embroidery stitches because its low lint finish and tight twist add a beautiful and subtle surface sheen. Your pre-cut wool kits will include instructions on basic hand stitches, so follow along with these stitch cards to decorate your calendar.

When everything is embroidered the way you want it, you can finish it with a pillowcase finishing technique. With your panel right side up, place a layer of batting and backing fabric over top. Make sure the backing fabric is right side down.

You’ll want to make sure that the backing and batting is larger than the top fabric. Measure both the batting and the backing at 34 inches by 26 inches, or 86 centimeters by 66 centimeters

Stitch the edges down with a quarter inch seam allowance. Leave a 4 inch opening on one side and don’t forget to backstitch at each end.

To make sure everything is stitched down well, it’s a good idea to go around again a second time, this time with a one eight inch seam allowance, starting and stopping at the same 4 inch gap, again using Spaget

Flip your piece inside out through the opening. Then give it a press with the iron to make the edges crisp.
As a final step, you can do some straight stitching between the design to help hold down the front, batting, and backing together.

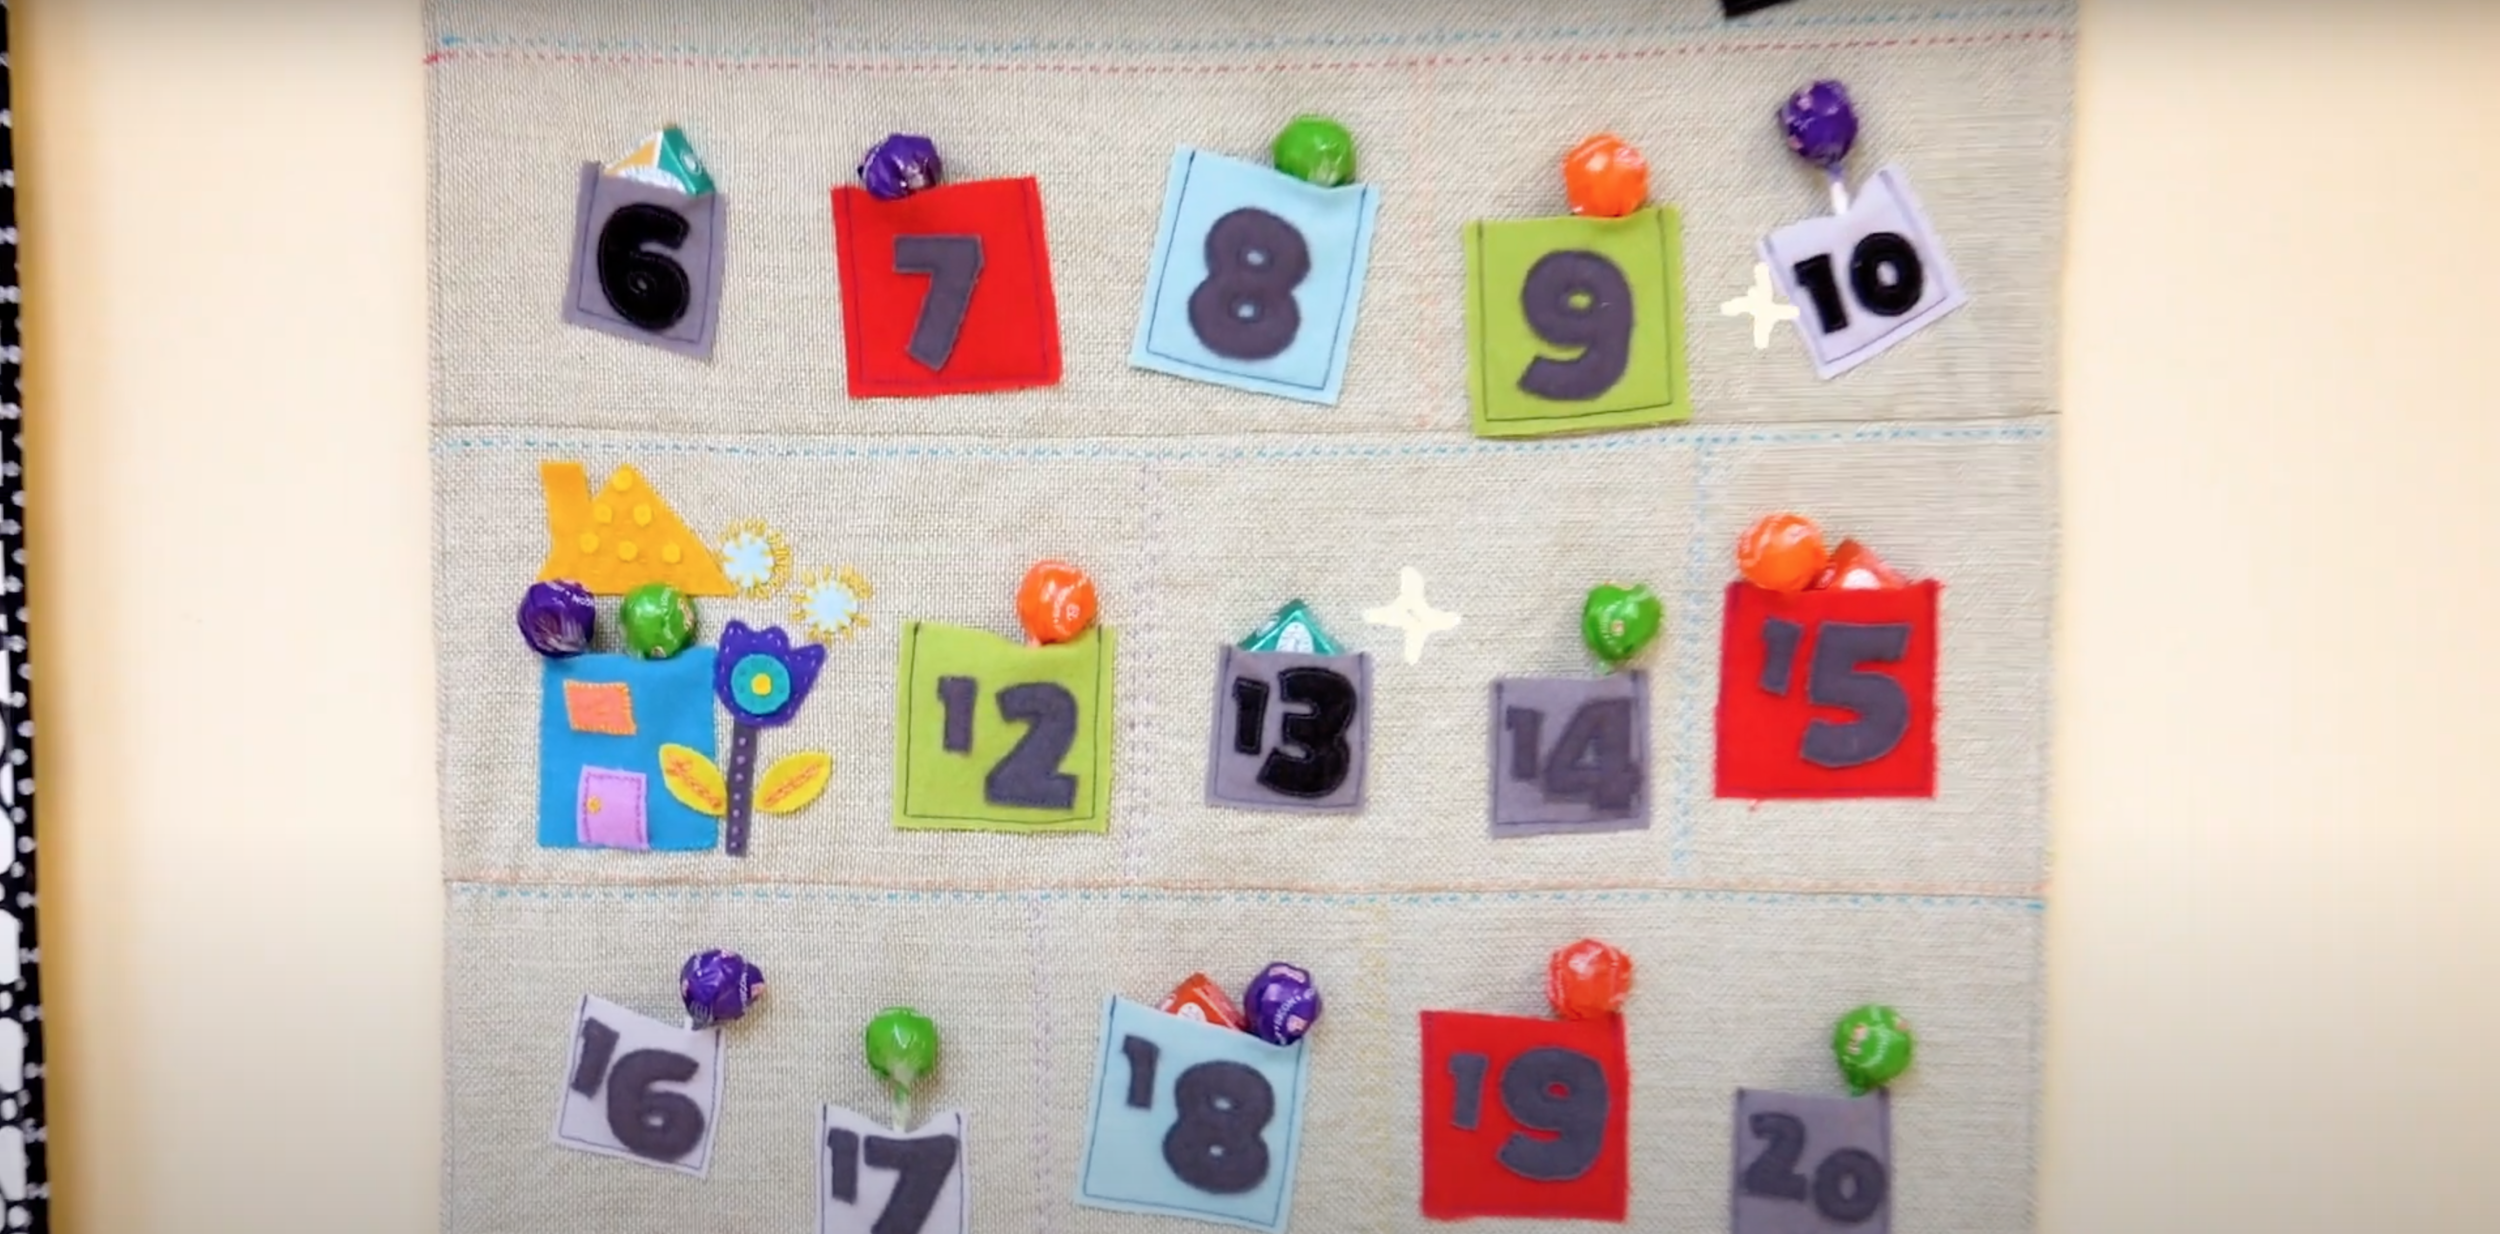
The finished advent calendar is a cute, cozy and customized piece you can tuck candy, small toys, or heartfelt messages into as you count down each day until Christmas.
Do you need some ideas for what to put in your advent calendar? Check out this great list by apartment therapy: https://www.apartmenttherapy.com/ultimate-list-of-advent-calendar-gifts-250929
These wool pre-cut kits designed by Sue Spargo make adorable decorations to give your handmade home décor that special touch. Using our downloadable pattern as a template, get creative and make your own design with your choice of colour, threads, pre-cut wool and wool fabric packs, and hand embroidered stitches to give it that special, personalized touch. This is also a great project to make together as a family this season, and what’s better than a family project to decorate the home with.
Feeling inspired to get creative with your stitching, and the cards included in the pre-cut wool packs just aren’t satiating your creative cravings? Sue Spargo’s book “Creative Stitching” has all you’ll ever need to cure that creativity craving! https://www.suespargo.com/store-detailnew.php?cat=12&ID=0
If you make this project, be sure to tag us in it on our Instagram @wonderfilspecialtythread or use the hashtag #wonderfil so that we can see what you make, and share them! And though it might still be a little bit early to say this, we’re wishing you a warm and cozy holiday season from all of us here at WonderFil Specialty Threads!
Can you feel the festive cheer in the air? Head on over to https://shopwonderfil.ca/ to harness that feeling and bring it into your home this holiday! You can also sign up for our free newsletter to receive more educational sewing tips, tutorials, and free patterns. Register by clicking here! We’ll see you again next time!