Making a Placemat for Your Easter Table
WonderFil Specialty Threads
Here is a simple idea to freshen your Easter table. It requires few supplies, and is quick and easy to make. WonderFil threads add the color and fun!
Materials:
- 14" x 18" Fabric. (We used a firm white linen, but a burlap would also be cute for a more rustic look.)
- Scraps of fabric for rooster and fusible web.
- WonderFil™ Threads for couched edge: We used WonderFil™ Eleganza #3 (#EZ09-Seaglass and #EZM30-Crushed Clementine and stitched it down with Tutti (Variegated 50wt cotton-colour #TU02-Bright Day.)
- WonderFil™ Eleganza #8 in White and Red(#EZ24) for embellishing.
- InvisaFil (100wt Cottonized Polyester #IF104-White) to stitch hem.
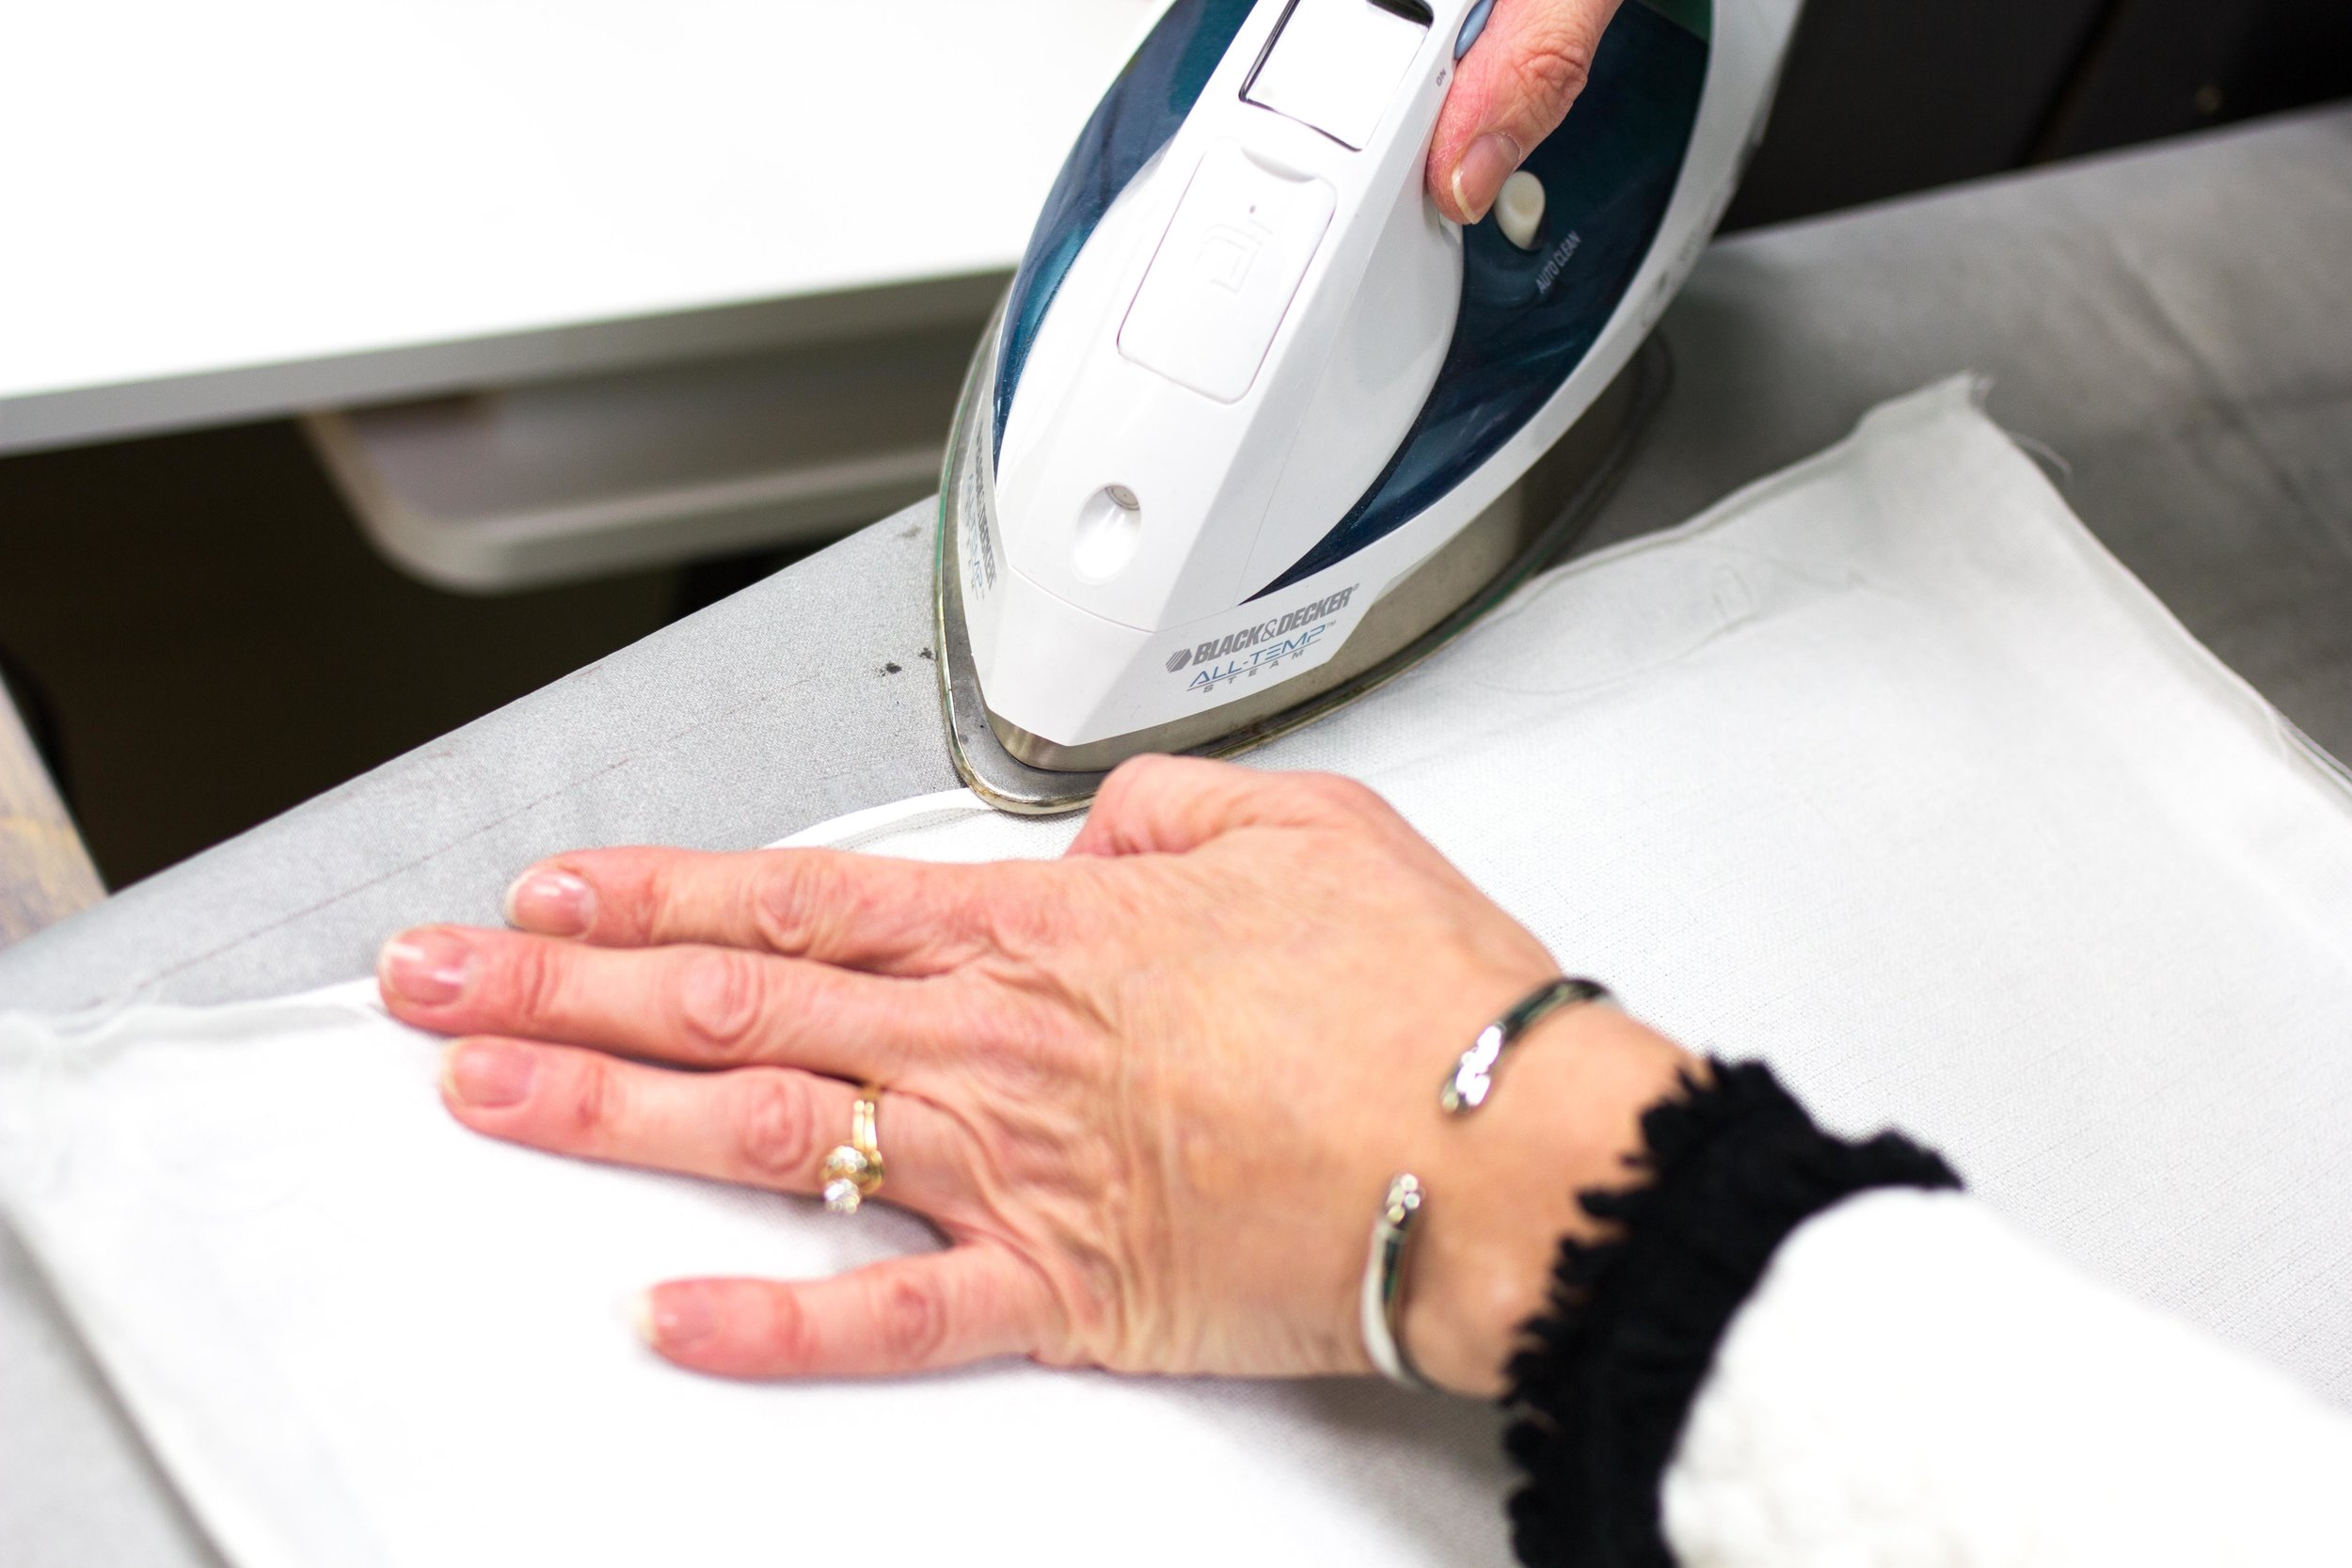
image 1
1. Press down ¼” around perimeter of rectangle.

image 2
2. Carefully measure a 1” hem around the edge and press again.

image 3
4. Mark a line with disappearing marker ¾” from pressed hem edge.
5. Pick a spot (not on the corner) and with a large eye needle, thread the two heavier threads from right side to wrong. Starting with the heavier thread ends pulled to the back will make it easier for you to have a clean finish at the end of your work.
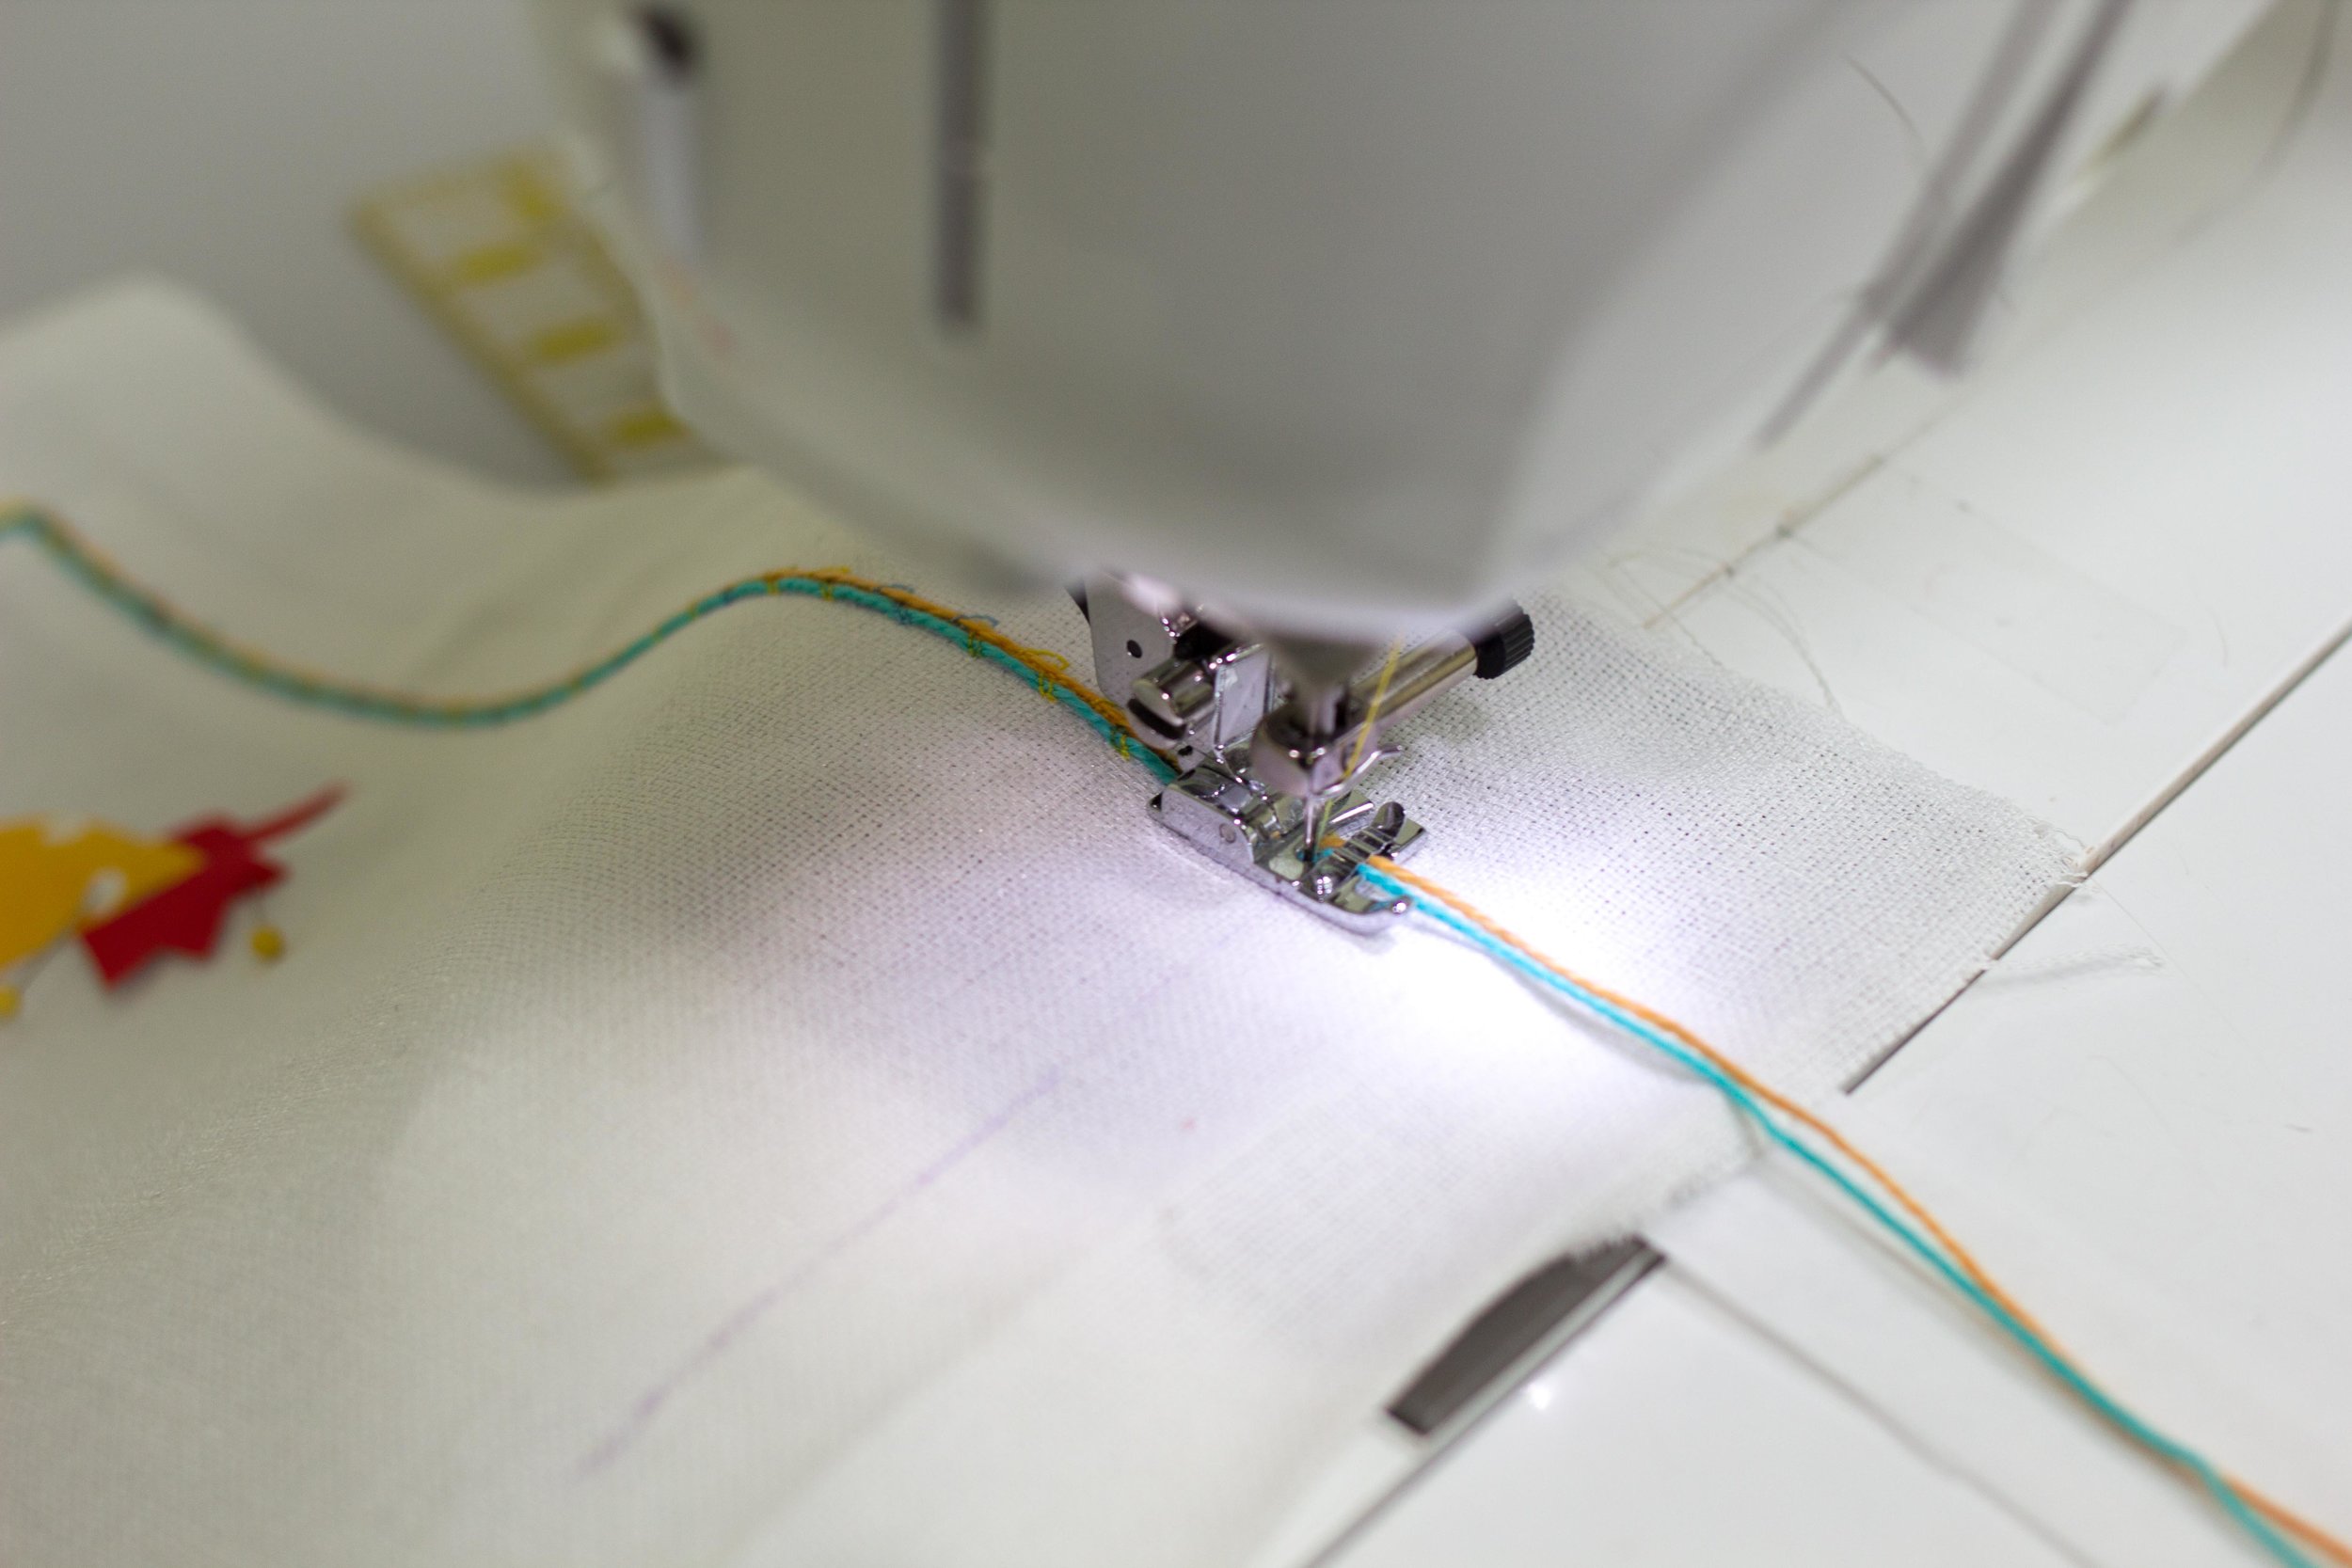
image 4
6. On the right side, feed the threads into your cording foot (keepingthe heel of the foot close to where the ends have been pulled to the wrong side)and, following your marked line, begin stitching. You can use a simple zig zag, or pick one of you machine’s decorative stitches. Adjust the width of your stitch so it just clears the top threads on each side. We stitched two threads down at once, but you could opt to stitch two or more single rows. A couching or cording foot like the one pictured is helpful to keep the strands evenly spaced . You will be laying the heavier threads on top of your fabric, and stitching them down with the decorative stitch and Tutti threaded through the needle. As we always do, we used a DecoBob prewound bobbin in the bottom (in white).
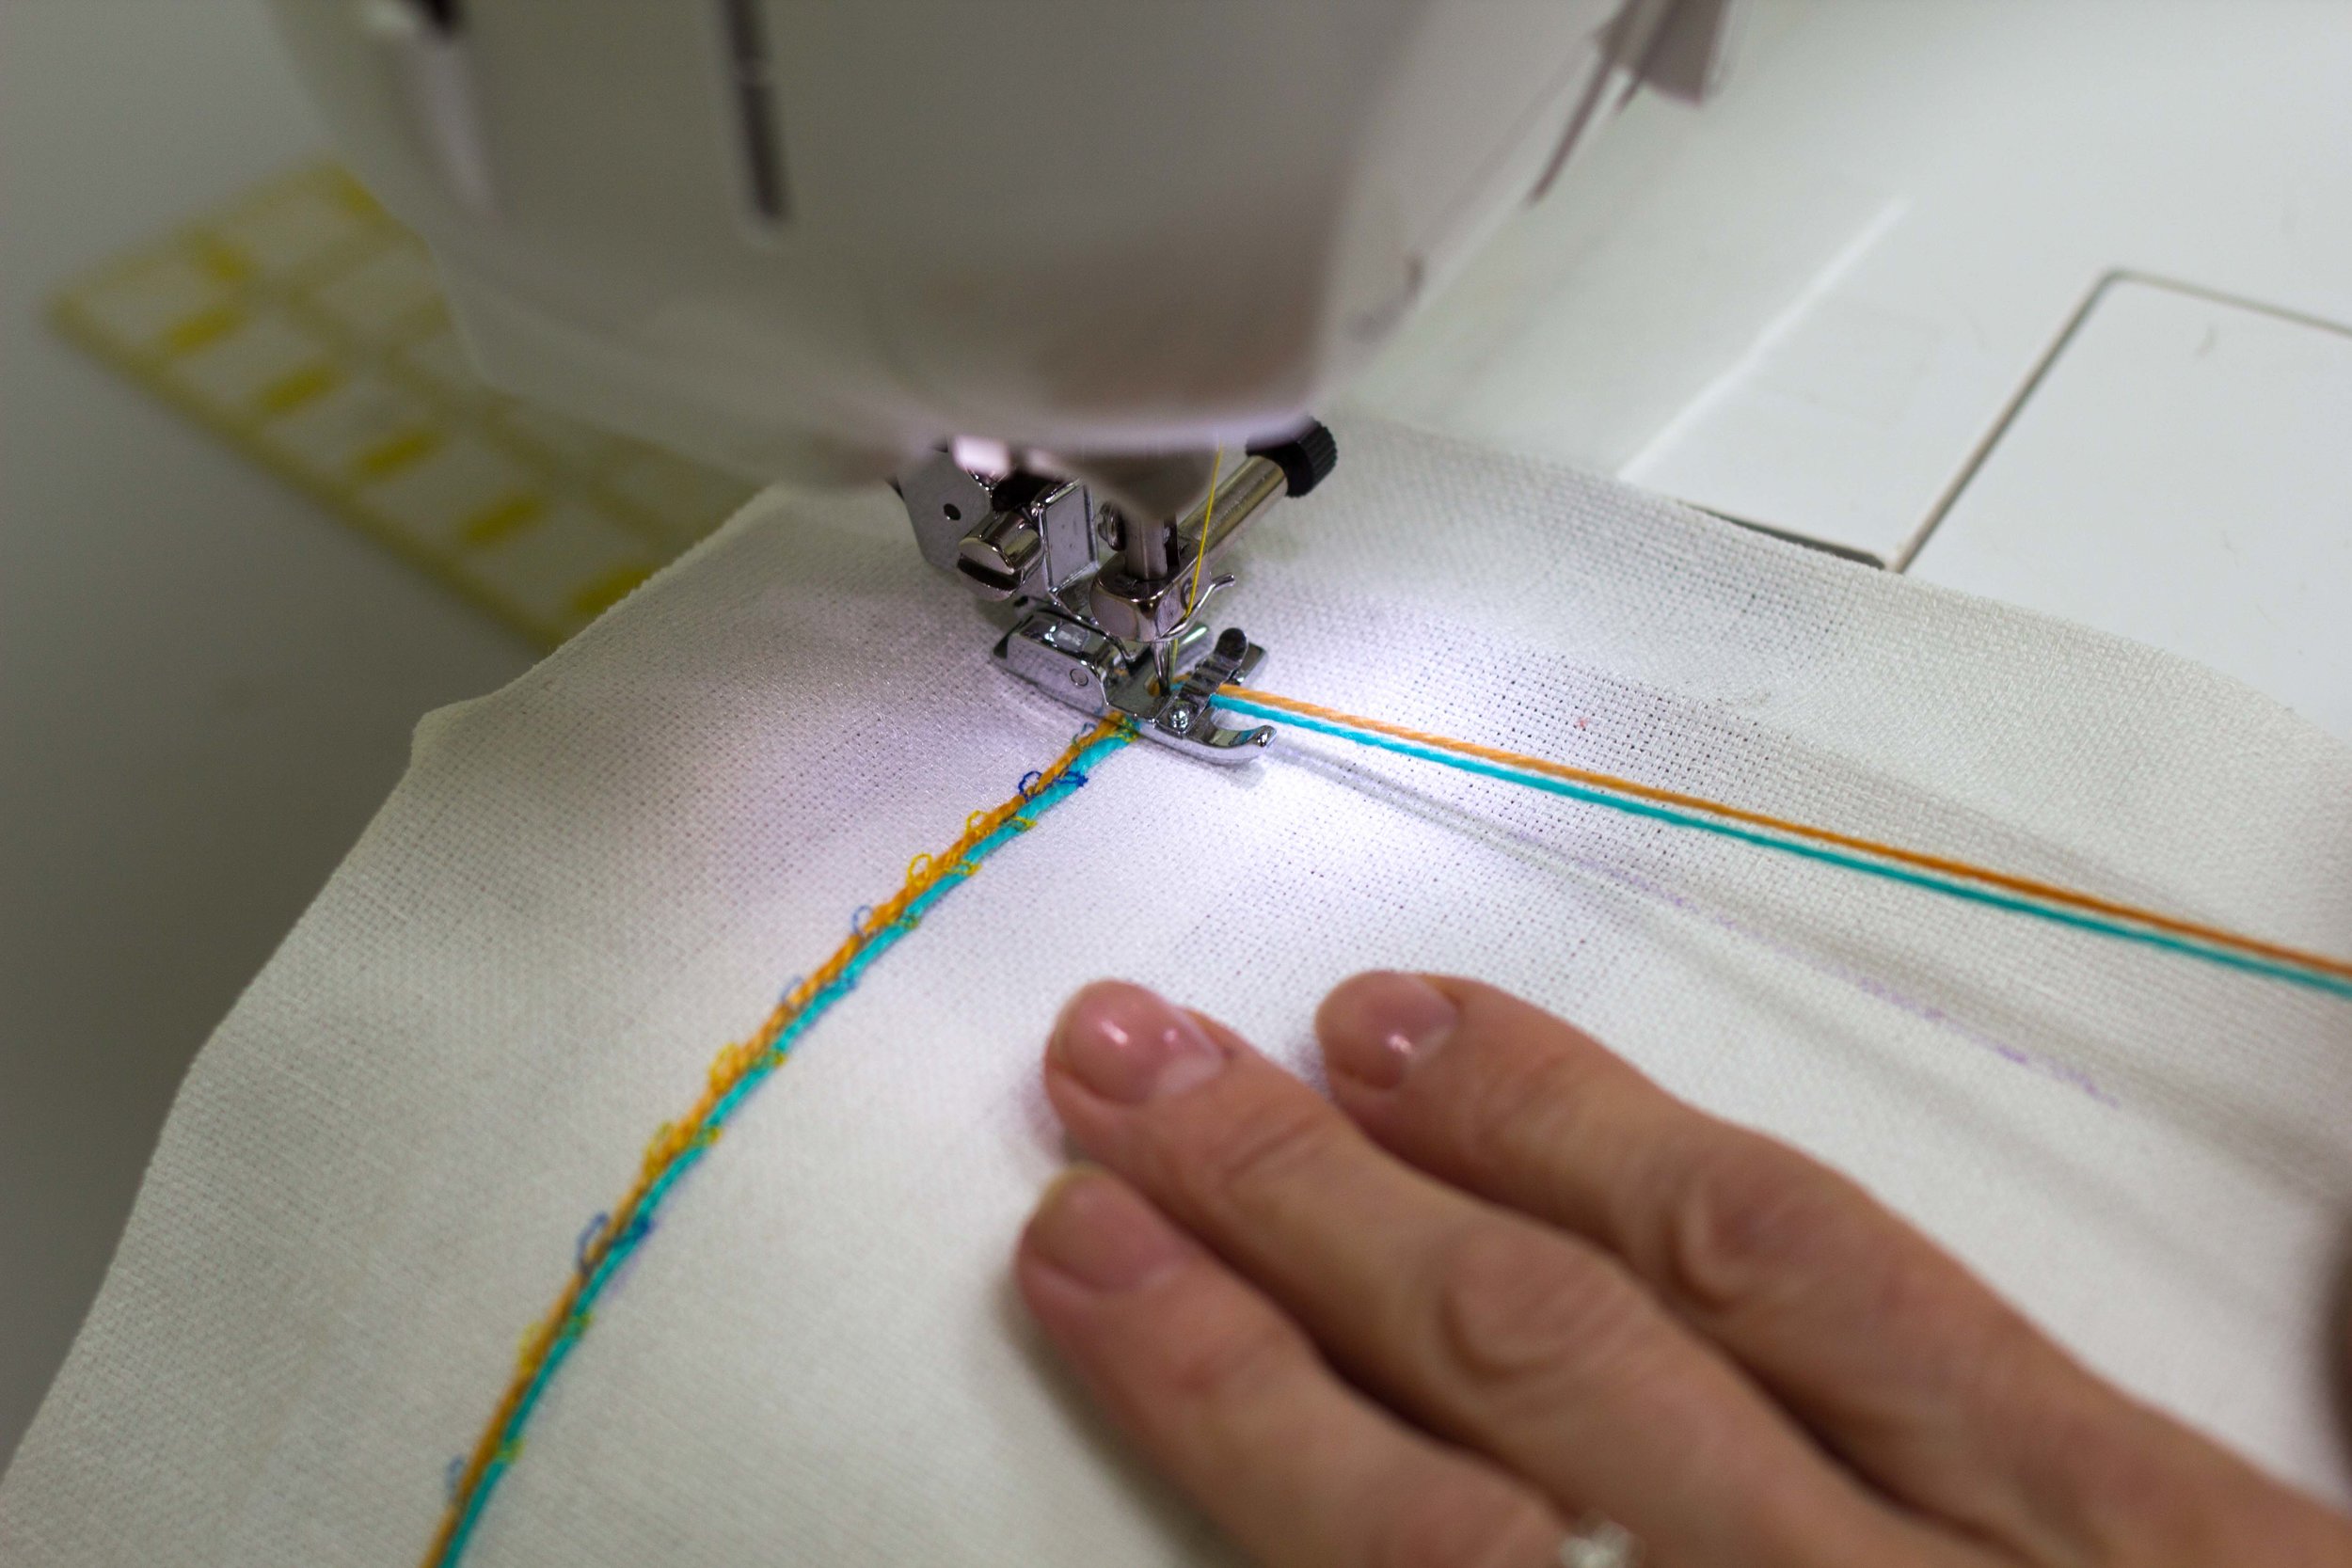
image 5
7. When you get to the corner, stop with your machine needle down and to the inside of your rectangle, to make a square corner.

image 6
8. Complete your rectangle, lining up the finished threads with your start.

image 7

image 8

image 9
9. Leaving a tail (image 7), cut your top threads and then use the large eye needle to thread them through to the wrong side (image 8&9). Knot threads and trim them close

image 10

image 11
10. Using your marking pen, mark a spot double your hem width from the corner (in this case 2”). Make sure you make this measurement from the first ¼” pressed down hemand not from the raw edge (image 10). Repeat on the other side of the corner (image 11).
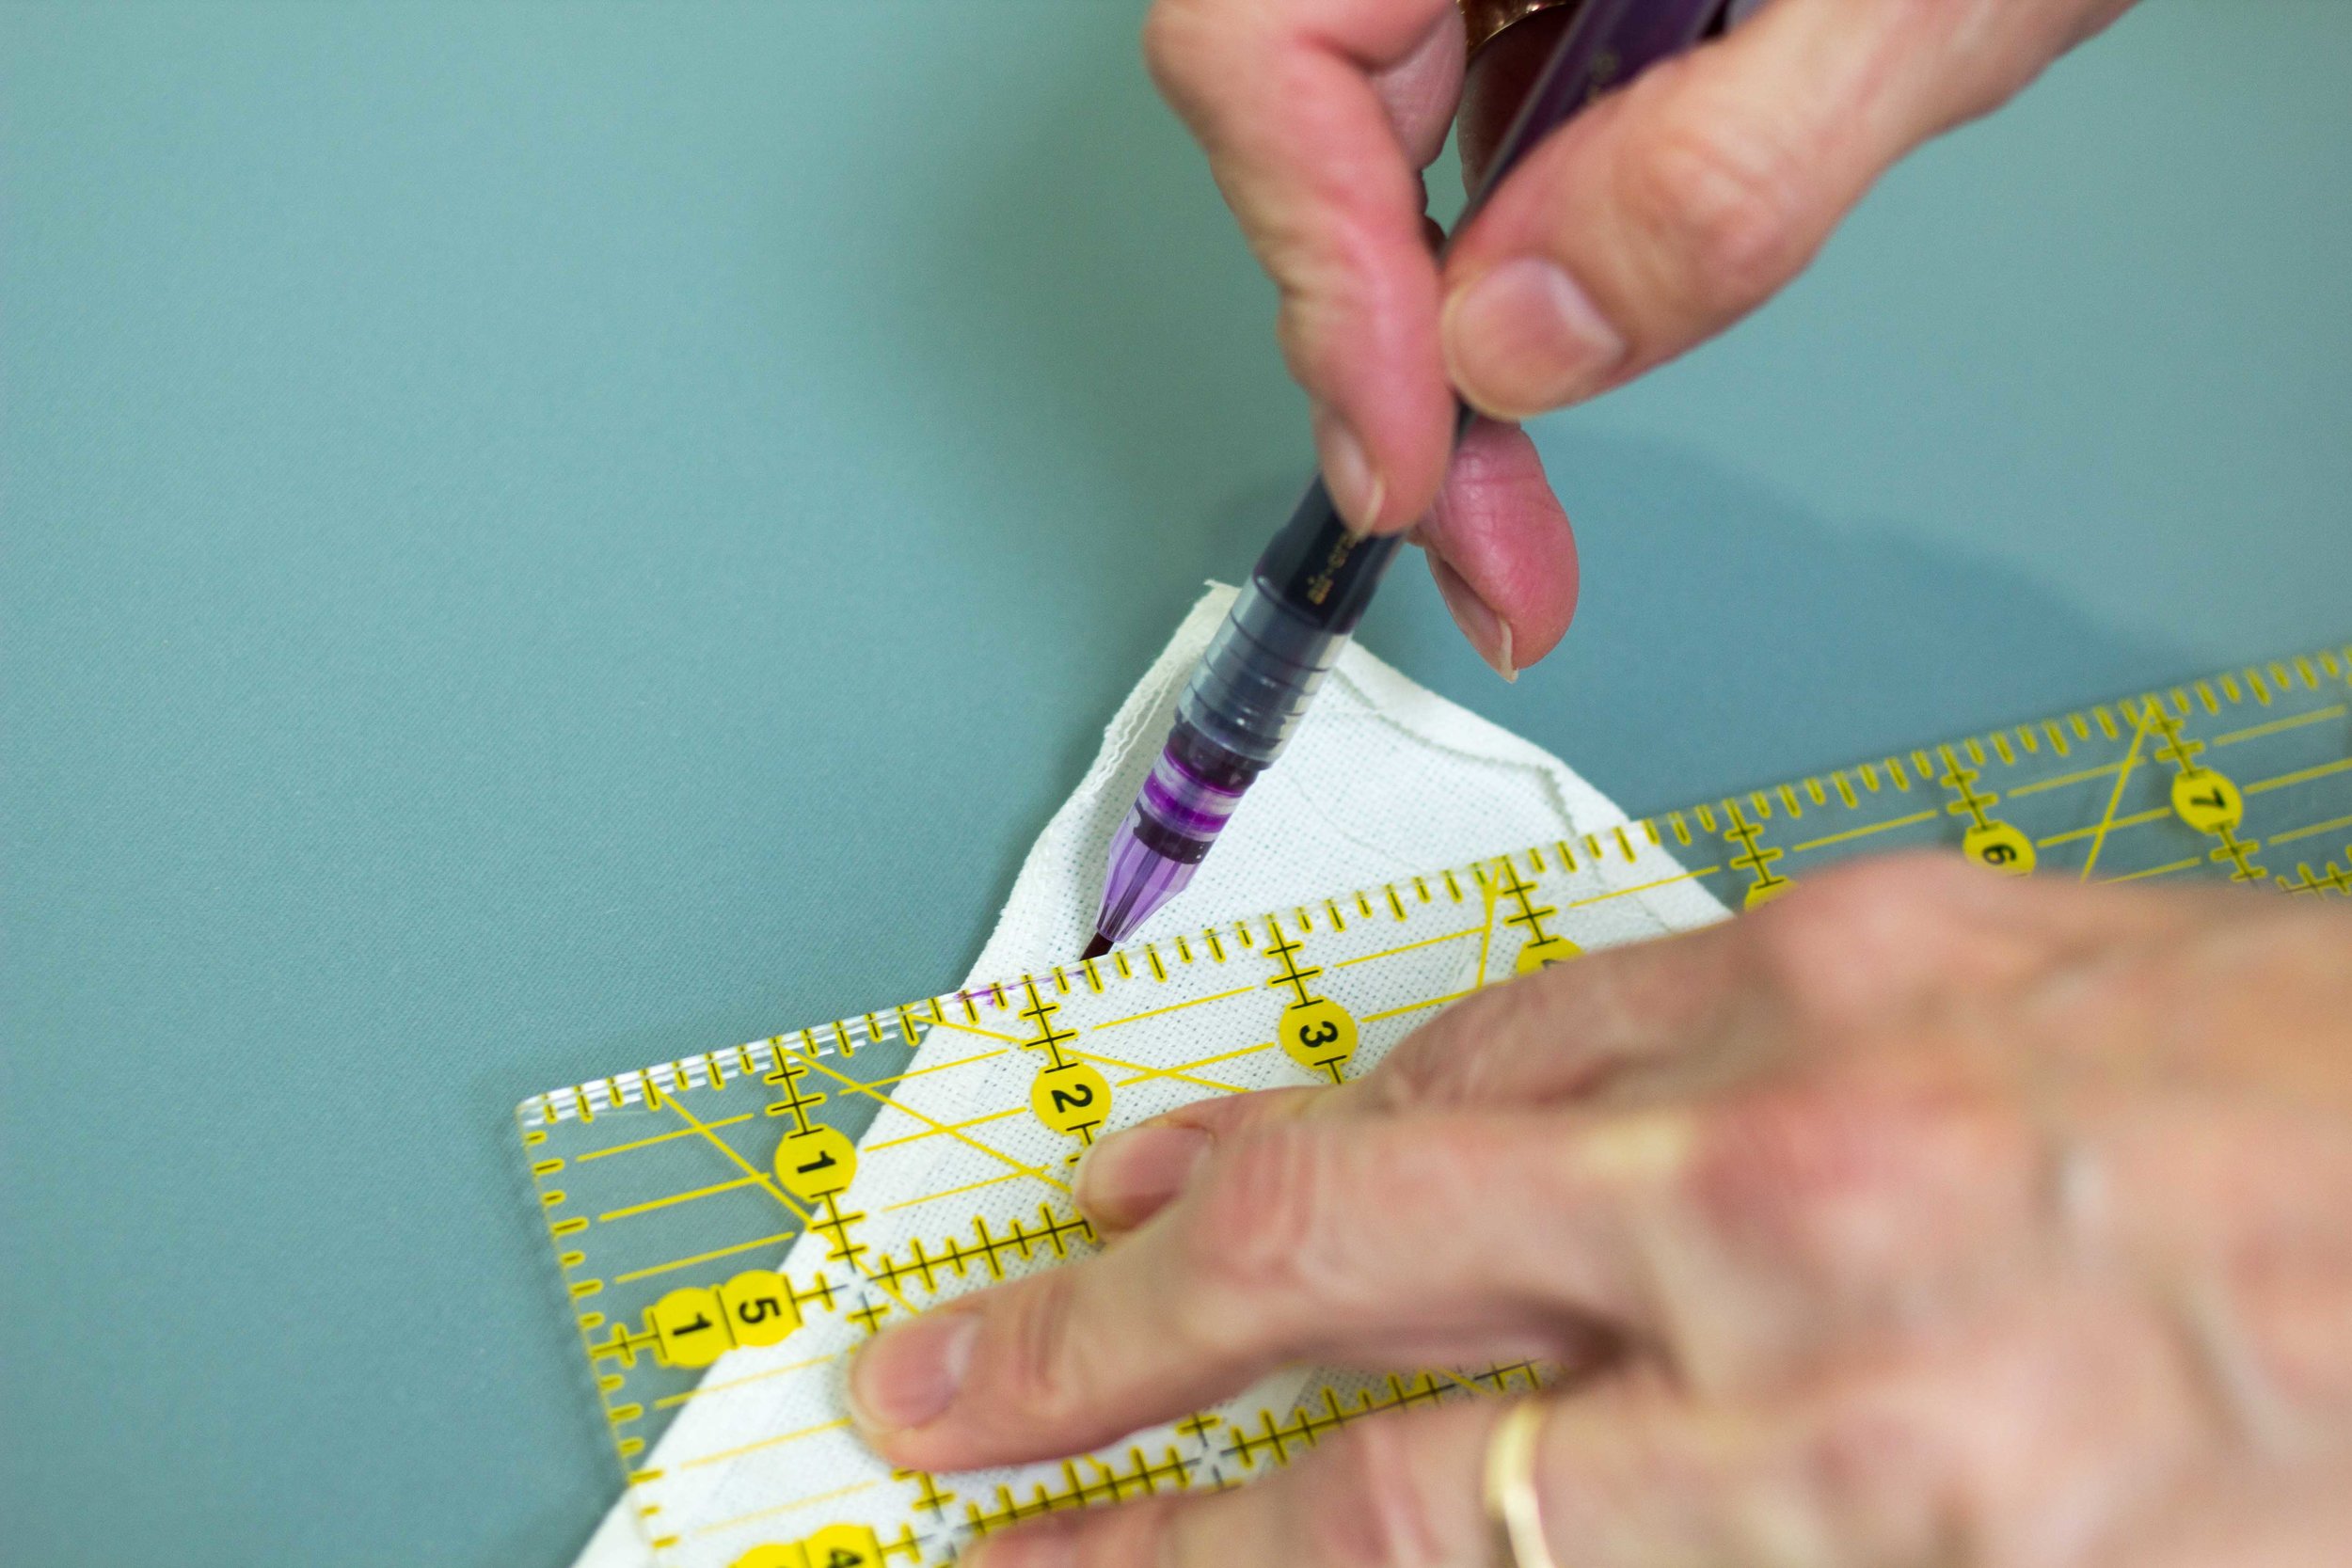
image 12
11. On the wrong side of your fabric, draw a line between these two marked points.

image 13
12. Fold the corner right sides together and stitch along this marked line, back stitching at ends. Trim seam to ¼”. Repeat on all 4 corners. This will create mitered corners for your hem. Turn right side out and press lightly.

image 14
13. Using the 100 wt InvisaFil, stitch hem down.

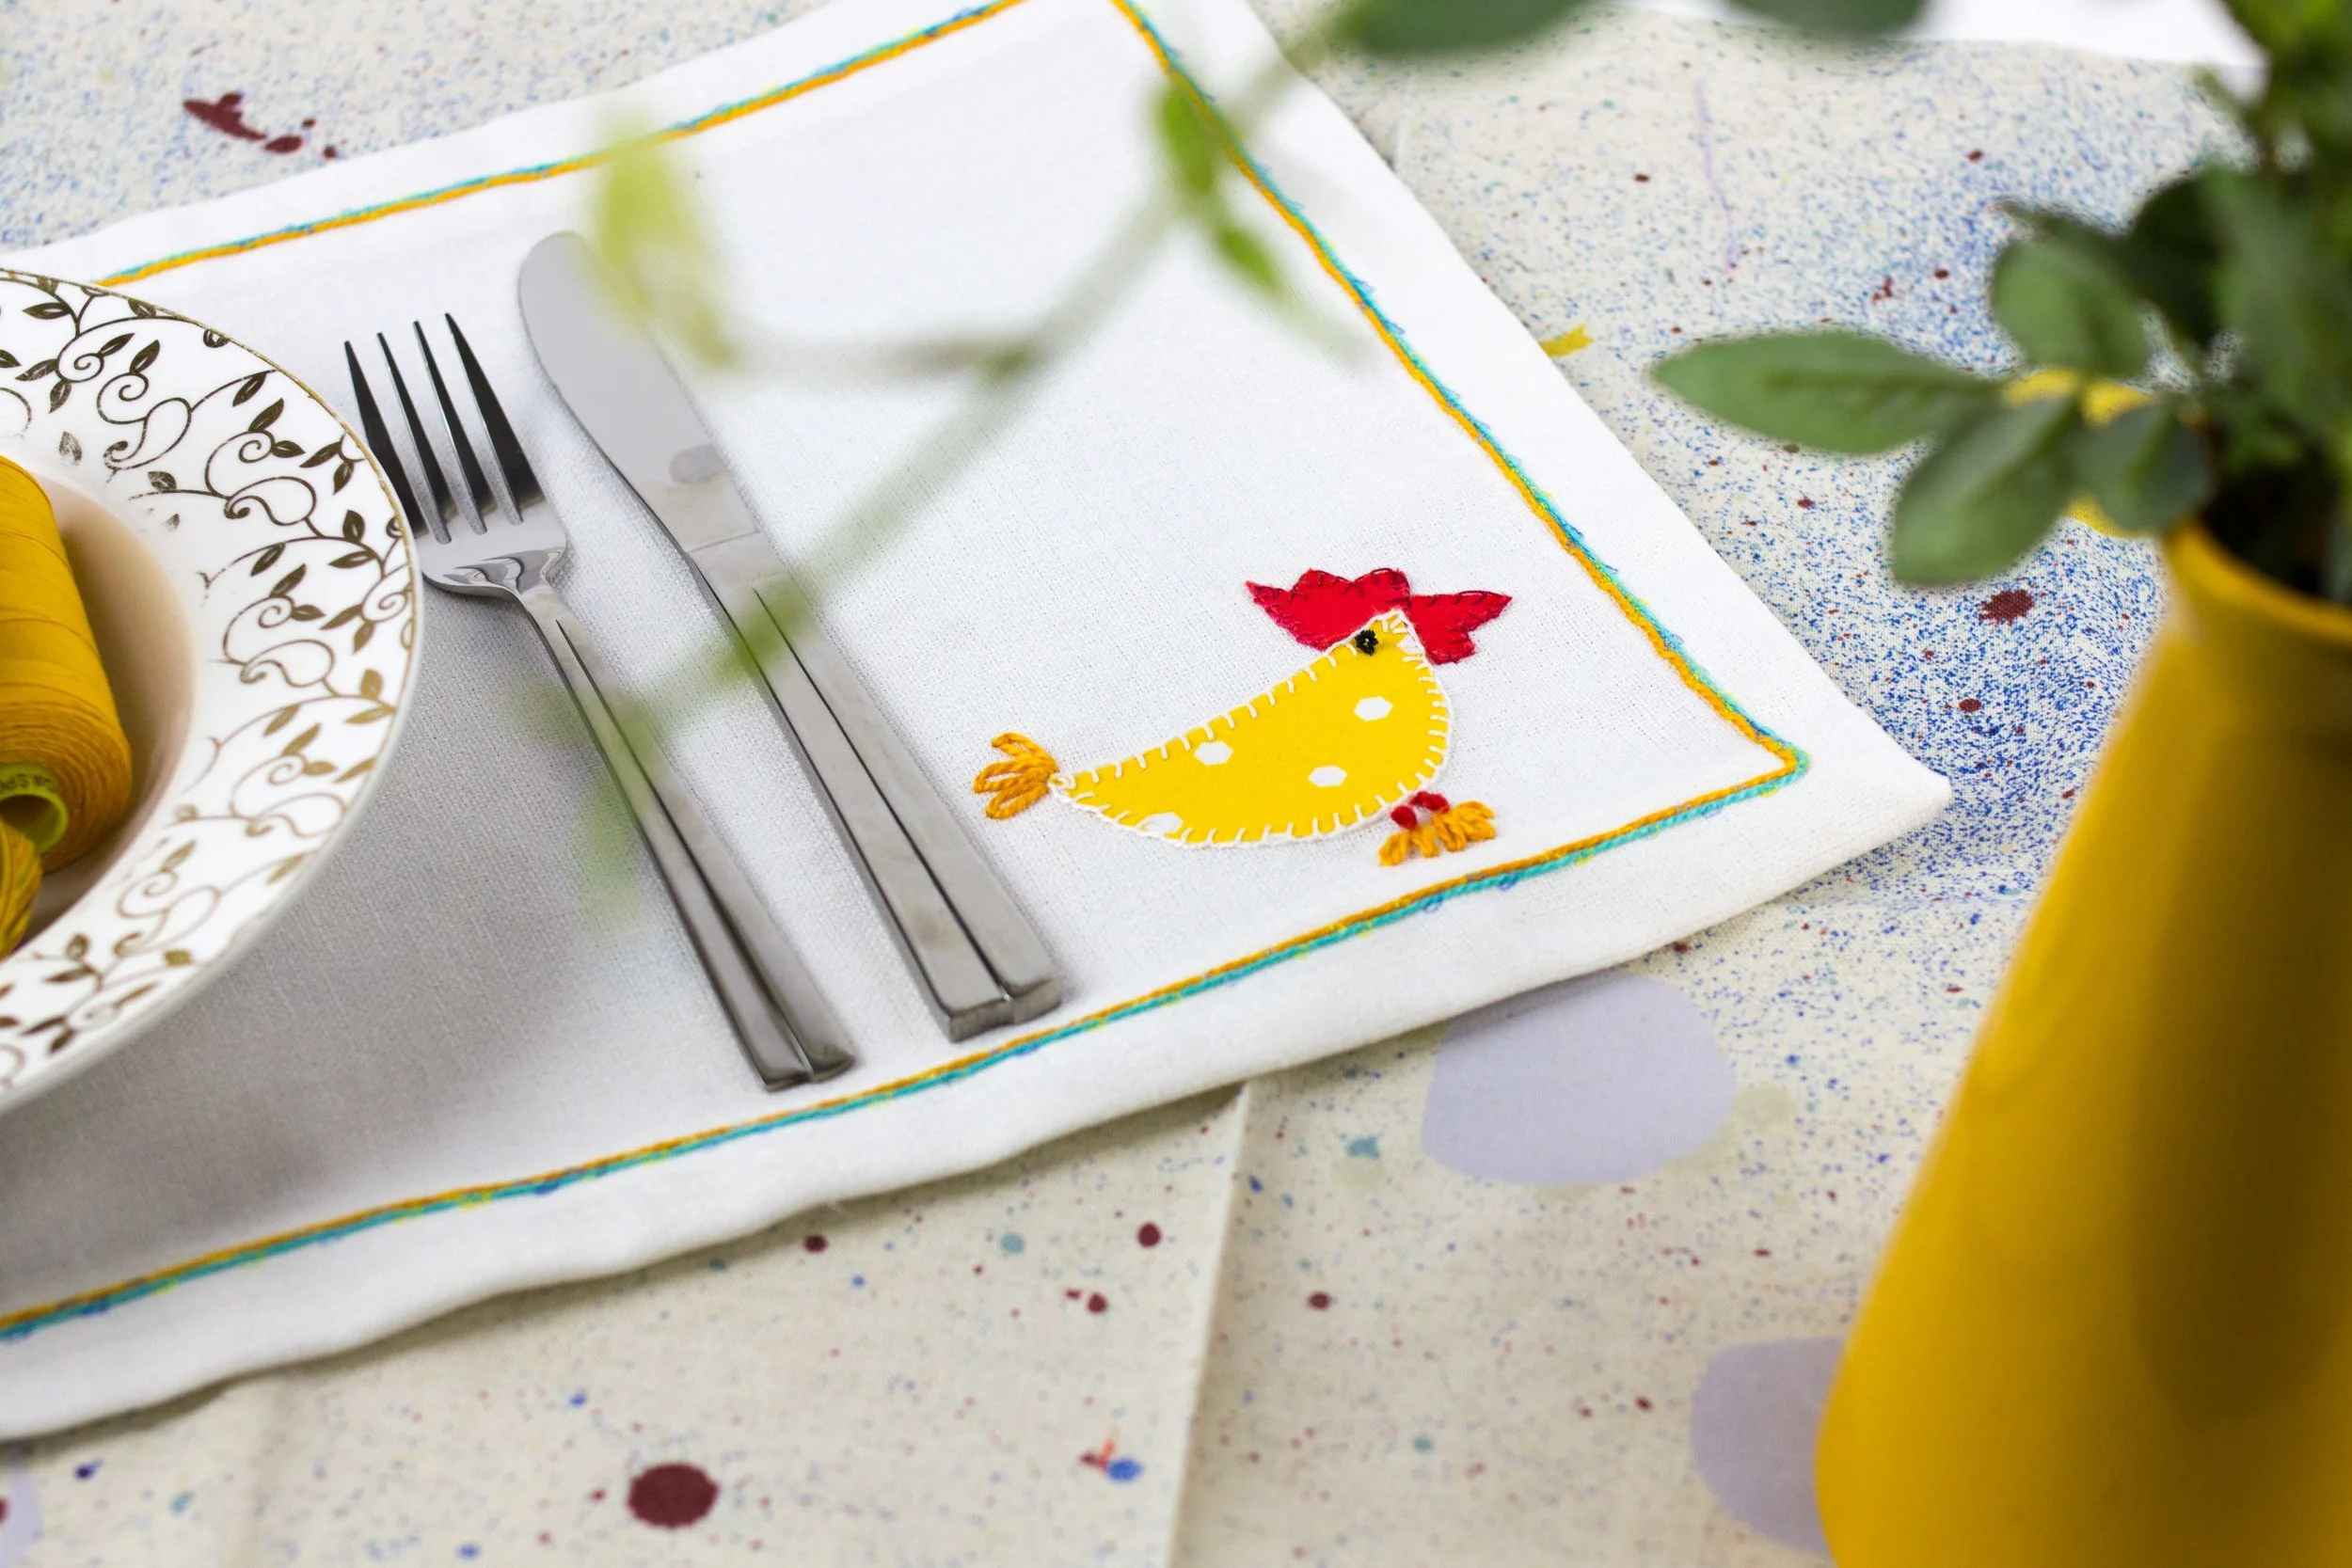
14. Cut a half moon shape out of a scrap of fabric for the body of the rooster and a beak and comb shape from another scrap. Use a fusible web paper to fuse these to your place mat in the corner. Use the 8 wt Eleganza to blanket stitch around these shapes. We used a long Bullion knot for the legs, and a daisy stitch for the tail and feet.
Your placemat is complete! You could make just one for a centerpiece, or one for each place setting at your Easter table.

