How to Darn a Sock by Hand
Maura Kang
Socks are always one of the fastest pieces of clothing to wear out, so why not try to preserve them (and its mate) instead of just tossing them away when a hole shows up? Darning is a super simple technique everyone can do, and you can use this technique for any piece of clothing, accessory, blanket, or item that has a hole in the fabric. We’ll show you two ways of darning a sock, whether you want to make it look good as new or embellish it with a statement.

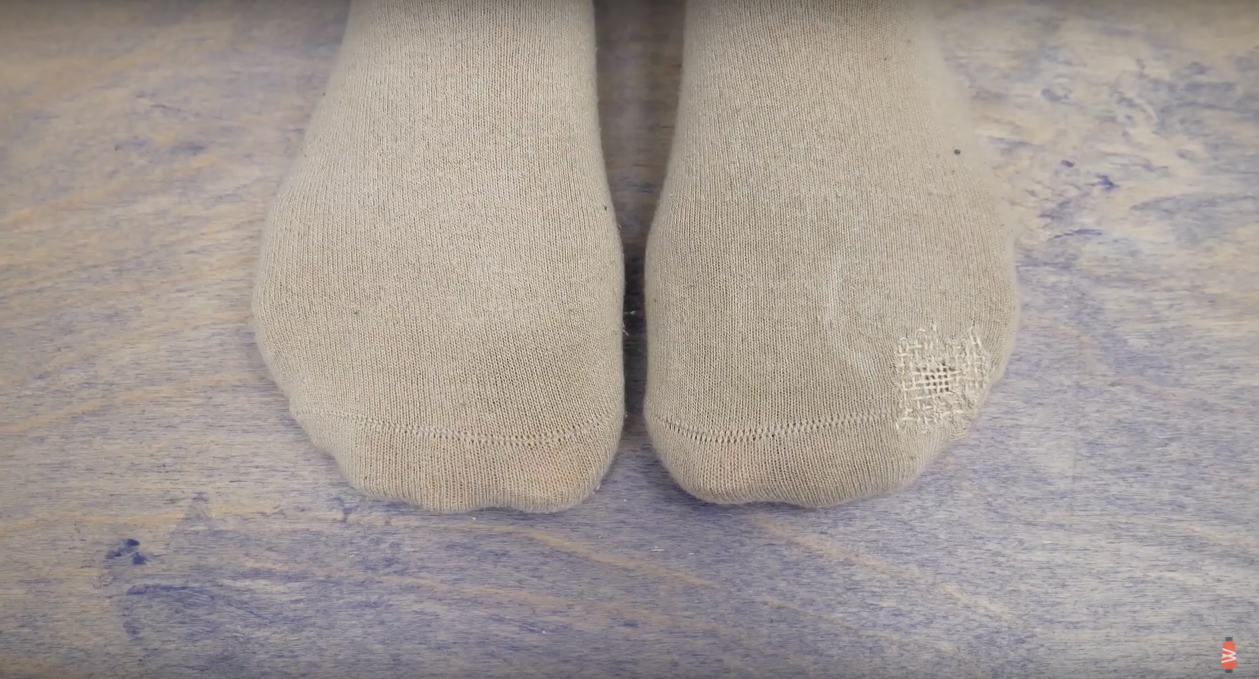
First thing you will want to do is take a close look at the thickness of your sock. In order to mend the hole you need a thread that is a similar weight to the sock.
For our thicker sock we are using a 3wt thread called Eleganza, which you can purchase here: https://www.suespargo.com/store.php?cat=90. We love this thread line because since it has been double gassed it results in very low lint- making it very smooth and easy to work with. It is also very strong and therefore great for mending.

3wt Eleganza
For the thinner sock we are using the same Eleganza but in a thinner 8wt instead. You can purchase following the same link listed above.

8wt Eleganza
We are using a darning mushroom, this will give us a nice large curved surface that makes the perfect platform to do the stitches on. We got ours from Clover, though there are many places that you can get one. As an alternative you could use anything small and curved like a snow globe, mug, jar, etc.


We are going to be using a needle that comes with this kit to darn our socks. There are three sizes of needle included in this- use the appropriate size based on the thread for mending the sock.

You want to place your sock onto the darning tool. Make sure the right side of the sock is facing out so you can see it.

You want to position so you have a nice placement of your hole over the darning tool. Then secure with the band included, or use an elastic band/hair tie.

For our hole we are cutting about 20” of the Eleganza 3 wt thread. This measurement will of course differ depending on the size of your hole.


Thread your needle and then we are ready to start sewing! Start on the top right of your hole. Pull the thread through with a knot on the wrong side. Then pull your thread through down to the opposite side on the bottom.
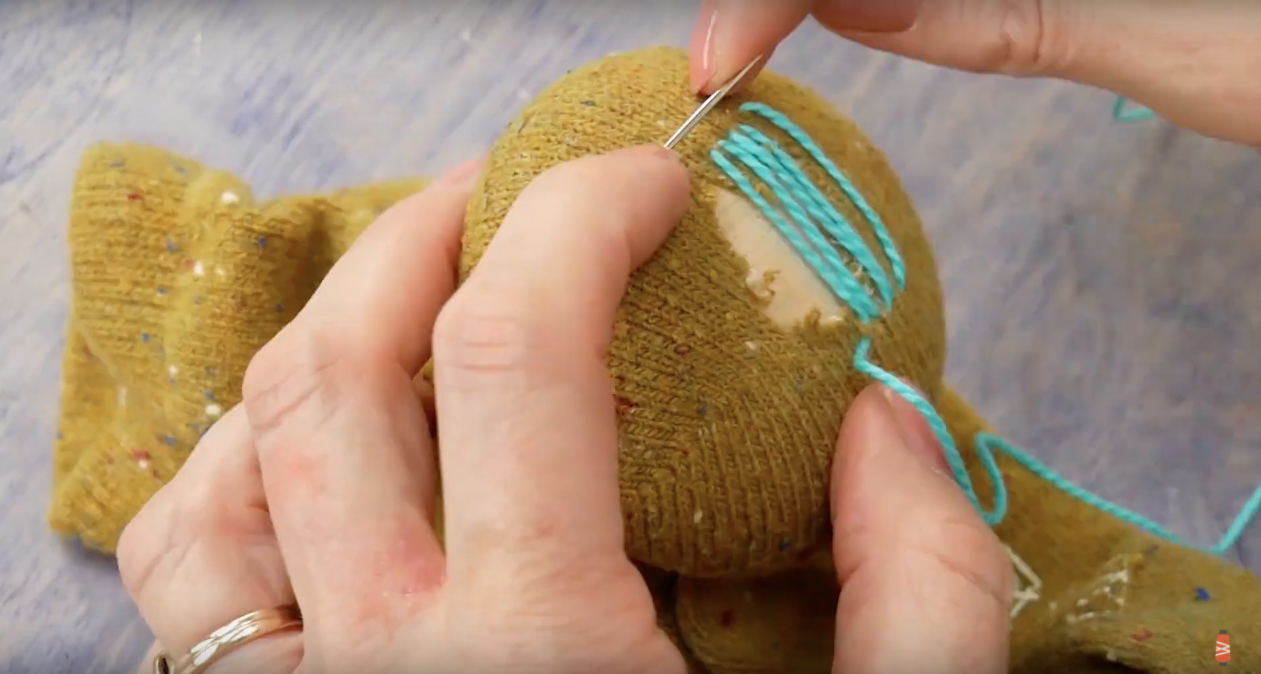

Repeat, working from right to left. Once you have covered the hole, extend a little past into the fabric- just to secure the thread. You can remove from your needle, but leave the tail long for now as we will secure and tie it off at the end.
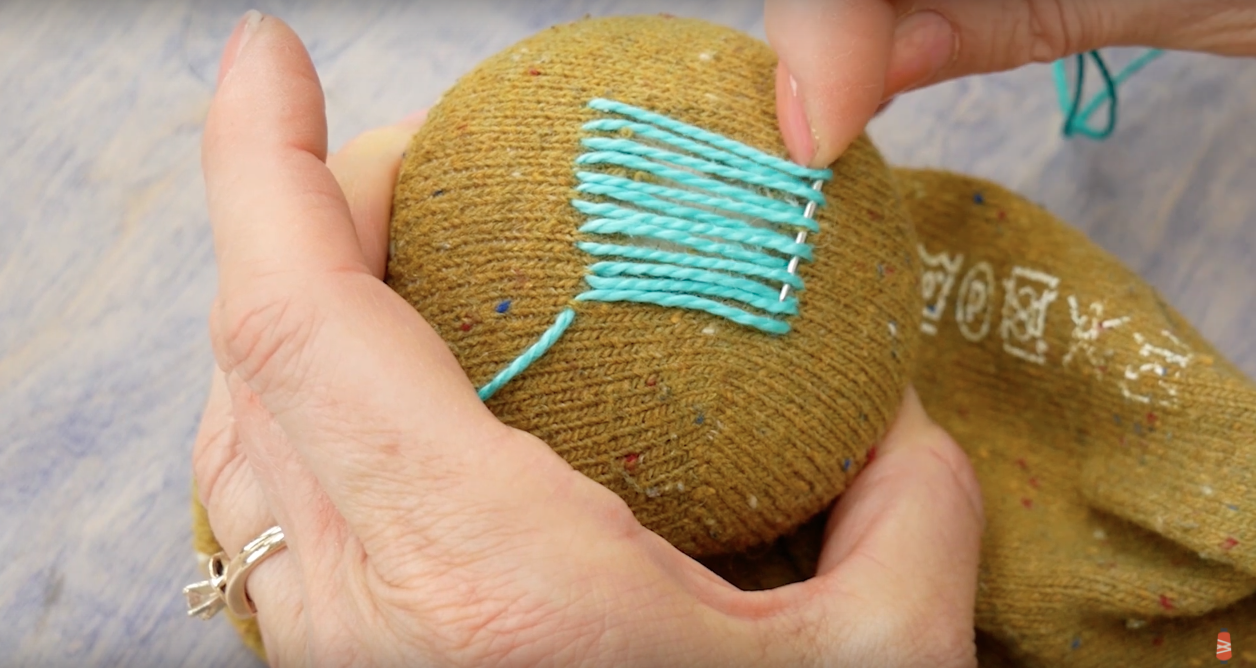

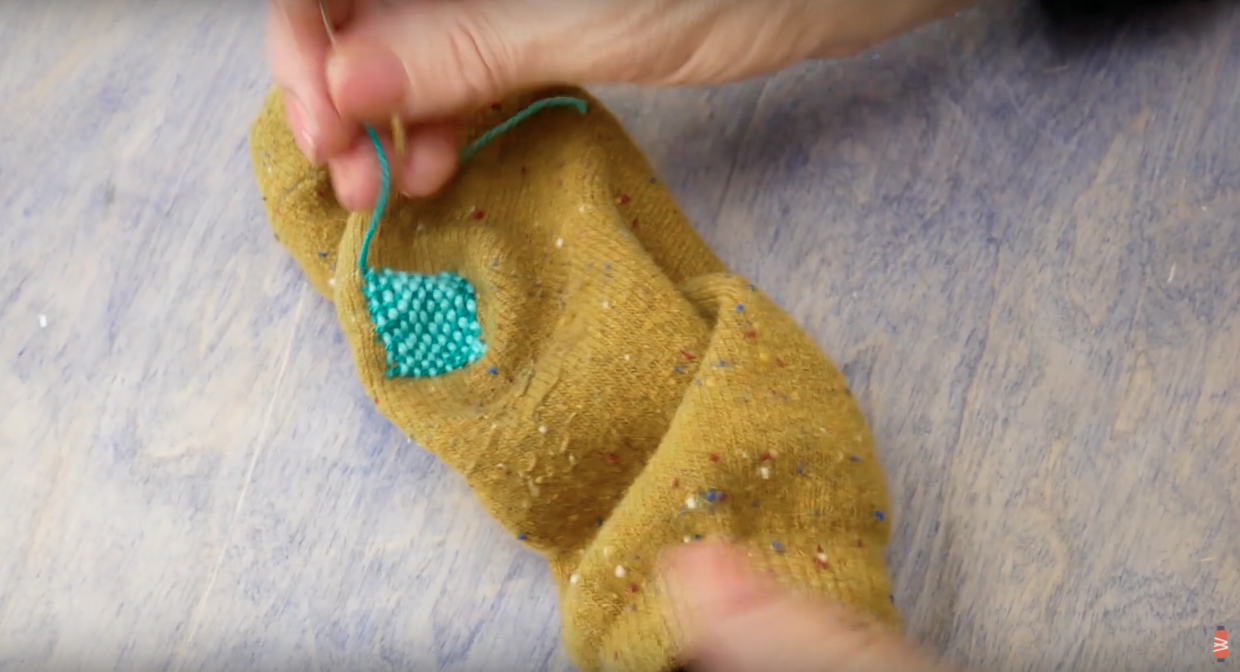
Next to make this mending stronger we are creating a weaved stitch in the opposite direction. You can use the same color of thread, but to make it look a little funkier we are doing an accenting color. Working perpendicular, with your needle weave above and below the previously created stitches. Leave a long tail where you started your stitch, and once you reach the other side take a small pick of the sock before starting the next line of the weave.

When you have your stitch in the sock fabric at the end of the row, then you can continue back the way your started going under and over the opposite threads you did in the first row. Make sure you are going over and under the correct thread for your row, or else the weave pattern will not be created.
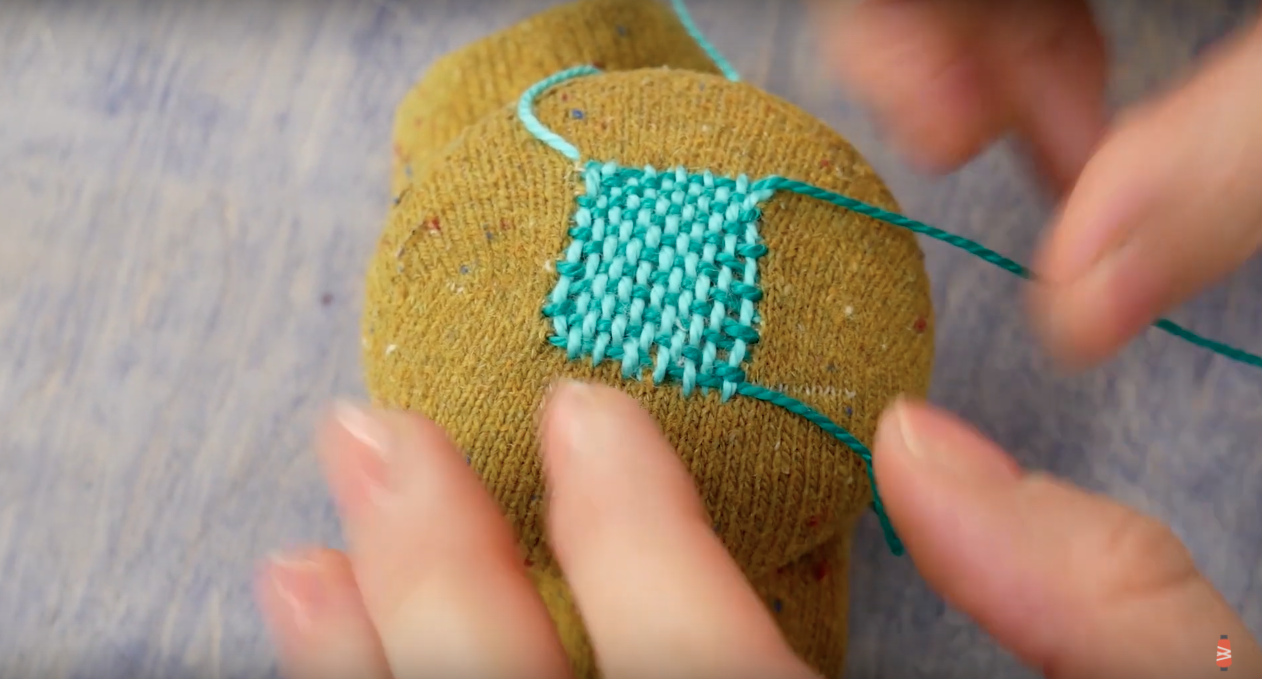
Continue until you have filled the whole area with the weave. You should have a tight and strong area now. Leave all of the thread ends long.
You can pull the sock off the darning tool and cut the thread tails to about 2 or 3 inches. Then pull the threads through to the wrong side of the sock using the needle.
Take the extra thread strand and stitch a few small stitches on the wrong side before tying a knot. Repeat for all thread tails.


Once finished then iron the patch to smooth it out.

Now you have a super cool patch that will add a little pop of colour!

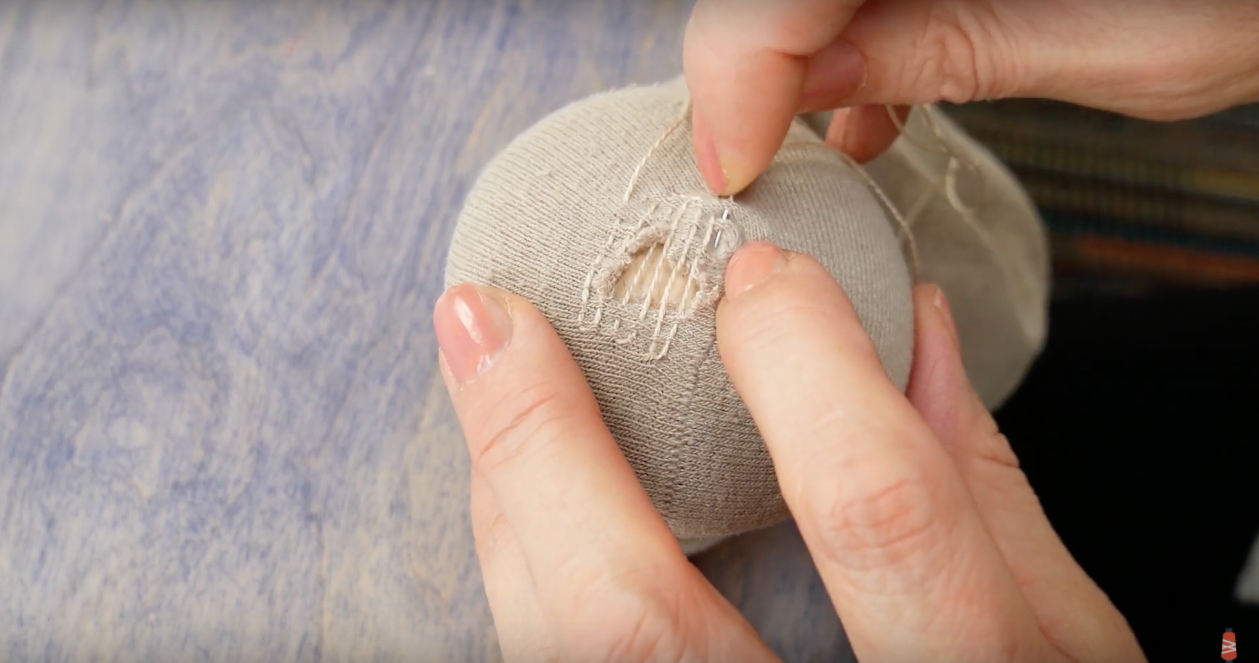
If you are looking to integrate the look of your darning so it blends in with the rest of the sock, you may want to choose a smaller thread, closer to the strands in your sock, with a matching thread colour. Because the thread is taking up less space, it may take a little longer to complete your darning. Repeat the same steps as listed above.


We hope that this fun tutorial may have helped you salvage a few pairs of socks. If you decided to try something funkier or decided to do a subtler mend, we would love to see it. Tag us on Facebook @wonderfil, Instagram @wonderfilspecialtythreads, or using the hashtag #wonderfil. Happy crafting!