Contact Us

Use the form on the right to contact us.

You can edit the text in this area, and change where the contact form on the right submits to, by entering edit mode using the modes on the bottom right. 

2915 19 St NE
Calgary, AB, T2E 7A2

18662506101

WonderFil Specialty Thread Blog

WonderFil brings you the latest news, events, upcoming thread lines and special tips and advice. Follow WonderFil Specialty Threads on our social media: Facebook, Instagram, Twitter, Pinterest, and Youtube.

Making Serger Lace Tutorial

WonderFil Specialty Threads

serger lace

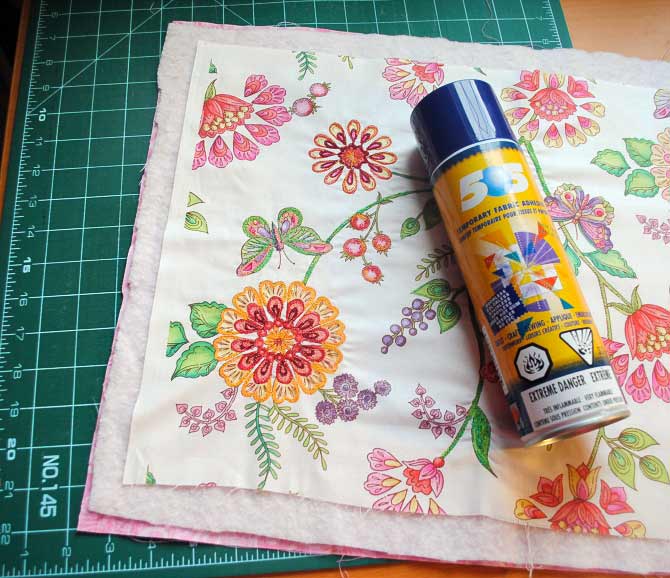
If you love the look of lace but don't have the time or patience to painstakingly craft bobbin lace by hand, we have a fast and beautiful solution that only requires a serger and your favourite mid-heavy weight WonderFil™ thread.

Materials:

  • a 4 thread serger
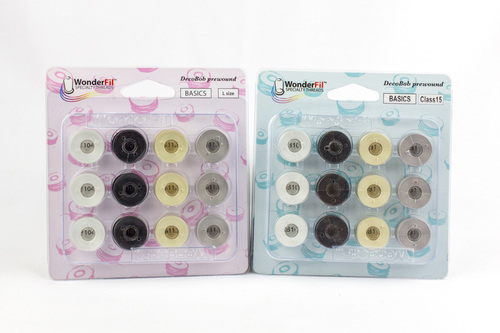
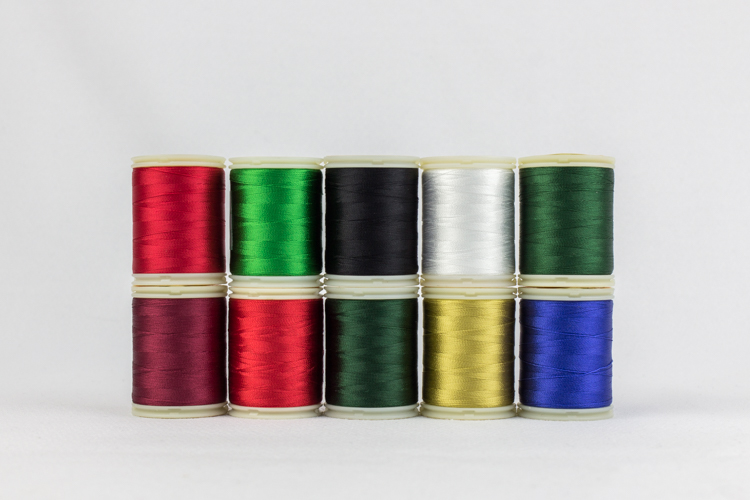
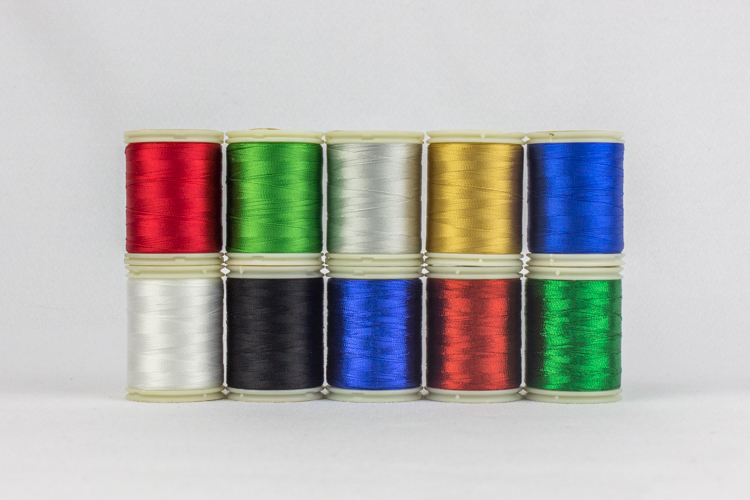
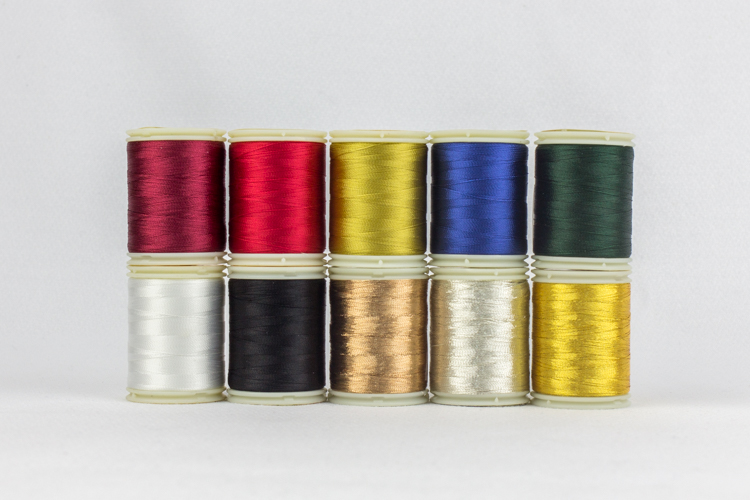
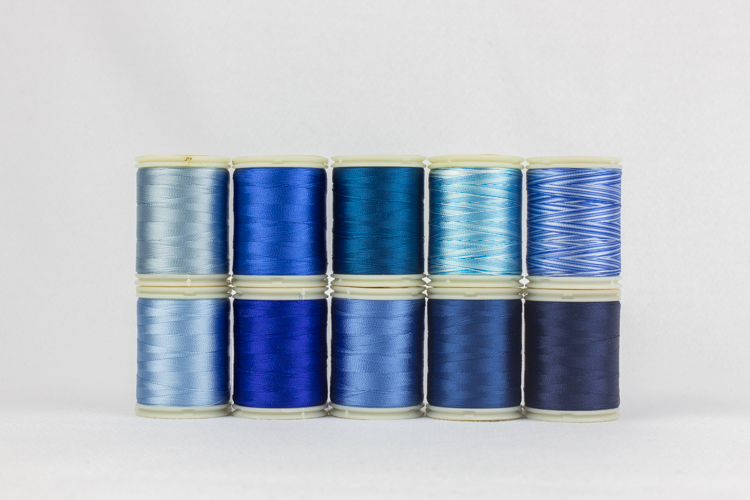
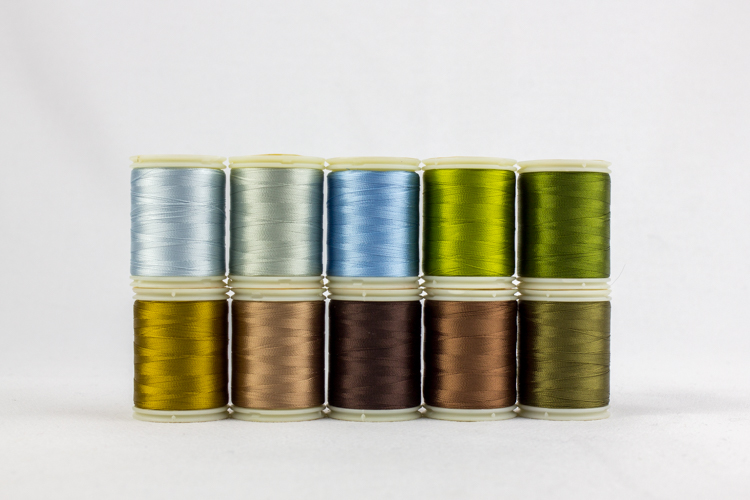
  • 3 spools of Konfetti™ 50wt cotton or 12wt Spagetti™ cotton (we recommend heavier weight thread as it tends to look better).
    * These WonderFil™ cotton threads are the ideal choice as they are extremely low on lint, meaning your serger will stay much cleaner.

image 1

image 2

1. Thread the serger with your thread. It is very important with sergers to put threads in the right order. Use the instruction guide on the machine or have your instruction book out as not all sergers thread the same.

2. Set up the serger for a 3 thread wide overlock stitch. We are going to use our left needle and both loopers. Make the cutting width as wide as possible.

image 3

3. Turn your hand wheel for a couple of stitches into a chain. When you are starting off, one thing that you want to decide is if you want to sew along the raw edge, or you want to fold your fabric up, and do your first row of serging this way. This is the first row (image 3).

image 4

4. For the second row, some people like to lower their upper blade on their serger to do serger lace, but we prefer not to (but that is a decision a sewer can make). On the presser foot there are two markings: one marking for the left needle position, another marking is for the right needle position. Guide the edge of the fabric along the edge of the right needle position and that is the mark we are going to use. Stitch down the entire edge in the new position so you end up with another row of serging (image 4).

image 5

5. When you have completed your second row of stitching, you will repeat step 4 about 5 more times, creating new rows of stitching over the last. This isn’t a technique where you want to sew really fast because you want to make sure that you're catching the previous row of your stitching (otherwise you will end up with holes in your lace). If you find it falling out of position, simply raise the foot and reposition the fabric.

image 6

image 7

6. After 5 rows, do a couple of rows with a shortened stitch length, from length 3 to 2 (image 6 & 7).

image 8

image 8

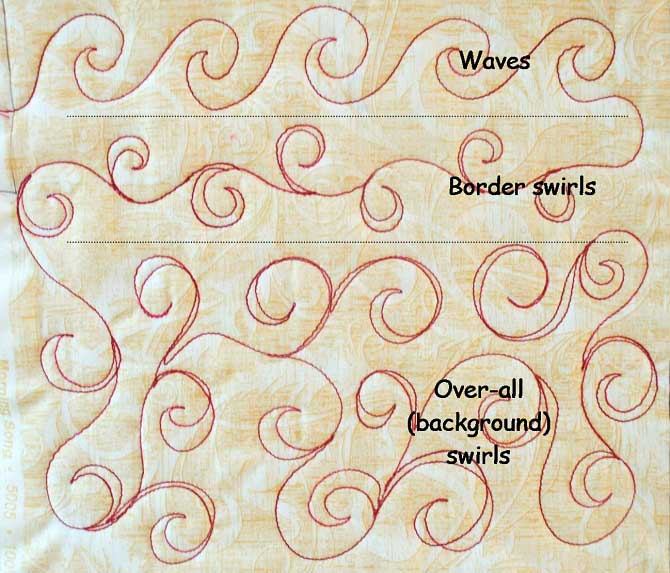
7. After a few more rows, shorten the stitch length again to 2 or 1 (making stitches even closer together). Create a few more rows until you start to get the wave look (image 8).

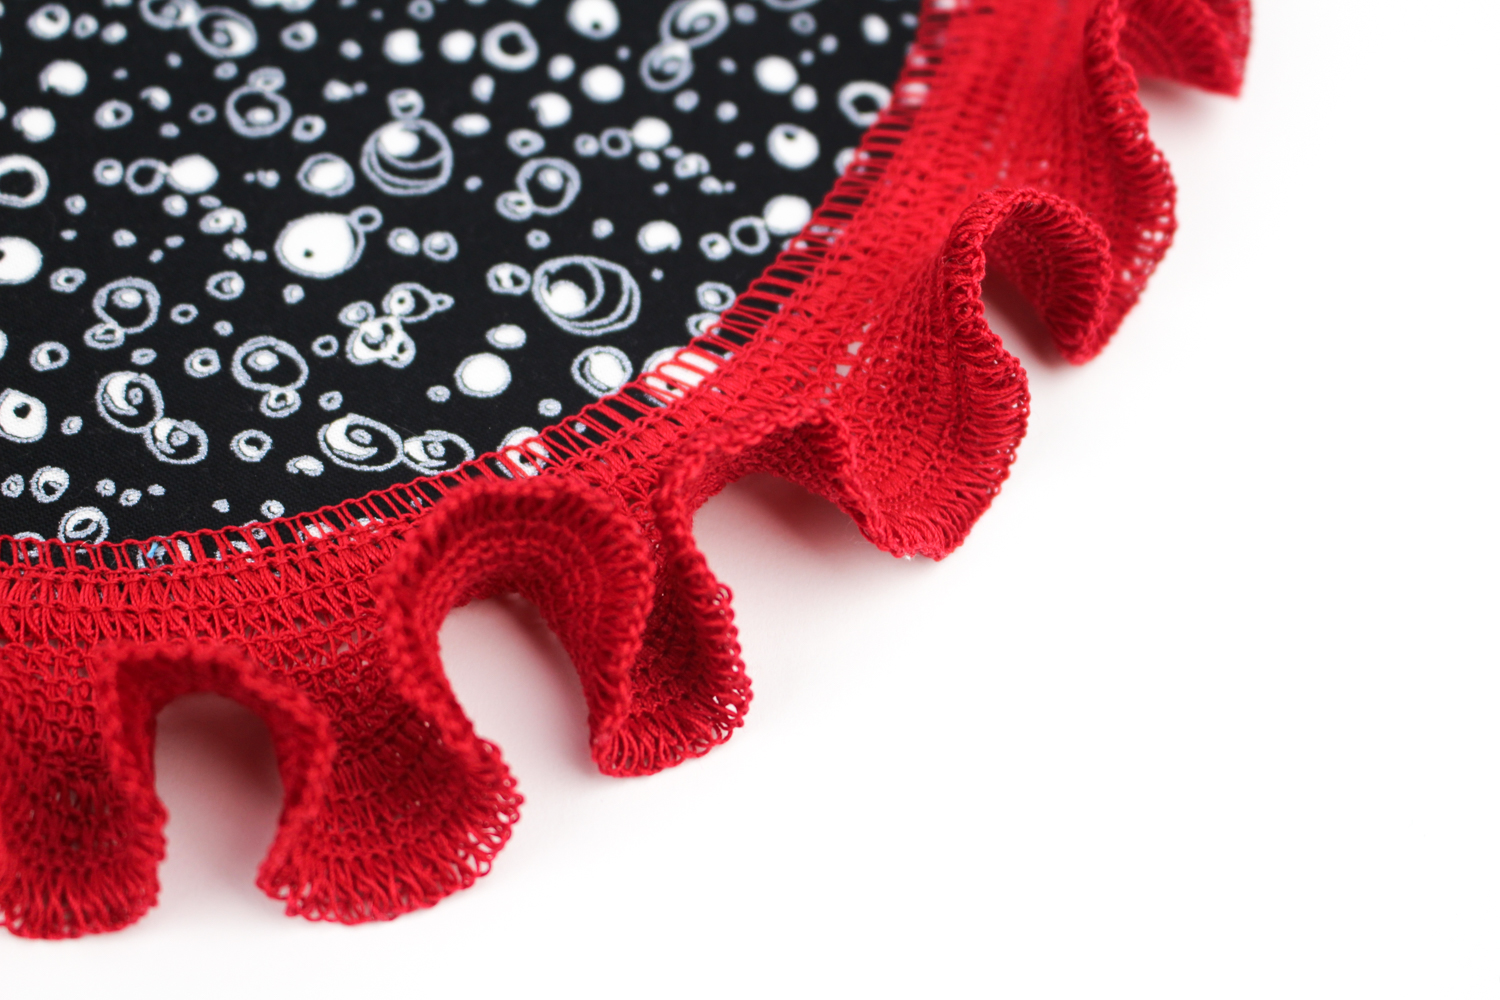
10. Your serger lace is now complete!


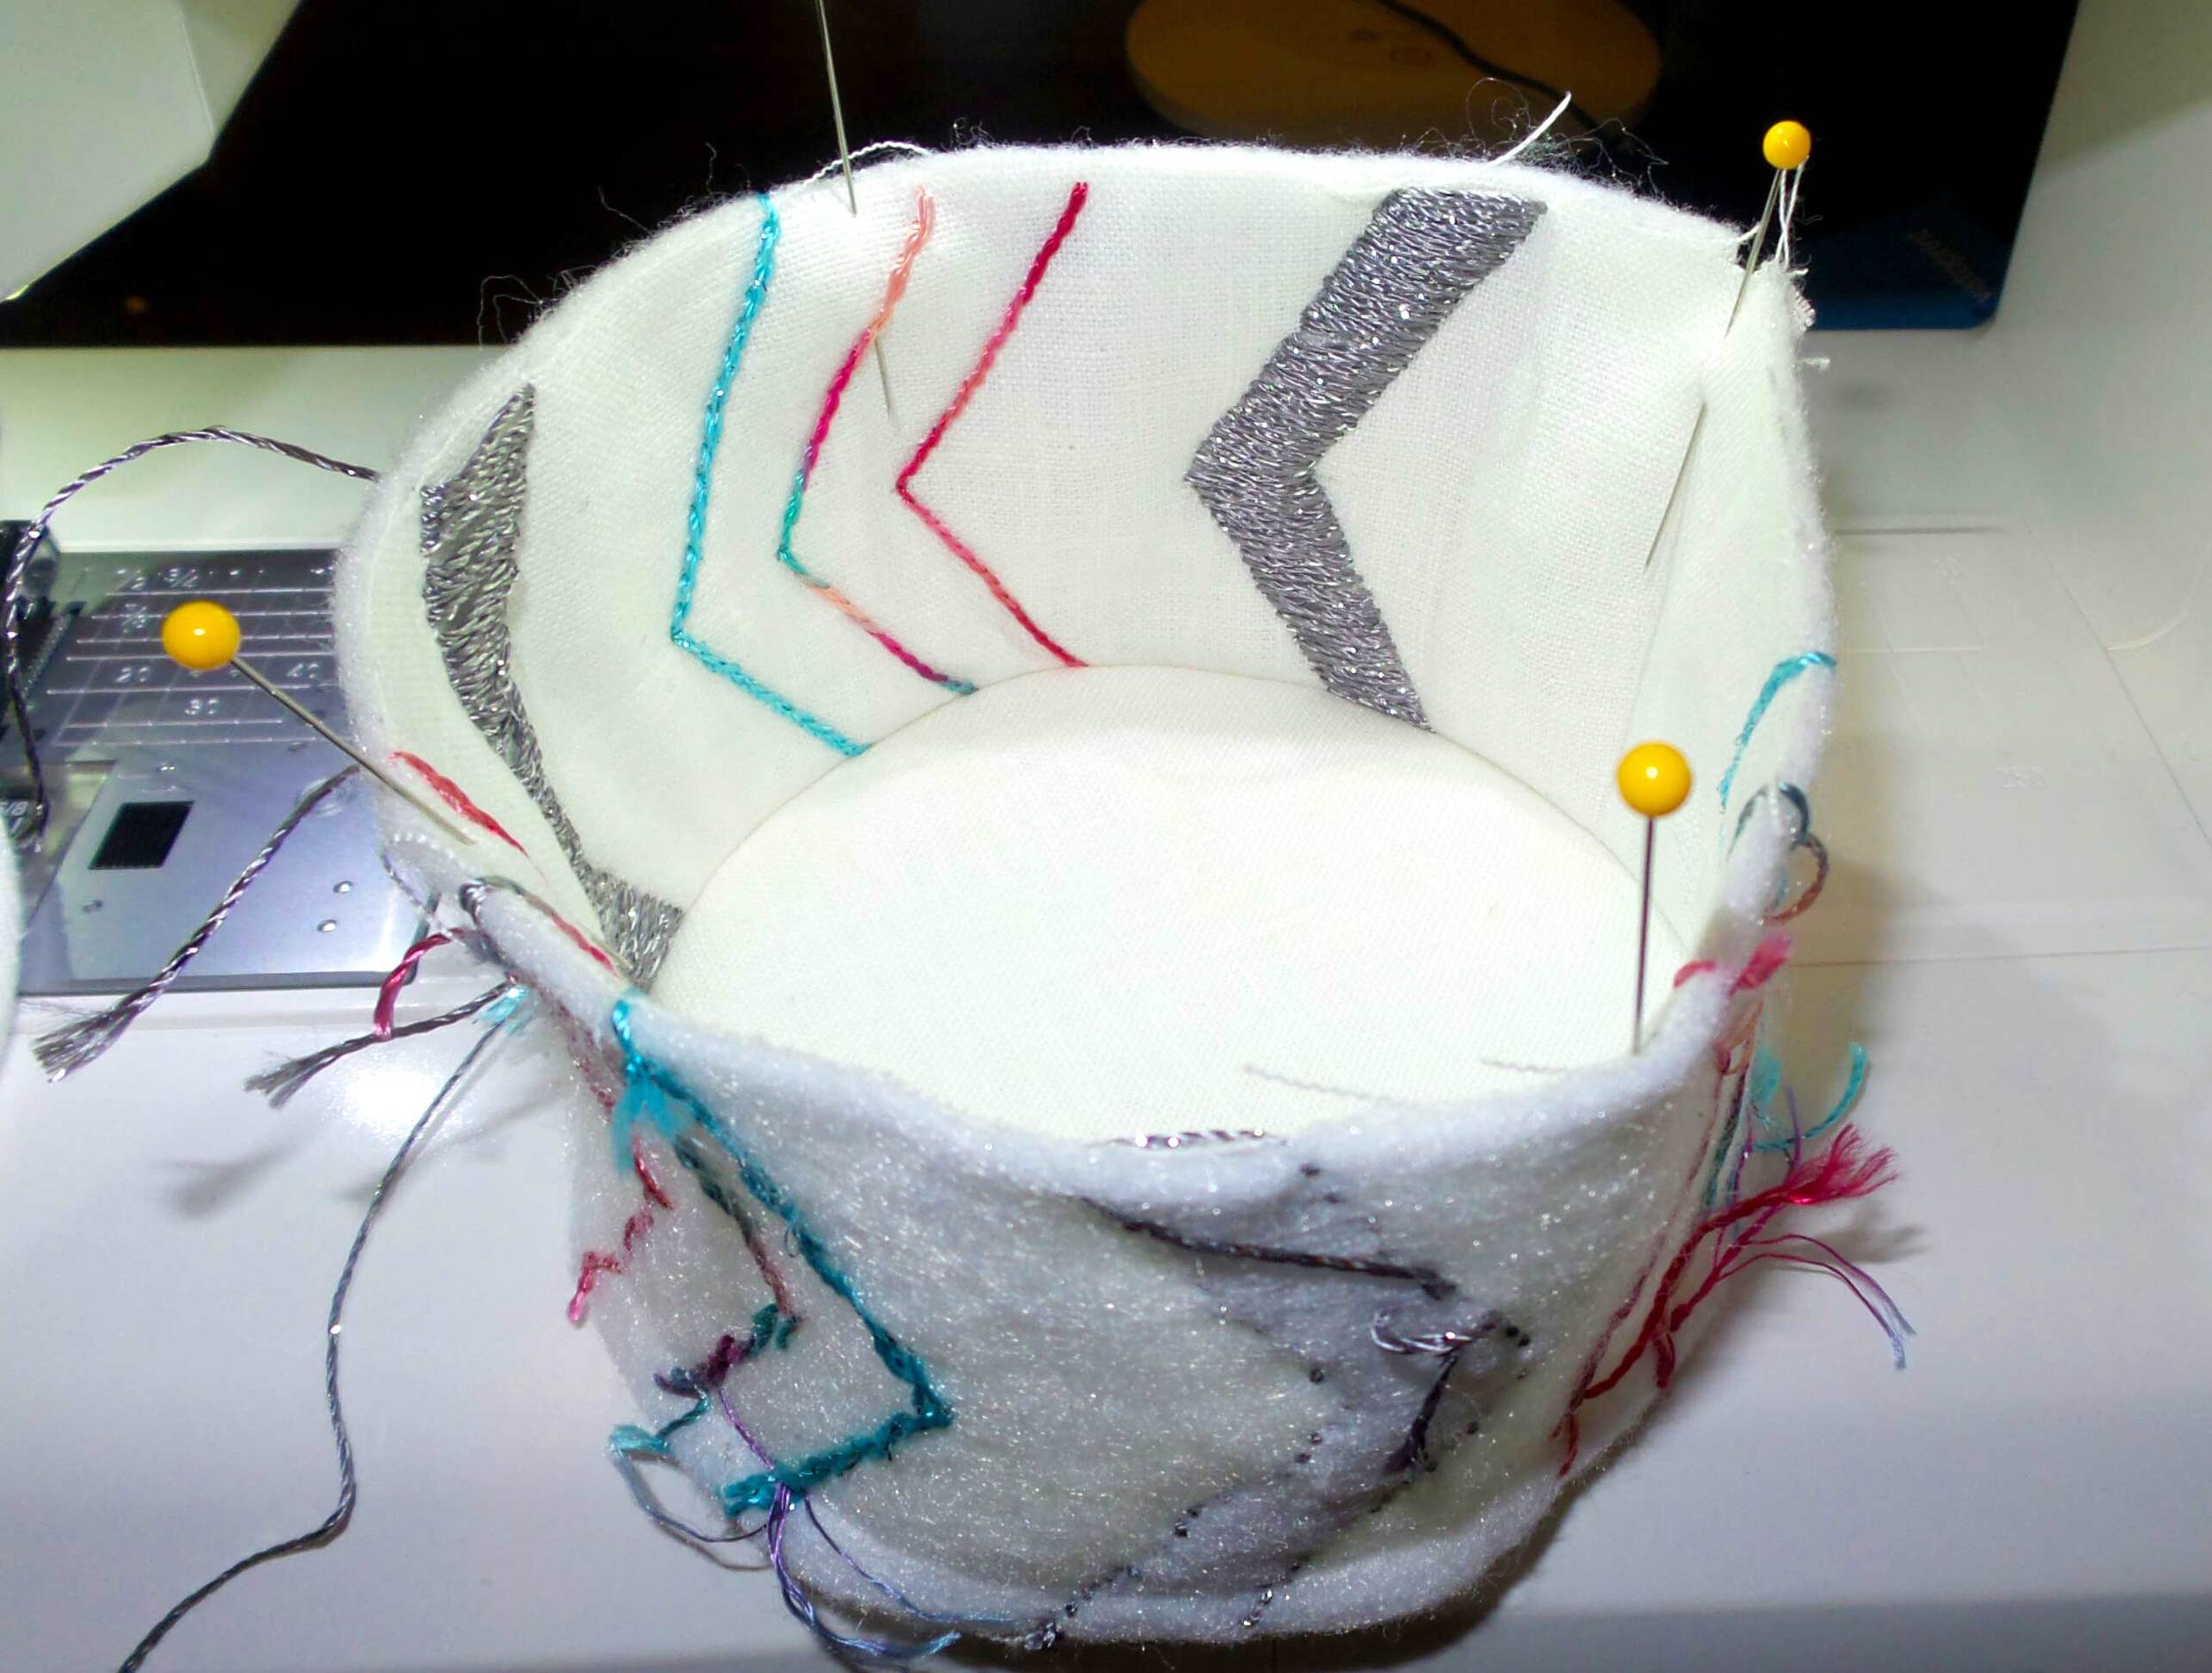
* When sewing serger lace on a curve or circle, be more gentle when turning the fabric. We recommend having a fabric piece bigger than an 8 inch circle because a smaller circle will make it harder for the serger. Otherwise, all the steps will be exactly the same.

How to Quilt a Thread Painted Surface

WonderFil Specialty Threads

We're sharing this post by Christine Baker from QUILTsocial, a fantastic site where you can find blogs featuring tips and projects about all things quilting!

A short while ago we posted about thread painting with Konfetti™ and Tutti™ which you can check out here.


Check out my finished thread painting!

I had so much fun playing with my Konfetti™ and Tutti™ threads, embellishing my book cover with thread painting. It’s equally important now to know how to quilt this thread painted surface!

I love how the threads make the fabric designs stand out more – check out the before and after photo of the large flower:

Thread painting with Konfetti™ and Tutti™ – before and after

Thread painting with Konfetti™ and Tutti™ – before and after

Time to rip out the interfacing

The next thing to do before we get quilting, is to rip out the excess interfacing from the back of the fabric. Depending on the type of interfacing you use, you may not need to do this, but mine is “tear-away” interfacing, so it is quite easy to remove. Just follow the manufacturer’s instructions for the type of interfacing that you are using.

Pulling the interfacing away from the back of the fabric

Pulling the interfacing away from the back of the fabric

Layering our quilt sandwich

First of all, let’s press the embellished fabric as it has shrunk in some spots due to the thread painting. Now we need to cut a piece of batting and backing fabric the same size. When I am quilting small pieces like this I love to use 505 Spray.

To use it, first spray your backing fabric with a light coating of the adhesive spray then place your batting on top. Next, spray your batting with the adhesive then place your top fabric on top. Smooth it out with your hands, flip it over and smooth the back and then flip AGAIN and smooth the front one more time. Next we are going to quilt!

Fuse the layers of the quilt sandwich together with 505 Spray

Fuse the layers of the quilt sandwich together with 505 Spray

Quilt as desired

Are you one of those people who just hate it when your instructions say “quilt as desired”? As a pattern designer, I’m guilty of using that phrase, but have no fear!!

For this project I’m just going to meander all over the fabric, avoiding the pieces that I embellished with the thread painting. I’m going to use the pale pink Konfetti™ thread to do my quilting as it will blend in nicely with the white background.

Meander quilting around the thread painting

Meander quilting around the thread painting

Below are some tips from another post by Christine Baker on QuiltSocial. For the full post click here.

Some tips for success with free motion quilting

When I teach my machine quilting class, I ALWAYS give my students these tips BEFORE we start:

  1. Relax and breathe! And don’t be too hard on yourself. Becoming proficient at machine quilting takes practice – LOTS OF PRACTICE.
  2. Free motion quilting is like doodling with your threaded sewing machine needle – so practice with pen and paper first until you get the feel for the new design.
  3. When you first start stitching a new design, first focus on the shape, and then as you get the hang of the shape start to try to get your stitches more uniform in length. If your stitches are really small then you need to move your hands faster. If your stitches are really big, you need to move your hands slower OR speed up your machine.
  4. If you get frustrated, STOP and TAKE A BREAK.
  5. There are no right or wrong ways to execute a particular free motion motif. No one but you knows what design you planned to stitch on your quilt, and therefore no one will know if it looks different than you intended. As you practice you’ll find that you develop your own style of quilting – one that is comfortable for YOU.

Start with the basics – meander (stippling) and loops

The first stitch to learn when machine quilting is stippling or meandering. And then progress to loops. These are the basic building blocks for most other designs. And even if you don’t become comfortable with more complex designs, you CAN meander or stipple quilt any quilt! Here are samples of my meandering and loops and you can also view this YouTube video which goes over the basics of free motion machine quilting.

Meander machine quilting pattern with Fruitti™

Meander machine quilting pattern with Fruitti™

Loops machine quilting pattern with Fruitti

Loops machine quilting pattern with Fruitti

Swirls, swirls everywhere

Once you perfected your loops you can progress onto swirls and waves. These can be used on their own in borders and backgrounds or integrated into other designs with other motifs such as hearts or leaves. Here’s a picture of a few different swirl and wave designs that I often use:

Swirls and waves free motion quilting design

Swirls and waves free motion quilting design

Christine Baker from Fairfield Road Designs demostrates how to free motion quilt a star design using her Gammill longarm.

An Interview with Author, Designer & International Teacher: Sue Spargo

WonderFil Specialty Threads

We've had a chance to talk to one of our favourite hand embroidery artists: author, designer, and international teacher Sue Spargo! This lovely lady works closely with WonderFil Specialty Threads™ and we've had the opportunity to create several lines of thread (and wool fabric) in her name.

Eleganza™ 8wt, 5wt, & 3wt 100% Egyptian Cotton
Razzle™ 8wt Rayon
Dazzle™ 8wt Rayon + 1 Strand Metallic
Efina™ 60wt 100% Egyptian Cotton
Ellana™ 28wt Wool/Acrylic


Southern Africa had a considerable influence on Sue’s creativity. She was born in Zambia and then educated in South Africa. She is still influenced by the energy and color of traditional African designs. Later Sue moved to England; this shift between two very different environments also inspires many of her designs. All these early experiences combined to stir her love of “primitive” arts and crafts and grew into a focus on contemporary folk-art.

The United States had always beckoned and in 1989 that dream was fulfilled. Sue moved to Connecticut and subsequently to Tennessee, Utah and Ohio. Each new state presented sharp contrasts and stirred more new ideas. With each move she was influenced by many wonderful, quilt enthusiasts.

All Sue’s current designs are available as books or patterns. Her first technique book, Creative Stitching, was published in 2012 followed by Creative Texturing in 2014. Martingale published a coffee table book ‘Stitches to Savor’ of Sue’s work which was released in late 2015.
Sue’s other absorbing passions include being with the four strong and fulfilling personalities that are her children, tending her garden and traveling to new and exciting destinations.

Q&A with Sue Spargo:

-------------------------------------------------------------------

Q:  I understand you have gotten a lot of inspiration from the places you have lived. Is there one particular place that really inspired you?

A: I would have to say that a lot of my influences came from growing up in South Africa. I lived in Johannesburg for most of the first 30 years of my life (apart from a short move to the UK). The colors and art there were a strong influence.

Q: You are known around the world for your beautiful hand stitching. Has that always been your focus?

A: Oh, no. I started out as a traditional quilter. I have really only been doing the hand work for about 8 years. About 15 years ago, I started dabbling with wool, as a way to add texture to my quilts. Then I added a few embellishing stitches. I became fascinated with the texture and depth it added, and I found that my students were very enthusiastic about working with wool.

Q: So did someone teach you the stitches?

A: No, I am totally self-taught. I looked through many books to find the right stitch for the particular piece I was trying to accentuate, and I started to become fascinated with the difference made by the threads I chose.

Q: You are very much in demand as a teacher. What is your favorite part about teaching?

A: I love getting my students to be more creative; I want them to believe they can make their own choices. Rather than saying ’Do this’, I like to encourage them to be their own artist and grow to be confident in their decisions.

Q: Tell me a bit about your company; I understand it is a bit of a family affair.

A: Yes, three of my four children work full time for the company. My daughter Kelly is the manager, my son Jason takes care of the dying of colors, a lot of the graphics for my books, and the ribbons, and my daughter Amy is our accountant, and has really taken charge of our non profit work.

Q: How did you end up partnering with WonderFil for your Eleganza, and your new wool thread (Ellana) and fabrics?

A: That was really all Andrew. He approached me about it for 2 or 3 years in a row at Market, and I always told him I was happy with what I had. But in the end, it was just good timing. The more I did the hand work, the more I understood what I liked and didn’t like about the threads. I really wanted a thread with a shorter variegation, and he understood that. He has always been fabulous to work with, and when he says he is going to do something, he really gets it done.

Q: Do you have a busy year scheduled for 2017?

A: Yes, I am going to start teaching again in January, and I have a couple of new things up my sleeve. I will have a new book out for Market, and of course, we will be promoting the new wool thread and fabric.

Thread Painting with Tutti™ and Konfetti™

WonderFil Specialty Threads

We're sharing this post by Christine Baker from QUILTsocial, a fantastic site where you can find blogs featuring tips and projects about all things quilting!

Ready…Set…Go!

We are finally ready to get stitching. When you are thread painting (or doing free motion embroidery – both terms are used) you can either stitch with a zig zag or a straight stitch.

If you can NOT drop your feed dogs and have to use a cover that only has a small needle hole, then you can only use a straight stitch. I’m going to try both to see which one I prefer.

First things first – the greenery

I decided to stitch the leaves and stems first as they seem the easiest things to start with. First of all I’m going to try using a straight stitch. I’ve got my feed dogs down and I’ve pulled my bobbin thread up to the top of the fabric. I hold both of the threads in my left hand (to prevent them from being pulled to the back) and I start stitching!

Please note that since I’m using my left hand to hold my camera, you’ll notice that I’m only using one hand to stitch instead of having two hands framing the needle.

Straight stitch thread painting – YouTube
Christine Baker of Fairfield Road Designs demonstrates how to thread paint using a straight stitch and Tutti™ thread from WonderFil™


On to the zig zag

I’ve figured out that, like machine quilting, the faster the machine is running, the nicer the stitches look! But unlike machine quilting, you don’t have to worry too much about keeping the stitches consistent! I think doing thread painting would be great for those quilters who are afraid of free motion quilting. You can get the feel of moving the fabric with the thread dogs down, but this is MUCH more forgiving than machine quilting. So now that I am comfortable with the straight stitch I’m going to try out the zig zag – once again, I usually use two hands when stitching!

Zig Zag thread painting – YouTube
Christine Baker of Fairfield Road Designs shows us how to thread paint using a zig-zag stitch and Tutti™ thread from WonderFil™


As you can see in the following picture, the zig zag stitching on this leaf caused the fabric to pucker more that when I used the straight stitch. I’m sure that I was moving the fabric back and forth too quickly, but I also find the stitching to look messy, so I am going to stick with the straight stitch.

Leaf stitched with zig-zag stitch.

Using the variegations to your advantage

Now that I’m getting the hang of thread painting, I can see now that if I pay attention to the thread changing colour, I can use the lighter sections to highlight the lighter side of the stems and the darker sections of thread to stitch the darker side of the stems. I also find that I prefer to use the thread to outline the shapes and highlight sections instead of covering the whole shape – see what I mean in this photo:

Stems and leaf stitched with straight stitch.

Let’s try out some flower power

I’ve stitched enough of the leaves and stems (at least for now) so I’m going to switch thread color and start working on the large flower. Here is a close-up of my first stitches made on the flower. As you can see, my thread choice was quite similar to the color of the fabric, so my stitches don’t stand out that much. I think for the rest of the stitching I’m going to try to pick threads that are either lighter or darker, or more heavily variegated so that they are more noticeable in the finished product.

Close-up of flower center.

For the butterfly I chose to stitch with the green variegated Tutti™ and the peach coloured Konfetti™ thread. I found that these choices ended up making the stitching much more noticeable.

Close-up of butterfly.

I’ve got lots of stitching ahead of me…

I can see already that this new technique might be dangerous! Not only is it going to eat up lots of my threads but it might eat up lots of my time too!! The more colours you add to the thread painting, the more beautiful it becomes. I love how the design on the fabric is subtly changed and the tactile feeling of the embroidery is added to the fabric.

6 Reasons to Love DecoBob Pre-wound Bobbins

WonderFil Specialty Threads

There are a lot of reasons to love WonderFil Specialty Threads pre-wound DecoBob bobbins. Here's a list of our top six reasons to keep these wonderful little bobbins in your sewing room:

1. They come wound with a higher density of thread than if you wind your own bobbin on a machine.

2. When winding your own bobbin you will often notice the thread filling a clump at one end before moving to the other end. DecoBob pre-wounds are wound completely evenly at the factory, which results in your stitches becoming a lot more consistent when sewing and quilting.

3. Unlike threads by many other manufacturers, DecoBob pre-wounds are not sprayed with any glue, which leaves a residue on the thread that can eventually cause build up in your machines and reduce stitch consistency. Using DecoBob in your machine will keep it happy!

4. The thread is wound in a reusable plastic bobbin, so you can always refill them again and again if you ever need to.

5. Because DecoBob is a super thin 80wt thread, it will reduce the bulk in all of your seams and allow them to lay crisp and flat. It is recommend to use DecoBob in the bobbin for all WonderFil thread lines because of this.

6. DecoBob pre-wound bobbins are available in 36 different colors, meaning you can find the perfect match to any project! Because DecoBob is a cottonized polyester thread, its matte finish will also help it blend into your fabric so that the bobbin thread shows less. 

With love and threads,

#WonderFil

If you enjoyed this blog post check out the Eleganza perle cotton in the fabulous Sue Spargo colour line!

Decorative Easter Eggs DIY

WonderFil Specialty Threads

Happy Easter weekend, everyone! We'd like to send a little inspiration your way with these gorgeous decorative easter eggs that are sure to be a hit in your celebrations. With a few basic materials and WonderFil's 8wt Dazzle thread, you can make these too!

Materials: 

  • White glue
  • White vinegar
  • Gel food colouring
  • 1 fresh white egg
  • WonderFil 8wt Dazzle thread (we used DZ8201-White in this sample)
  • A large eye needle that is longer than the length of the egg
  • Gold or silver bead caps (these are sold at most craft stores)

1.  With a long needle, pierce each end of an egg. Insert needle far enough into egg to puncture the yolk, and then blow from one end of the egg to drain. We recommend doing this over a sink as it can be rather messy. Rinse and pat dry.

2. Mix a solution of food coloring and white vinegar in a glass bowl. There should be enough solution to submerge the egg. We used the gel style of food coloring; if you do not mix it thoroughly the concentrated dye will leave different colors on the egg, which was the look we were trying to achieve: i.e. a mottled egg look. Let the egg soak for about ½ hour, turning frequently to completely cover the egg with dye. Remove from solution and let dry on a paper towel, again turning often to prevent uneven color drying ( it is a good idea to wear latex gloves, as the dye will stain your fingers).

3. Cut a long piece of WonderFil Dazzle thread (about 5 yds). The sparkle and brilliant colors of Dazzle add a beautiful dimension to the decorated egg. You will need a sewing needle that is longer than the egg from end to end, with a large enough eye to accommodate the heavier thread.  Thread the needle and carefully insert the needle through the egg, leaving a short tail. Pull thread around the outside of the egg and back through from end to end. Use a dab of white glue on the thread to secure it to the egg and keep it from sliding around. If the holes at the ends of your egg are around 1/8 to ¼ of an inch around it will be easier to put the needle through (we will cover these holes later). Try to keep thread lines an equal distance apart. When you have gone around the entire egg, secure tails with a dab of glue.   

4. Cover end hole with gold or silver bead caps, attaching with white glue.

Your egg is now ready for its debut!

Chevron Embroidered: Pillbox Pincushion

WonderFil Specialty Threads

This month we want to share with you a project that would not only be fun, simple and easy to make, but also useful. For this project we decided to use the WonderFil’s Razzle and Dazzle threads.

The Razzle and Dazzle threads are perfect for hand embroidery, the silky soft 6 ply rayon thread adds a beautiful shine and sparkle to any project. Simple stitching and the usefulness of the pillbox make it the perfect project to try your hand at embroidering. This is a great project that can simply be modified and customize. Have fun with the pattern and design, these pillbox pincushions make the perfect little gift.

With a few simple seams and a little stuffing, you will be moving your pins into their new home before you know it.


Materials

  • Wonderfil Dazzle - 6180, 3130
  • Wonderfil Razzle – RZM03, RZM15
  • Wonderfil Designer -  White - DS426
  • Linen Fabric, 1/4 yd.
  • Fusible Fleece, 1/4 yd
  • Fiberfill stuffing
  • Button

Tools

  • Rotary Cutter
  • Ruler with 60 degree angle markings
  • Fabric Marking tool
  • Soft Sculpting doll needle

Basic Supplies

  • scissors
  • sewing machine
  •  pins
  •  hand sewing needle,
  • iron
  •  pressing surface


Directions

1. Fuse fleece to linen with hot iron. Cut: One - 14 ¼” x 3”, two -  4-3/4″ circles.

2. Using a ruler and the fabric marking tool draw a line along the length side panel at 1 ½”. Add the Chevron design by using 60 degree markings on the ruler. Spacing chevrons ½” apart draw a set of 2 (space them an inch apart), then add a set of 3 chevrons. Repeat pattern with 1 inch between each set.   

3. With the Razzle and Dazzle threads use a stem stitch trace along the marked chevrons in the sets of 3 alternating thread colors. Using a satin stitch sew between the sets of 2. In the same manner repeat this pattern on the remaining markings.

4. With the right sides together, sew the ends of the embroidered strip together to create the ring.

5. Fold the ring in half evenly and place pins on either side. Fold the matching pin mark ends with pins. Find the quarter marks on the circles by folding the circle in half, then proceeded to mark them in the same manner. Repeat to find the other set.

6. Match the quarter marks of the circle and the tumbler ring with right sides together. Proceed to pin it in place and machine-sew using 1/4″ seam allowance. Attach the bottom circle in the same manner, leaving 2″ opening to turn.

7. Turn the right side out. Fill the cushion with fiberfill until firm.

8. Slipstitch the opening and close using Wonderfil designer thread.

9. Position the button on the center of the circle. Sew through the center of the cushion using doll needle. Add the bottom button on opposite sides. Sew back and forth while pulling to make the buttons push into the cushion; secure.

by: Jennifer Davey from Be Still My Crafting Heart

With love and threads,

#WonderFil


Wrapped Easter Eggs DIY

WonderFil Specialty Threads

Easter weekend is coming up and we have a quick and easy alternative way of decorating your eggs! Using only three basic household items and Eleganza perle cotton thread, this DIY is simple enough to do with kids and a good way to avoid the mess that comes with dyes.

Materials:

  • Sue Spargo Eleganza #8 perle cotton
  • A large sewing needle
  • White glue
  • A raw, fresh white egg
* This project can be completed with a hardboiled egg if you only plan on keeping it for a few days. If you use a hardboiled egg you can skip the first step.


Pierce both ends of the egg with the large needle, inserting it far enough to break the yolk inside. Then blow on one end of the egg until the yolk is expelled from the opposite hole. We recommend doing this over a sink for easy clean up. The empty egg will be fairly delicate, so handle it with care.


Pour some white glue into a small bowl. Dip your thumb and index finger into the glue and run it over the end of the thread up a few inches, then stick the thread to the surface of the egg. Continue spreading the glue on the thread as you continue while wrapping it around the egg in a random crossed pattern.


The random colour variations of Eleganza adds a colourful contrast and texture. Try making a few eggs in different colours to create a beautiful Easter basket or egg hunt!

WonderFil is coming to Cologne, Germany!

WonderFil Specialty Threads

Cologne_Germany_Kolnmesse-03.jpg

Hallo, Deutschland!

WonderFil is coming to Cologne, Germany for H+H this Friday March 18 - Sunday March 20. This international trade fair for creative handicraft and hobby supplies features workshops, events, fashion shows, and an extensive exhibition hall with exhibitors from all over the globe.

You can find us at Koelnmesse in Hall 03.1 at stand C016.

For more information please visit: http://www.hh-cologne.com/handcrafts-and-hobbies/index.php

AQS QUILTWEEK AT LANCASTER, PENNSYLVANIA

WonderFil Specialty Threads

The next AQS QuiltWeek is revving up at Lancaster, Pennsylvania, beginning tomorrow on Wednesday March 16 and running until Saturday the 19th. Stop by for incredible instructors, workshops, special exhibits, hundreds of display quilts, and a whole array of local and international vendors including WonderFil Specialty Threads.

Find the perfect thread for your next project at the WonderFil booth: #1331/1333 at Lancaster Country Convention Center in Lancaster.

For more information visit: http://www.quiltweek.com/locations/lancaster/

St. Patrick's Day Lavender Scent Sachet DIY

WonderFil Specialty Threads

Scented sachets are wonderful additions to the home as they can be used in a variety of clever ways all around the house. Tuck them in closets or in drawers to leave a lightly fragrant scent on your clothing, keep them in your vehicle as a natural alternative to car fresheners, drop them in your dryer to keep clothes smelling fresh, keep them with your storage to act as a natural repellent instead of using mothballs, drop them in a bath for an aromatic and relaxing at-home spa day, or even tuck them into your pillow case to help you relax and sleep at night. They also make cute and thoughtful handmade gifts for every occasion!

These adorable little pouches are not only practical household items, but incredibly easy to make and turn into decorative pieces. Here’s what you need to make a four leaf clover sachet:


  • download and print the four leaf clover pattern
  • felt or wool in dark green and light green colouration
  • a chalk fabric pen
  • dried lavender or other dried herbs, flowers, or spices of your choice (these can easily be purchased at a local specialty spice store or online)
  • Eleganza 8wt perle cotton in White
  • appliqué pins
  • no. 24 chenille needle

Optional materials:

  • 100wt InvisaFil in colours IF712 and IF702
  • Eleganza 8wt perle cotton in colour EL5G26
 

Begin by cutting out the printed four leaf clover template and trace, using the chalk pen:
2 pieces of the large clover on the dark green felt
1 piece of the small circle on the dark green felt
1 of the smaller clover on the lighter green felt.


We used 100wt InvisaFil (colour IF712) thread to whip stitch the small dark green circle to the smaller light green clover, then used IF702 to do the same with the light green clover over one piece of the dark green clover.

Next we began to embellish the piece using Eleganza perle cotton in White and EL5G26. Starting with a simple backstitch, we made a circle around the center and added a series of french knots and bullion knots for contrast and detail, however you can do whatever you like!

Once you're finished hand embellishing your piece, take the second dark green clover piece and layer it underneath. Then begin blanket stitching the two pieces together with the White Eleganza thread. Continue until you have a small gap left before reaching the end.

Using a small tea spoon, carefully fill the sachet with dried lavender, or whichever other herbs/spices you may be using, and gently push it into all the corners with your finger until the sachet is full.

Tie off the blanket stitch to complete your scented sachet!

We hope you enjoyed our latest DIY project! Remember, you can always use different colours of wool or felt to make a "flower" instead of a four leaf clover.

With Love and Threads,
WonderFil

Q & A with Trish Stuart

WonderFil Specialty Threads

TEXAS-BASED QUILTER, AUTHOR, & INTERNATIONAL TEACHER

Raised in Alaska and currently residing in Texas, Trish’s art is heavily influenced by nature and color. She has a broad range of techniques and styles, ranging from traditional piecing, her own method of easy curved piecing, small and large scale appliqué, painting on fabric and mixed media. She currently can be found working in wool and embroidery. A former “Sewing Star” for both Pfaff and Viking, Trish has been a repeat guest on nationally broadcast television programs, is featured on Craft Daily as one of their online teachers, has been published in national quilting magazines, traveled and taught both nationally and internationally. She has published 12 books and over 200 patterns. Her passion is inspiring others to succeed in their own creativity, encouraging them to work out of the box by showing how to get from A to B. The point is to have fun doing it!

Trish has been with the WonderFil Teacher Program since 2009.

Q: How did you start makingquilts?
A: Originally I didn't even like quilts. I thought they all had to be made out of calico and I didn't care for calico. But one day I was walking with a girlfriend and she asked if it would be ok if we stopped at a quilt shop because she needed some fabrics to complete a quilt she was working on. They had such beautiful fabrics! I went right home and designed my first quilt. My great Grandmother had quilted so I new a little bit about the designs, but I actually designed my first quilt before I had ever made one.

Q: Tell me a bit about your quilting journey
A: I lived in Alaska for years. At the time I started quilting all quilts were fairly 'girlie'  and no one was really making masculine quilts. But I had two sons, so I started making quilts for them, with scenes like bears and fishing, from my Alaska influence. I was also painting and selling watercolors, so my local shop owner convinced me to start teaching color classes, which no one was really doing then.

Q: So that is how you started teaching?
A: At first I couldn't imagine myself teaching, but when I discovered all the tools that were available, like rotary cutters and special rulers, it opened up a new world to me. I was an accountant, but I had decided to stay home with my kids when they were smaller, so I had the time to quilt and start into some teaching. Then I started writing books, and doing training videos for Viking and Pfaff. We eventually moved to Texas, and then I could teach all over the country, which had been difficult when I was in Alaska. I became heavily booked up. Then 6 years ago I suffered a personal tragedy, but I was so booked, I just kept going to fulfill all my bookings. When I finally stopped, it all hit me and I found myself unable to teach or create at all for years. Certain companies like Hoffman Fabrics and WonderFil Threads continued to support me and didn't forget about me. That meant the world to me. I eventually spent six months struggling to work out a specific pattern for Hoffman, and once I got through it, I was able to start teaching and creating again.

Q. What are your favorite WonderFil threads?
A. I have been working a lot with wool lately, so I absolutely love Razzle, Dazzle and Sizzle (8 weight rayon with percentages of metallic). The shine of the rayon and metallic look so great with the wool. I have also just started digitizing for machine embroidery, so I am looking forward to trying more of your embroidery threads, like Splendor.

Find out more about Trish Stuart and her incredible work on her website: trishstuart.com

With Love and Threads,
WonderFil

AQS QuiltWeek at Daytona Beach, Florida

WonderFil Specialty Threads

The next AQS QuiltWeek is revving up at Daytona Beach, Florida, beginning tomorrow on Wednesday February 24 and running until Saturday the 27th. Stop by for incredible instructors, workshops, special exhibits, hundreds of display quilts, and a whole array of local and international vendors including WonderFil Specialty Threads.

Find the perfect thread for your next project at the WonderFil booth: #1108/1110 at Ocean Center in Daytona Beach.

For more information visit: www.quiltweek.com/locations/daytona/#mg

Valentine’s DIY Project For That Special Someone

WonderFil Specialty Threads

Valentine’s DIY Project: A Gift For That Special Someone

Valentine’s is just around the corner and we have the perfect DIY project for this special occasion! Valentine’s day is the day of love, whether that be for your partner or simply a friend. This cross-stitch is a great and personalized way to express to someone that you are thinking about them!

Here are all the materials you will be needing for this project:

  • 1 piece of 11 count aida cloth 7”x8” (will vary based on size of design)
  • Size 22 tapestry or darning needle
  • Threads:
    • 12wt Fruitti (100% Egyptian Cotton)
    • Colors used in project 
    • FT 20 - Storm
    • FT 10 - Roses
    • FT 15 - Carnation  
  • Pattern: www.cross-stitch-pattern.net 
  • “Thank You for Being My Friend”
  • Embroidery scissors
  • 6” Cross-stitch hoop
  1. The first step is to choose the pattern you would like to cross stitch with your personalized message. We used a free pattern from www.cross-stitch-pattern.net where you can find a variety of different designs for your cross-stitch.
  2. Next cut out your aida cloth large enough to fit your design and have at least 2 inches of extra cloth outside of the hoop to give your hoop enough fabric to grab .

3. To place the fabric in the hoop, first lay the outer hoop on a flat surface, and lay your aida cloth overtop (please note that the outer hoop screw will have to be loose enough for the inner hoop to fit inside with the aida cloth. Push in the inner hoop loosening screw if necessary. Flip the hoop over and pull the aida cloth to create a tight flat surface, while tightening the outer screw to hold the fabric in place. 

4. Pick a central point in your design to start; it is best to work in one color at a time. By using the Fruitti thread it is not necessary to separate strands. This particular design used several colors to create the same effect that the variegated Fruitti does on its own. For this design the heart was worked first leaving squares empty for any letters. A counted cross stitch pattern requires that you pay close attention to the number of squares worked. If you have never done any cross stitching, there are many instructional videos available online.

5. Next the blue portion of the design was worked, leaving only the inner pink letters and the heart border left to work. 

6.The completed design, framed, would make a great Valentine’s gift for your special someone!

Happy stitching and happy valentines day!
With Love and Threads,

WonderFil


Fresh & Original Valentine's Day Colour Palettes!

WonderFil Specialty Threads

Valentine’s Day is coming up and store shelves are beginning to show those unmistakable colours of red, pink and white that we all recognize to represent this annual day of love. As lovely as this colour palette is, sometimes we want to step into something a little different, a little newer. We’ve come up with ten fresh and sexy new colour palettes for Valentine’s Day and paired each colour with the one it correlates to in our Splendor thread line, making it easy for you to pick and choose the perfect palette for your Valentine’s project! Just look at the number in the bottom right corner to find the matching thread colour.


Cotton Candy

Adding a touch of blue into an otherwise warm colour palette adds contrast and interest and keeps it from looking all “the same”. Consider adding a cool colour to a warm palette to add a breath of fresh air and give the other colours something to jive against.


Not all Valentine’s palettes need to be based on warm colours. This collection of purples and blues is contrasted by a small amount of pink to balance it out and keep it from feeling too heavy, while the dark colours play a mysterious and sensual part.

Sweet Dreams


Naughty & Nice

Placing a vibrant, bright colour next to a neutral colour like this bright pink and dark grey allows the brighter colour to shine without over-powering the whole palette. Keeping the other three colours in the palette as softer hues ensures the colours don’t compete with each other for attention.


A group of bold and bright colours work well for kid-themed projects, or anywhere you want something punchy. Consider experimenting with a limited colour palette of 3-4 colours that are all bright and fairly saturated, making sure not to use too many as they will end up fighting with each other and distracting the eye unless balanced out with a more softer neutral colour.

First Love


Splendor is a 40wt rayon that is wonderfully soft and silky to the touch that gives projects a beautiful sheen and drapability. It can be used for machine embroidery, quilting, thread painting, serging, and any kind of decorative stitching, making it extremely versatile. We also love using Splendor to embroider clothes, towels, or other items that need to be frequently washed since it is also colourfast.

Hope you found some inspiration and we wish you a very happy Valentine's Day!

With Love and Threads,
WonderFil

Road to California 2016 - Ontario, California

WonderFil Specialty Threads

As many of you might already know, Road to California starts tomorrow, Thursday January 21st, in Ontario, California! The WonderFil team is already setting up box-fulls of thread products, sample quilts, and even a demo station!

Our thread displays are nearly ready!

Our thread displays are nearly ready!

To make things even more exciting, we’ve recently started a Periscope account. Periscope is a fantastic new app that allows you to connect with people all around the globe and see the world through their “eyes”. Join us on Periscope to see what WonderFil is up to during Road to California, even if you can’t be there! We’re excited to show you what’s getting us excited during all of our shows and events this year. (https://www.periscope.tv/)

Speaking of apps, Road to California has recently introduced their very own Road to California app that offers an image feed, class and vendor information, on-going events, as well as a map and location information - all in one organized place. This helps all attendees keep everything they need to know right in their pocket, as well as keeping everyone up to date on schedules and event times so you can plan your day and not miss a thing! You can download the app from your phone’s app store.

Find WonderFil Specialty Threads at booth #1018/1020 from January 21 - 24 at the Ontario Convention Center. For more information visit: http://www.road2ca.com/

We look forward to meeting you!

Join us at the 2015 CHA MEGA Show

WonderFil Specialty Threads


Happy New Year! 2016 has begun and we can’t wait to get the year started. We are looking forward to all the new products and innovations to come. We are excited to be kicking off the new year at the Crafts and Hobby’s Association MEGA show in Anaheim, California form Jan 9-12. 

Look out for our WonderFil booth at 912/914. We’ll be brining along all our newest lines of thread like FabuLux and the Sue Spargo collection in Eleganza in #3, #5 and #8.

Check out our booth and get inspired by all the great crafty projects that can be made with WonderFil threads! 

For more information visit the CHA website. http://www.chamegashow.org/

With Love and Threads,

WonderFil

#WONDERFIL

5wt and 3wt Elganza Perle Cotton are here!

WonderFil Specialty Threads

We’re so excited to announce the arrival of our latest and greatest 3wt and 5wt Eleganza perle cotton in the fabulous Sue Spargo colour line! In addition to the already existing 8wt thread, these heavier weights are perfect for additional textures, dimensions, and contrast for stunning projects. Let’s take a look!


 This lineup shows the difference in weights starting at 8wt (left) to 5wt (middle) to 3wt (right). The heavier the thread, the higher up it sits on the fabric, and the more visible it becomes.


Eleganza by Sue Spargo is the ultimate choice for wool appliqué, hand embroidery and sashiko. Available in 36 solid and 54 variegated colours, it’s also double-gassed and mercerized, resulting in a wonderfully smooth and lustrous surface that glides through all types of fabrics. You can check out a full list of her colours here


Combining different threadweights in the same area make for a beautiful variety, even when using the same stitch! Choosing matching variegated threads adds additional contrast for an easy and perfect colour palette.


Sue Spargo loves to pair Eleganza with wool. The natural appearance of both fibres make a charming team that is delicate, beautiful and just a little bit funky! Wool also carries a lot of texture, making it an excellent baseline for beautiful stitches laid overtop. Every piece just begs to be touched.

Eleganza

If you’re eager to see more of Sue Spargo’s incredible work, you can follow her on her blog. US customers can also order Eleganza by Sue Spargo directly from her site.

Follow Sue Spargo online to see more of her incredible work!

With Love and Threads,

WonderFil

#wonderfil

Q&A with Ana Buzzalino!

WonderFil Specialty Threads

Calgarian fibre artist and quilt instructor

Sunflowers

Ana has been a teacher on a variety of quilting techniques for the past 20+ years. Some of the recent workshops have focused on free-motion quilting and surface design. She is currently working on a new series of work that includes mixed media and is a frequent contributor to Quilting Arts Magazine and Quilting Arts TV.

Many of Ana’s quilts have won several awards at local and national shows, and have been juried into major international shows. 

WonderFil is proud to have counted Ana Buzzalino as part of our Teacher Program since 2009.

Dawn Over Heritage 

Q: How did you start quilting?
A: I was working in downtown Calgary and I went for a walk one day at my lunch hour. I ended up in Kensington and saw a beautiful “blanket” in a store window, so I went in to ask the lady if I could buy it. She said it wasn’t for sale but she could teach me how to make one (it was a quilt shop). So I joined a class and haven’t looked back since!

Q: Where do you find your inspiration for your quilts?
A: Everywhere, really. Photos, words in a book, magazines…I have more ideas than I have time to create. So if I start a project that I don’t like, I don’t necessarily finish it. I only work on what I like.

Berries From the Trees 


Q: What are you currently working on?
A: I am doing more dying of my own fabrics, and a lot of free motion work. I will often do small prototypes of pieces to make sure they will work in larger pieces. I keep these and sometimes frame them as small art pieces.

Q: What are your favourite WonderFil threads?
A: I only use DecoBob or InvisaFil in my bobbin. In my needle I love the 40 weight rayon (Splendor) because it has such a great sheen and never breaks on me. I also love the variegated Silco (35 weight cotton) because it has such a silky finish.

Find out more about Ana and her amazing work at anabuzzalino.com

With Love and Threads,

WonderFil

#wonderfil

Our Favourite Colours Inspired by Winter

WonderFil Specialty Threads

It’s nearly that magical time of year again! Frosty landscapes coated in powdery white, evergreens laden with sparkling icicles, and cozy homes shining with twinkling lights in the dark of night. For those who love winter (and for those who prefer to spend it hibernating under a warm quilt) we have a few favourite thread palettes perfect for finishing those holiday projects.

Snowflakes embroidered with Spotlite

One of our absolutely favourite threads to use during this season is Spotlite™, a 40wt rayon core metallic thread. Metallics are beautiful and reflect the shining theme of the holidays, making it a magnificent choice for winter-themed projects. While we offer Spotlite™ in 40 different colours, a simple way to achieve a gorgeous project is to choose a neutral palette of gold and silver threads and a brightly coloured fabric to embroider over. This allows for a pop of colour in your project without worrying about matching colours.

However if you like your threads to carry the colour in your project, we also offer colour coordinated tubes of Spotlite™ in 9 different colour themed sets, including a Christmas themed set. Spotlite is a gorgeous thread that can be used for embroidery, decorative quilting, built-in decorative stitches, thread painting, and 3D embellishment effects.

Speaking of themed sets, our 40wt rayon thread, Splendor, is available in packages with colours revolving around special themes. Included are Blue, Landscape, Christmas, Classic Christmas, and Country Christmas. These not only make great sets to easily get started on a project, but also make thoughtful gifts for the sewers and quilters in your life! Splendor is a versatile thread that can be used for machine embroidery, quilting built-in decorative stitches, machine quilting, rough edge appliqué, and even serging.

Warm browns and whites make a good contrasting combination for cute holiday creatures. Since they are already neutral tones, you can add little splashes of bright colours to liven it up without worrying whether or not the colours match!

With Love and Threads,

WonderFil

#wonderfil