Contact Us

Use the form on the right to contact us.

You can edit the text in this area, and change where the contact form on the right submits to, by entering edit mode using the modes on the bottom right. 

2915 19 St NE
Calgary, AB, T2E 7A2

18662506101

WonderFil Specialty Thread Blog

WonderFil brings you the latest news, events, upcoming thread lines and special tips and advice. Follow WonderFil Specialty Threads on our social media: Facebook, Instagram, Twitter, Pinterest, and Youtube.

Filtering by Tag: #8

Introducing Razzle™ & Dazzle™: 8wt Rayon & Rayon + Metallic Threads

Maura Kang

These juicy 8wt threads know how to show off boldly. Razzle™ 100% rayon and Dazzle™ rayon with metallic threads can be used for a variety of hand techniques, in serger loopers, and even in domestic sewing machines with specific techniques. They can add a totally new dimension to your projects that can’t be achieved with any other kind of thread. Let’s take a closer look at what makes Razzle™ and Dazzle™ threads so unique.

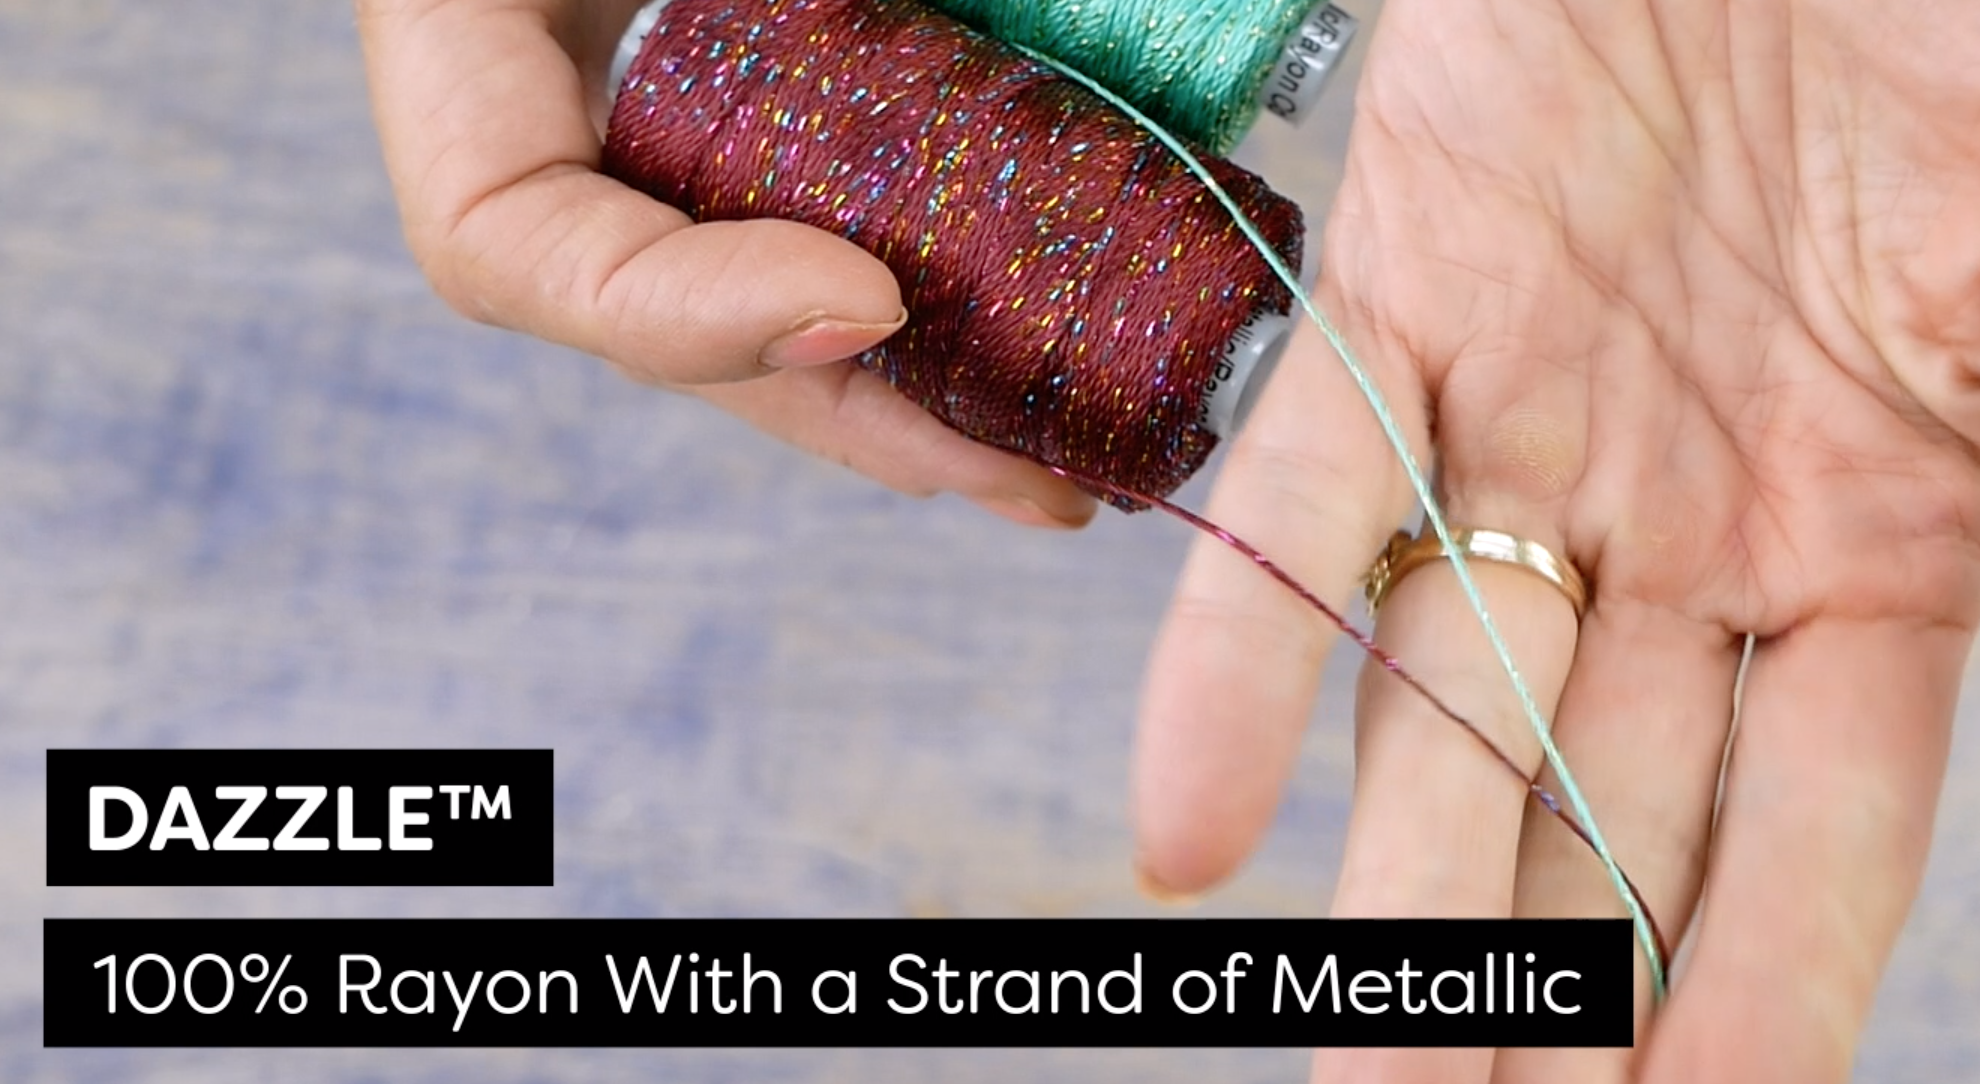
Razzle is an 8wt 100% rayon thread with a gorgeous and soft lustre, while Dazzle is an 8wt rayon with one strand of metallic running through it for when you just need a wink of sparkle.

1.png
2.png

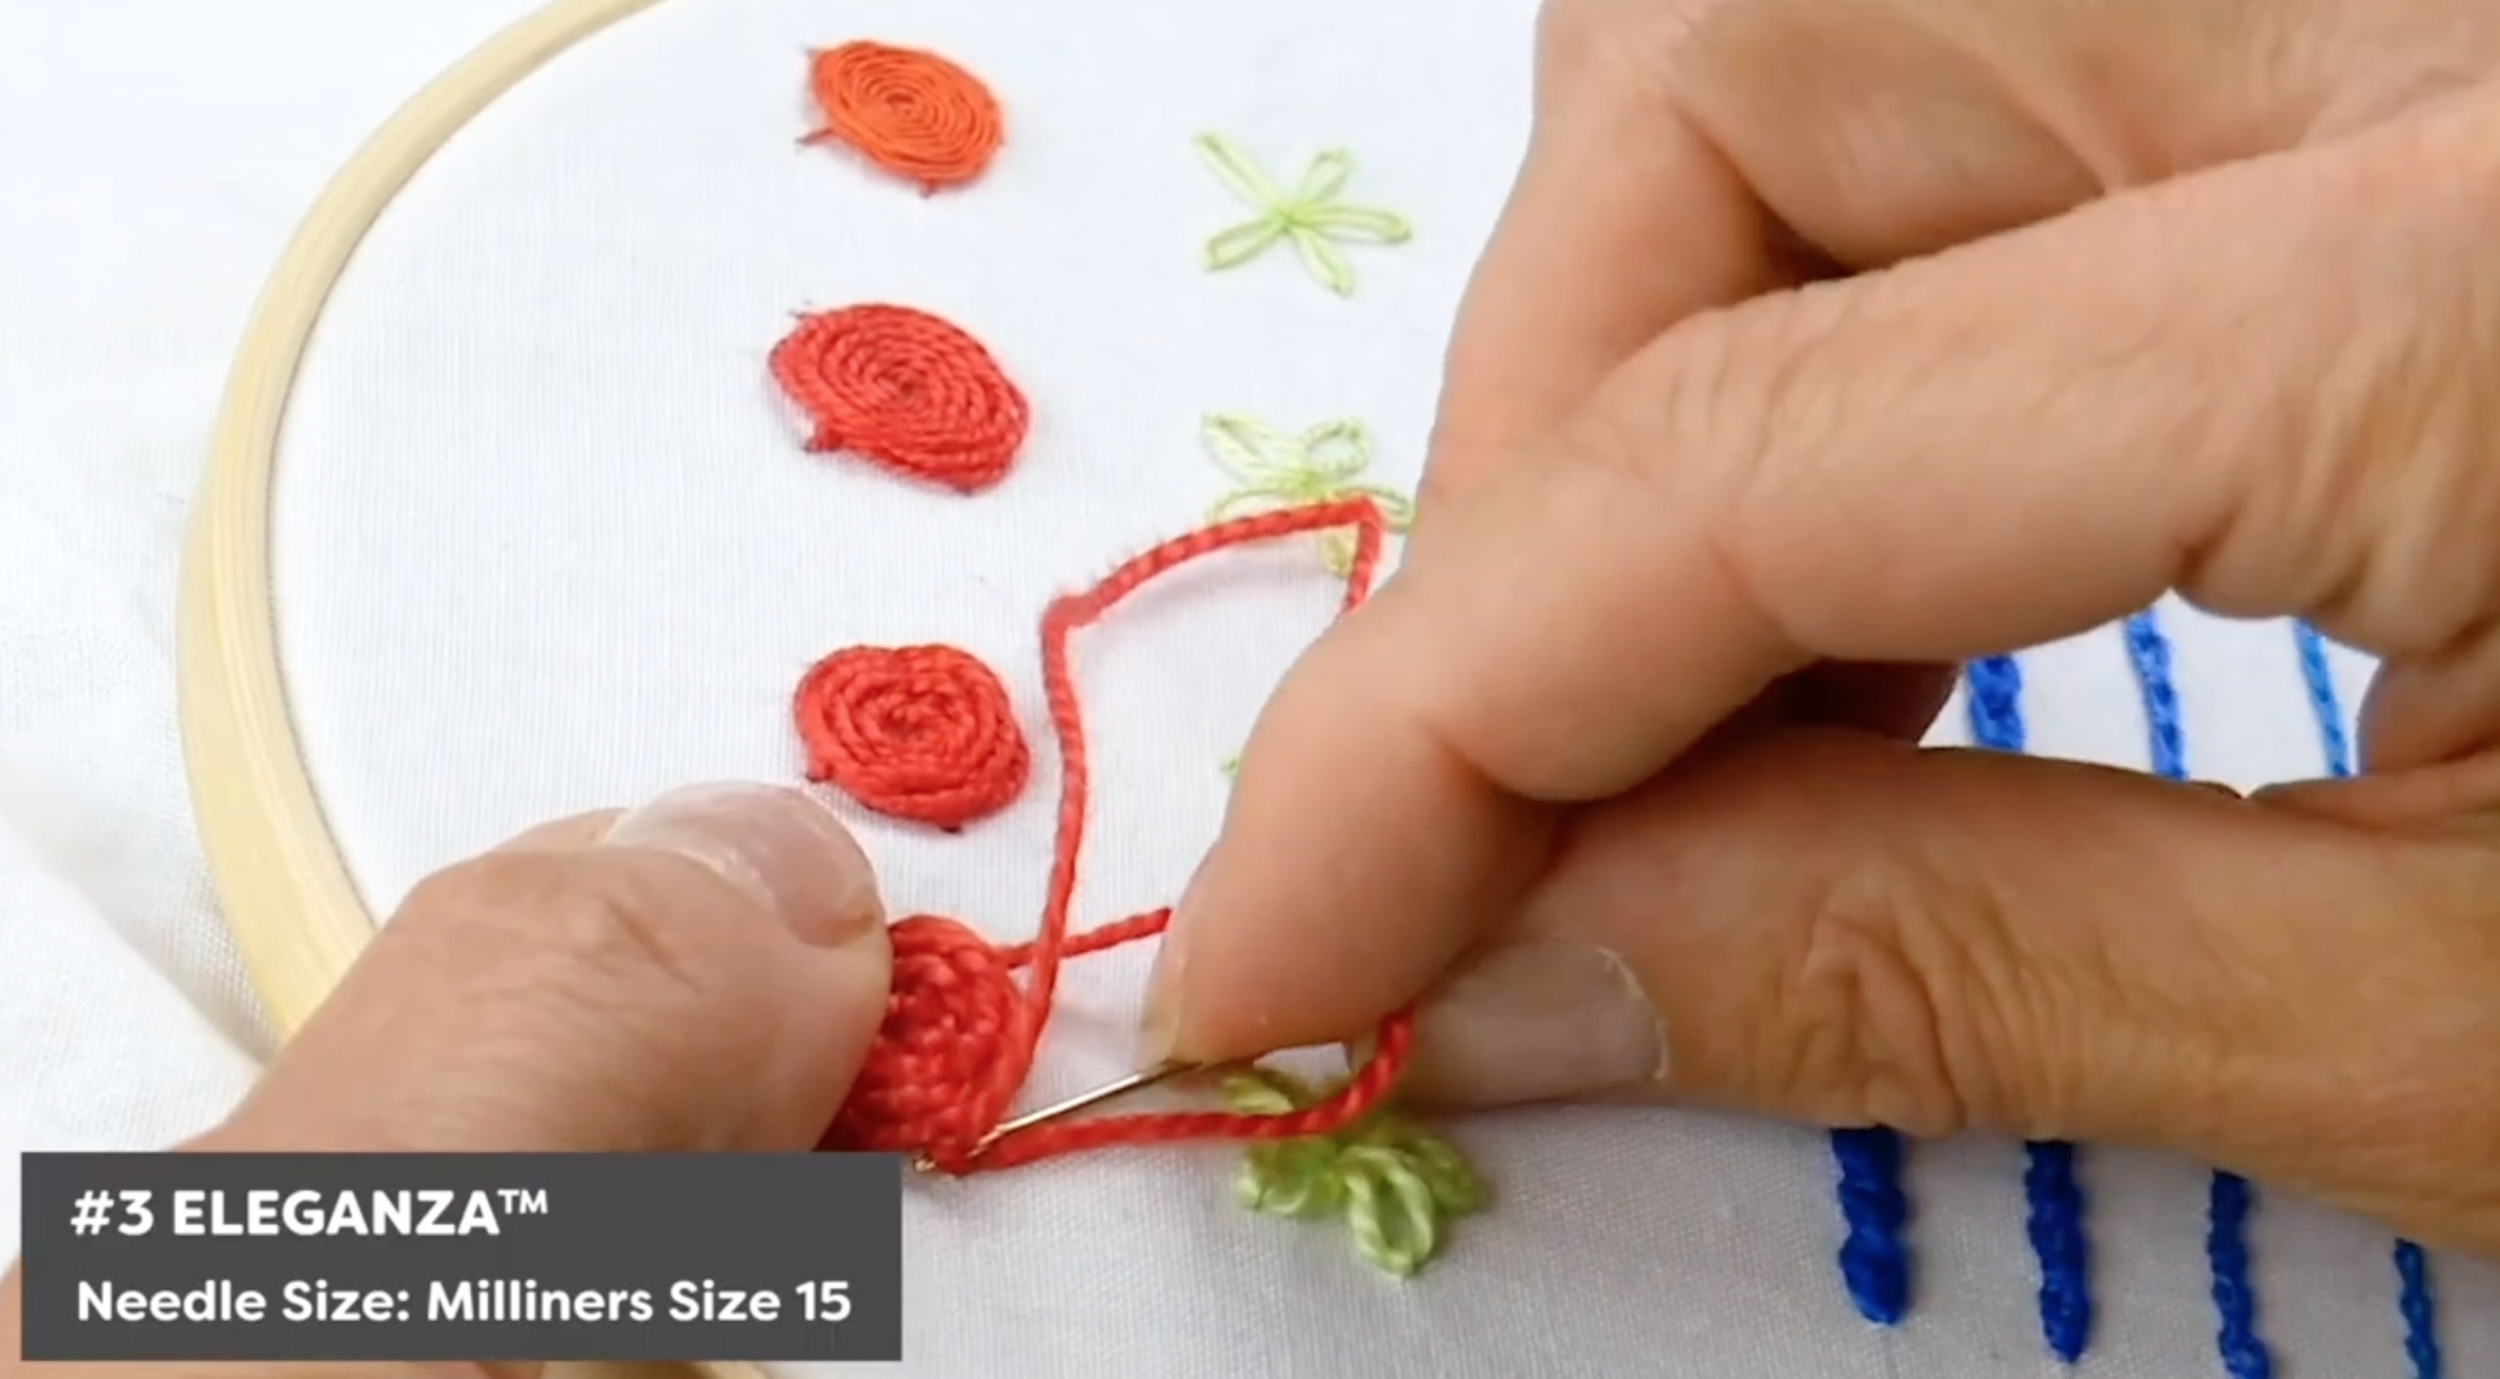
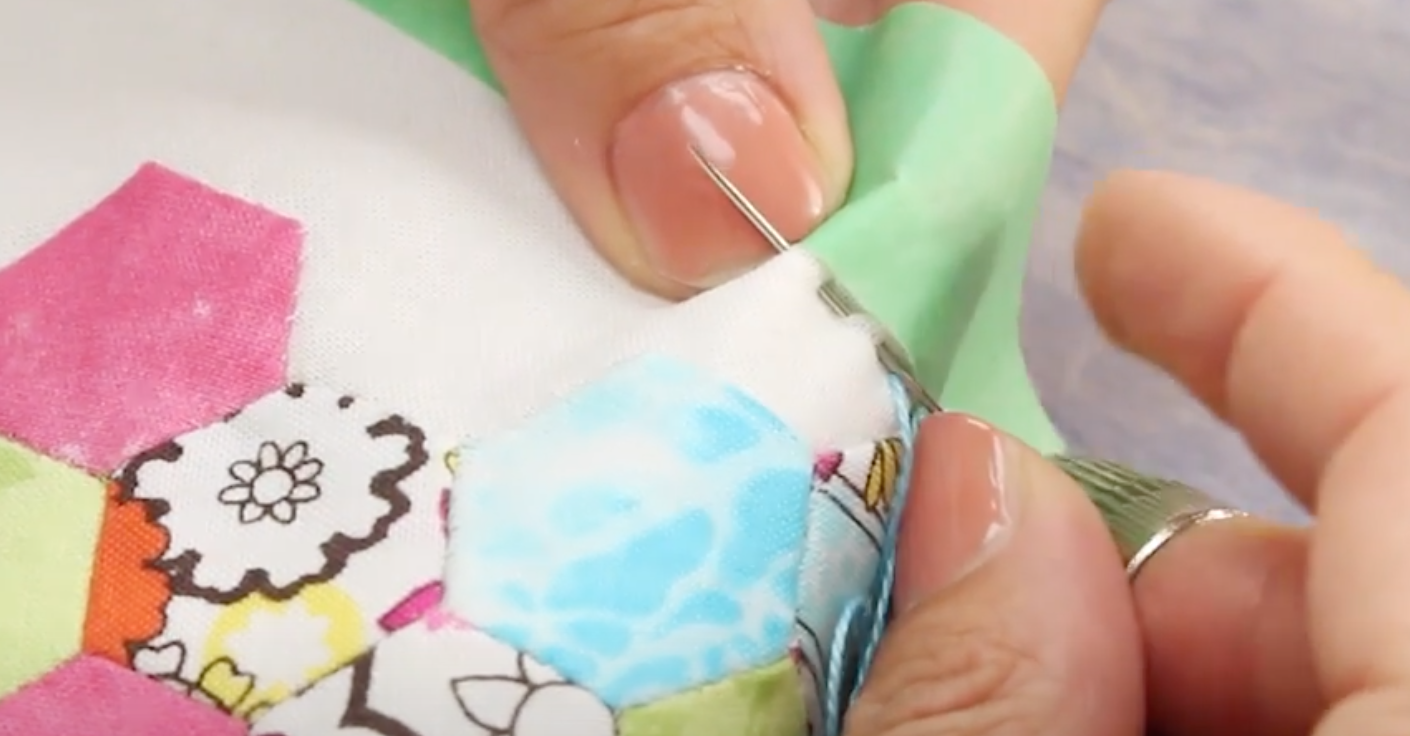
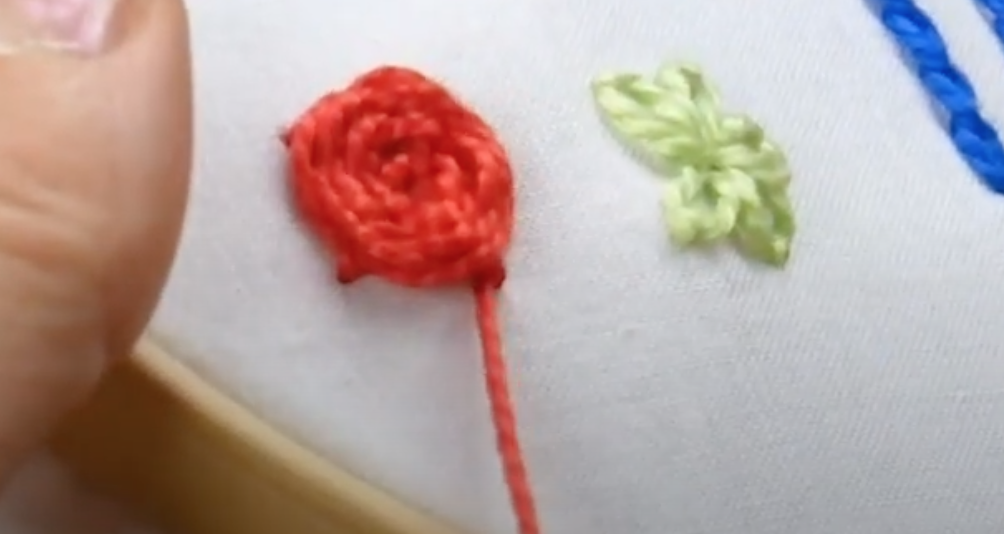
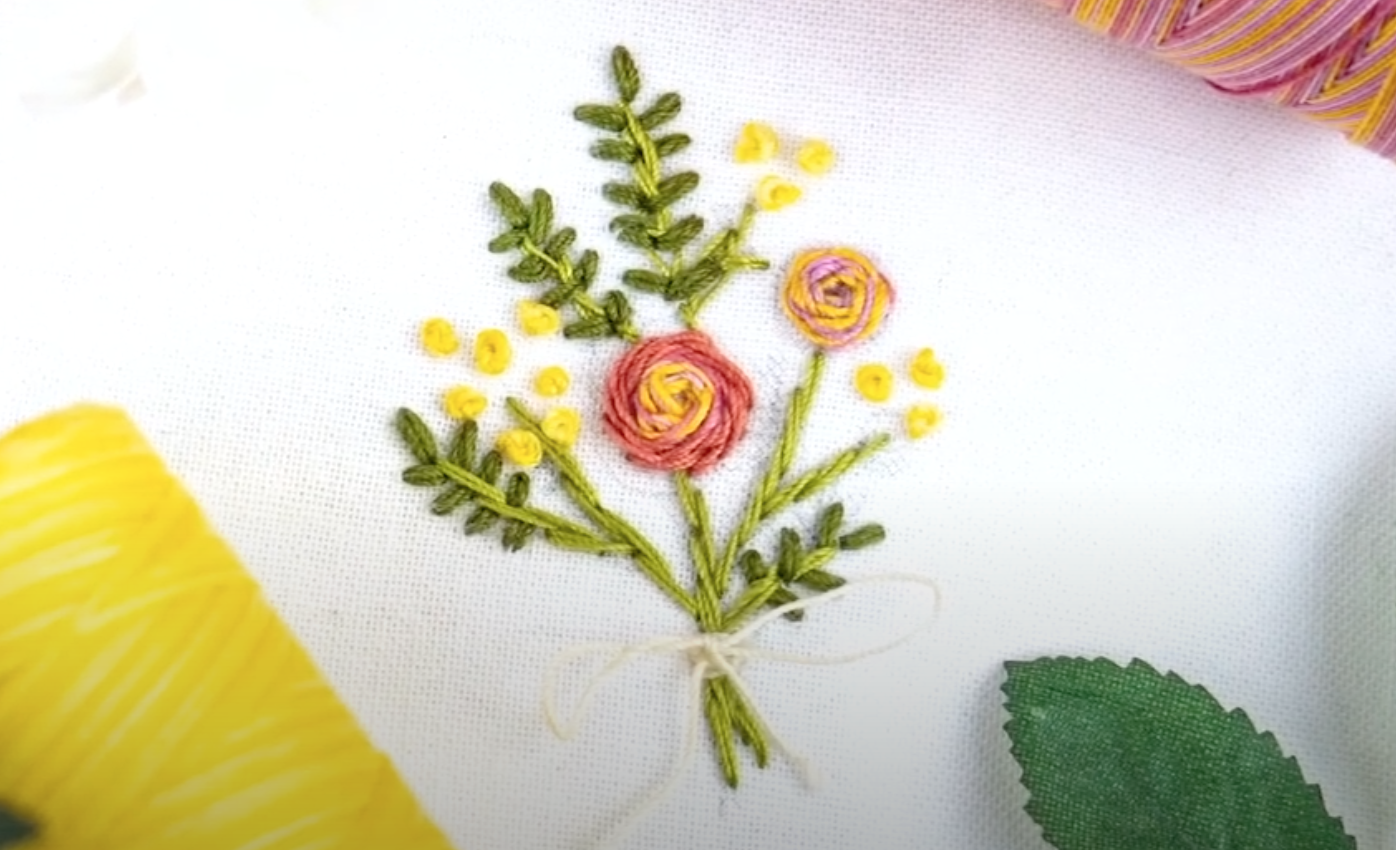
When you think 8wt threads, one of the first uses that comes to mind is hand embroidery. Razzle and Dazzle are popular choices because unlike other 8wt rayon threads on the market, they have a tight twist that resists unravelling, making it ideal for pulling it through all kinds of fibres and fabrics. You can stitch confidently for beautiful and perfect hand embroidered embellishments.

3.png

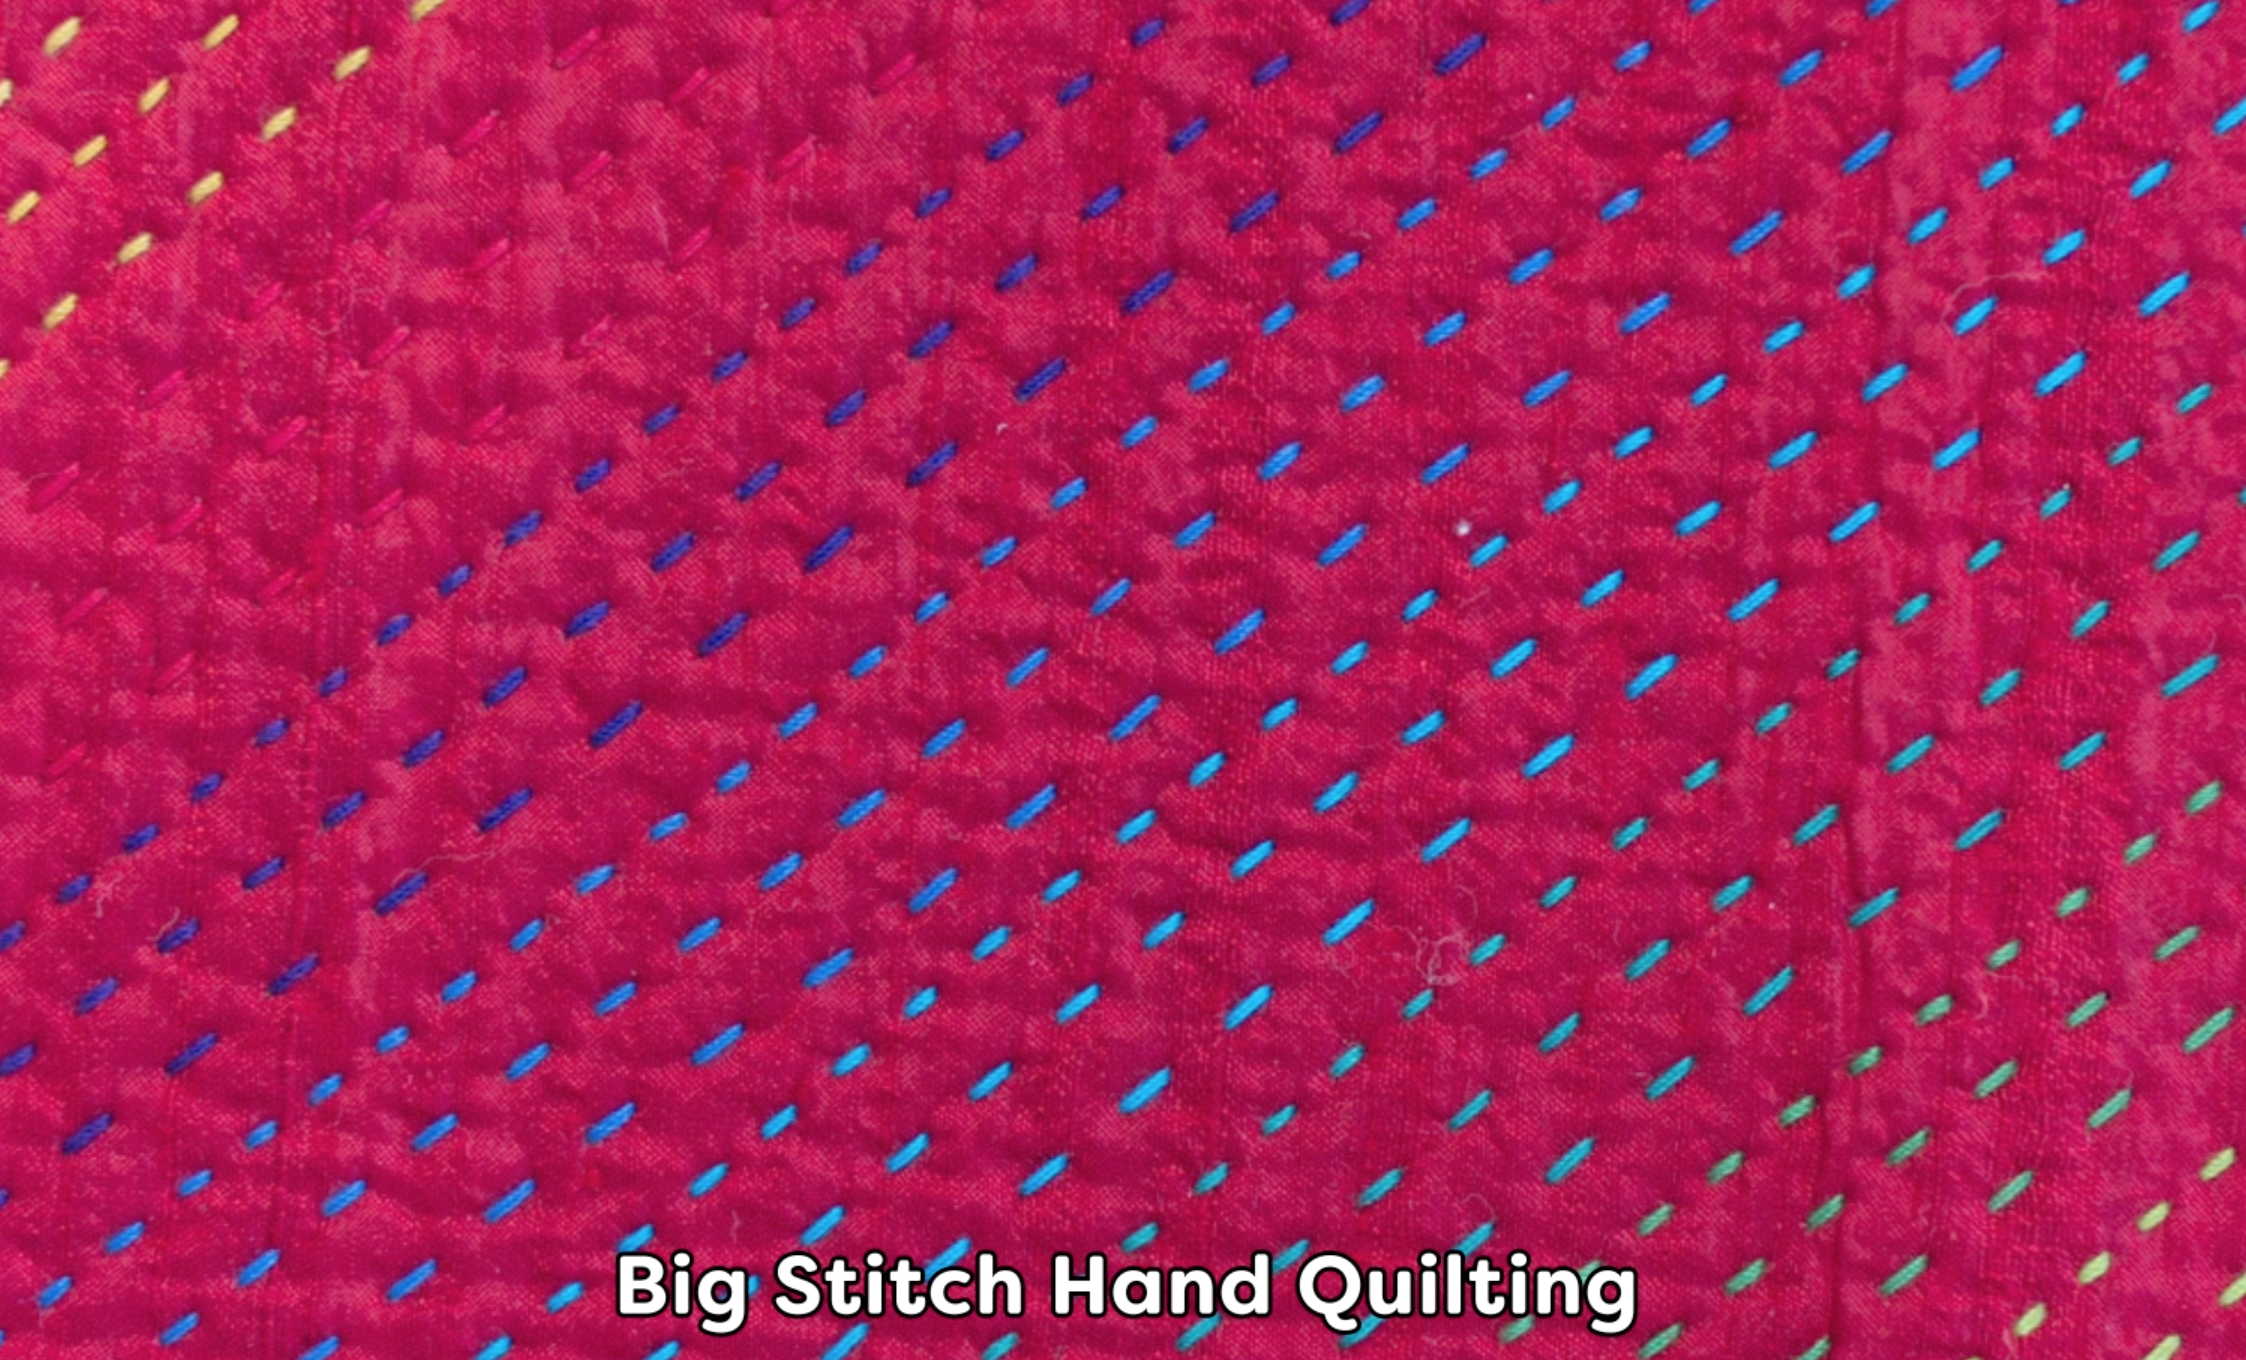
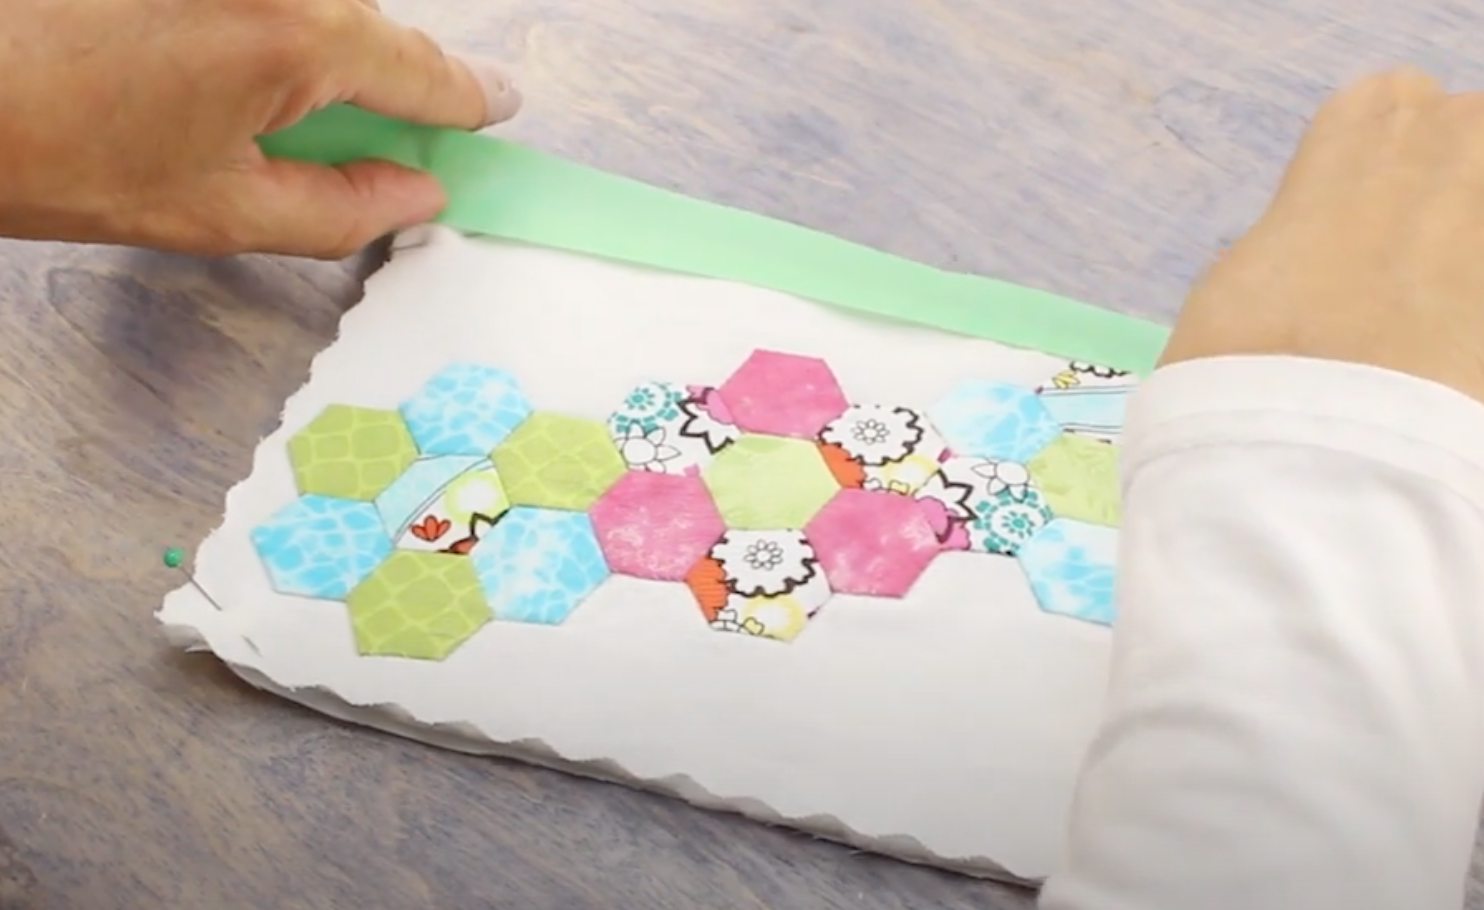
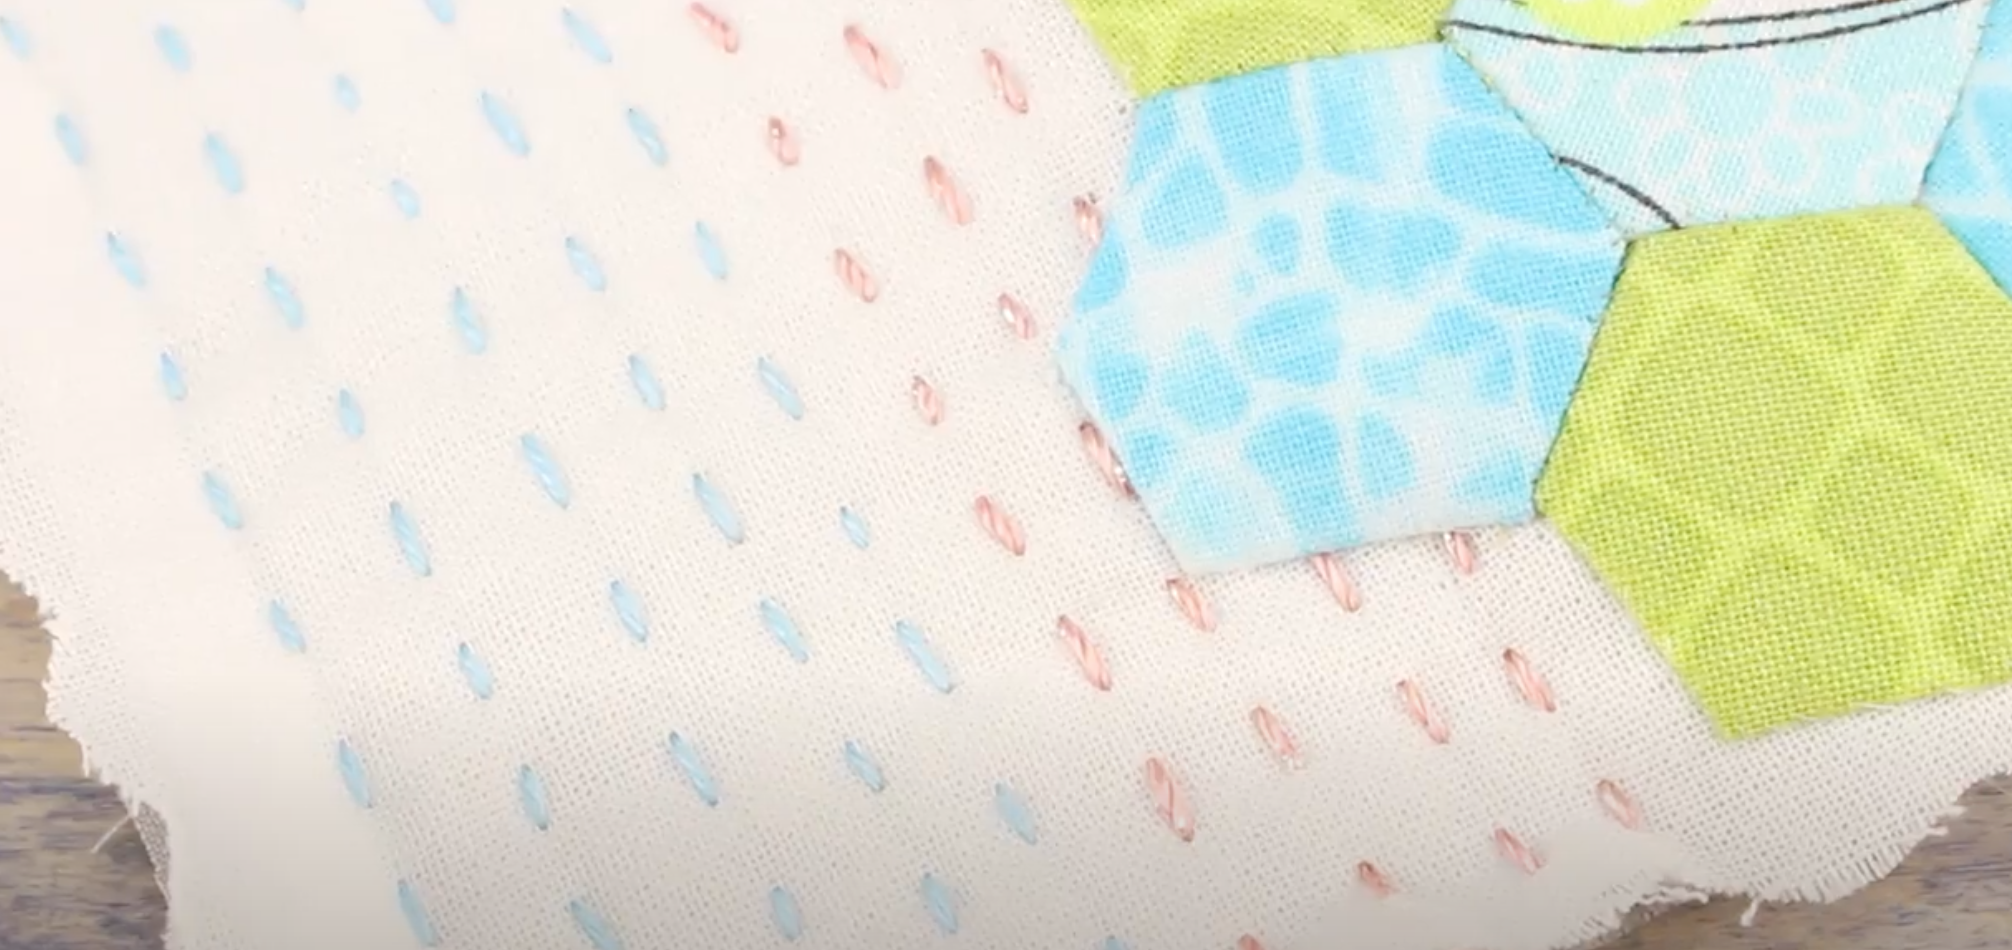
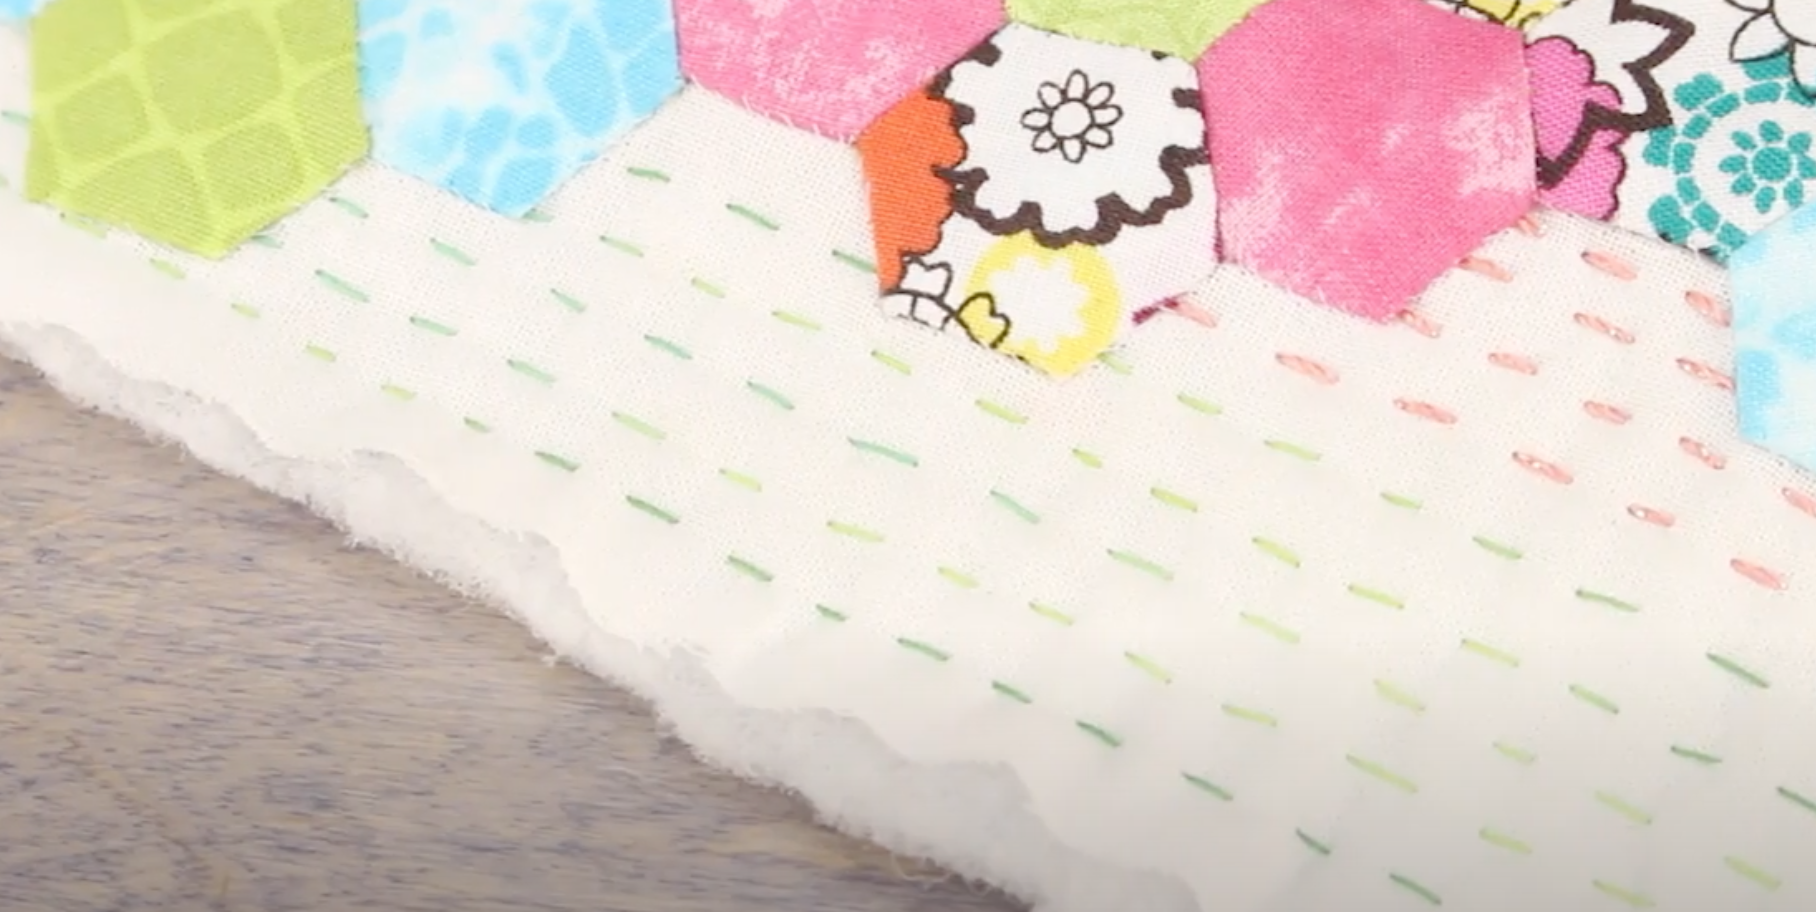
Consider Razzle and Dazzle for other hand techniques like sashiko, big stitch hand quilting, visible mending, crochet, crafts, and tassels.

But these threads aren’t just limited to hand sewing. You can use these threads on the upper and lower loopers of your serger to create fantastic decorative edging on any project. Because these threads are made with rayon, they’ll leave a soft, silky, and shiny edging that is perfect for quickly finishing small quilts, panels, clothing, or any piece you want. We even made a tutorial to show you how to set up your serger and do this for yourself, which you can check out by clicking here.

4.png

While 8wt threads are too large to fit through the eye of your machine needle, that doesn’t mean you can’t use them on your sewing machine. Razzle and Dazzle make for an incredible couching thread that stands out from the fabric to create a gorgeous, touchable surface texture. You can also wind them on your bobbin to do bobbin work, which is a technique where you sew upside down to get away with sewing with these heavy 8wt threads in your machine. These techniques are perfect for adding that little extra bling and texture to any project.

5.png

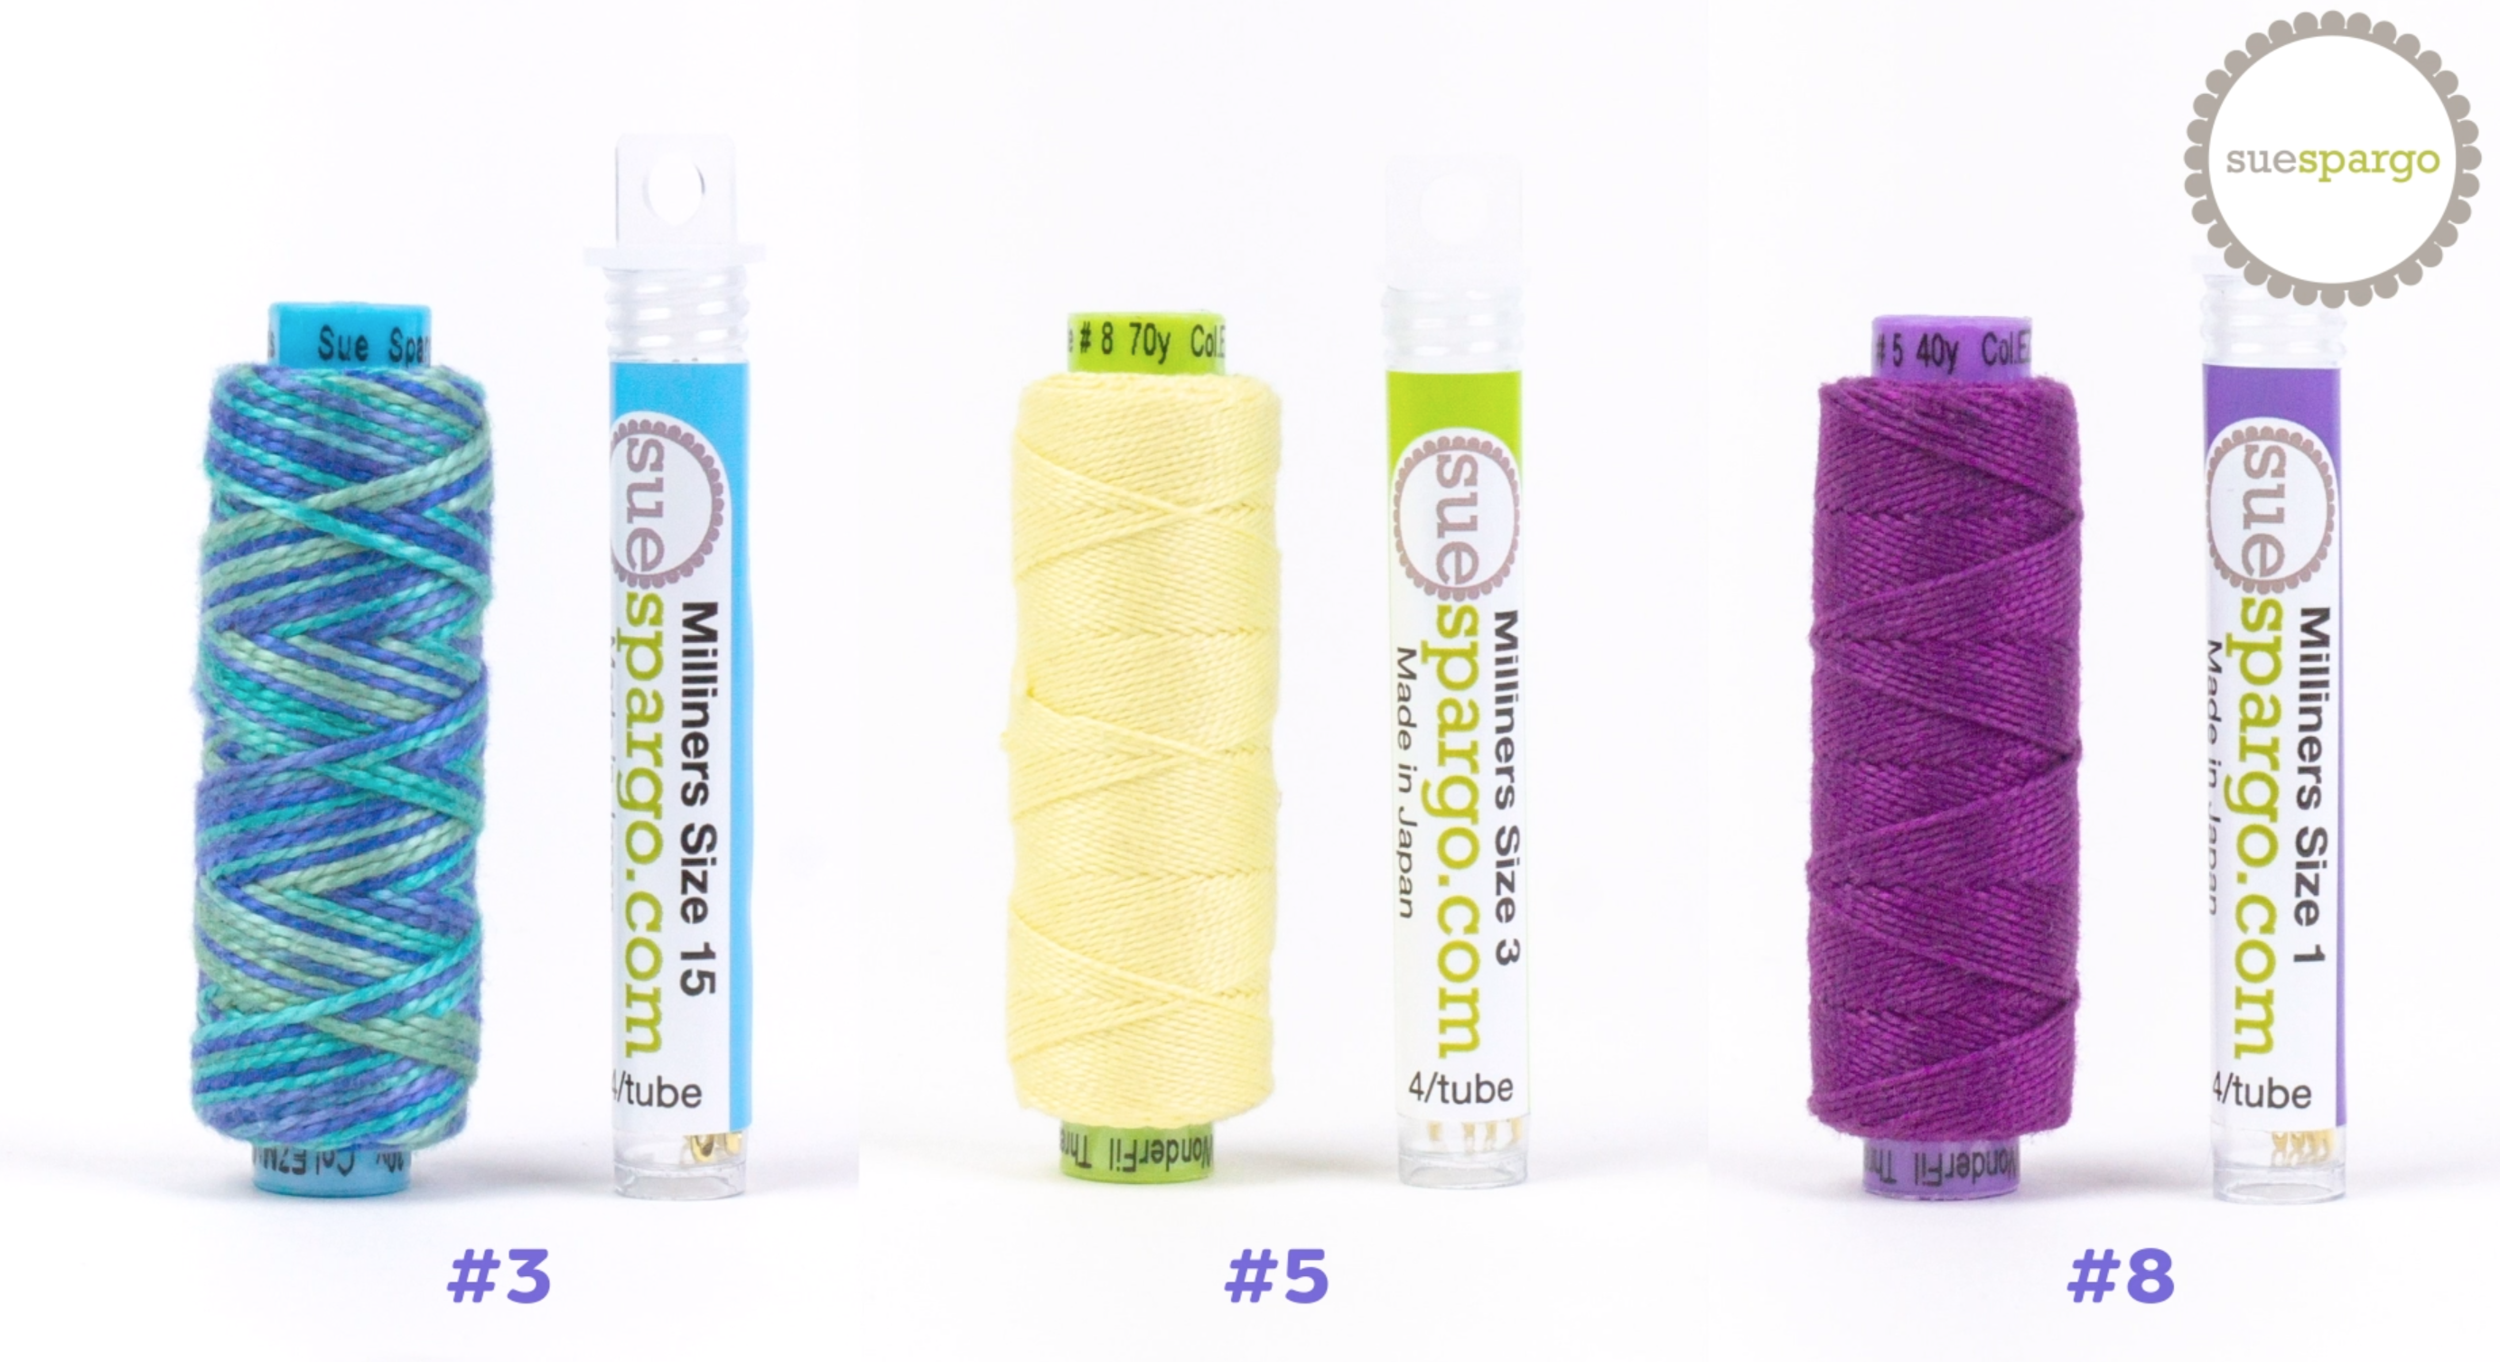
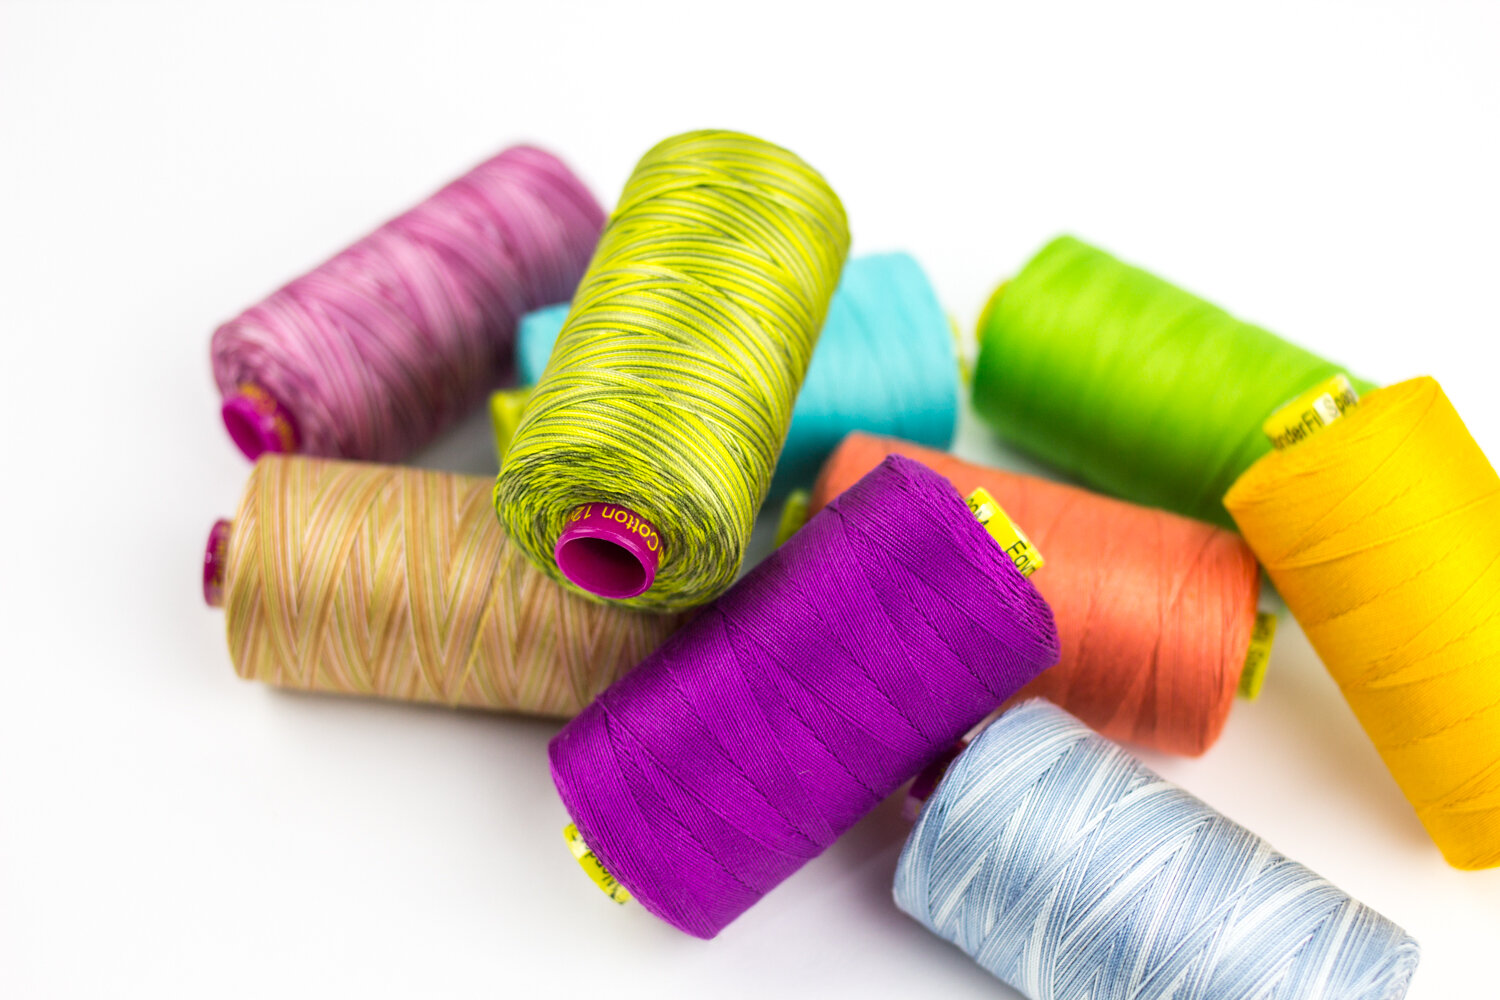
Razzle comes in 46 solid colors in the WonderFil line, and 54 solid and variegated colors in the Sue Spargo collection. And Dazzle is offered in 34 colors in the WonderFil line, 36 colors in the Sue Spargo collection, and 35 unique twisted colors in the Starry Night Hollow collection by Kim Rado. These gorgeous threads are enough for anyone to fall in love with. 

Inspired to sew with Razzle and Dazzle? Shop the Sue Spargo collection at www.suespargo.com, or find all of these colors in one of your local stores at www.shopwonderfil.com/shop-local.

Needle Punch Tutorial & Free Patterns!

Maura Kang

Needle punch is a simple way you can easily and quickly create beautiful stitched patterns and designs. We’ll show you how to set up your needle punch tool, our recommended thread and materials, and walk you through simple tips on how you can use this technique to create different textures and stitches. We’ve even included a few FREE printable patterns below to help get you started on your next needle punch project!

Materials:

  • Download one the free patterns by clicking here.

  • Recommended thread: Eleganza™ #8 perle cotton thread: https://shopwonderfil.com/product-category/eleganza/

  • Needle punch tool (we used one by Clover)

  • Embroidery hoop (to fit the free patterns above, we used a 5.5” hoop)

  • 100% cotton monk’s cloth with an even weave

  • (optional) A light table to trace your pattern onto the fabric, we used one by Daylight

  • Clear glue

0.png

Before you can begin needle punching, you’ll need to prepare your fabric. Download one of the patterns from the link above or select one of your own. You can trace this pattern onto your monk’s fabric using a light table or by holding it up against a window. Some patterns can also be transferred using an iron or with carbon paper and will come with instructions on how to do so.

1.png

We recommend using a 100% cotton monk’s cloth with an even weave as this will be the easiest to keep your stitches looking consistent and straight.

2.png

Once your pattern is traced, hoop the fabric tightly in an embroidery hoop. For the free patterns available above, we used a size 5.5” hoop. You can then proceed to load your needle punch tool with thread. Our recommendation is a #8 size perle cotton as this will offer enough friction in the fabric to hold, while still showing boldly. We used #8 Eleganza perle cotton as it has a very tight twist which prevents untwisting, and a low lint finish that allows it to pull easily through the fabric.

3.png

Your needle punch should come with a needle threader. Slide it through the tool from the base of the needle so that the threader is facing the top end of the punch. You can then slide the thread through the threader loop and pull it back through the punch, drawing the thread with it through to the base of the needle.

Inserting the needle threader.

Inserting the needle threader.

Sliding the thread through the needle threader’s loop.

Sliding the thread through the needle threader’s loop.

Drawing the needle threader back out, pulling the thread with it. Your needle punch is now threaded!

Drawing the needle threader back out, pulling the thread with it. Your needle punch is now threaded!

Leave a tail of a few inches of thread and slowly begin punching through the fabric, filling in the design. You’ll notice two sides to the fabric, one that sticks out with loops, and the backside which is shorter. You can choose to make either side your “right” side.

Front side.

Front side.

Back side.

Back side.

For reference, the side you do the punching from will be the “back side” of the fabric, while the opposite side will be the “front side”. When you’re finished filling in a section, trim away the thread and secure the back side with clear glue.

9.png

To create an optional fun texture, you can take a pair of scissors and cut the loops on the front side of the fabric, releasing them. You’ll end up with a soft and fuzzy texture that can be trimmed down around the edges of the design to keep the edges clean and crisp.

Cutting the loops.

Cutting the loops.

The resulting texture after cutting the loops.

The resulting texture after cutting the loops.

To change the texture and add a bit of contrast in the design, we’ll be flipping the hoop over and punching from the “front side” instead of the “back side”. Since these stitches will now be more visible, an option while you’re filling in the design is to move back and forth in a zig zag pattern. This creates an even satin stitch that mimics the shape of the leaf.

12.png

Once again, when you’re finished filling in a section, trim away the thread and apply clear glue to secure the stitches at the start and end of the thread.

13.png

Play with the side you punch from to create a variety of textures for your project! Continue these steps until your design is complete. Below is the front side of our hoop.

14.png

To finish your hoop, trim the fabric to the edge of the hoop. We’ll be leaving our design in the hoop to frame and hang it.

15.png

Experiment with the textures you can create using this fun and simple tool! This is a versatile way to efficiently fill in designs in by hand and get creative.

16.png

Feeling inspired? This needle punch is available from Clover. You can find Eleganza™ in a whopping 340 unique solid and variegated colours to play with. Find it in a local store near you at www.shopwonderfil.com/shop-local or to order it online. Share your needle punch projects with us on social media using #wonderfil, we’d love to be inspired by you!

You can also sign up to receive weekly sewing tips, free patterns, and tutorials in our newsletter. Register by clicking here! You can unsubscribe at any time by clicking the unsubscribe button on the footer of every email you receive.

Introducing Eleganza Perle Cotton Thread

Maura Kang

Perle cotton is one of those thread basics any hand stitcher can’t go without. So why not reach for the best? Eleganza is a gorgeous perle cotton thread that comes in an incredible 340 unique solid and variegated colours. With that kind of selection, you’ll be spoiled for choice when it comes to choosing the colours for your next project.

One of the things that make Eleganza perle cotton unique is its tight twist. This 2 ply thread resists unravelling, making it easy and efficient to sew with, without worrying about tangling or untwisting. That’s not something anyone wants to think about while they’re focused on creating something beautiful. The thread has also undergone double gassing, which is a process where 80% of the thread lint is burnt off its surface. This process is repeated a second time, making this one of the cleanest and smoothest perle cottons on the market. You’ll have no trouble stitching with this thread through all kinds of fabrics and fibres.

2.png

200 of these shades are available in 100 solid and 100 variegated colours in the WonderFil collection. These little balls come in size #8 weight thread, the most popular thread weight for any kind of hand embellishment. They also come in 140 colours in the Sue Spargo collection. Designer, author, and teacher Sue Spargo has curated her own stunning collection of Eleganza threads, available in the Original and Primitive colour collections. You’ll find the #8 weight spools of Eleganza have double the amount of thread on them as the balls in the WonderFil collection.

3.png

You’ll also find these colours available in an additional #5 and #3 thread weights. #8 is marked by green spool tops, #5 is marked by purple, and #3 by blue. This makes it easy to tell which weight you’re using at a glance. These additional thread weights make it possible to create emphasis and texture, even when doing the same embellishment stitches. It truly opens up a whole new dimension of hand embroidery.

4.png

If you’re looking for the perfect needle to match these thread weights, Sue has made it incredibly simple. Sue Spargo brand needles are coloured to match the spool tops in her collection so you’ll know right away which needles pair with the thread size.

5.png

Eleganza is the perfect choice for any hand embroidery projects, big stitch hand quilting, sashiko, visible mending, and crafts. You can even use it in the machine for bobbin work and couching, or on the loopers of a serger for a beautiful decorative edging.

6.png
7.png
8.png

Inspired to stitch with Eleganza? Shop with Sue Spargo at www.suespargo.com, or find either collection in one of your local stores at www.shopwonderfil.com. And don’t forget to share what you make with it on social media using hashtag wonderfil. We’d love to be inspired by you!

How to Do Big Stitch Hand Quilting

Maura Kang

Big stitch hand quilting uses a simple running stitch and a heavier thread such as 12wt or 8wt thread. This is the perfect technique to add a personal touch to quilts, and those slight imperfections from doing hand stitching only adds to the home-made charm. This is a gorgeous way to give your quilted projects a textured, hand-made look.

Before starting you’ll need to take a look at the thread you’ll be using. One of our favourite choices is Eleganza, an 8wt Egyptian perle cotton thread that has a soft sheen to its matte finish. This thread is thick enough that it stands out more boldly against the fabric. One of the things that makes this thread an ideal choice is that it has been double gassed, resulting in a super low lint finish. It also has a very tight twist to prevent unravelling as you stitch.

1.png

If Eleganza is thicker than you wanted for your quilting, another option is Spagetti and Fruitti. These 12wt Egyptian cotton threads are thinner than Eleganza, but still thick enough that it stands out. Like Eleganza, they have both been double gassed for a very low lint finish, so your stitches will not only look beautiful, but the thread is very easy to pull through the fabric and fibres.

2.jpg

Finally, another option we’d like to suggest is Dazzle, an 8wt rayon thread with a single strand of metallic woven through. While we normally wouldn’t recommend a rayon thread to hand quilt with because it’s so slippery, because this thread has a strand of metallic in it, it has more friction to grip the fabric and stay in place.

3.png

These are only a few options for thread, but they give you an idea of the different types of threads available that can change the look of your hand quilting. Before starting, I’m going to peel a length of painter’s tape and place it along the line I want to do my quilting. This gives me an easy guide to follow so my quilting stays straight and doesn’t wobble. Because painter’s tape isn’t too sticky, I can peel it off when I’m done without leaving any residue.

4.png

If you have a particularly large quilt, using a quilting hoop to keep your quilt taut while quilting is preferable. However, since my piece is quite small, I’m going to go without one which is fine too. 

For any 8wt threads, you can use a chenille size 24 or a long darner size 1 hand needle, but any needle with a large enough eye to fit the thread will also work. To begin, cut a manageable length of thread, not too long that it will get tangled. Tie a knot on the opposite end from the needle.

5.png

Choose a position slightly before where you want your actual quilting to begin and poke the needle through to the batting, but not far enough that it goes through the backing.

6.png

Pull the thread all the way to the knot, and once it reaches the fabric, give it a sharp tug so that it goes through the fabric and gets buried behind it. You’re now ready to begin your stitching. You can decide how large you want your stitches to be, just try to keep your spacing consistent.

7.png

Poke your needle down the length of the stitch you want it to be, but don’t pull it all the way through. Continue loading up stitches along the length of your needle until you have a few on your needle, then you can pull your stitches through. This is the basis of the running stitch. It helps to keep your thumb in front to push the fabric closer to the needle so that you don’t end up with too big of a stitch.

8.png

Now if you happen to run out of thread or want to finish off your line of stitching, you’ll need to bury your thread. To do that, tie another knot close to the base of the fabric. It helps to put your finger on the knot before pulling the thread all the way through to keep the knot as close to the fabric as possible.

9.png

Now put your needle through the same hole, slide it through the batting and come up a little ways away, and pull the thread all the way through giving it a little tug to get the knot through. Now you just need to snip the thread and your knot will hide nicely behind the fabric.

10.png

That’s all there is to it! For comparison, we’ve done more hand quilting over here using Fruitti, the 12wt variegated cotton thread. You can see it’s quite a bit thinner, and how that variegated colour looks. Beside that is another section using Dazzle, the 8wt rayon and metallic thread. It’s the same weight as the Eleganza, but that strand of metallic gives it a lot of sparkle for a totally different effect. The rayon is also a lot shinier than cotton.

(left) Eleganza, (right) Dazzle

(left) Eleganza, (right) Dazzle

(bottom) Fruitti (top) Dazzle

(bottom) Fruitti (top) Dazzle

You can create such a natural look by hand quilting, something that a machine can never achieve. It might be a little time consuming, but with a little patience, it’s totally worth it. Inspired to sew? Head on over to shopwonderfil.com/shop-local/ for a list of stores and retailers you can purchase from.

Introducing Alison Glass Eleganza™ Perle Cotton

Maura Kang

Good things do come in small packages. Introducing this stunning new collection by Alison Glass for WonderFil® threads. Your favourite #8 perle cotton Eleganza™ thread now comes in 48 brand new colors designed by Alison Glass to match her fabric collections. It’s truly a match made in heaven.

For those who can’t get enough, you can find these threads in four pack varieties: Stars, Sun,  Flora, and Fauna. Each pack includes 12 perle cotton balls each, with Stars containing 12 stunning variegated colors, and the other three with a beautiful variety of solid shades. With colors this delectable, we truly couldn’t resist all four packs.

1.png

But this thread isn’t just pretty to look at. Eleganza™ is a 100% long staple Egyptian perle cotton thread that has been double gassed, resulting in a beautifully smooth and lustrous finish that glides through all types of fabric and fibres. It also has a strong, tight twist and doesn’t like to unravel. That means you’ll be able to create tight, firm stitches that look and feel both gorgeous and professional.

2.jpg

So what can you use this thread for? This is a #8 size thread, which is ideal for all kinds of hand embellishment, big stitch hand quilting, visible mending, sashiko, and even couching and bobbin work on a sewing machine. It’s perfect for both beginner and experienced sewists. You can really showcase texture and color with this thread like no other.

We recommend a milliners size 1, long darner size 1, or a chenille size 24 hand sewing needle with this thread. That will ensure you don’t create too large of a hole in your fabric, nor will you end up with too small of a hole for the thread to comfortably fit through.

3.png

Alison Glass Stitch Club, Available May – November, 2020

We’re excited to announce a new 6 month stitch club program with Alison Glass! Each month will have its own stitch style theme (kantha, sashiko, embroidery, etc.) with projects that feature these gorgeous threads. Members will receive a mini magazine-style PDF each month that includes a new hand stitching project and tutorial, featured fiber artists, further reading and inspiration, tips, tools, and material suggestions, and other inspirational and fun content.

To learn more about Alison Glass + WonderFil Eleganza™ threads, or to join the stitch club, visit: https://alisonglass.com/product-category/stitch-club/

StitchClubLogo.jpg

Comparing Hand Embroidery Thread Weights: 12wt, #8, #5, #3

Maura Kang

When doing hand embroidery, there are a number of thread weights to choose from. We’ll show you the difference between a 12wt, #8, #5 and #3 thread and how they show up differently in your stitches so you can choose the right look for your project. Choosing a variety of weights is the perfect way to give your hand embroidered project a unique look with different textures.

1.png
2.png
8.png
9.png
10.png
11.png

The most common size of hand embroidery perle cotton is a #8. If you’re just starting out or doing any general hand embroidery, this is the recommended thread weight. It shows off beautifully with all the different varieties of stitches, and the thread will pull easily through all kinds of fibres and fabrics. With this thread you will want to use a size 3 milliners needle. Our line of perle cottons is called Eleganza™ and comes in #8, #5 and #3 sizes with Sue Spargo. Let’s take a look at the other two sizes.

3.png

#5 is a little thicker than the #8 but still thinner than the #3. Many people prefer using this size over the #8 because they like how it stands out a bit more and adds a little more emphasis to the stitching. With this size thread, we recommend using a milliners size 1 needle.

4.png

The #3 is the thickest weight of Eleganza perle cotton and its size is comparable to yarn. While this thick thread might give some stitchers pause, all of the Eleganza line of threads go through a treatment called double gassing, which removes almost all the lint from its surface. This gives it a silky smooth finish that pulls much easier through the fabric while making your stitches look clean and tidy. It’s great for adding outlining and emphasis to any hand sewing project. We recommend a size 15 milliners needle with this thread.

5.png

Finally, we have these 12wt threads called Spagetti™ and Fruitti™. Both of these threads are a long staple Egyptian cotton that has also been double gassed for a super low lint finish so your stitches will look clean and beautiful. A 12wt thread is comparable to a single strand of embroidery floss like what you would get when you split the strands. This is perfect for any small or fine detail stitching, or if you’re stitching on a fabric with a higher thread count.

6.png
7.png

These are just a few stitches to show you the difference thread weight can make in hand embroidery. Experiment with them yourself and show us what you stitched by tagging us on Facebook or Instagram! Facebook @wonderfil or Instagram @wonderfilspecialtythreads or by the hashtag: #wonderfil.