Contact Us

Use the form on the right to contact us.

You can edit the text in this area, and change where the contact form on the right submits to, by entering edit mode using the modes on the bottom right. 

2915 19 St NE
Calgary, AB, T2E 7A2

18662506101

WonderFil Specialty Thread Blog

WonderFil brings you the latest news, events, upcoming thread lines and special tips and advice. Follow WonderFil Specialty Threads on our social media: Facebook, Instagram, Twitter, Pinterest, and Youtube.

Filtering by Tag: information

Binding Quilts with Your Backing Fabric - No Binding Strips Needed!

Maura Kang

We want to show you a fabulous way of binding your quilts using just the backing fabric. It’s fast, easy, and still looks just as good as if you did it with binding strips. This is a wonderful way of simplifying your binding without sacrificing a professionally finished look!

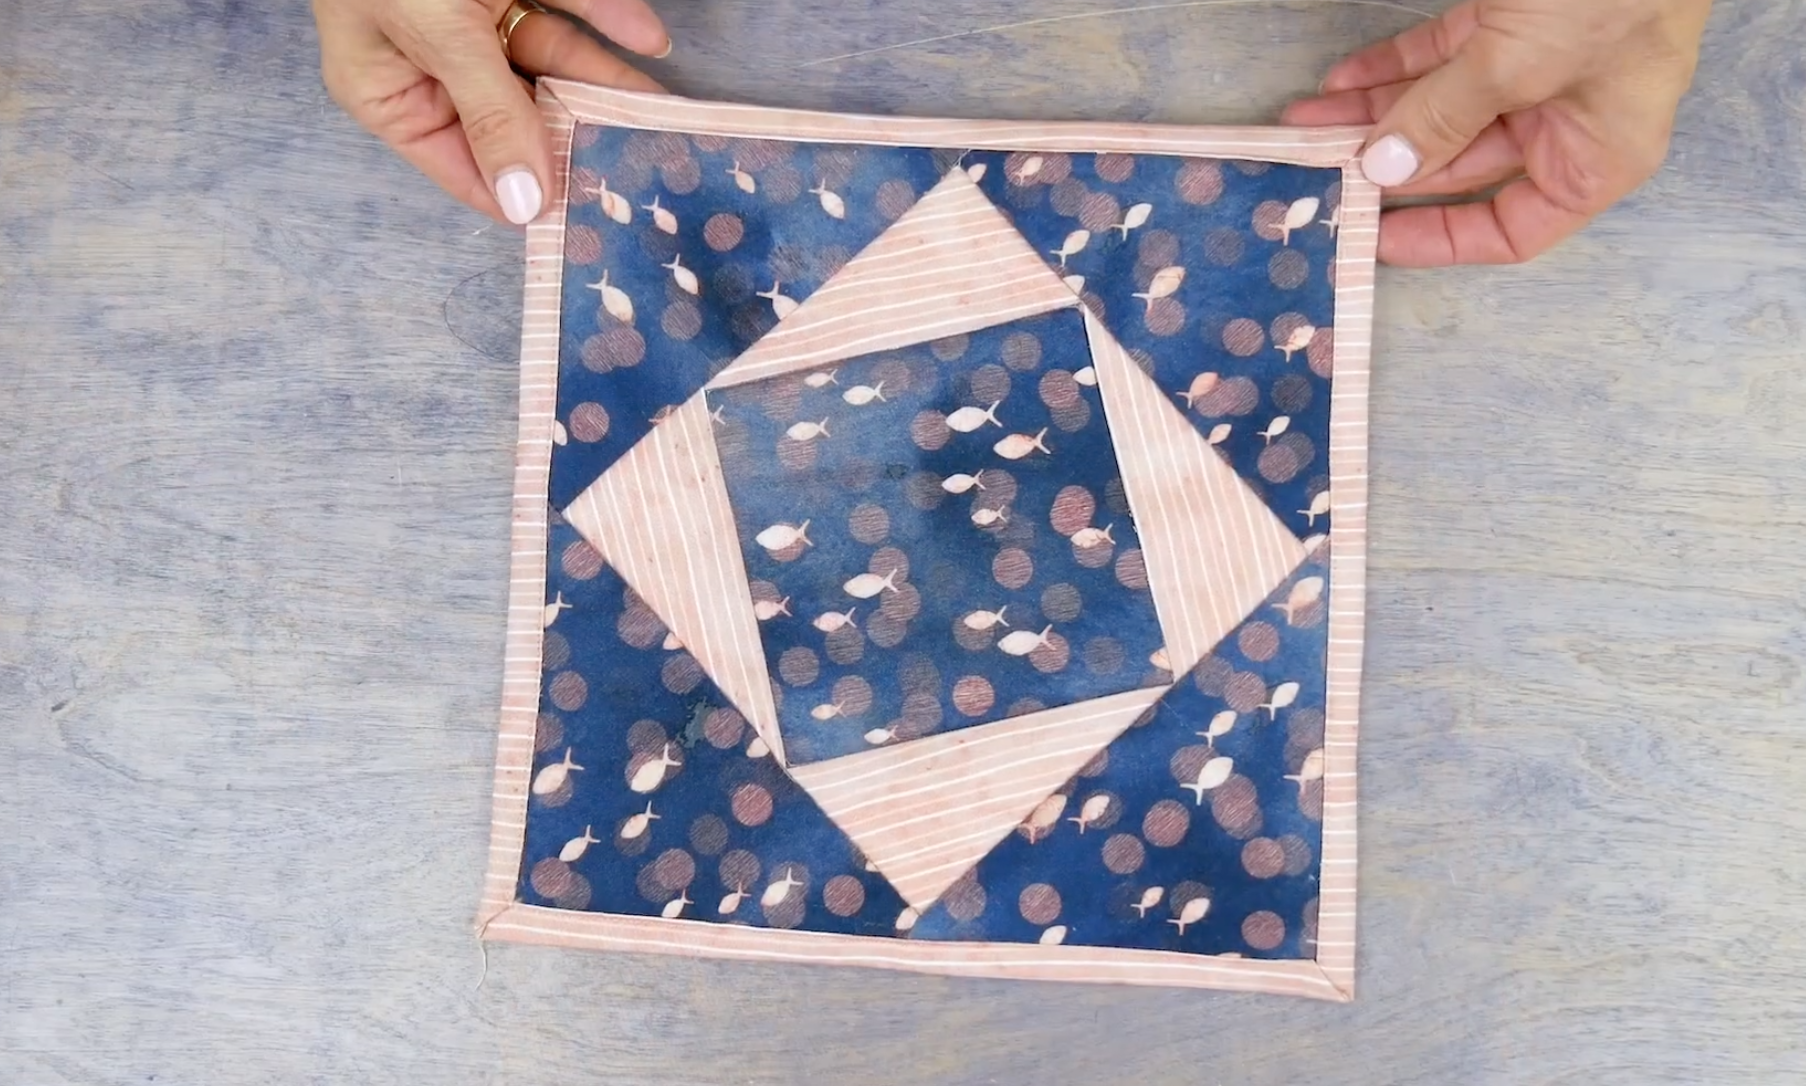
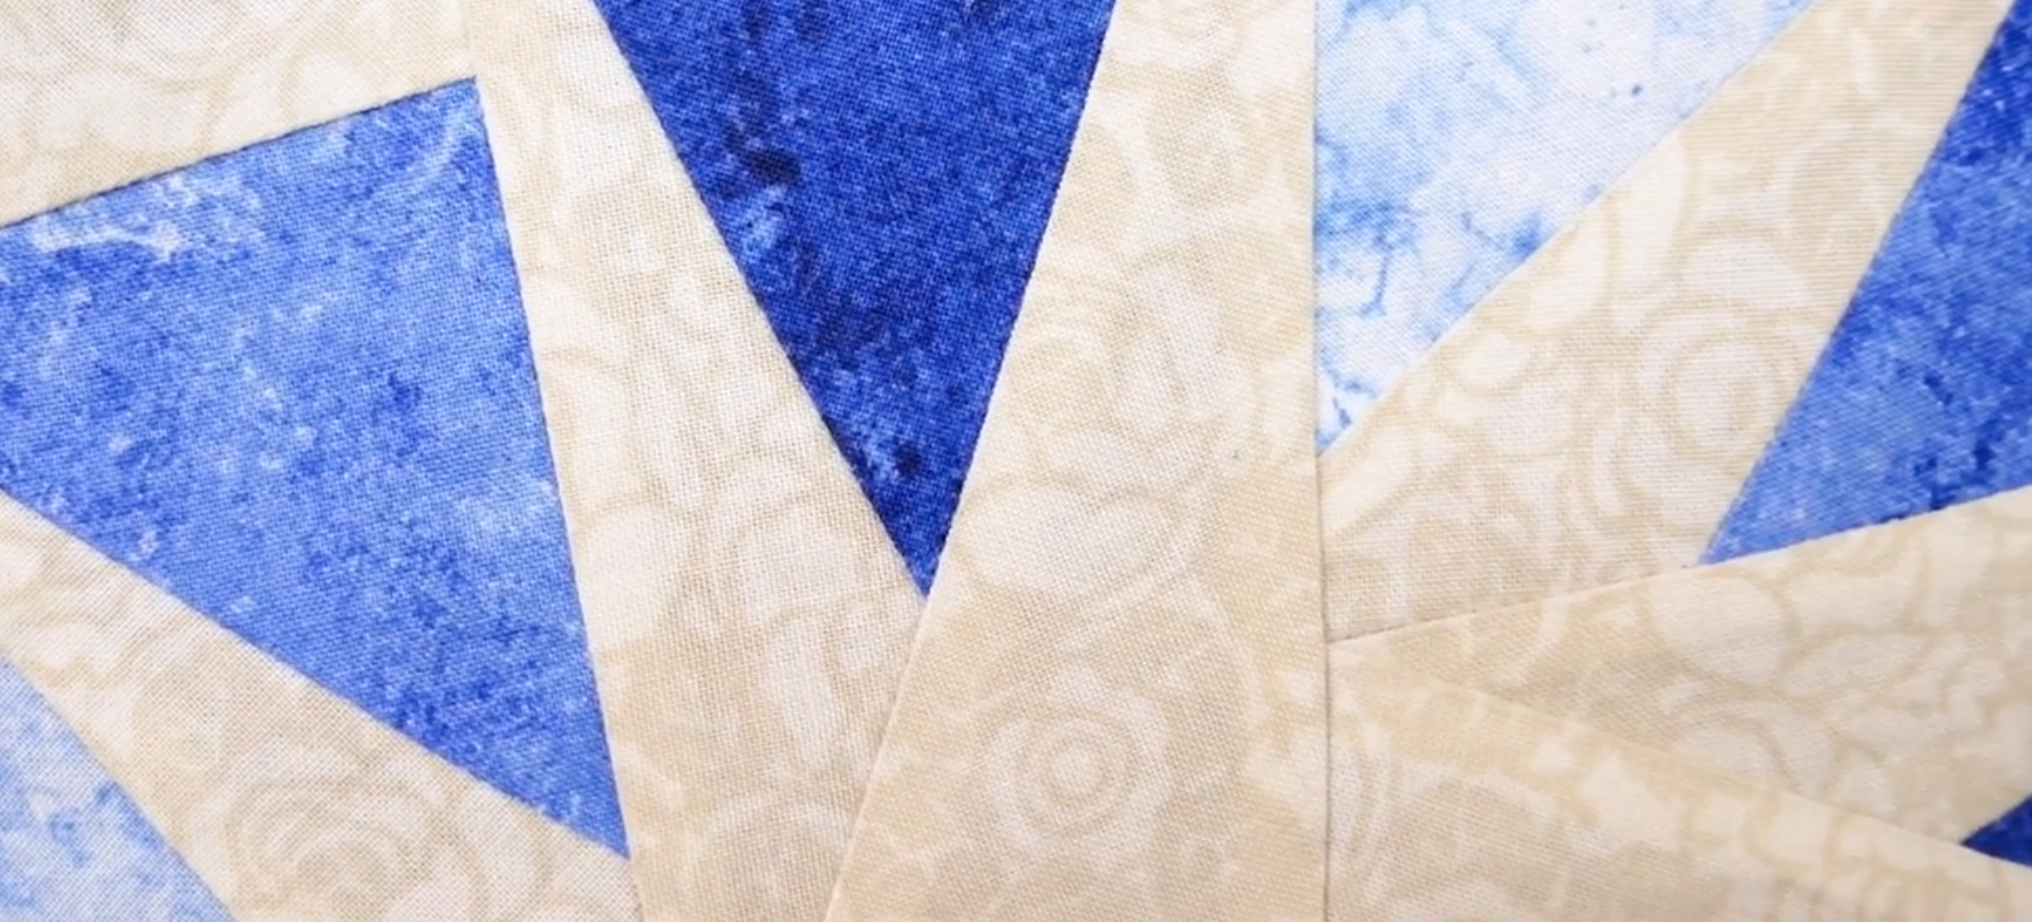
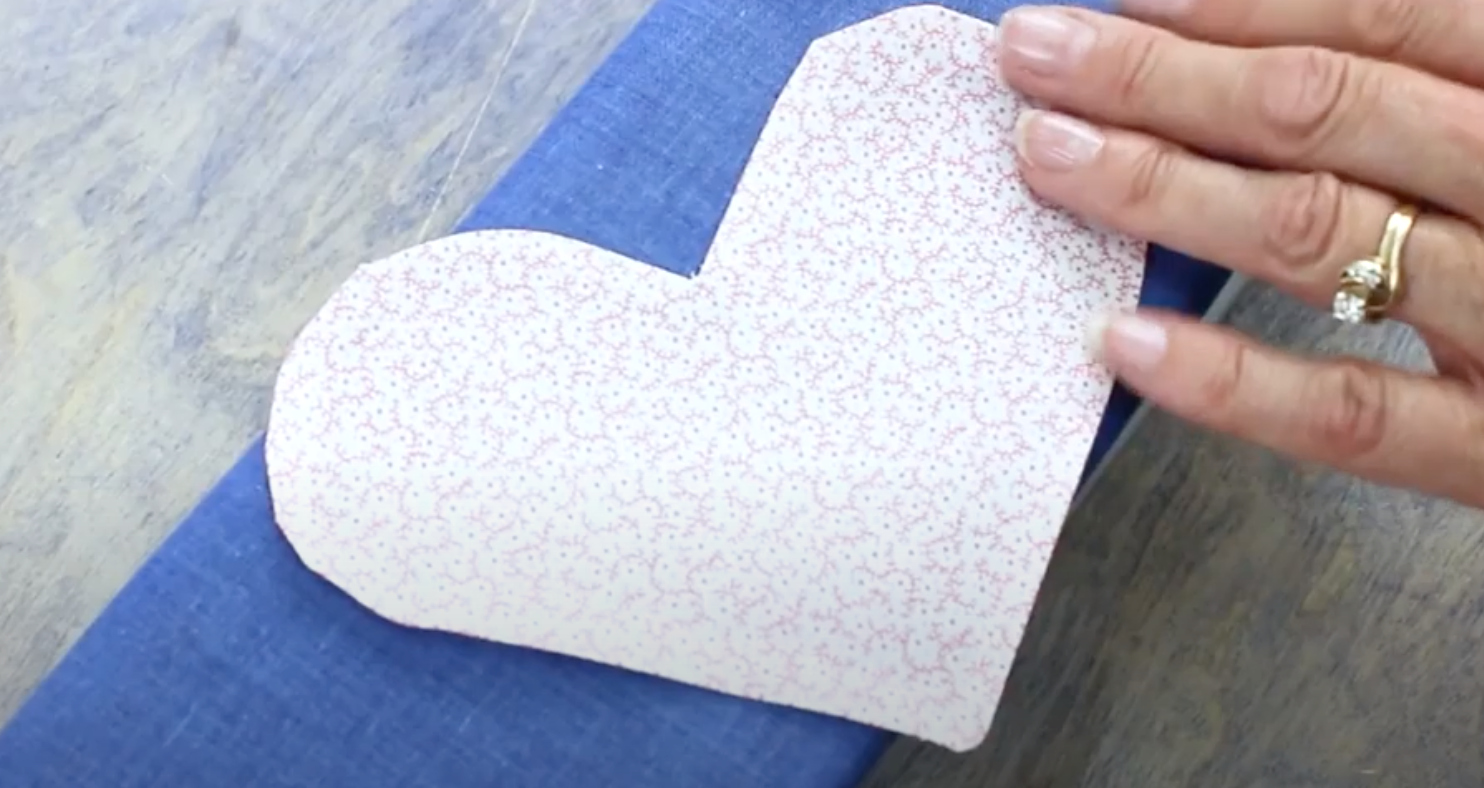
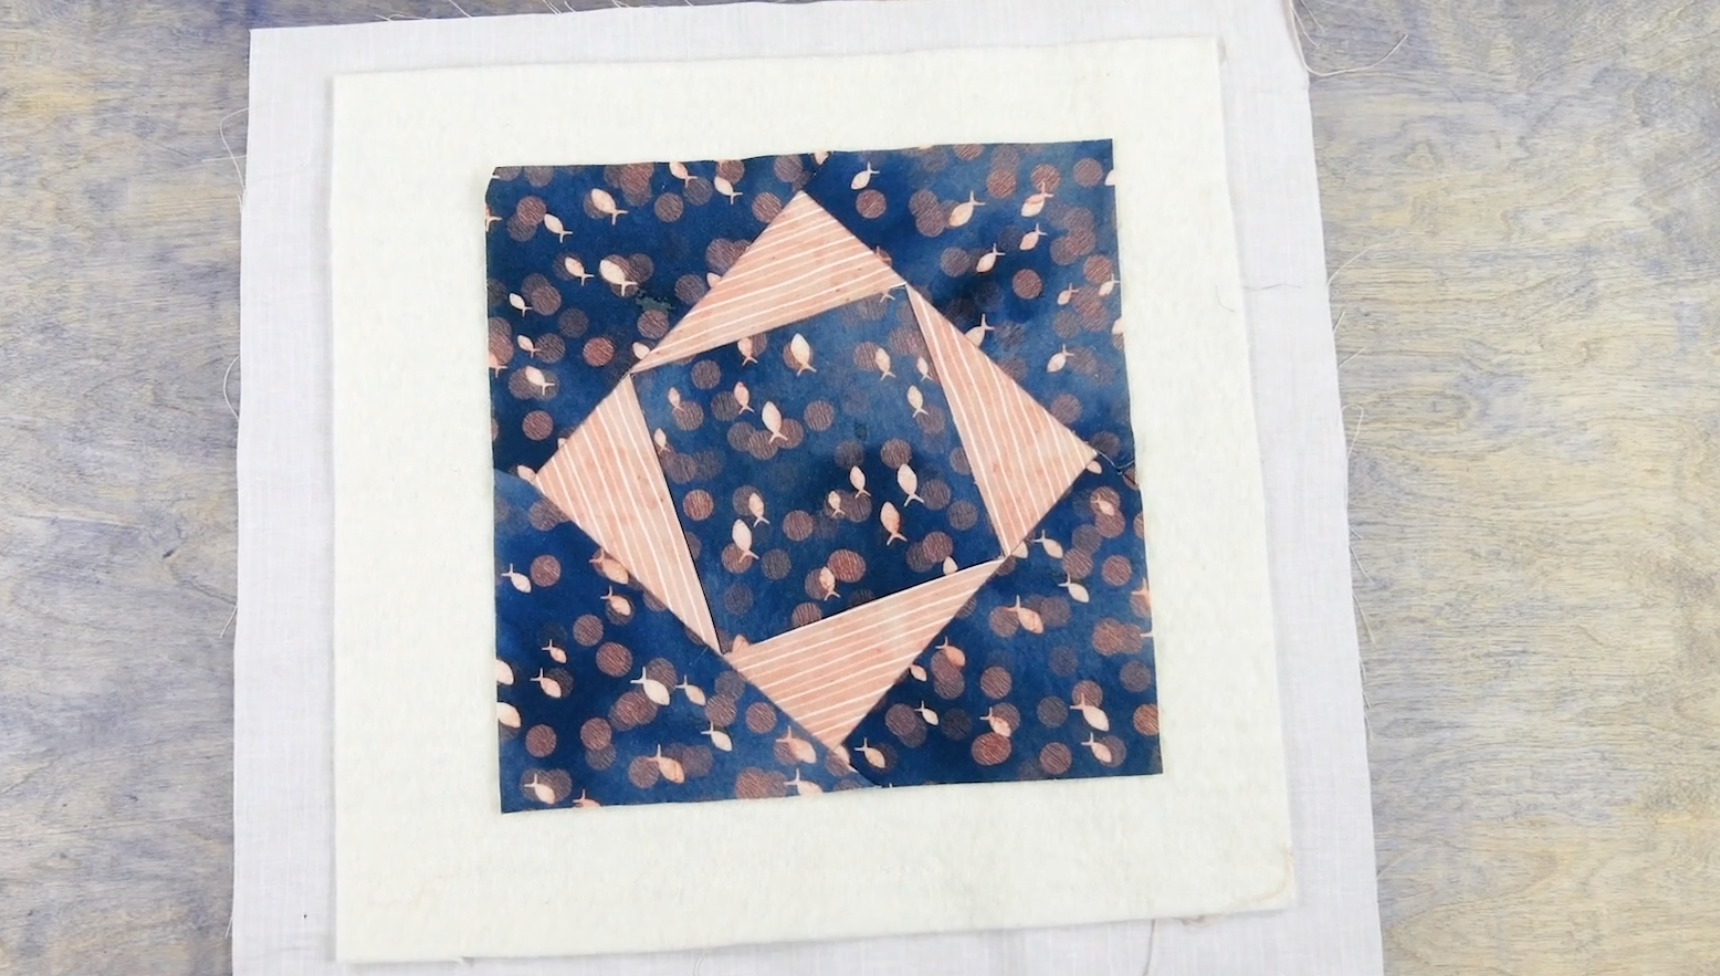
We’re using this quilt block as an example of how to set up your own quilt to bind it with the backing fabric. This method will of course still work on a larger sized quilt, but we’ll just be demonstrating the technique on this block.

After your quilt has been quilted, you’ll have some leftover batting and backing fabric along the edges. If you plan on binding it with the backing fabric, you’ll need to leave an excess of about 2 or 3 inches of backing fabric.

2.png

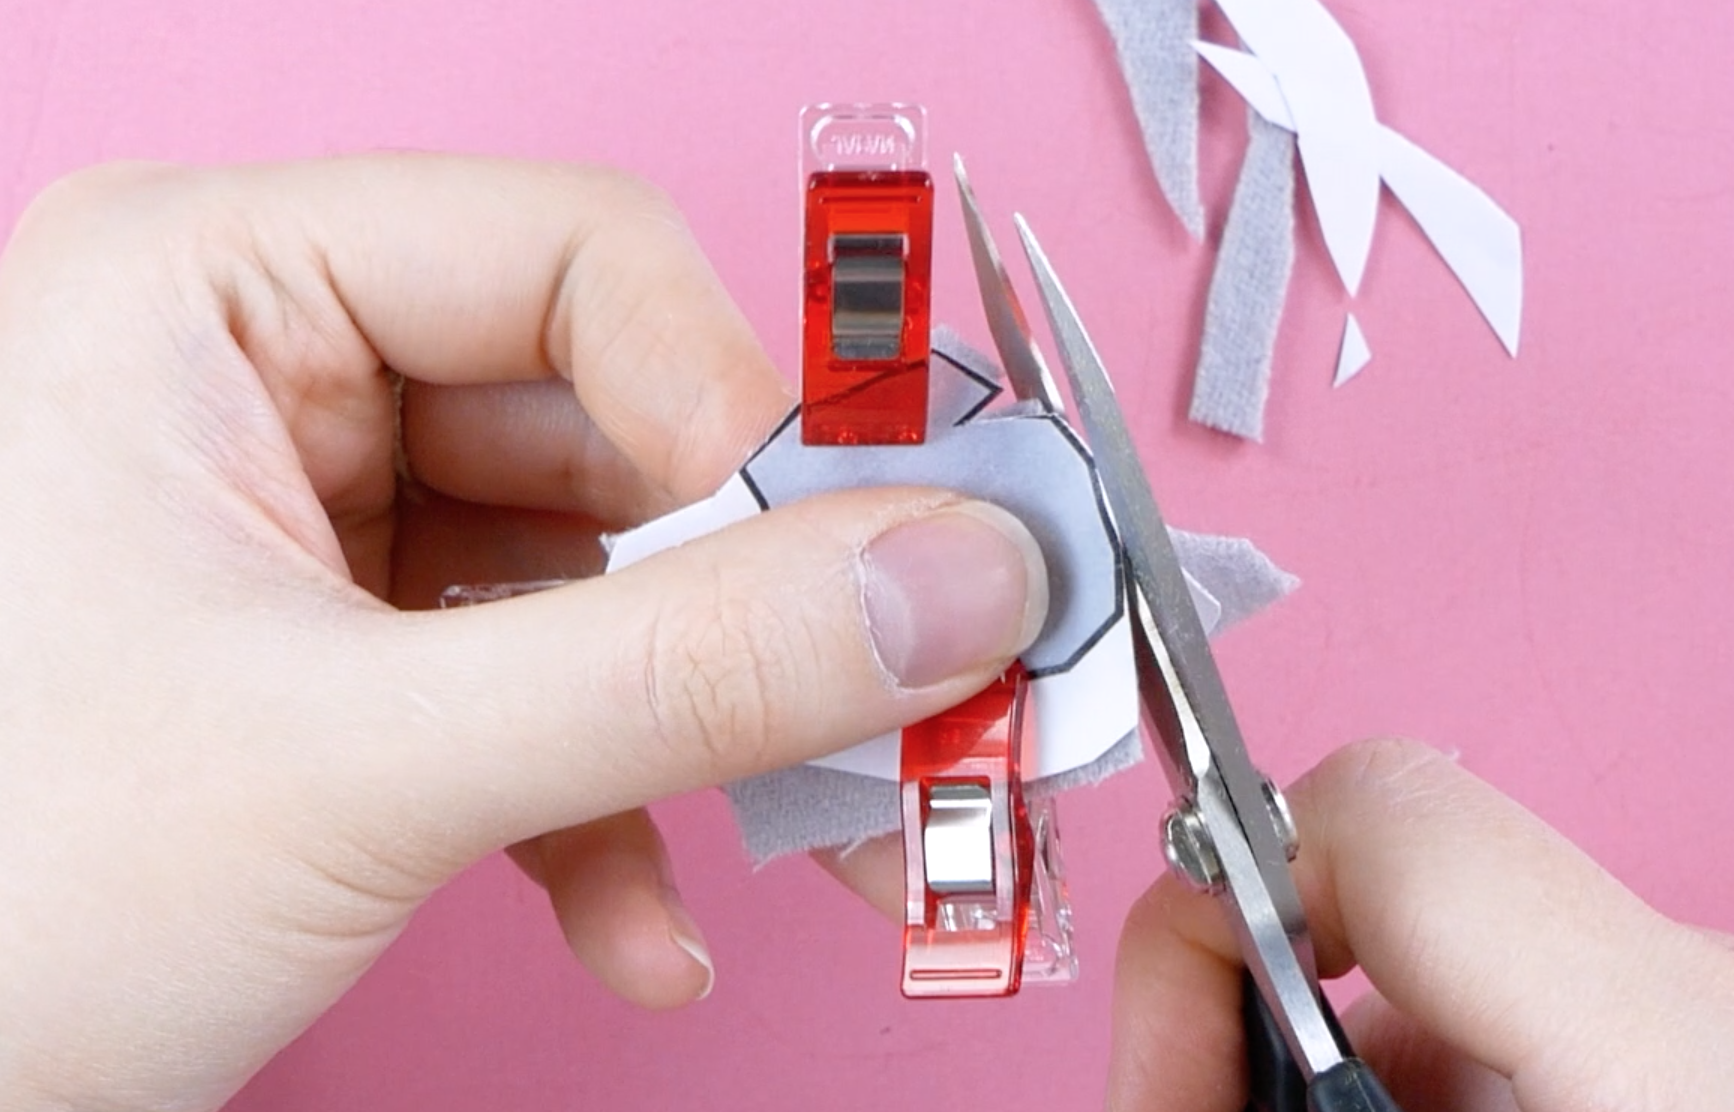
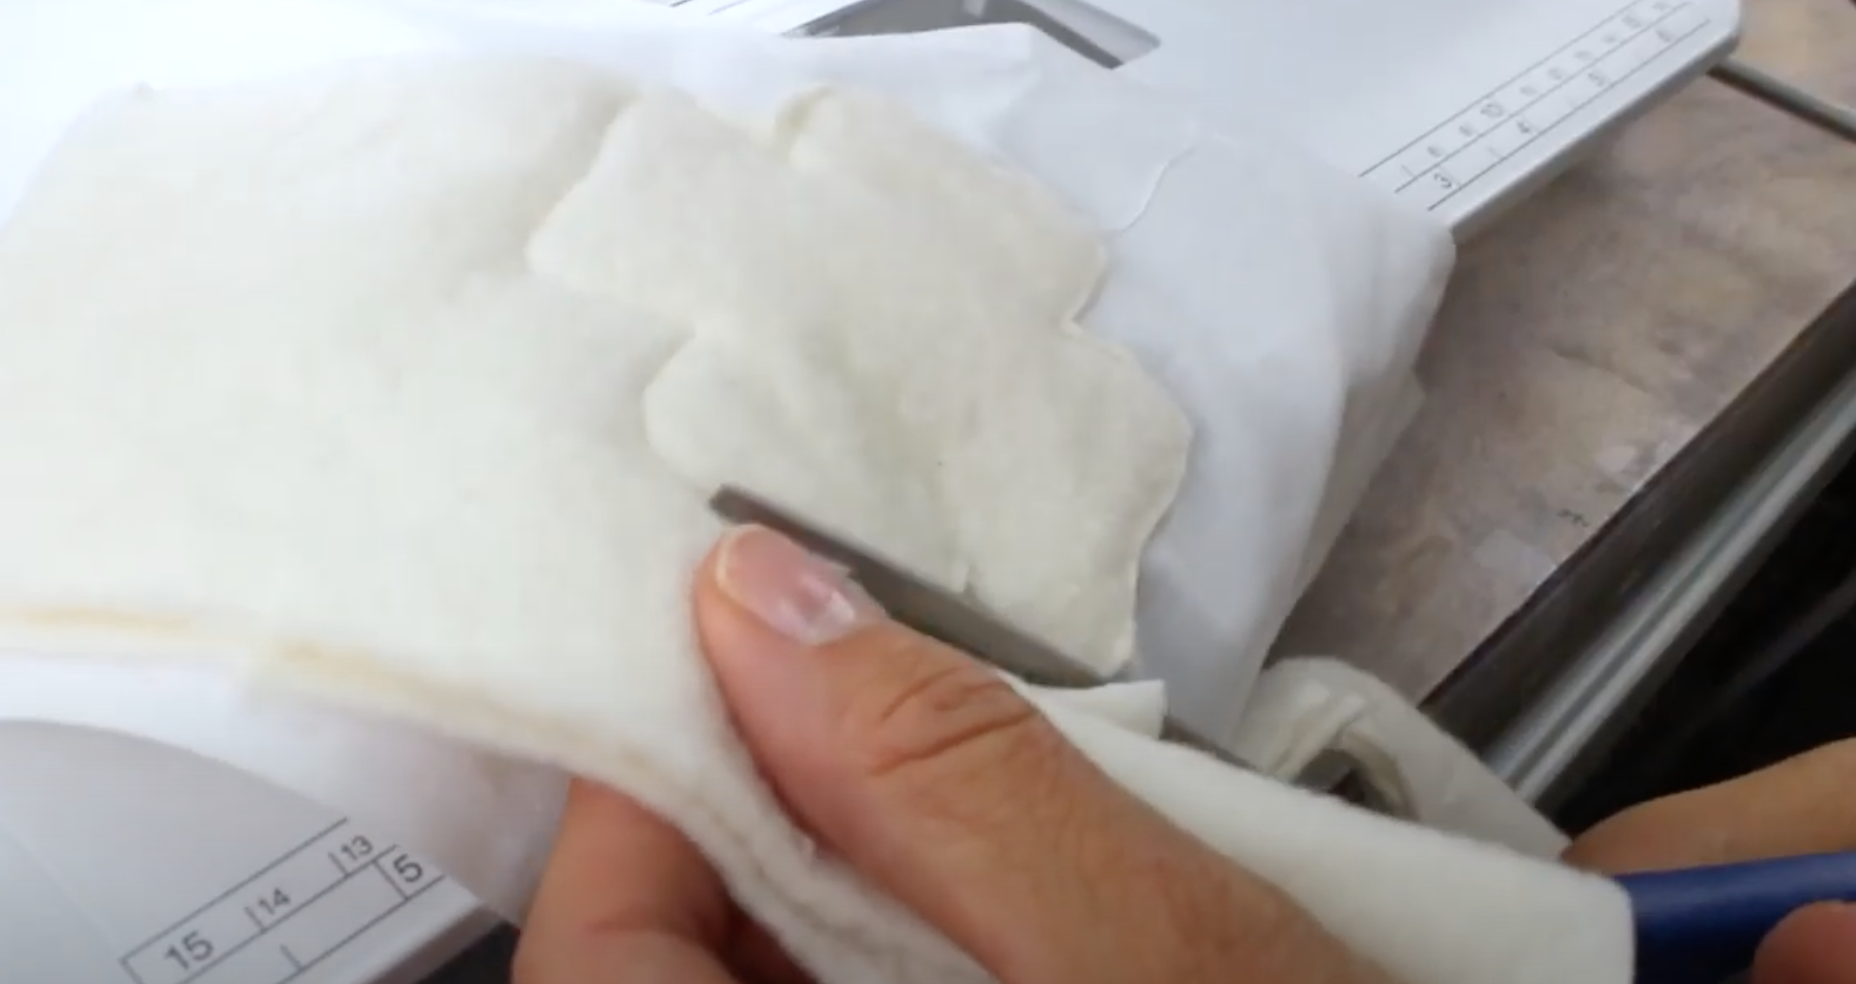
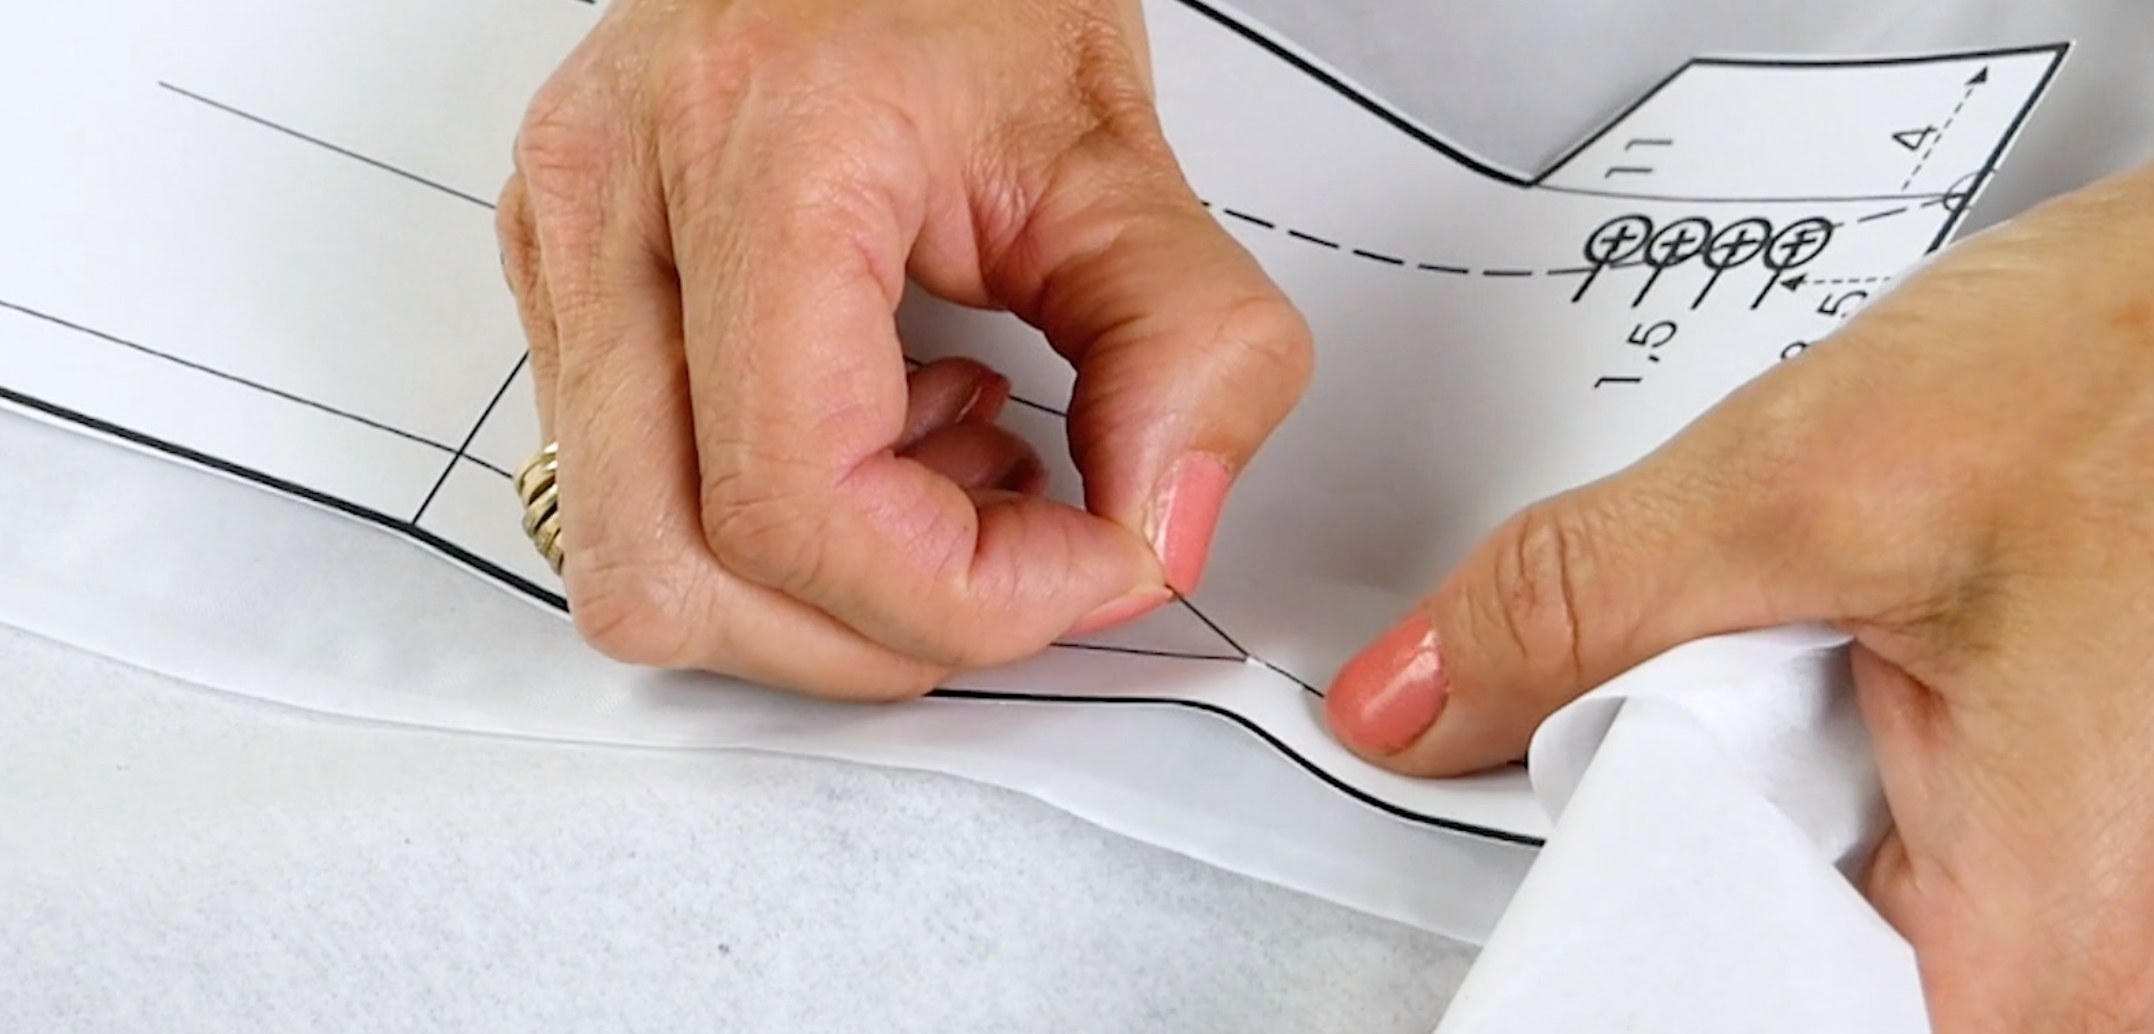
Before you can begin binding, you’ll need to square up your quilt. Tuck your backing out of the way and trim the other layers with your rotary cutter. Be careful not to cut through any of your backing fabric. If you can’t get your backing out of the way enough that you won’t cut into it, you can also carefully trim your layers with a pair of scissors as long as you can get it all squared up evenly.

(Pinning the backing fabric out of the way)

(Pinning the backing fabric out of the way)

(Trimming the batting to square up the quilt)

(Trimming the batting to square up the quilt)

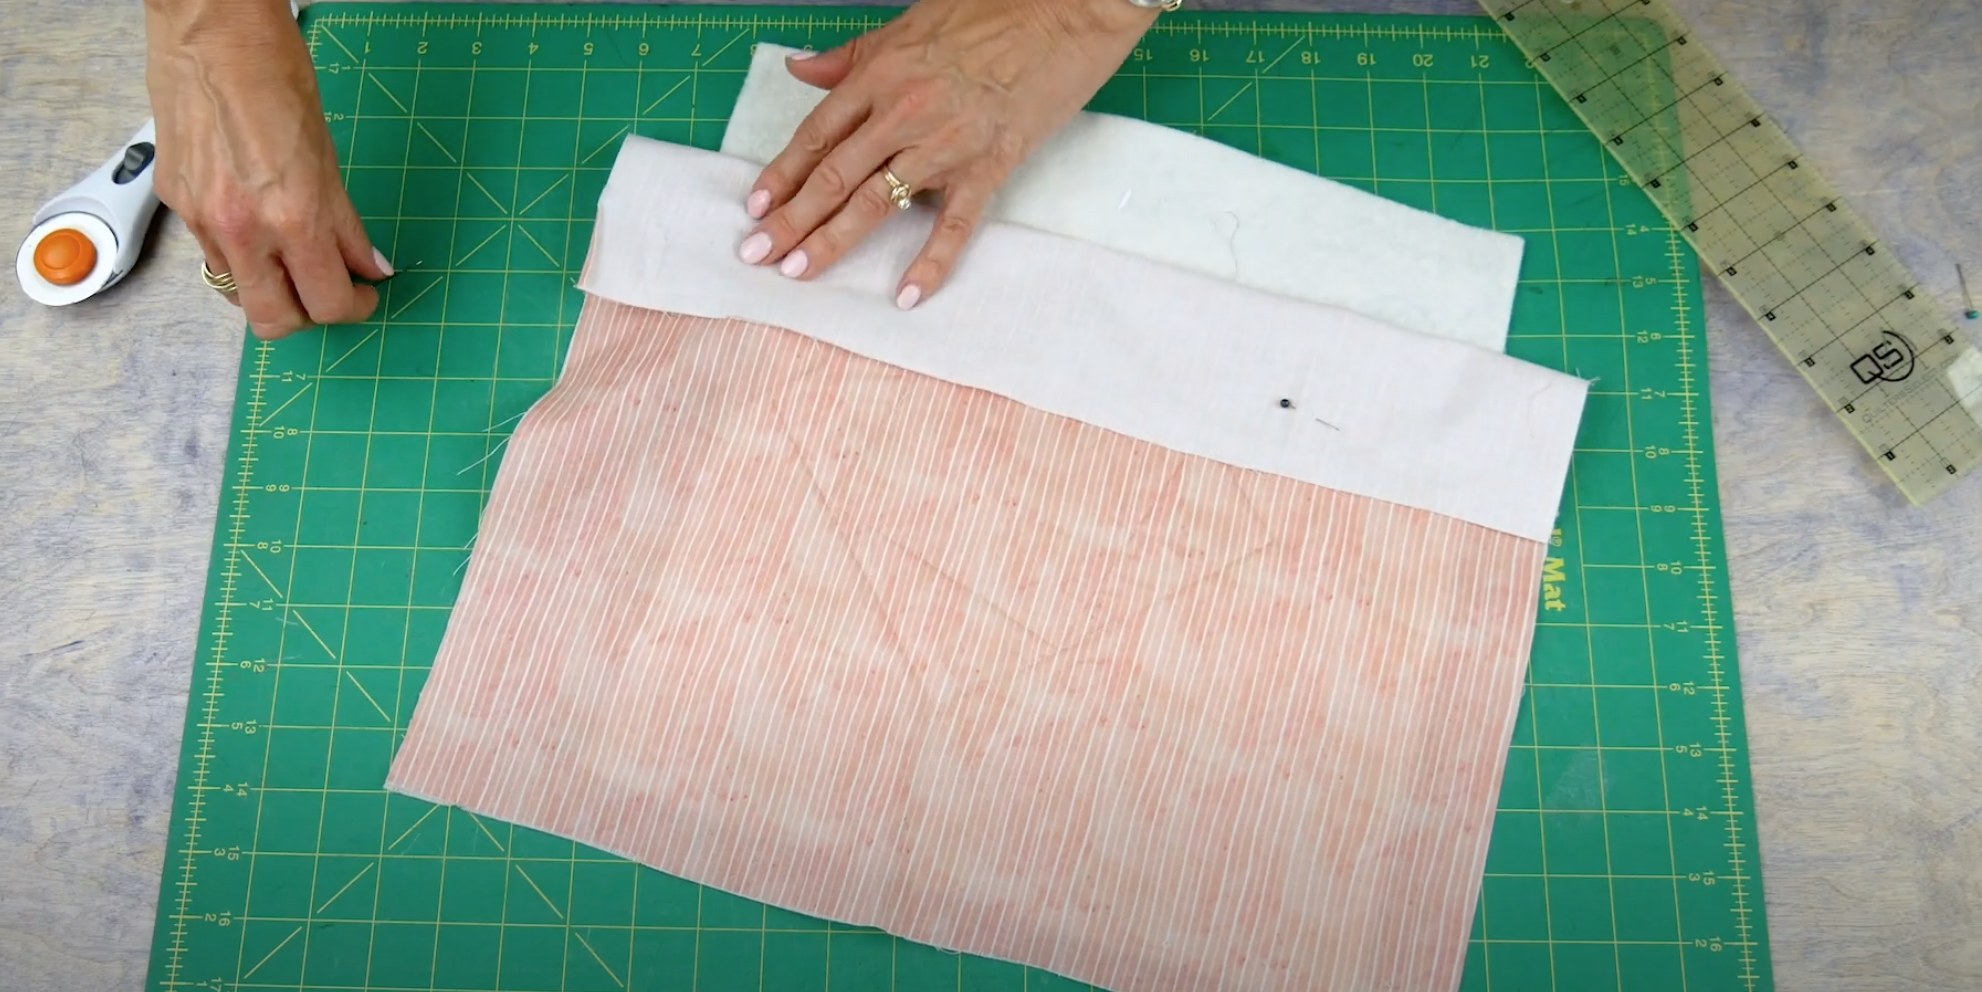
When your quilt is trimmed and squared up evenly, you can now trim your back fabric. You will need an inch of back fabric from the edge of your quilt, so take out your quilt ruler and trim it so that you have an even 1 inch of back fabric all the way around.

(Trimming the backing fabric to 1”/2.5cm

(Trimming the backing fabric to 1”/2.5cm

6.png

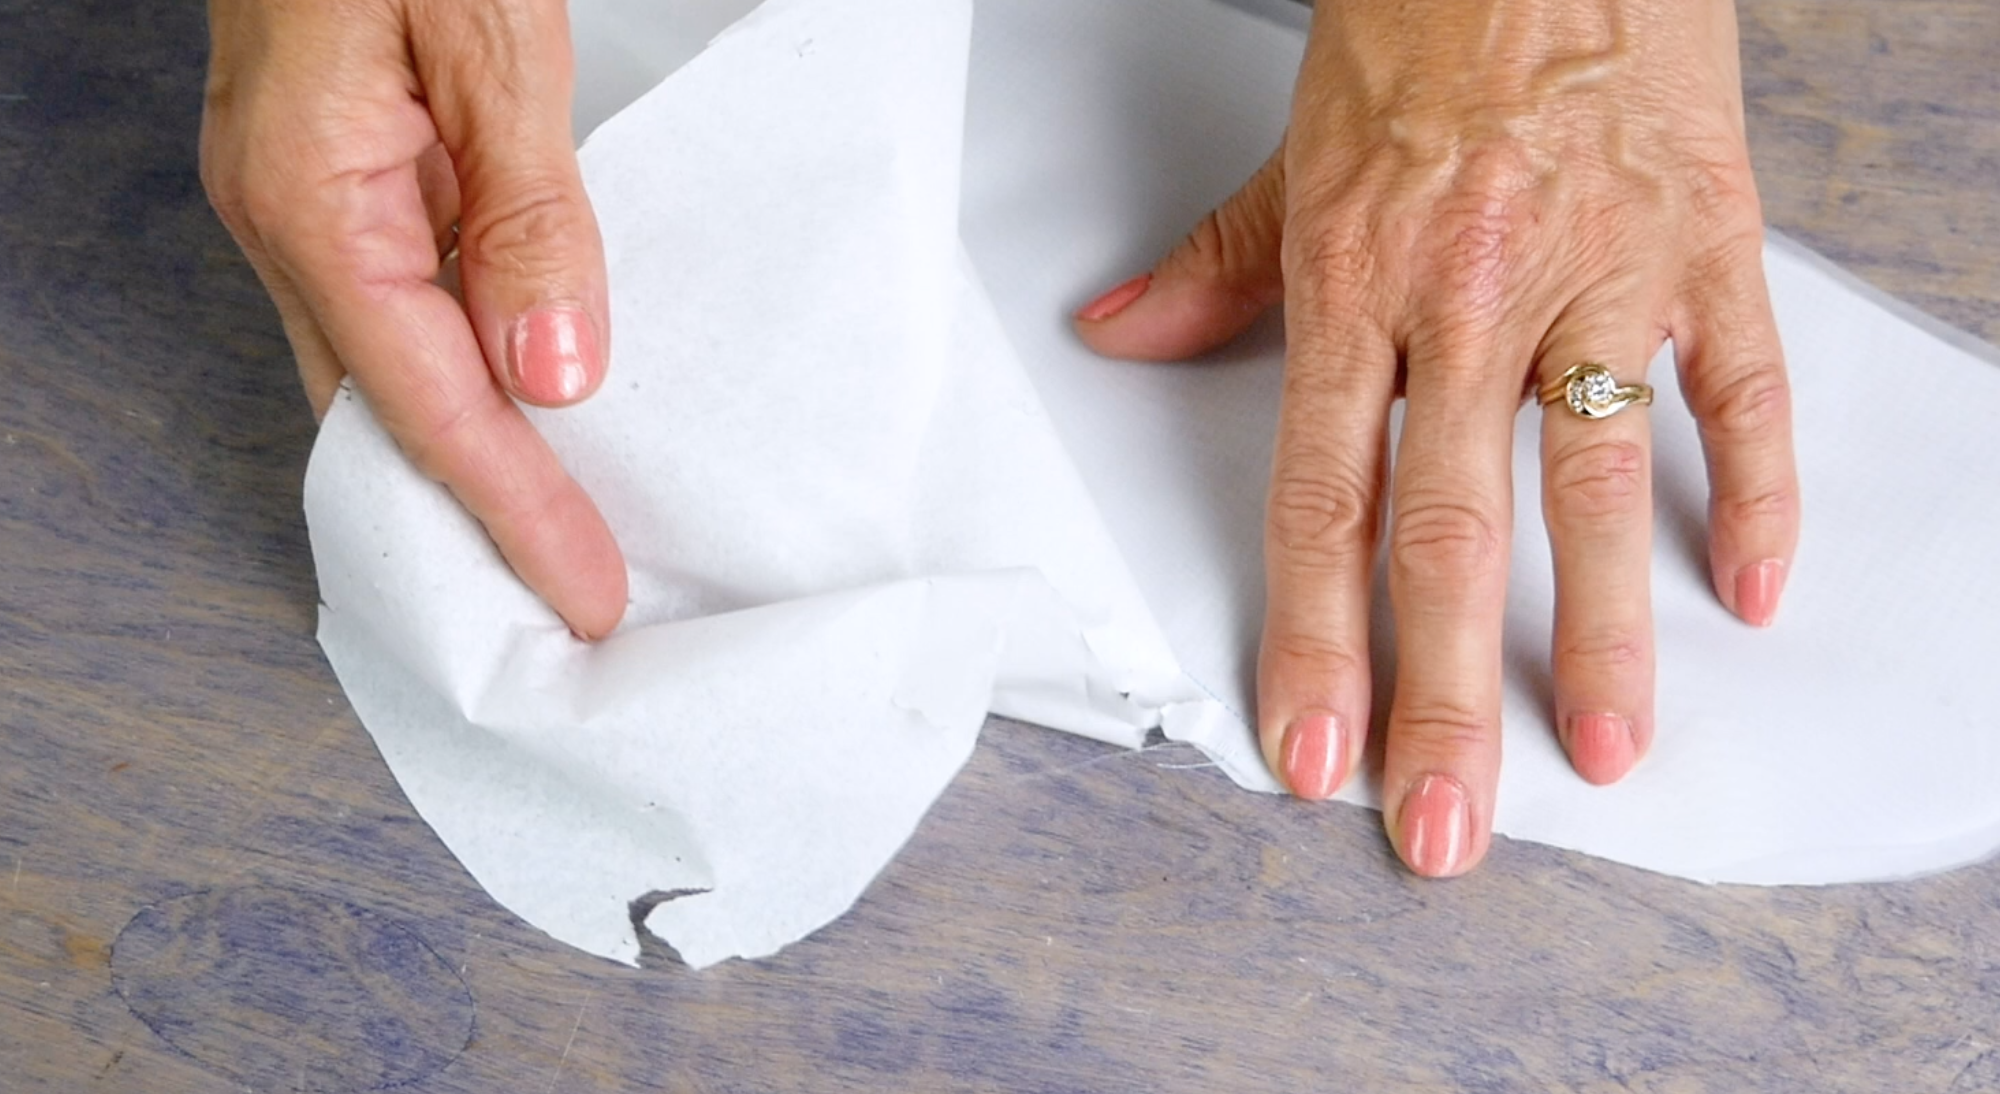
Fold your back fabric in half so that the edge of the fabric is just touching the edge of the quilt top. You don’t need it to overlap the quilt top, just have it lined up against the edge of it. Press with an iron to hold the fold in place.

7.png

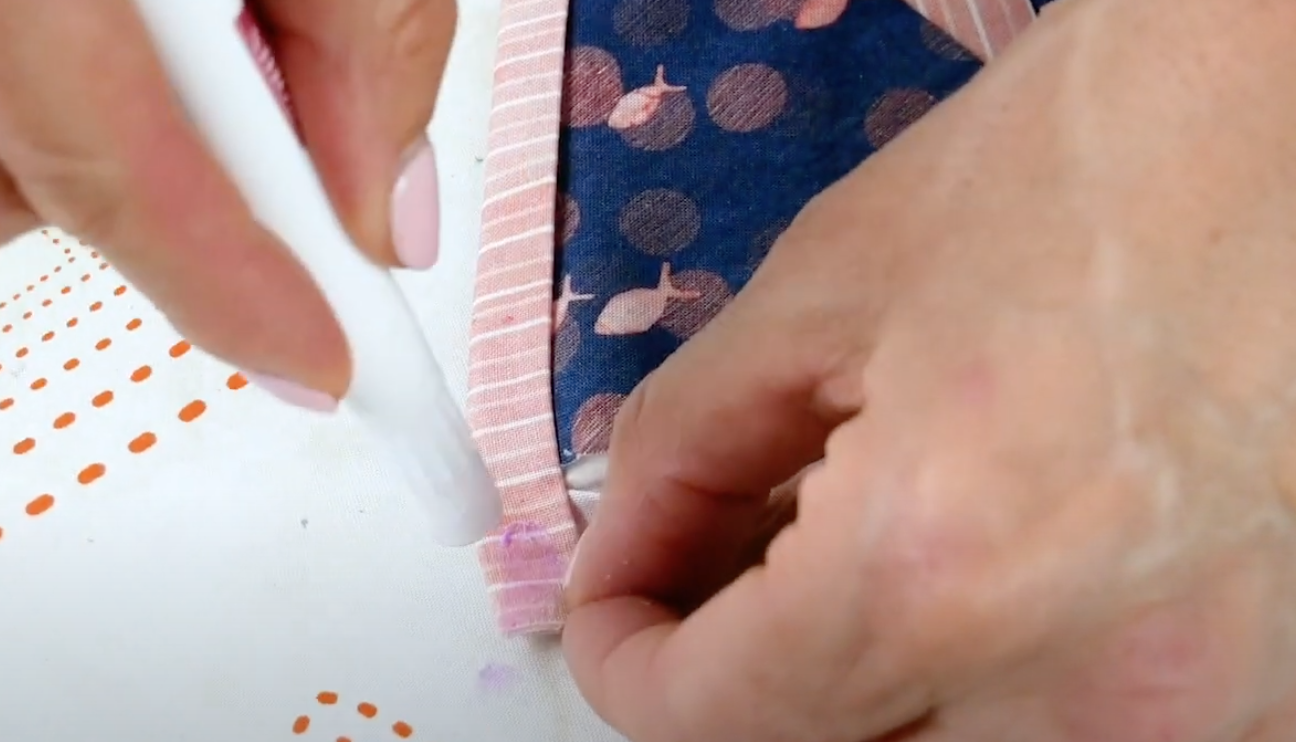
Now you’re going to fold the binding over one more time. Take a glue stick and run it across your binding, then when you fold it down again it will help hold it in place. Press again with the iron to keep it stuck down snugly.

8.png

Now that you have your first folded edge, we’re going to fold the corner into a triangle making a 90 degree angle. Add another dab of glue and press it down with the iron to keep it in place.

9.png

Like before, fold the backing of the next edge down and press it in place with the iron. Take your glue stick and glue the entire edge including the folded triangle. Fold it over again and iron it down as you fold. The corner should have a perfectly mitered edge if your quilt is squared up correctly and the backing is folded evenly.

10.png

Continue these steps for the other two edges. When you come around to the last side, fold the corners on both ends of the backing into a 90 degree angle. Then fold and iron the binding down like before. Dab your glue across the entire fold including both corners and fold again, ironing it down as you go.

11.png

When you’ve finished, your quilt should have perfectly mitered corners and a binding that transitions evenly from back to front without an extra seam like you would with strip binding.

12.png

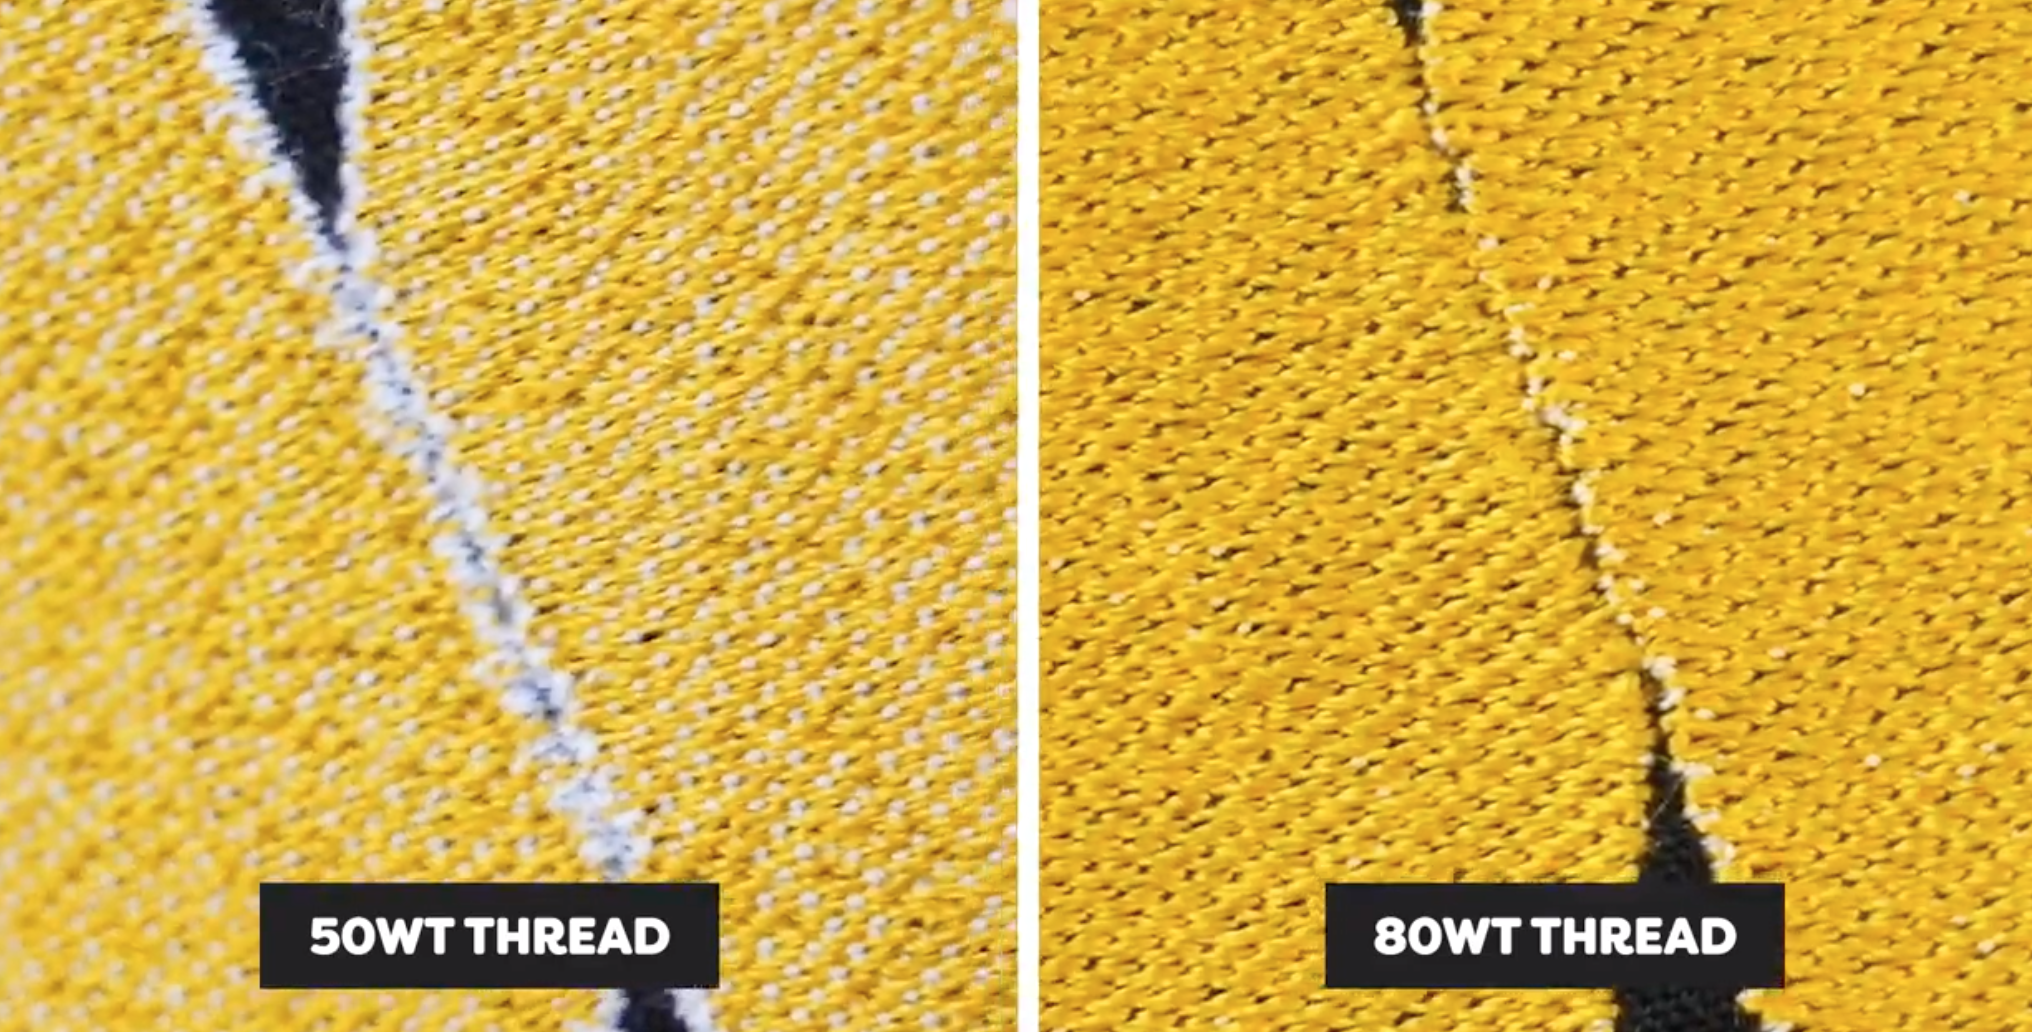
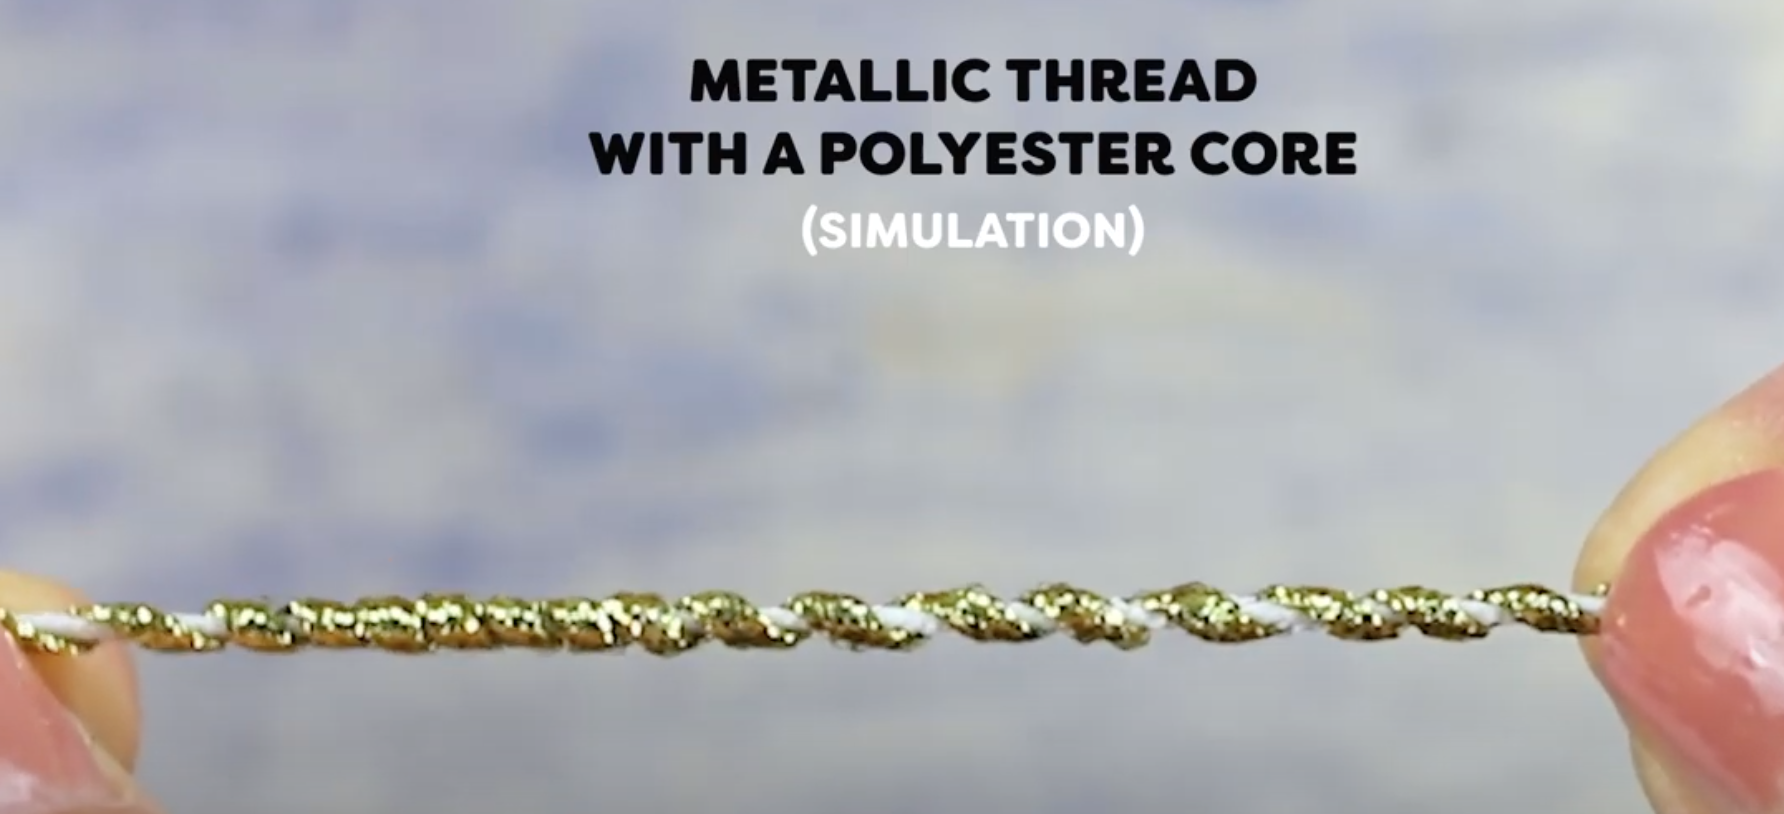
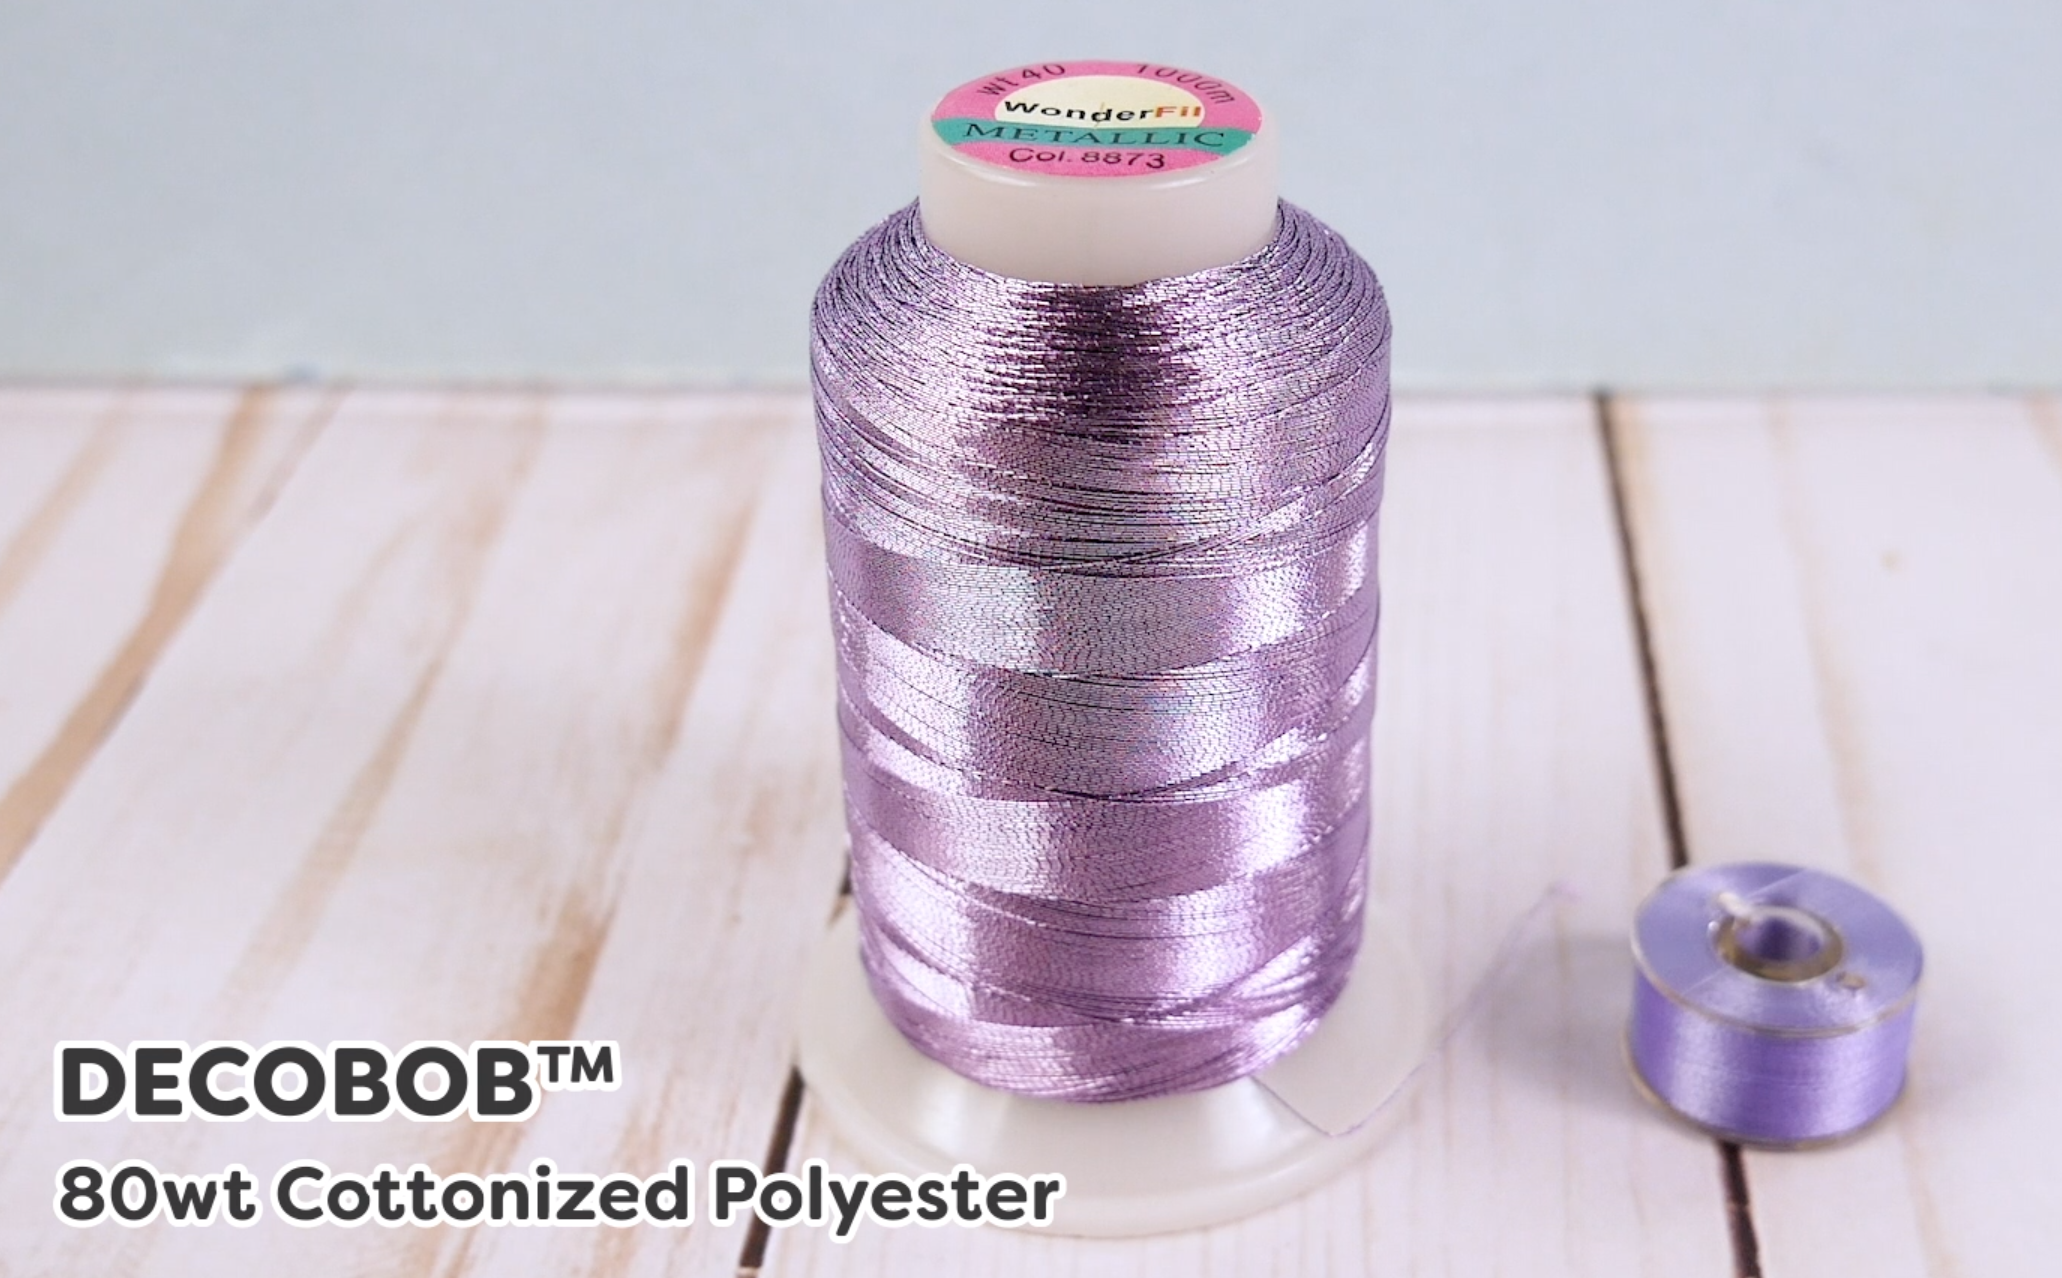
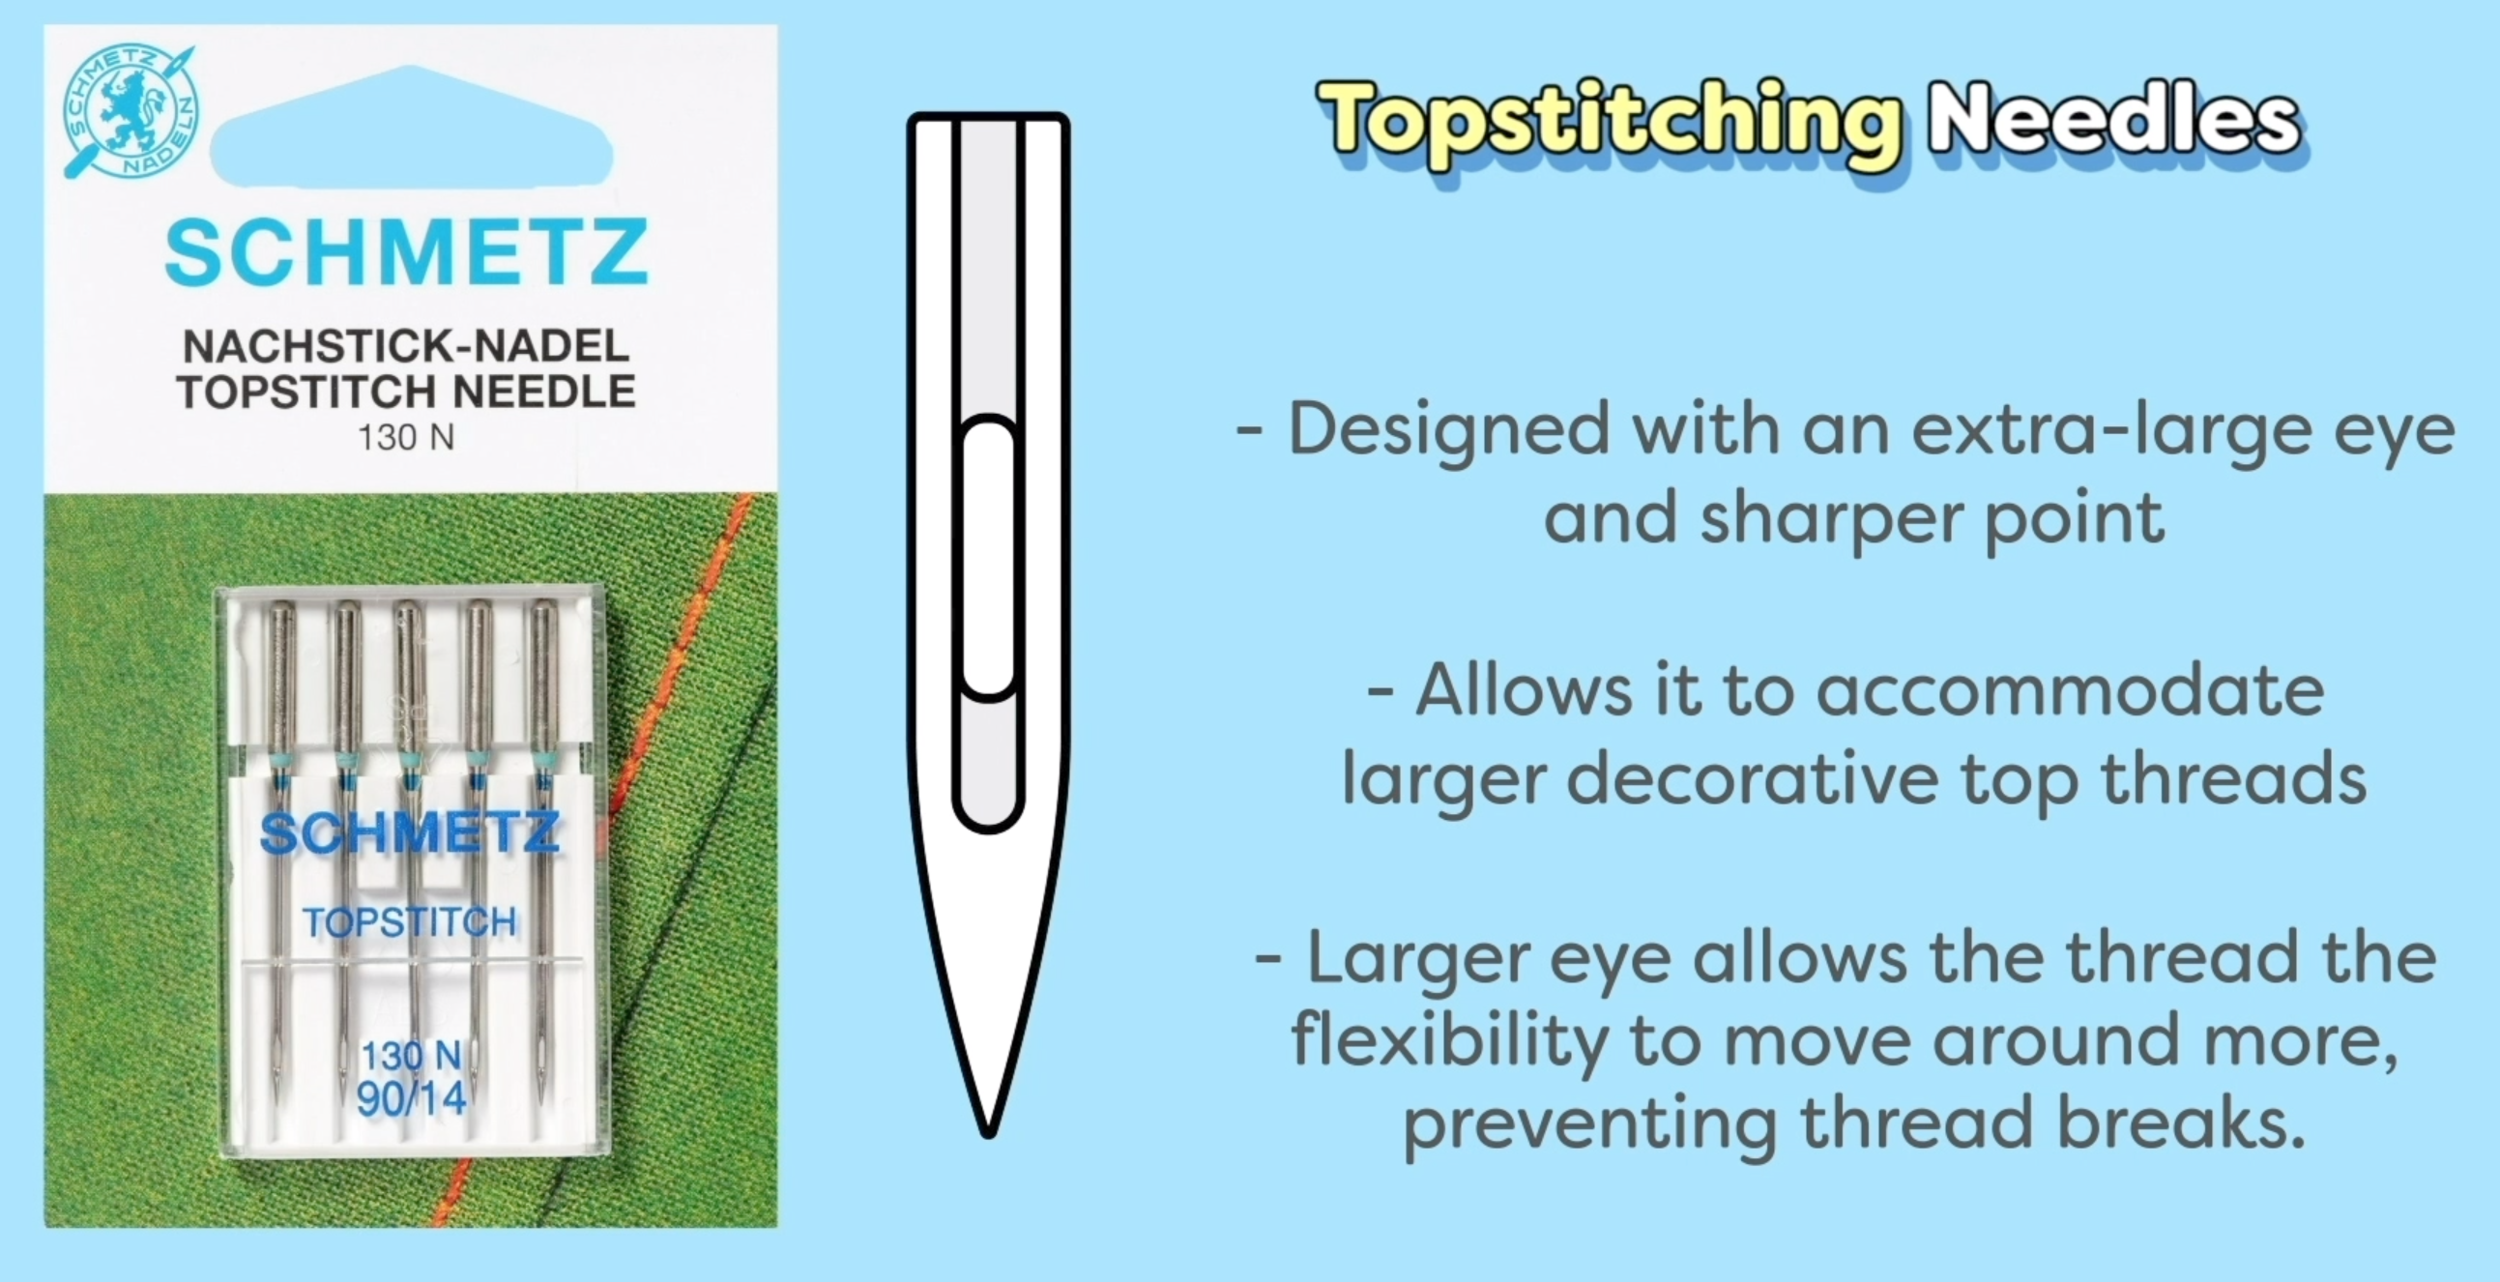
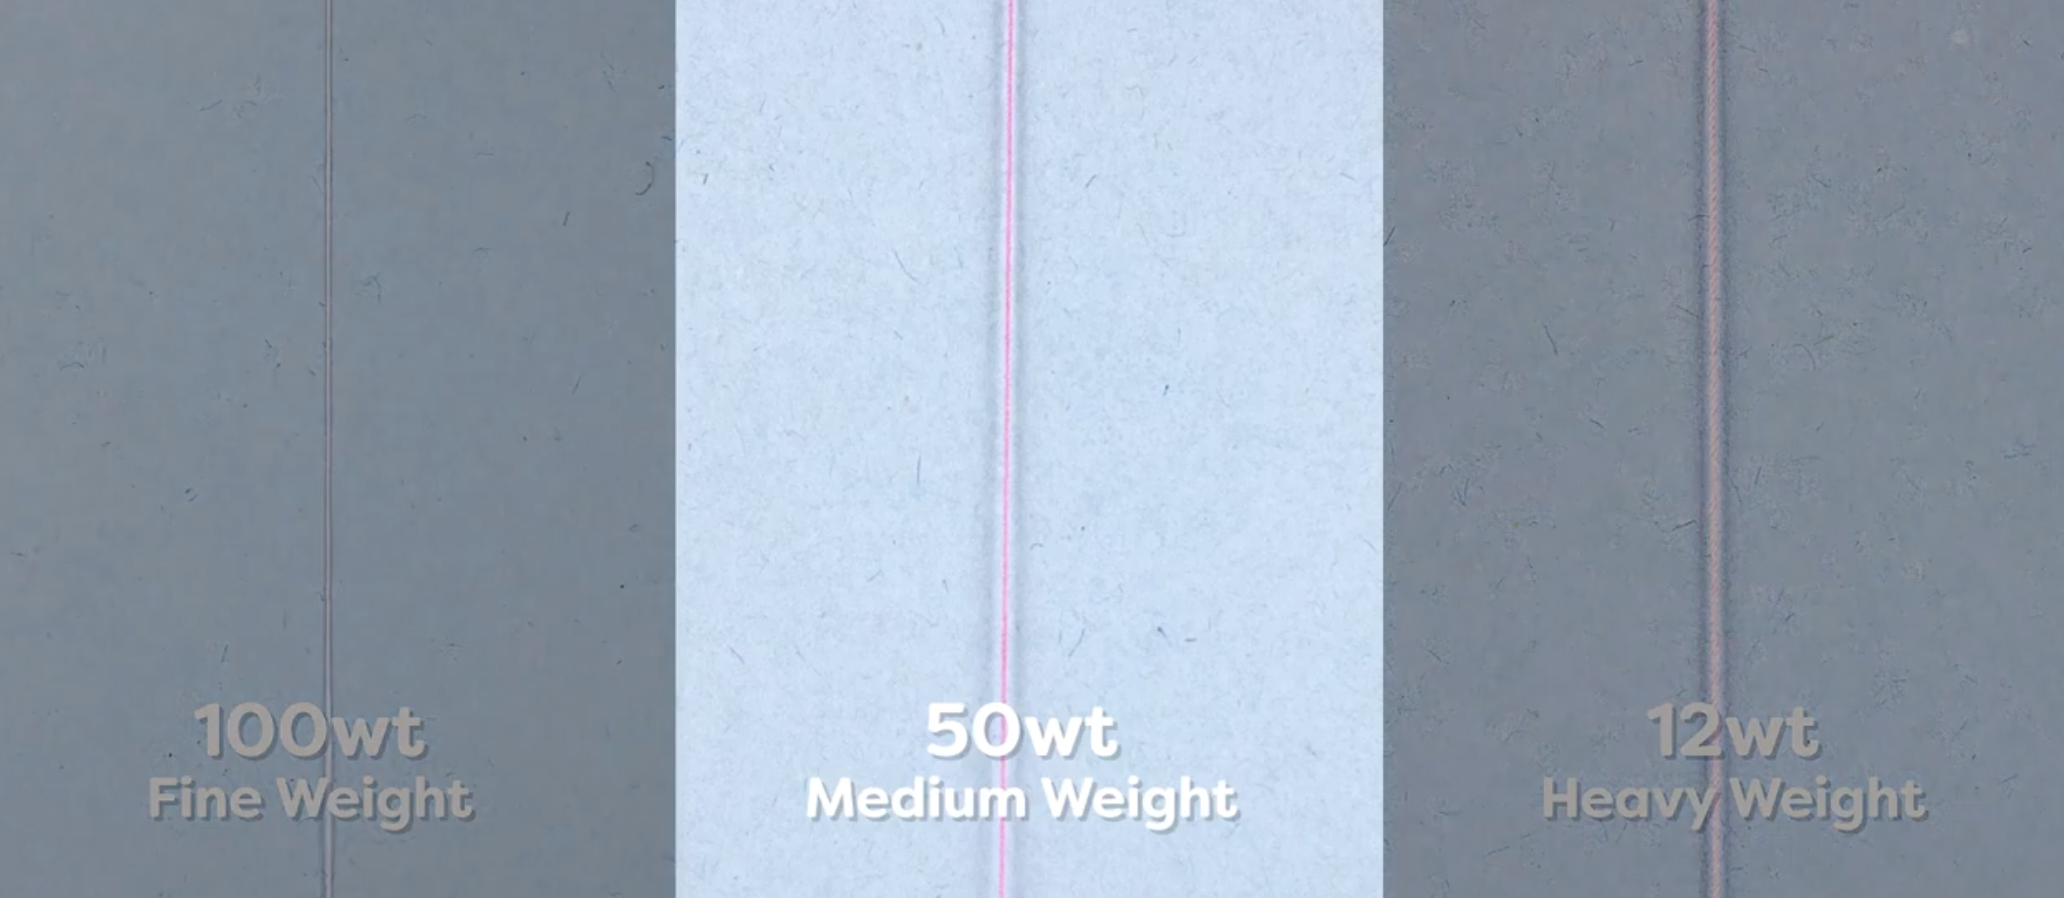
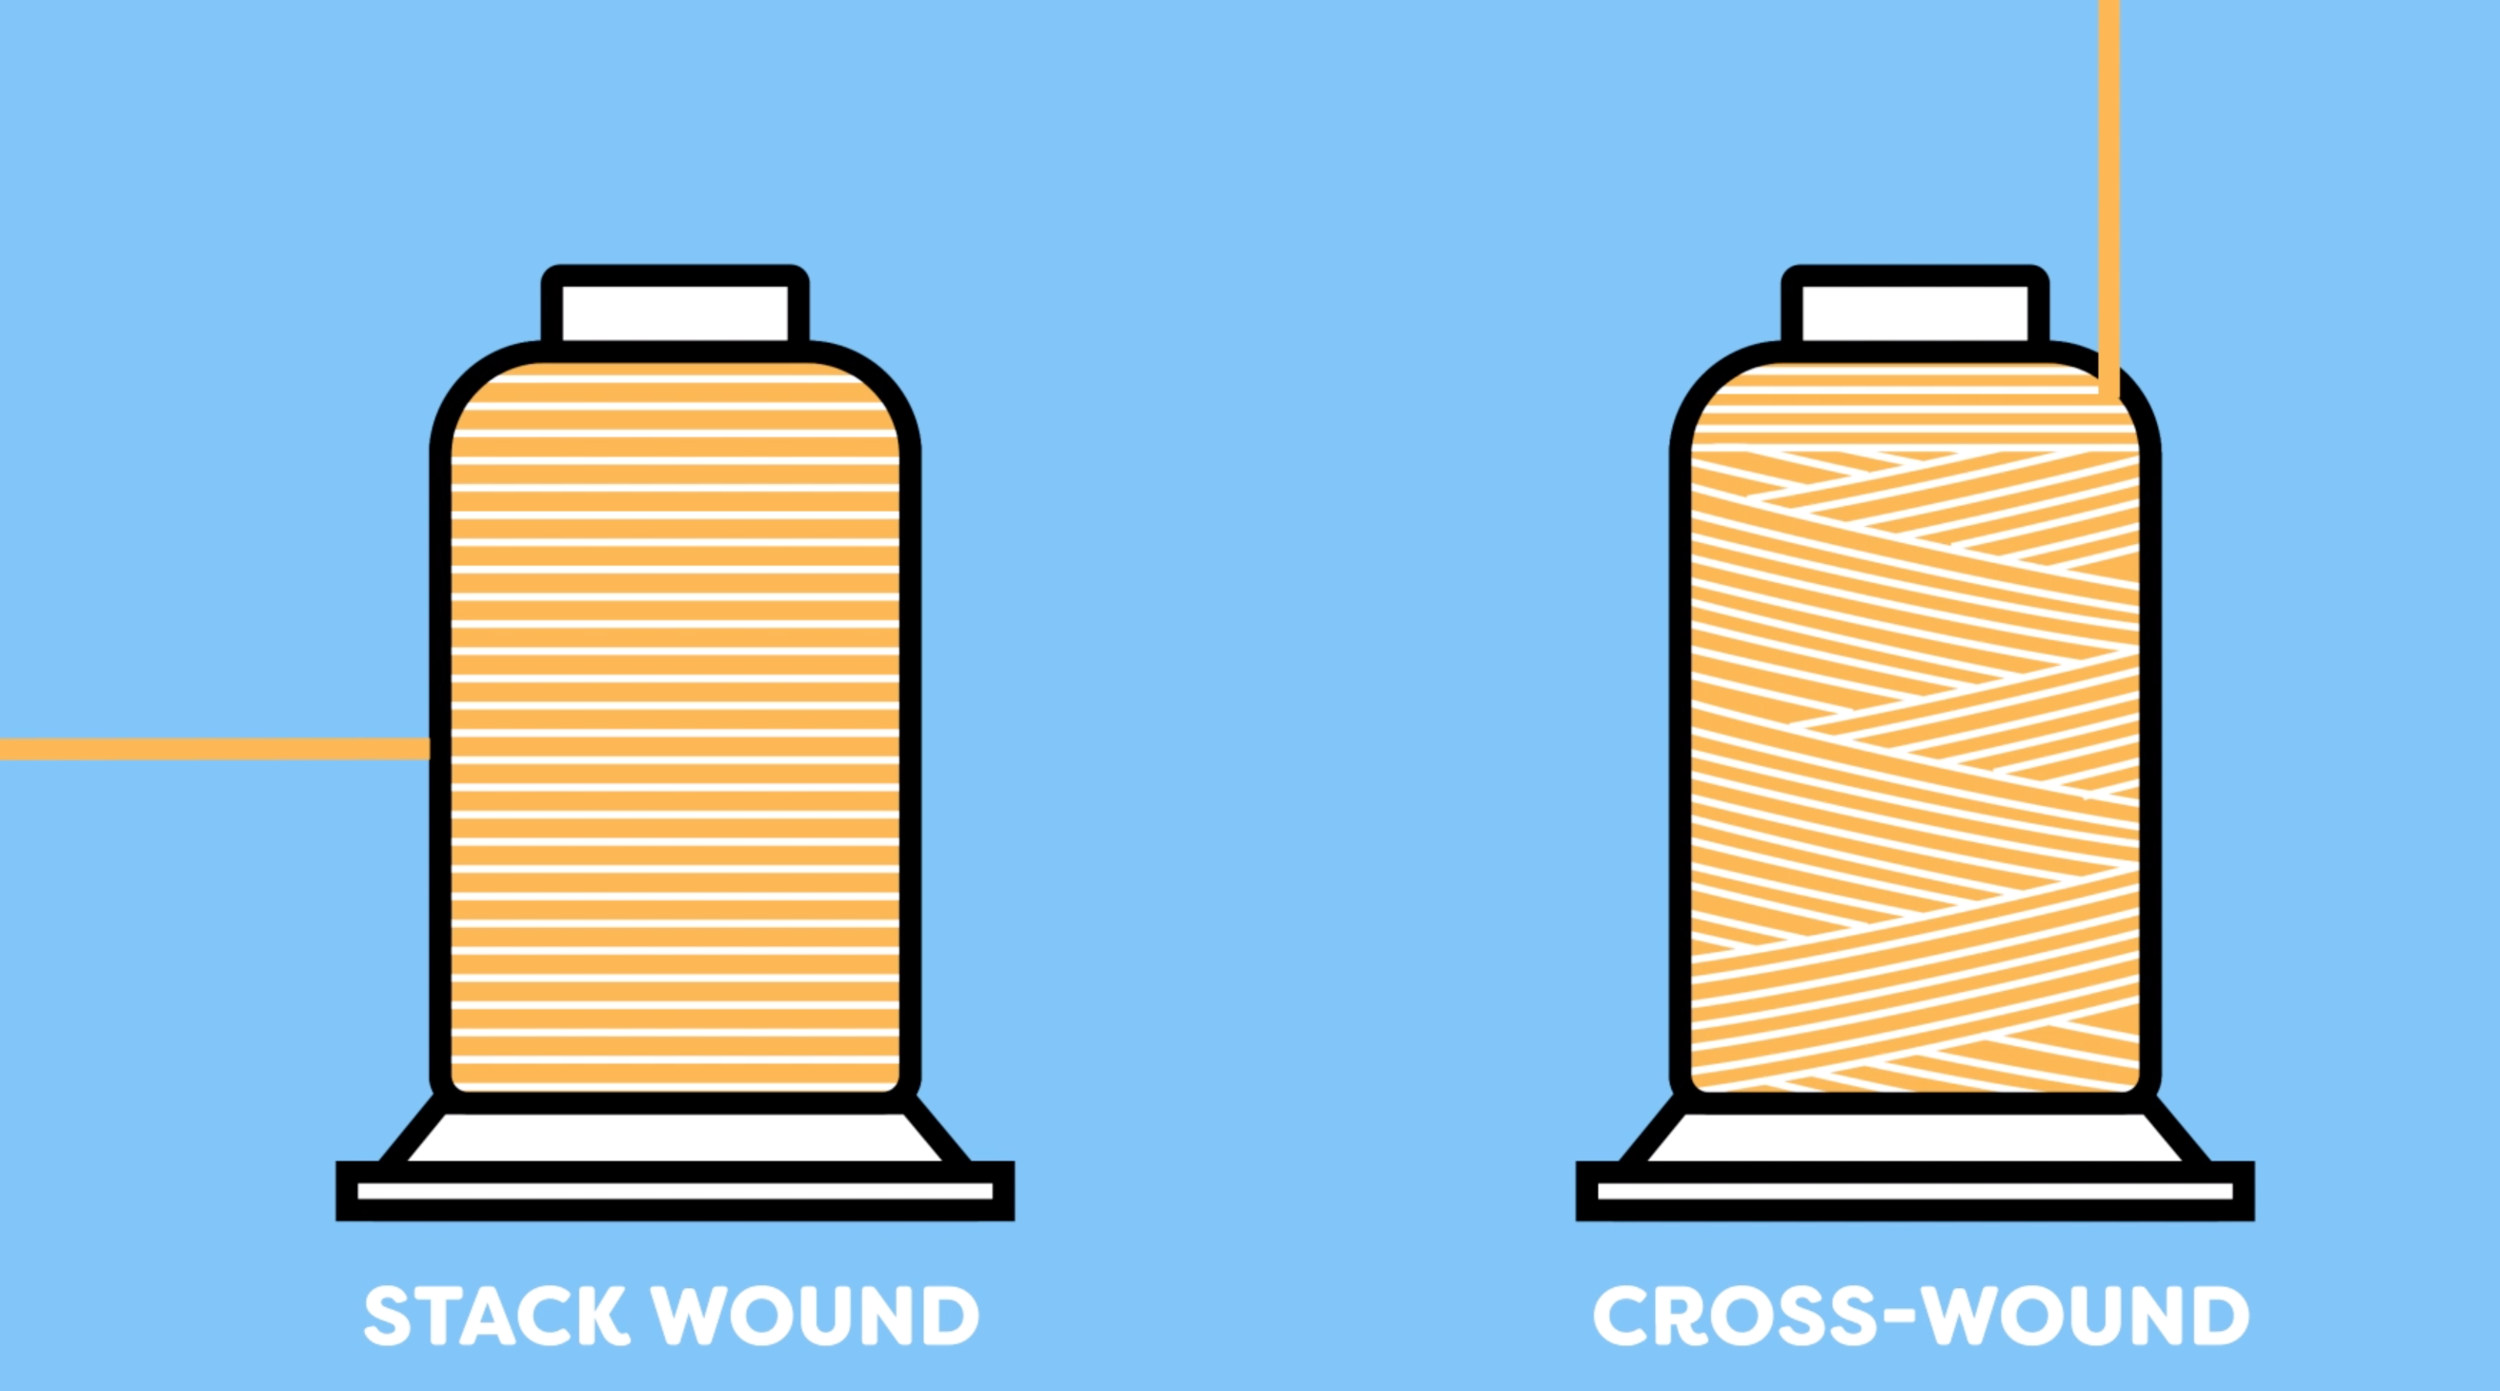
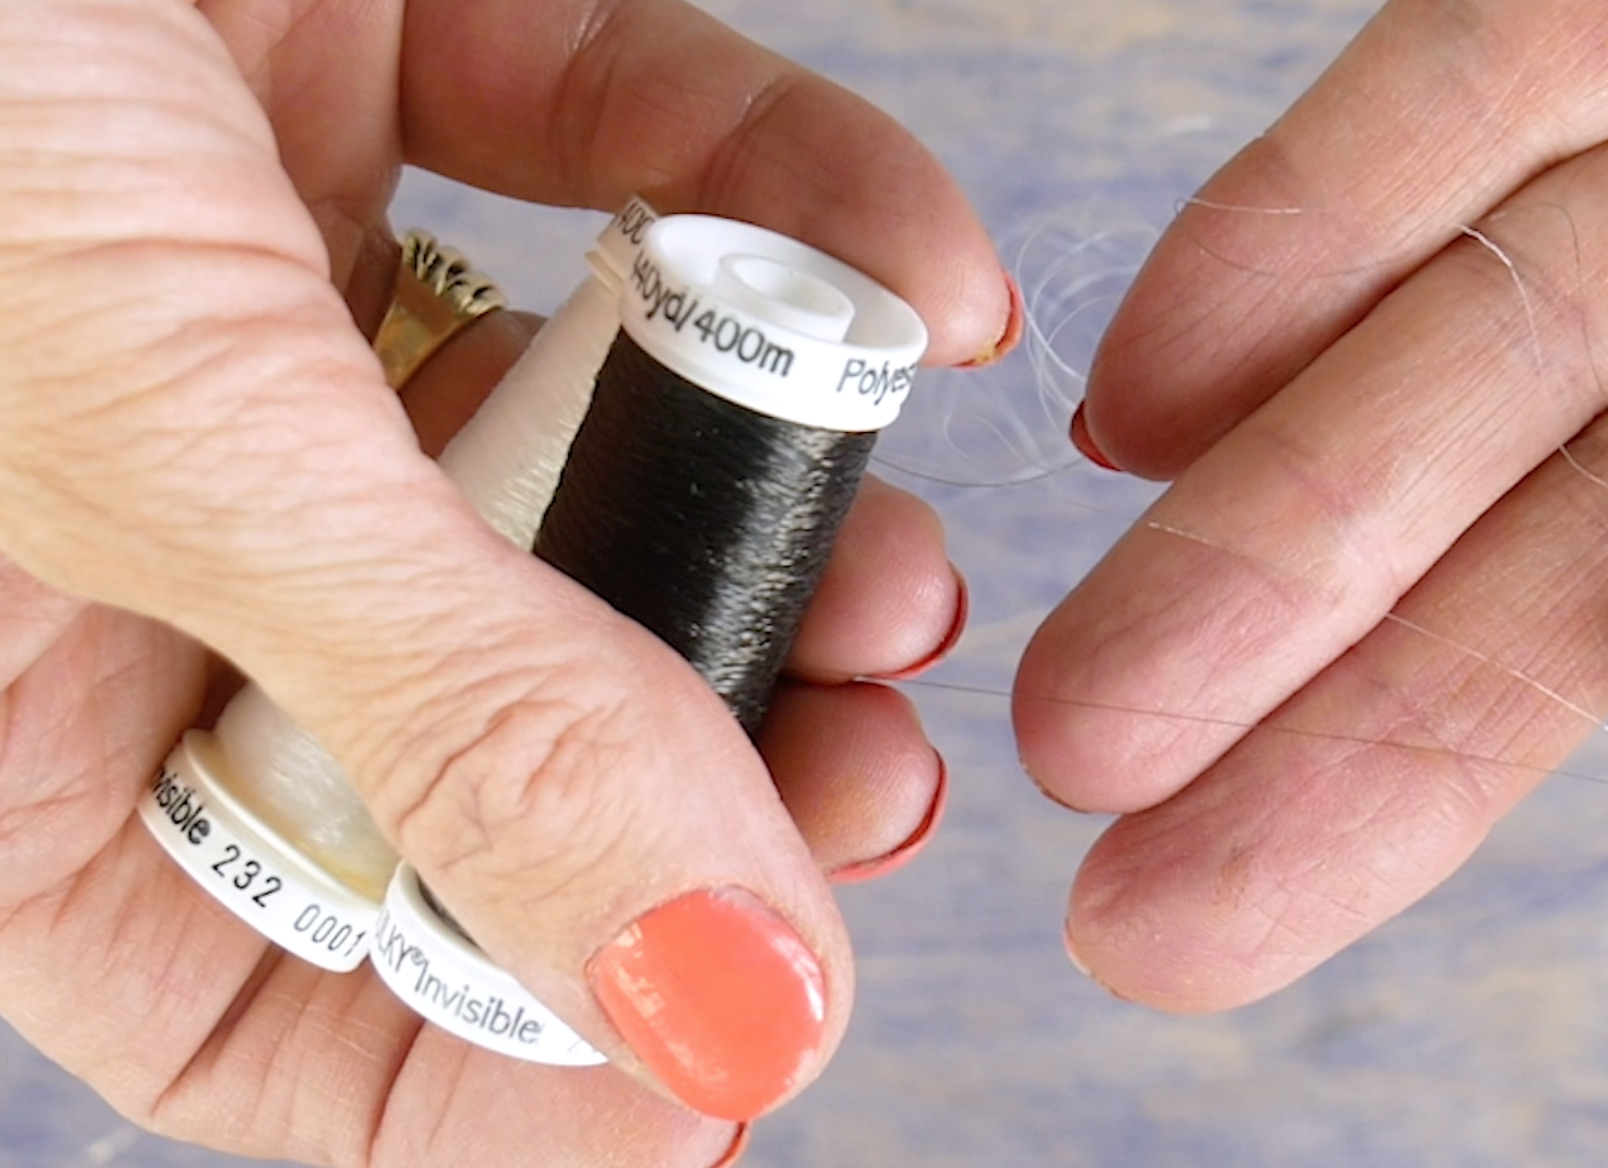
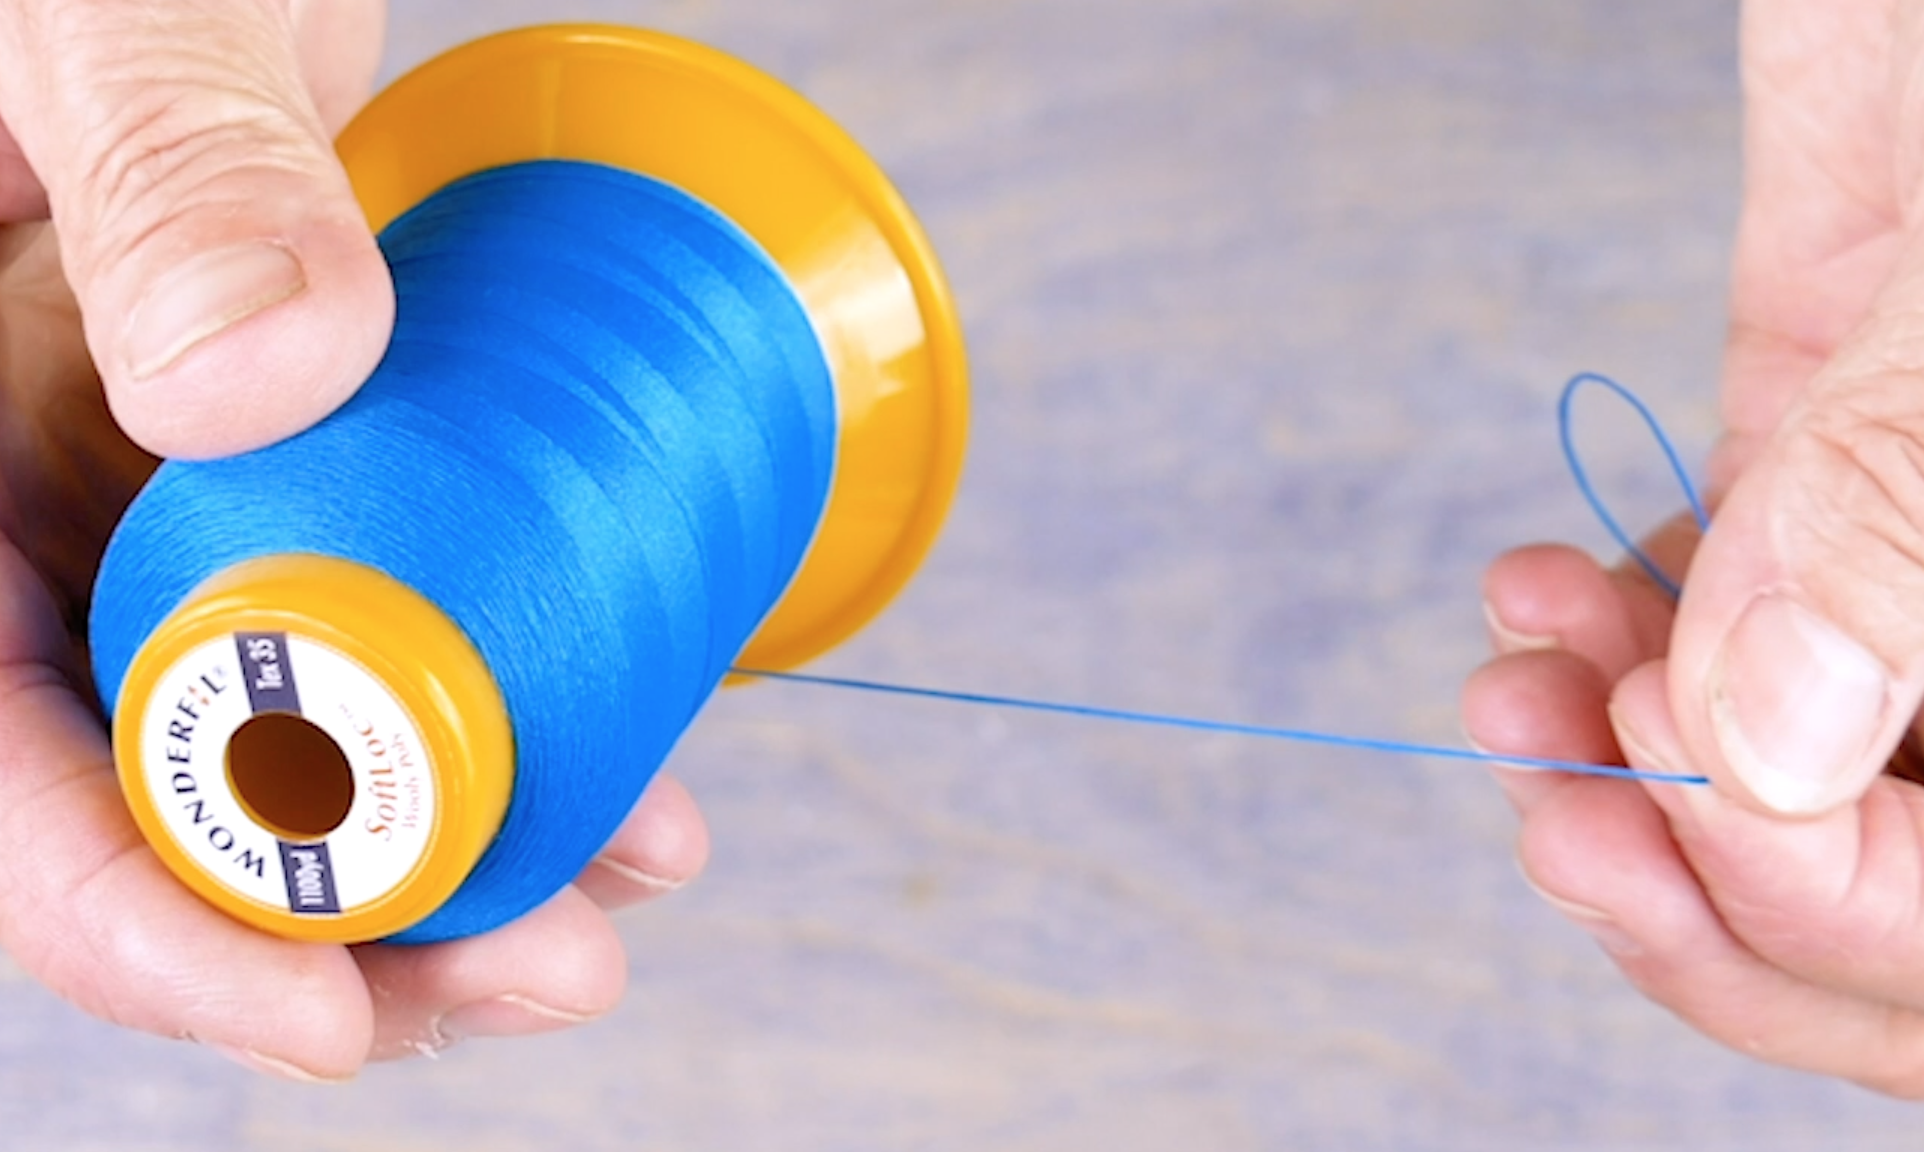
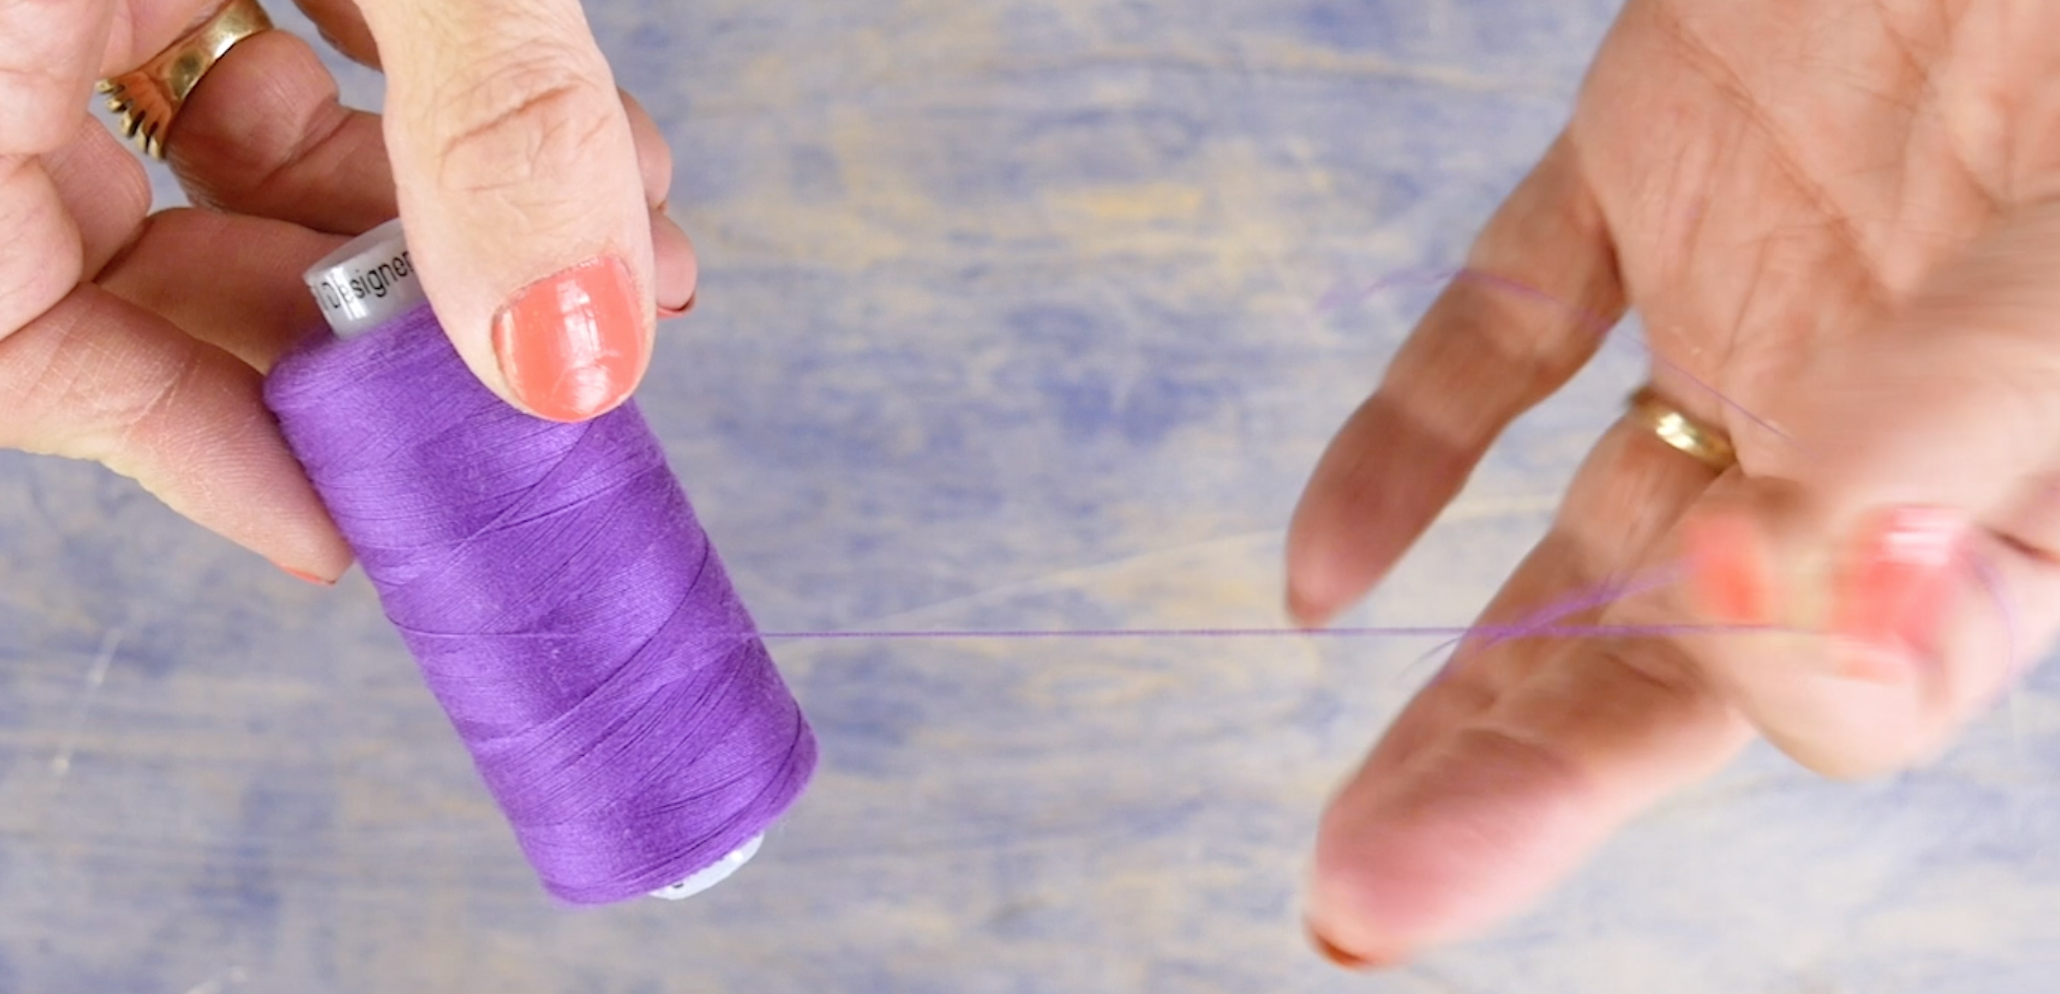
At this point you can choose to hand stitch your binding down like it’s traditionally done, or you can machine sew it which will go quicker. No matter which method you choose, we highly recommend using a finer thread in the top and bobbin. The thread we’ll be using is called DecoBob, which is an 80wt cottonized polyester thread. Because it’s so fine, it will really help to hide in the fabric so your stitches will be less visible. This is especially important if you choose to machine stitch your binding down. We recommend this thread because it’s strong enough to reliably hold your binding down without being too visible or worrying about the thread breaking.

14.png

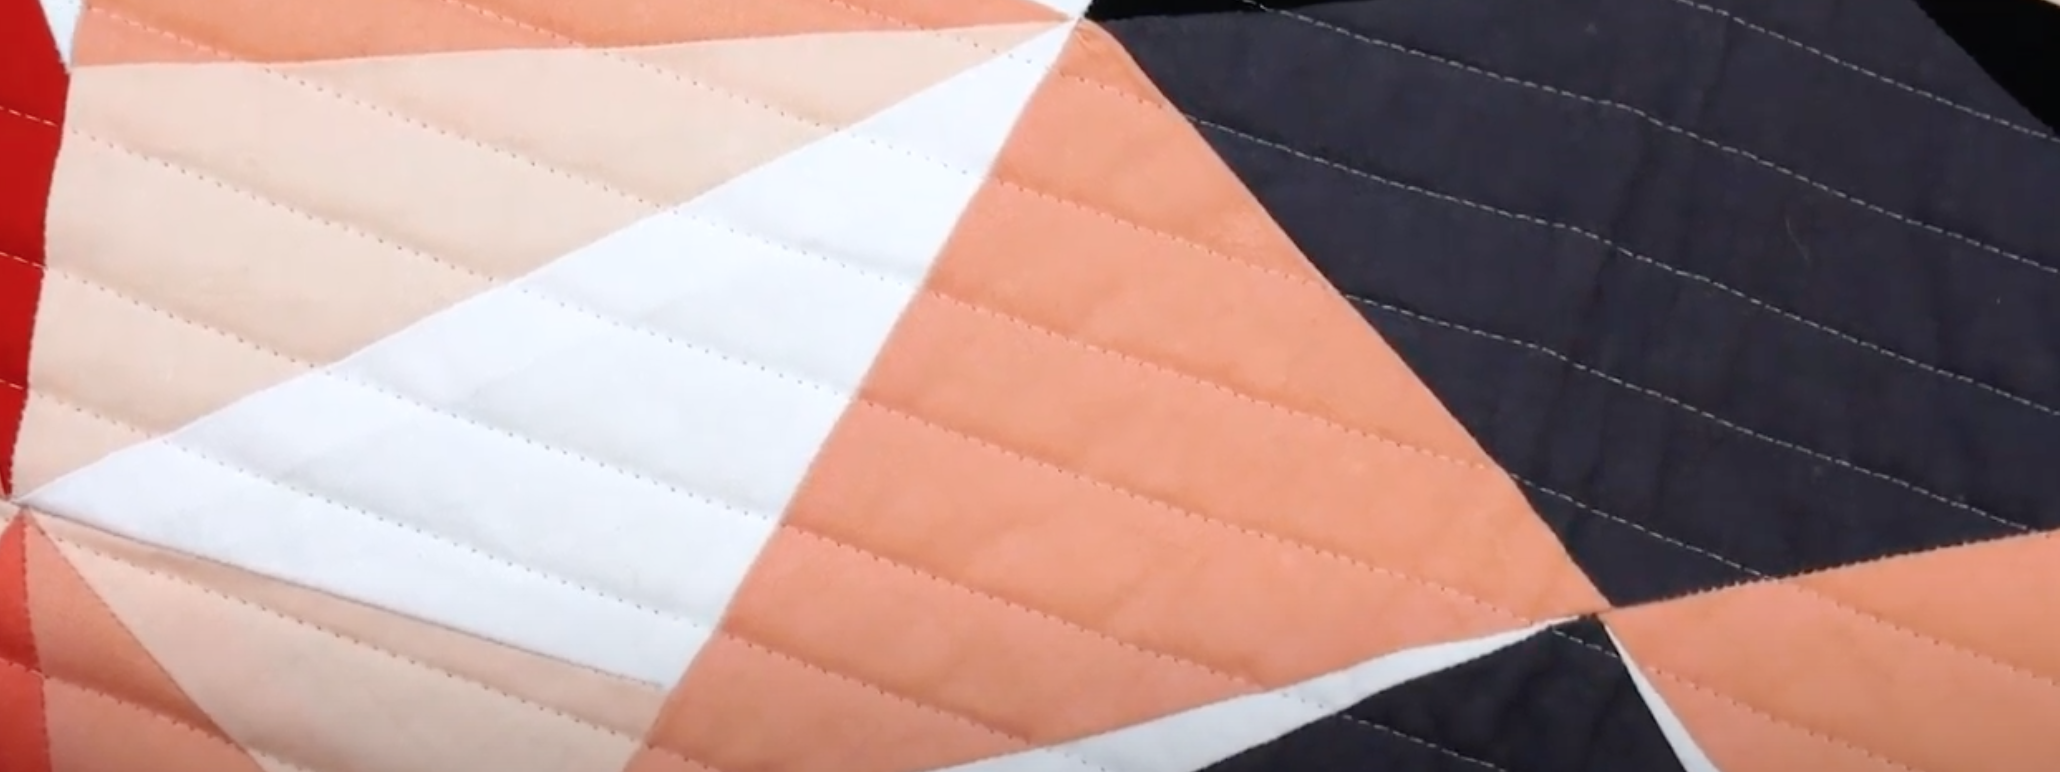
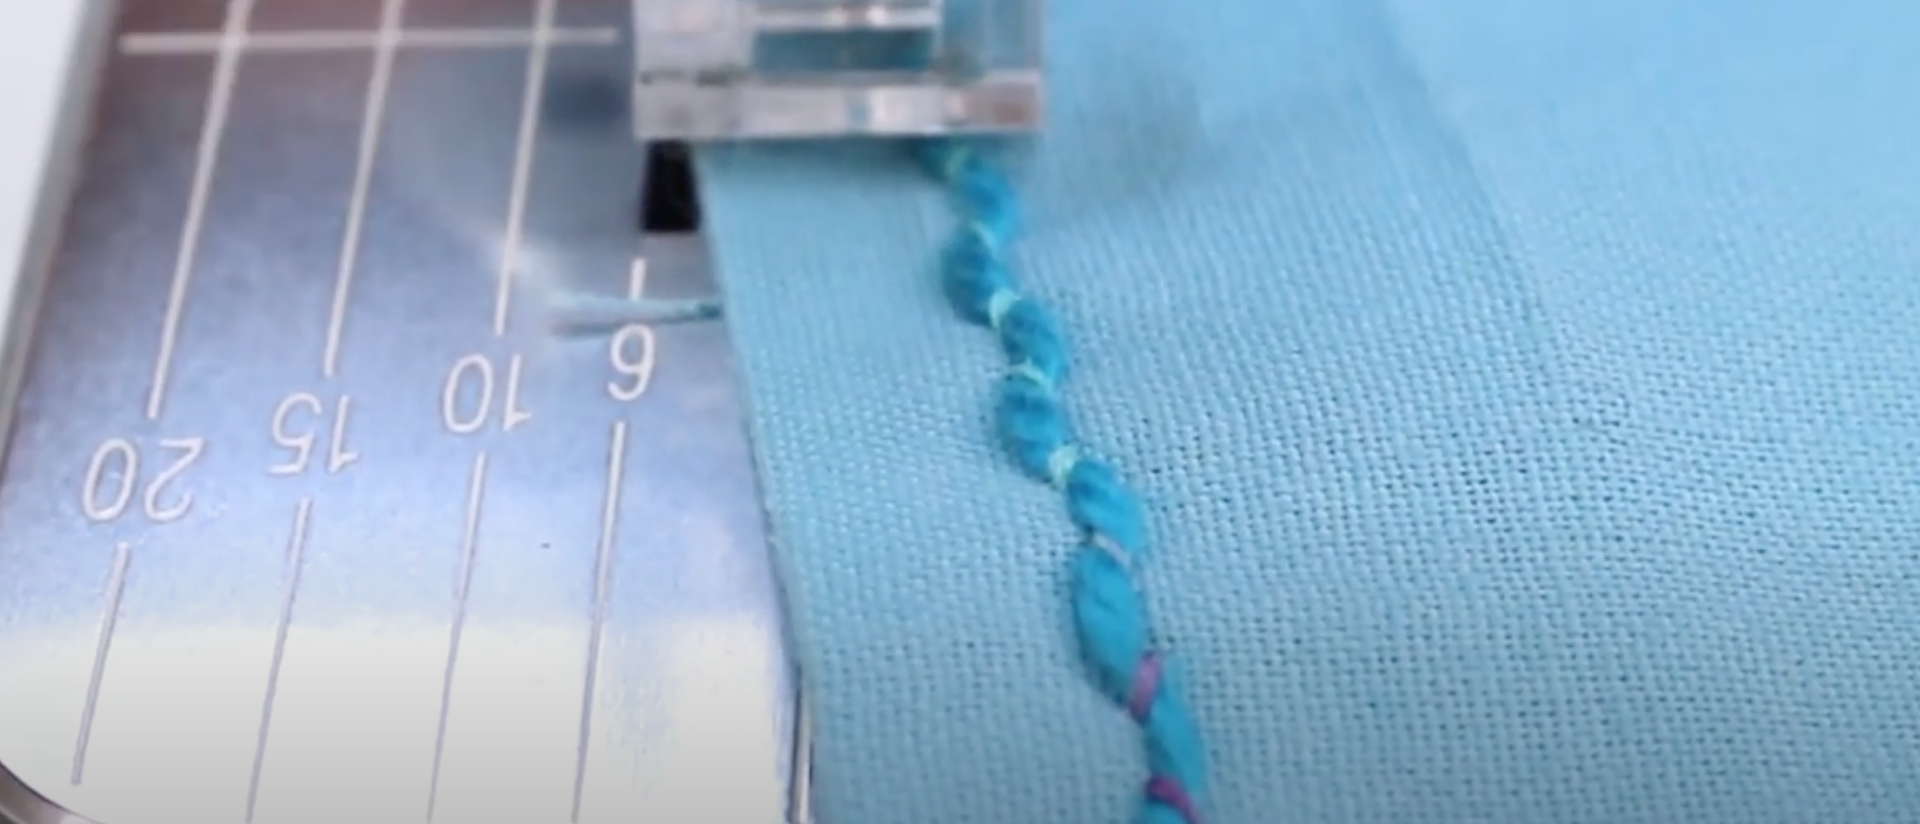
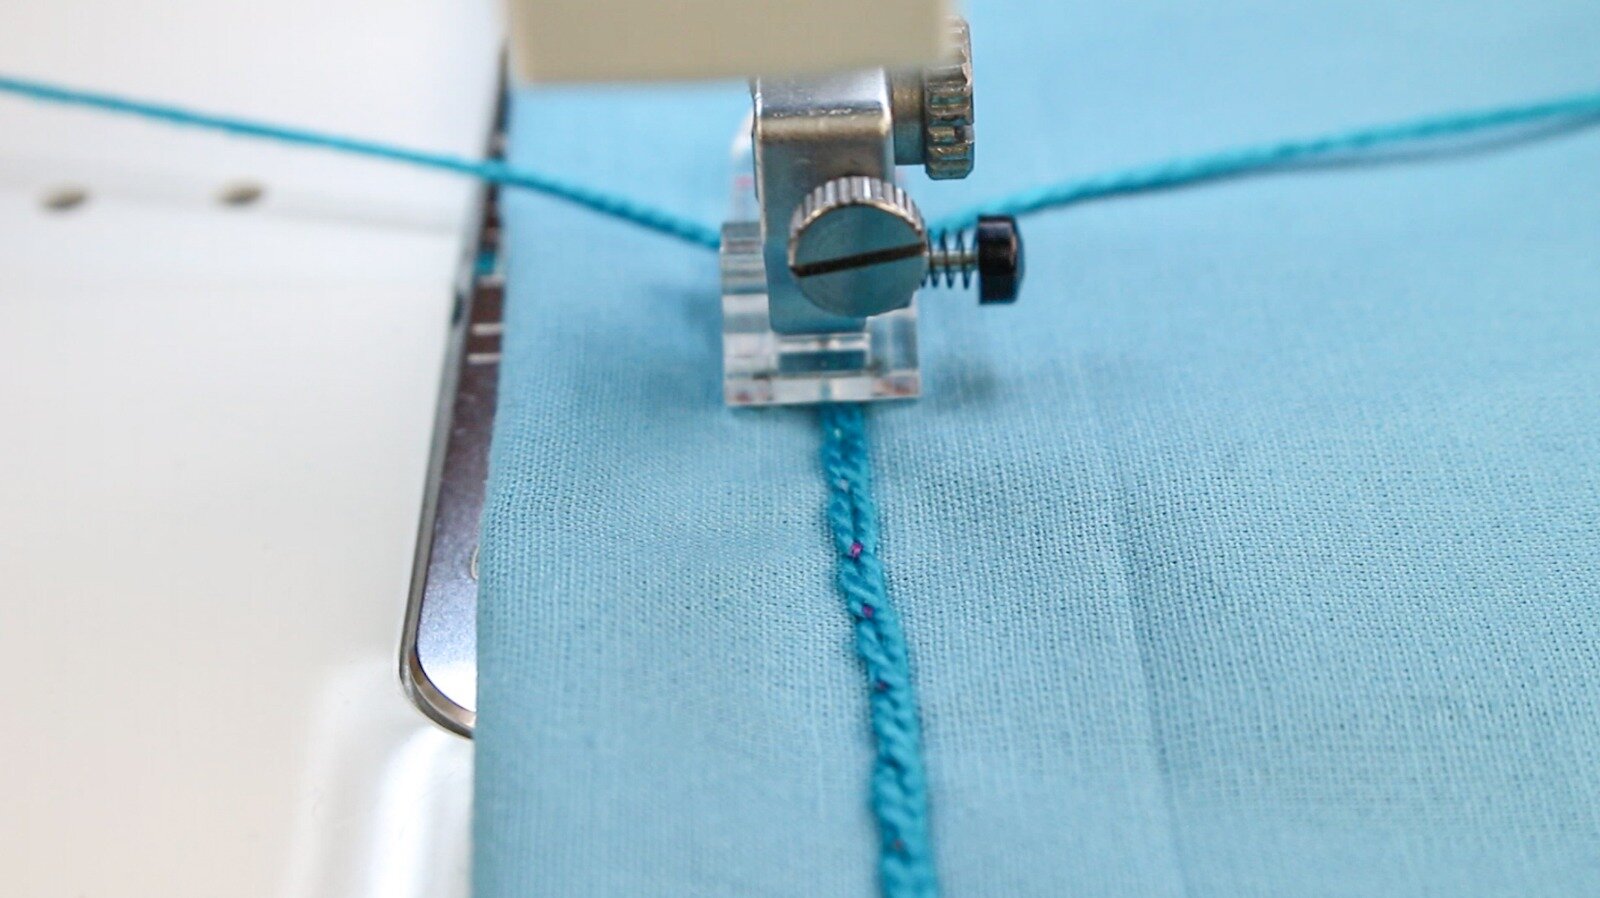
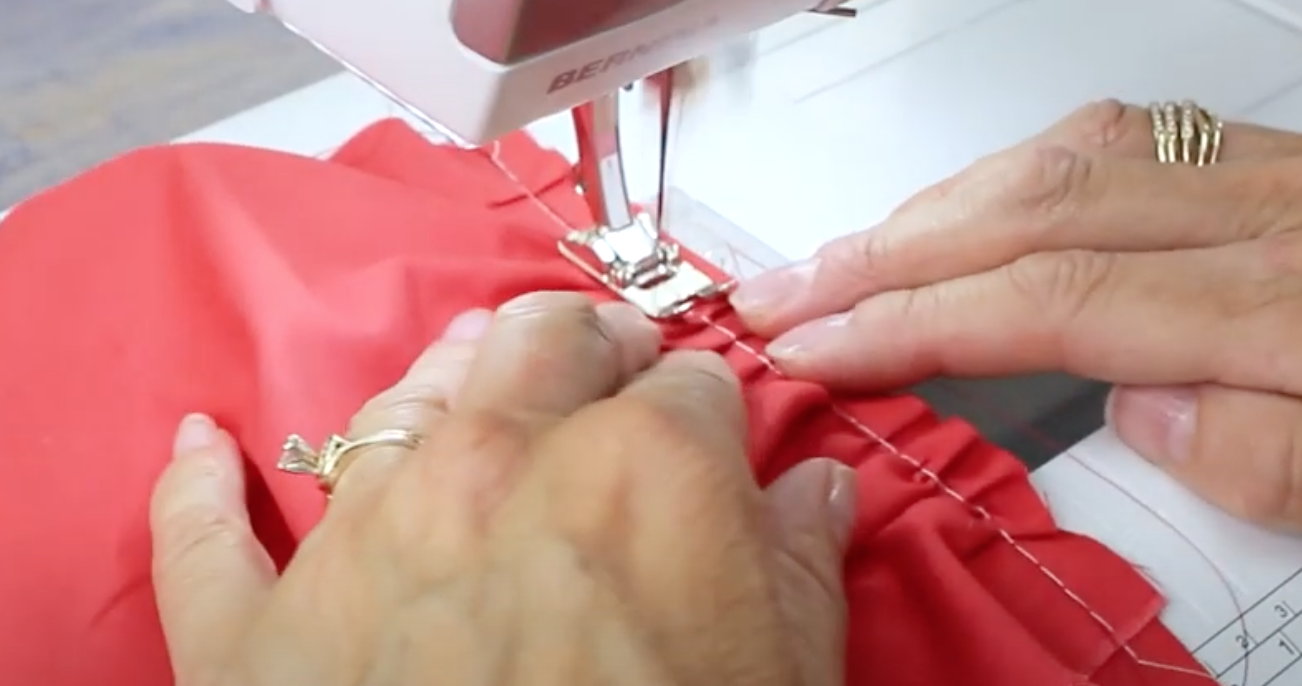
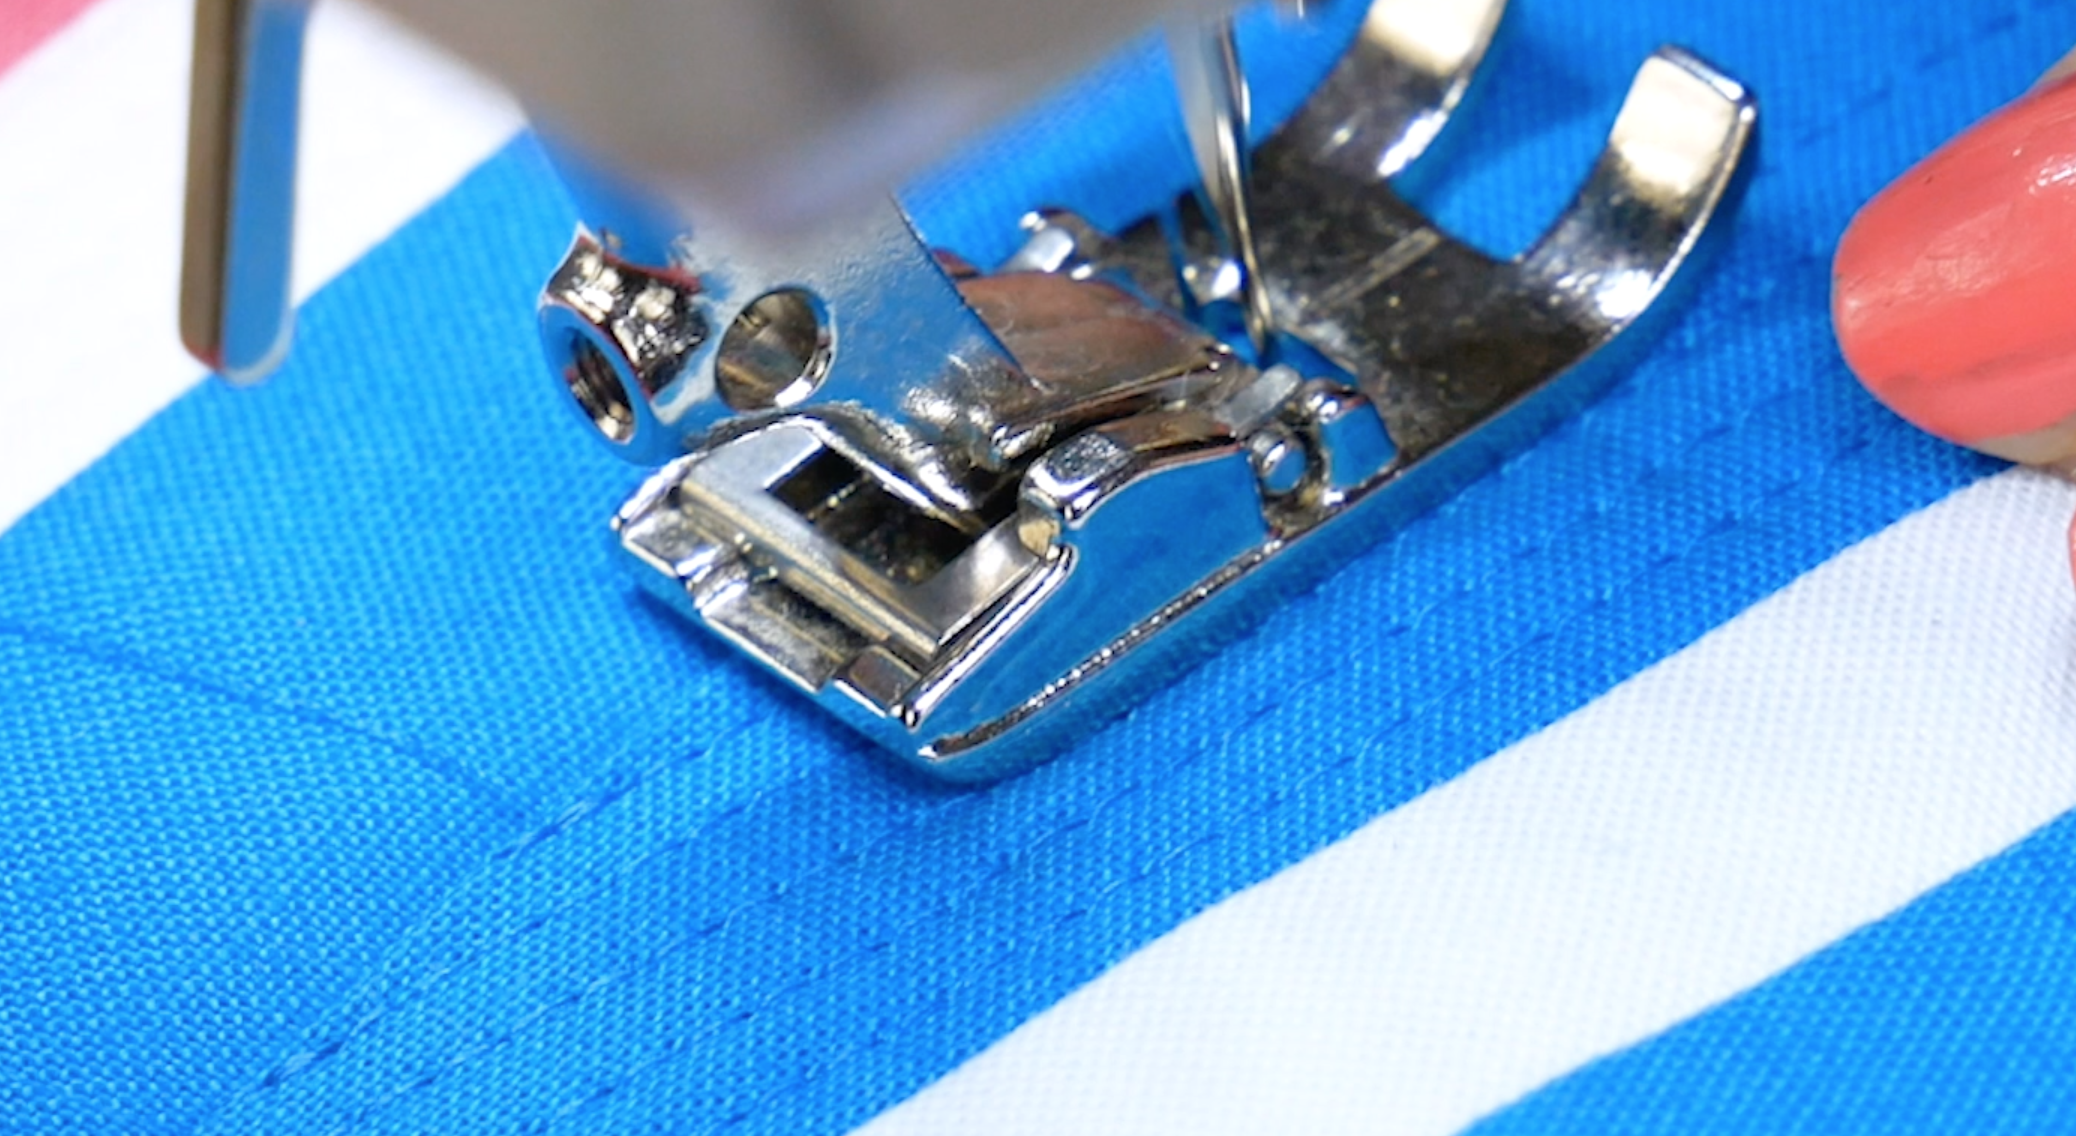
To sew the binding down with your machine, you want to stitch as close as you can to the edge as you can. Because we tacked everything down with the glue earlier, the fabric is much less likely to shift as we sew. However, you can hold the edges down with some wonder clips if you need to. Sew all the way around your binding and don’t forget to back tack at the beginning and end.

15.png

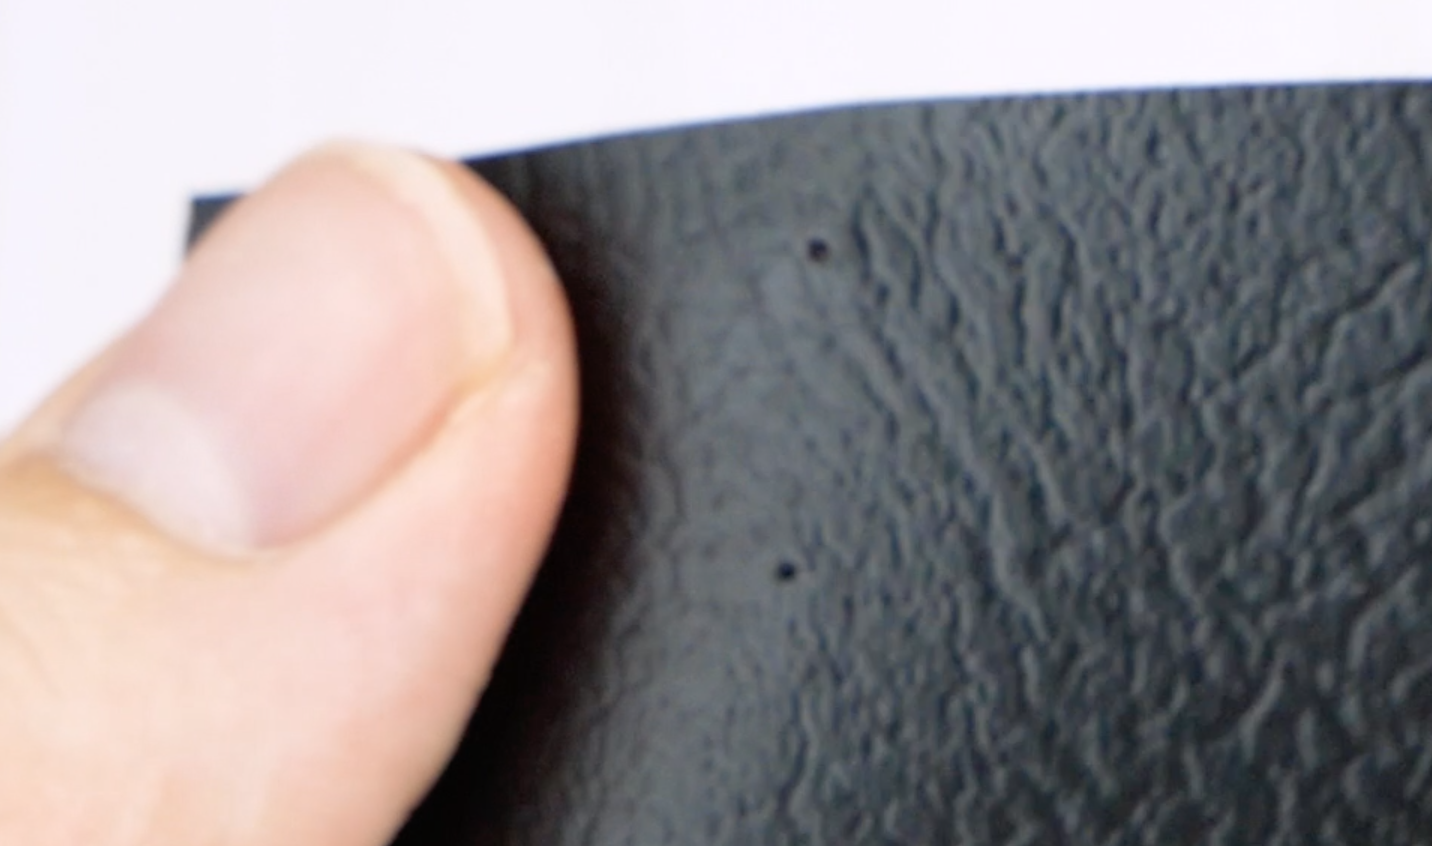
There will be a gap at the mitered corners. These can be hand stitched close if you want to, or they can be left open if the quilt isn’t going to experience too much wear and tear. When you’re done, you have a beautifully bound quilt that smoothly transitions from back to front, and perfectly mitered corners. If you machine stitched it down with the 80wt DecoBob thread, you’ll also find that your stitches aren’t too visible either.

16.png

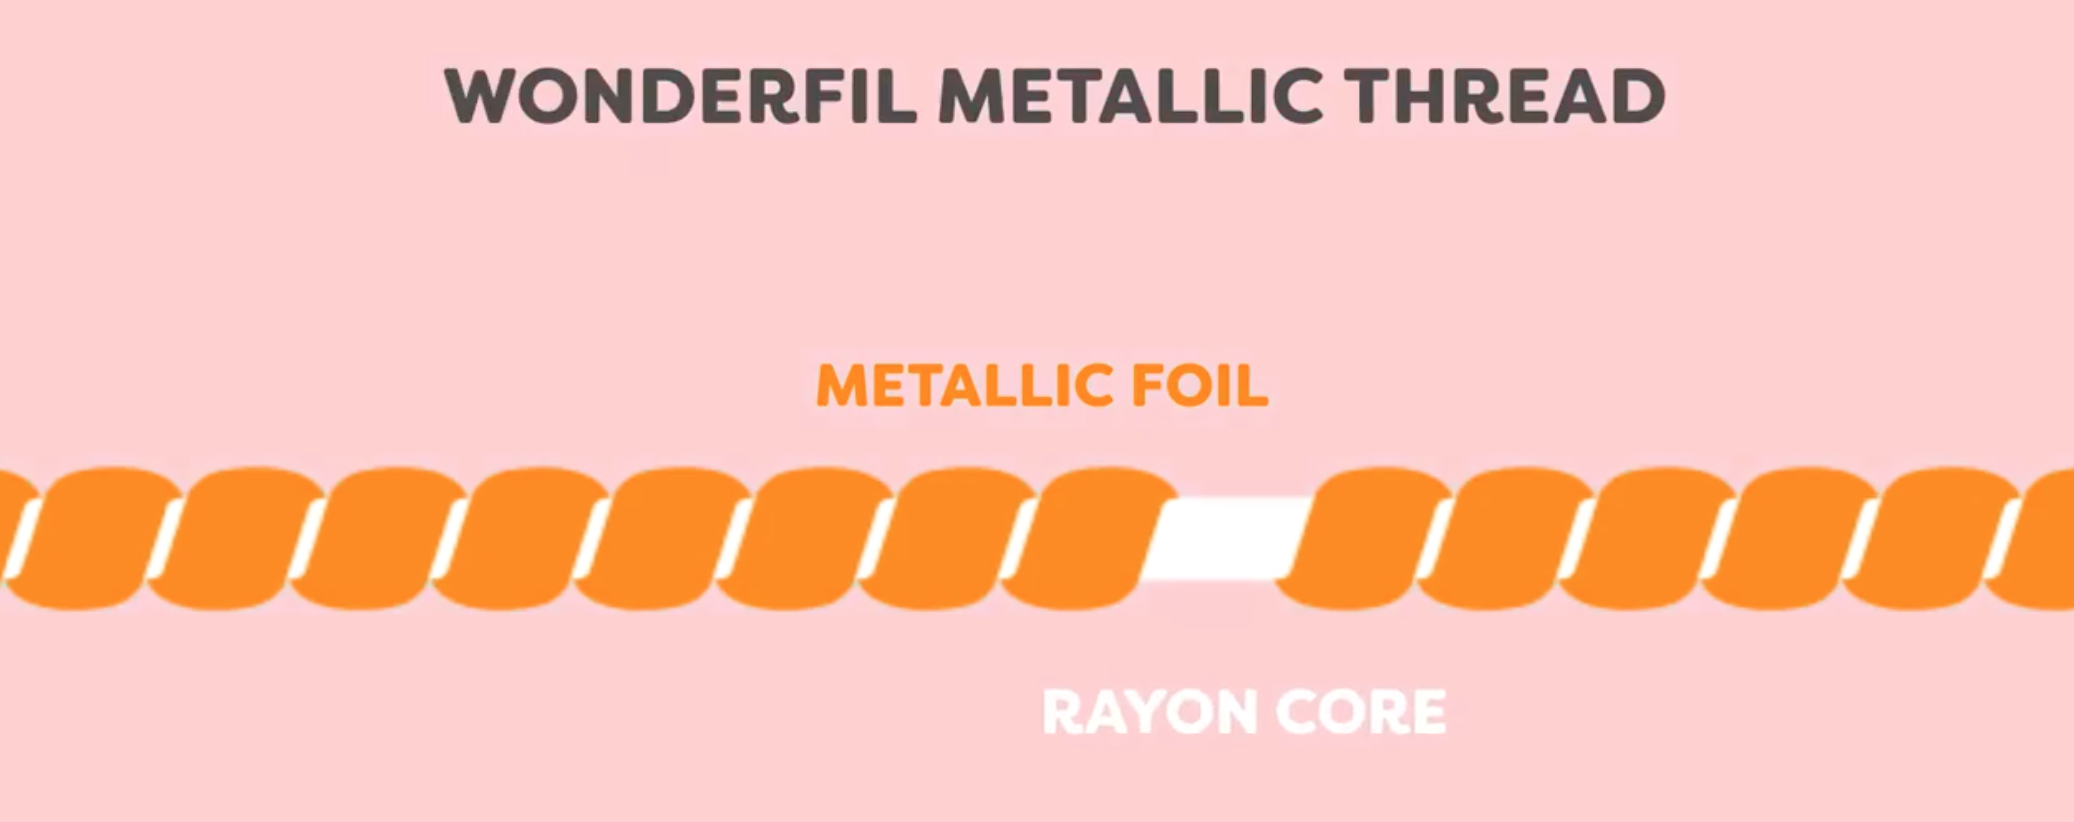
Inspired to sew with WonderFil threads? Find a store in your area that carries WonderFil at www.shopwonderfil.com/shop-local. You can also sign up for our free newsletter to receive more educational sewing tips, tutorials, and free patterns. Register by clicking here! We’ll see you again next time!

17.png

4 Popular Thread Myths You Should Ignore

Maura Kang

There’s a lot of sewing myths out there, and a lot of the time they were made because of a lack of thread technology advancement or there simply weren’t any other choices available. We’re going to debunk these 4 popular thread myths that are simply no longer true.

Thread Myth #1: Always Use the Same Thread Top & Bottom

One of the most common thread myths we hear is that you must always use the same thread on the top and in the bobbin. This is simply not true, and here’s why. As your machine sews, the top and bottom threads are pulling against each other for tension. By choosing a finer bobbin thread such as this 80wt cottonized polyester called DecoBob, the bobbin thread will always give way to the top thread. This allows for a smoother tension and fewer thread breakages.

1.png

If you’re using a 50 or 40 weight thread to sew, which is the most common medium weight thread, the thread adds more extra bulk to the seams than most people realize. This 80wt bobbin thread is almost half the size of 50wt thread in comparison, and as a result will allow the stitches to lay flatter and the bobbin thread will show less.

2.png

This is most especially noticeable in embroidery where you have a lot of dense stitching all in an area. In this embroidery, the top section used a 50wt white bobbin thread. Below it, we switched to a white 80wt pre-wound bobbin. You can literally see the difference it makes simply by choosing to use a finer thread in the bobbin.

3.png

Thread Myth #2: Embroidery Thread is Always 40wt Polyester

While we’re on the topic of embroidery, another thread myth we frequently hear is that an embroidery thread should always be a 40wt polyester. Don’t get us wrong, we love 40wt polyester for embroidery and it’s a great choice, but you can also achieve better results by changing up your thread depending on what kind of embroidery project you’re doing.

For instance, we stitched out several sizes of this embroidery pattern going from larger to smaller. The embroidery at the larger size looks great, however as you get smaller and smaller, you start to lose the detail and the lines become squished together. Any embroidery with many fine details benefits from using a finer thread. Here we used DecoBob 80wt thread in the top and bobbin and you can see how many details are kept at a smaller size.

4.png

For another comparison, we stitched out some lace using a 50wt cotton. We then stitched out the same lace pattern using DecoBob 80wt thread and you can see how many more details show up in the lace with the finer thread. So if you’re doing any embroidery with a lot of little details, always choose a fine thread to make it with. The results are worth it.

5.png

However, polyester isn’t your only choice for embroidery thread, what about rayon? Rayon and polyester have some differences, namely that rayon has a more beautiful, glossy sheen in comparison to polyester which carries more of a fragmented, artificial sheen. Rayon is also softer and more flexible to the touch, while polyester is stiffer and rougher to the touch. However, polyester is also able to withstand mild bleaching and is resistant to most chemicals while rayon is not. Rayon also tends to weaken when exposed to water and should therefore just be used for decorative elements and not construction purposes.

6.png

These are both good choices for embroidery but knowing the properties of each material will help you make a more informed choice when choosing the best one for your project. Don’t forget that cotton thread is also a beautiful embroidery choice as it offers an organic, matte look. And metallic thread which is also a stunning choice for anything you want to pop.


Thread Myth #3: Metallic Threads Are Fickle and Always Break Too Easily

Metallic threads have a reputation for being fragile and difficult to sew with. However, it’s best to keep in mind that 1) not all metallic threads are made with the same quality, and 2) thread technology has advanced from the last few decades and many of the previous problems have now been addressed. This is Spotlite, a metallic thread made by WonderFil threads. Something that makes it unique is that it uses rayon for its core, meaning the metallic foil is wrapped around a core thread made of rayon.

7.png

Many companies opt for polyester as the core due to its strength, however we chose a rayon core because rayon has zero stretch to it. As polyester tends to carry more stretch to it, as the thread goes through all the bends in the machine, the thread can stretch around those corners, causing it to break. As rayon carries no stretch at all, this causes significantly fewer thread breaks and allows for a smooth sewing experience. It also means that stretching doesn’t pull the metallic foil away from the core, which would change the texture and reveal a different colour in the stitching.

8.png

We always recommend using a DecoBob 80wt pre-wound bobbin in the bottom with any metallic thread. As mentioned before, this will allow the bobbin to always give way to the top tension, resulting in fewer thread breaks and tension problems. Check out our video on sewing with metallic threads (without the headache) for a deeper look at sewing with metallic threads!

9.png

Thread Myth #4: Polyester Thread Cuts the Fabric So You Should Only Quilt with Cotton

This is one of the most common thread myths we hear because decades ago there was some truth to it. Since then, thread technology has made leaps and bounds in advancement, and polyester threads have become one of the easiest and best choices to sew with. Not only does the polyester thread not damage the fabric it is sewn into, it actually lasts longer and is more resilient than cotton over the years. It also carries next to no lint, meaning you’ll need to clean out your machine less frequently.

10.png

Let us know in the comment section if you learned something from this video or if you have your own thread myth to debunk. Inspired to sew with WonderFil threads? Head on over to shopwonderfil.com for a list of stores and retailers you can purchase from. You can also sign up for our free newsletter to receive more educational sewing tips, tutorials, and free patterns. Register by clicking here! We’ll see you again next time!

Introducing Spotlite™ 40wt Rayon Core Metallic Thread

Maura Kang

Metallic threads are a gorgeous choice for any decorative stitching, machine embroidery, or decorative quilting. They shine in a way no other thread can. But many people struggle to use metallic threads because they can be a little more fickle to sew with than others. Let’s take a closer look at WonderFil’s 40wt metallic thread called Spotlite and what makes this special thread stand out.

Metallic threads are designed with a thin metallic foil wrapped around a core made of another material. Many thread manufacturers will use polyester for the core because polyester is a strong, durable material. However, polyester also tends to carry a stretch to it. As the thread passes through the thread path in the machine and around all those bends, it can stretch around those bends, causing thread breaks. Stronger doesn’t always equal better in this case.

1.png

This is why WonderFil takes a different approach and uses rayon for the metallic thread’s core. Rayon carries zero stretch to it, meaning it won’t stretch around the bends in a machine’s thread path. This leads to fewer thread breaks and shredding, as well as a higher stitch quality.

We always recommend choosing a quality metallic thread as not all metallic threads are made equally. The quality of the thread you use will directly impact how easy it is to sew with, which is especially noticeable when using a metallic thread.

2.png

So, what can you use metallic threads for? The possibilities are truly endless. Because of metallic’s beautiful sheen, you can achieve a look and texture not possible with any other kind of thread. Even a single stitch of metallic can add a pop of sparkle to your quilts. Should you choose to quilt with metallic thread, we recommend using it only for art quilts, wall hung quilts, or small areas of decorative stitching on bed quilts, as metallic thread doesn’t have the same strength as regular quilting threads.

Quilting with Spotlite™ 40wt rayon core metallic.

Quilting with Spotlite™ 40wt rayon core metallic.

Denser stitching such as thread painting will really show off the iridescent beauty of Spotlite thread. Artist Teri Cherne stitched layers of Spotlite to create this stunning thread painted piece. You can also use it in the embroidery machine for a beautiful metallic look to your embroidery designs. This thread is an exceptional choice for freestanding lace patterns, and you can easily and quickly make freestanding lace ornaments for the holidays.

4.png

For best results, always pair Spotlite thread with a super fine bobbin thread like DecoBob 80wt cottonized polyester. This fine thread plays nice with any top thread, which makes a big difference in the stitch quality of a metallic thread. It will also further reduce thread breaks and shredding, and prevent tension changes.

You should also ensure you’re using the right needle for this thread. We recommend a 90/14 or 100/16 topstitch needle, or a 90/14 metallic needle. Topstitch needles have a larger eye, giving the metallic thread more space to move around and preventing the thread from shredding. Metallic needles are designed to shield the thread as it passes through the fabric, which also prevents shredding. Both needles are a good choice when using this thread. You can also use Spotlite on the longarm machine with a size 16 needle.

6.png
7.png

While metallic threads aren’t usually recommended for hand sewing, you can get away with it if you cut shorter strands. Choose a sharps needle with an eye large enough to fit the thread and only cut strands no longer than 18 inches long, or you may end up with tangling issues.

You can choose from a range of 40 different colours with Spotlite. Or pick up a Spotlite tube which includes 4 coordinated colours, as well as a free sheet of Wonder Guard.

7.5.png

If you haven’t used a Wonder Guard before, this handy little thread guard is a must for metallic threads. Simply wrap it around the spool, snugly but not too tightly, and you can actually sew with it on.

8.png

If you’ve used metallic threads before, you’ll notice they tend to have a curl to them, or a memory. This is the thread holding the shape of the spool it was wrapped around. A Wonder Guard will help pull those curls off the thread as the thread draws off the spool, preventing those curls from entering the machine and messing up your tension. They’re also perfect for storing the thread when you’re not using it!

9.png

For our guide on how to sew with metallic threads easily, don’t forget to check out our video, “How to Sew With Metallic Threads (Without the Headache)”.

Inspired to sew with Spotlite? Head on over to shopwonderfil.com for a list of stores and retailers you can purchase from. You can also sign up to receive weekly sewing tips, free patterns, and tutorials in our newsletter. Register by clicking here! You can unsubscribe at any time by clicking the unsubscribe button on the footer of every email you receive.

5 Clever Sewing Tips You May Not Have Thought Of!

Maura Kang

We have 5 of our favourite sewing tips, perfect for any sewist. These clever tips can help run your sewing room more efficiently and improve your projects!

1. This seam remover from Kai Scissors can be your new best friend! When you have to rip out your seams, carefully use this tool to cut speedily through the stitches. It will save you so much time!

1.png

2. When you are cutting small pieces out of a pattern, instead of using pins, try using Wonder clips to hold together the pattern pieces to the fabric. This way not only it will hold together the pieces firmly, but you will also have something to grab on to while cutting such delicate pieces.

2.png

3. Have you ever used cork or leather for a project and experienced big holes whenever you tried to pin them together? Plus those heavy weight materials always make it difficult for pins to go through, too! In this case, try using Wonder clips instead of pins. They can hold your material together without leaving any holes in your project!

3.png
4.png

4. How do you store your cutting mats? A good way to store them flat is to hang them using binder clips. This way, the cutting mat doesn’t take up too much space and also can prevent it from getting warped when it leans against the floor and a wall.

6.png
7.png

5. Do you ever find it hard to organize all your hand needles in the correct sizes and sometimes forget which one is the one you were looking for? Take an old pin cushion and mark each section with the needle sizes that you use. When you pull one out to put in your machine, mark the spot with a decorative pin!

8.png

Ready to start sewing? You can find a list of stores that carry WonderFil threads on www.shopwonderfil.com/shop-local/. You can also sign up to receive weekly sewing tips, free patterns, and tutorials in our newsletter. Register by clicking here! You can unsubscribe at any time by clicking the unsubscribe button on the footer of every email you receive.

Differences Between Thread Weights: Where to Use Them & How They Look

Maura Kang

Your standard thread will often come in a medium 40 or 50 weight. But a huge variety of other threads exist in super fine 100 weight, or super chunky 3 weight options too. In this video, you’ll learn how these different weights of thread will show up (or not be seen at all) and where they can be used for the best advantage. Sew like a pro when you understand how thread weight influences your stitching!

Whether you want the thread to blend in or sparkle and show off, choosing the right thread will make all the difference in your projects.

1.     Medium Weight Threads

These are the types of threads that you will most frequently find, most often 40 or 50wt. They can be used for most construction, quilting, machine embroidery, sergers, and general purpose sewing.

1.png

Medium weight threads can be made from all types of materials including cotton, polyester, rayon, and even metallic. This thread weight will blend or show up depending on what the material is made from. Therefore, a cotton will blend more than a metallic will. But if you really don’t want your thread to show, you may wish to consider a different weight.

2.png

2.     Fine Weight Threads

Fine weight threads run from 60wt to 100wt. These smaller threads are ideal for intricate work such as micro quilting and fine detailed machine embroidery like freestanding designs or monograming.

3.png

They can be made from cotton on the larger end to polyester on the finer end. The fine threads blend better and take up less space, so they’re ideal for hand & machine appliqué, stitch in the ditch, English paper piecing, and micro quilting. Dense quilting will also leave quilts softer, more flexible and lighter as the thread doesn’t take up as much space or add as much weight.

Quilting with InvisaFil™ 100wt, a light grey blends in with every colour.

Quilting with InvisaFil™ 100wt, a light grey blends in with every colour.

This 80wt cottonized polyester thread called DecoBob is our favourite piecing and bobbin thread. Because it’s so fine, it makes seams lay flatter and crisper when piecing. This is especially useful when it comes to foundation paper piecing or when you need to accurately match up patterns and blocks. It’s also incredibly strong, making it a reliable choice to hold your quilts and projects together.

Piecing with DecoBob™ 80wt.

Piecing with DecoBob™ 80wt.

As a bobbin thread it is unsurpassed. The fine thread can be paired with any top thread including thicker threads. It greatly reduces tension problems, lets your seams lay flatter and look more professional, and as a bonus, allows your bobbin to hold more thread since the fine thread takes up less space.

7.png

3.     Heavy Weight Threads

Heavy weight threads range from 12wt – 3wt. 12wt threads can still fit through the eye of a sewing machine needle, so you can do some incredible stitching with this thicker thread. Whereas 8wt and heavier threads are not recommended as a top thread.

8.png

Use 12wt for bold machine quilting, big stitch hand quilting, thread painting, decorative stitching, hand embroidery, sashiko, big stitch hand quilting, crafts, and even hemming jeans. When using it on the machine the thicker thread will stand up from the fabric giving you a wonderful textural effect.

Decorative stitching with Fruitti™ 12wt cotton thread.

Decorative stitching with Fruitti™ 12wt cotton thread.

8wt threads and thicker the most commonly used for hand embroidery. Even though they’re too thick to fit through the sewing machine needle, you can still do couching and bobbin work with it on a machine, or use it in the loopers of a serger. 8wt and thicker can also be used for the same things as 12wt, in addition to crochet and knitting.

10.png

Still have questions about thread weight? Let us know in the comments. Ready to start sewing? You can find a list of stores that carry WonderFil threads on www.shopwonderfil.com/shop-local/. You can also sign up to receive weekly sewing tips, free patterns, and tutorials in our newsletter. Register by clicking here! You can unsubscribe at any time by clicking the unsubscribe button on the footer of every email you receive.

7 Ways to Use a Sashiko Machine

Maura Kang

Sashiko is a hand technique originating from Japan that uses a simple running stitch, however this machine replicates the look of a running stitch done by hand. This amazing machine can do all sorts of things with this one simple stitch, however they can be a little pricey to buy. We’ve compiled 8 techniques you can easily do yourself on the sashiko machine so you know how to use every advantage it brings.

The sashiko machine ensures stitches are uniform and consistent, making it easier and faster to accomplish your project. It only has one kind of stitch and threads differently from a regular sewing machine because it only uses the bobbin thread and no top thread.

1.png

Traditionally sashiko is done with white cotton thread on indigo dyed fabric, however you can choose any colour of thread and fabric you want. With a sashiko machine, you can even do more than just decorative stitching!

2.png

You’ll want to choose a medium weight thread as the sashiko machine will double up the stitches. So if you have too heavy a thread, you’ll end up with shredding and stitch consistency problems. I’ll be demoing with two threads. The first is a 35wt thread called Silco. This is a synthetic cotton thread that’s completely lint free. The second is Konfetti, a 50wt Egyptian cotton thread.

1. Quilting:
If you love the look of hand quilting but don’t have the time or patience to quilt an entire quilt by hand, you can do it with the sashiko machine instead. This is also a great solution for anyone with arthritis in their hands. The sashiko machine gives you the look of hand quilting, but at ten times the speed!

3.png

2. Appliqué:
You can use the sashiko machine for raw edge appliqué. This is a simple but beautiful way to appliqué your pieces down with a simple running stitch and combines the traditional look of sashiko with your appliqué project.

4.png

3. Adding trims:
The sashiko machine is perfect for quickly adding trims to clothing or home décor items, with the advantage of giving it the hand stitched look. I like to add it to sleeve cuffs, collars, bags, or pillows.

5.png

4.Couching:
It’s really easy to do couching without the need for a couching foot like a regular sewing machine requires, however it will look a little different. Place the ribbon or yarn you want to couch down horizontally across the needle and take one or two stitches, then pull it over to the other side of the needle and take another stitch or two. Continue this process to finish couching it down!

6.png
7.png

5. Braiding:
Another method of couching with the sashiko machine that creates a different look is by braiding two threads back and forth in front of the needle. Take your yarn or ribbon and place the center of it in front of the needle so you’re holding both of the ends in your fingers. Take one or two stitches to secure it, then weave both ends opposite across the front of the needle and take another one or two stitches. Continue doing this and you’ll end up with a woven couched thread.

8.jpeg

6. Fabric flower:
Using organza or another similar lightweight fabric, you can create a flower by scrunching up the fabric and stitching over it so that the edges flare up. Take a piece of fabric, about 5 inches wide and 25 inches long, depending on how large you want the flower to be. Position it along the centre of the fabric and push it up against the needle before taking a few stitches. Continue doing this while slowly turning the fabric clockwise. You’ll end up with a beautiful fabric flower that’s perfect for decorating a birthday party, or upcoming baby or wedding shower!

9.png
10.png

7. Pleats:
You can easily add a decorative pleat on a piece of clothing or home décor item using the sashiko machine. Position your fabric where you want the pleat to fall from and push the fabric up against the needle. Take a few stitches to secure it and continue to press and stitch as you sew straight down. The result is a beautiful gathered pleat.

11.png

There’s so many creative ways to use the sashiko machine, so please tell us what you’ve made in the comments below! Ready to start sewing? You can find a list of stores that carry WonderFil threads on www.shopwonderfil.com/shop-local/. You can also sign up to receive weekly sewing tips, free patterns, and tutorials in our newsletter. Register by clicking here! You can unsubscribe at any time by clicking the unsubscribe button on the footer of every email you receive.

How to Choose the Right Machine Needle

Maura Kang

1.png

Due to the variety of fabrics and threads available on the market, needle manufacturers have quite a selection to choose from. Every needle has its own purpose, but how do you know which is the best one to use for your project? We’ll walk you through the different categories of needles, the anatomy of a needle, and when to choose a certain type of needle. We’ll be focusing on domestic sewing machine needles as these are the most widely used.

2.png

Part 1: The Anatomy of a Needle

Every needle is made up of roughly the same parts. On the front of the needle, you’ll see the point of the needle that pierces the fabric. Above that is the eye which the top thread runs through, and the groove which runs all along the shaft of the needle. This groove allows the thread to be nestled inside, protecting it as the needle runs through the material and keeping it out of the way so it can glide through the material without protruding, thus creating smooth and even stitches.

Above the shaft is the shank which is the part of the needle that is held by the machine. The shaft of most domestic sewing machine needles usually have a rounded front face and a flat back side to make it easy for insertion. At the top of the shaft is the butt which is the part that is inserted into the machine. The shoulder is the section between the shank and shaft. This is where most needle brands will add a strip of colour indicating the type of needle it is.

3.png

On the back side of the needle you will find the scarf, an indentation that makes it easier for the bobbin thread to grab the top thread and create a stitch. The length of the scarf will vary depending on the type of needle.

Part 2: Needle Sizing System

There are two ways to measure needle size, the American and European systems. Both are usually indicated on the packaging of the needle. American sizes usually range from 8 to 19, while European sizes range from 60 to 120. For example, the sizing on this Schmetz needle case indicates the European size on the left and the American size on the right. So a 90/14 needle means it’s a 90 in the European size and 14 in the American size. The larger the number, the larger the needle.

4.png

You will want to pair a smaller size needle with a finer thread and a larger needle with a larger thread. Using too large of a needle will cause the thread to sit in a hole too large for it, which can look ugly. And a needle that’s too small for the thread will cause excess friction from the thread pulling through too small of a hole in the fabric and won’t fit well in the eye of the needle, which will lead to thread breaks.

Part 3: Types of Needles

5.png

Universal Needles

Universal needles are intended for all-purpose sewing. It is recommended to use a universal needle for woven fabrics as it is designed with rounded edges and a tapered point, meaning the needle isn’t so sharp that it will shred the fabric. The shape of the needle allows it to slip through woven fabrics easily rather than cutting through it which can wreck the fabric.

1.png
6.png

Super Non-Stick Universal Needles

A popular new needle on the market is a super non-stick needle. These universal needles are coated with a super non-stick coating like the kind you’d find on a Teflon pan. This coating allows the needle to glide through tacky materials like stabilizer, which makes a huge difference in improving the stitch quality and consistency and preventing thread breaks.

Screen Shot 2020-05-25 at 5.34.40 PM.png
7.png

Ballpoint/Jersey Needles

Similar to universal needles, a ballpoint or jersey needle has rounded edges to avoid cutting the fabric. However, it differs in that it carries a much more blunted point in comparison to the universal, allowing it to slide between the weave of the fabric and preventing holes or runs in the knit fibres. It is best used for close knit fabrics such as jersey or interlock fabrics.

3.png
8.png

Embroidery Needles

Because machine embroidery involves a lot of high-speed stitching in a dense area, embroidery needles offer a larger, elongated eye that helps protect the thread, preventing it from breaking. The scarf is also specially shaped to prevent thread breaks and keep a consistent stitch quality at high-speed.

4.png
9.png

Topstitching Needles

Topstitching needles are designed with an extra-large eye and sharper point, allowing it to accommodate larger decorative top threads. Other specialty threads that are usually considered less strong, such as metallic threads, should also be used with this needle as the larger eye allows the thread the flexibility to move around more, preventing thread breaks.

5.png
10.png

Metallic Needles

These needles are similar to an embroidery needle in that they are designed with a larger polished eye and scarf to prevent the thread from shredding. These needles are intended for metallic threads.

6.png
11.png

Quilting Needles

Quilting needles are designed with an extra-long shaft and tapered point made to penetrate several layers of fabric and batting. Its slightly rounded point prevents damage to the multiple layers of material and keeps the thread from shredding.

7.png
12.png

Microtex/Sharps Needles

These needles are more slender and much sharper than most needles. They are designed to penetrate finely woven, delicate or microfibre fabrics, or for doing appliqué or quilting with fine threads.

8.png
13.png

Denim/Jeans Needles

Denim and similarly thick cotton fabrics like canvas may cause problems with other needles due to the heavy material the needle must sew through. This needle is designed with an extra strong and sharp tip, as well as a slender eye that aids the thread in gliding through the thick material and preventing skipped stitches.

9.png
14.png

Leather Needles

Designed for heavy and dense materials such as leather, artificial leather, and thick non-woven materials such as vinyl. Leather needles have a distinct triangular shape made to penetrate through these materials with a clean, large hole.

10.png

These are just some of the most common domestic sewing machine needles on the market. Let us know in the comments if you learned something new from this video or tell us about a sewing needle you can’t live without. 

Ready to start sewing? You can find a list of stores that carry WonderFil threads on www.shopwonderfil.com/shop-local/. You can also sign up to receive weekly sewing tips, free patterns, and tutorials in our newsletter. Register by clicking here! You can unsubscribe at any time by clicking the unsubscribe button on the footer of every email you receive.

5 Ways to Use Water Soluble Thread

Maura Kang

Usually a thread is meant to hold things together, not disappear when exposed to water! However, water soluble thread has a lot of fantastic uses that you may not have thought of before. (Pro tip: don’t forget you can’t lick the end of this thread when threading a needle). Here’s a list of 5 great ways you can use water soluble thread so you can both improve your sewing and sew more efficiently!

This is Rinse ‘n Gone, and like its name sounds, it will actually melt and disappear when exposed to water. Remember: Do not lick the end of it to help thread your needle! We also recommend storing it in a sealed bag in a dry place as direct exposure to liquid can wreck your spool.

1.png

Basting quilts or clothing:
There’s a lot of times you might want to baste when sewing a project together. The beauty of using water soluble thread is that you don’t have to pull the basting stitches back out when you’re finished with them!

You can use it to baste your quilt top in place to keep it from shifting when you’re quilting it. Start by positioning the piece you want to quilt using pins, then using a hand sewing needle threaded with Rinse ‘n Gone, make big basting stitches across the project, removing the pins as each section is secured. Now you can quilt my project without needing to worrying about quilting around the pins. The basting can easily be removed by putting the quilt or project in the washing machine on a gentle cycle, or simply scrubbing out the thread with a wet toothbrush.

2.png

Use Rinse ‘n Gone to baste clothing pieces together. Sometimes a pattern will call for easing in sleeves or gathering fabric, and a basting stitch is perfect to do that temporarily before you stitch it down permanently. Like a quilt top, just give your project a wash in the machine when you’re finished, or take a damp toothbrush or sponge and gently brush it away. The thread will disappear like magic.

3.png
4.png

Trapunto:
Water soluble thread works great when securing your initial layer of batting when doing trapunto. First, draw your trapunto design with a washaway marker. Now place two layers of high loft batting under your design and stitch around your raised layer with Rinse ‘n Gone thread in the needle, and a bobbin thread in the bottom, such as DecoBob 80wt thread. Turn your work around and trim the batting away close to the stitch line.

5.png

Next, layer your piece with your regular batting and backing. Quilt around your design as desired with your chosen quilting thread, leaving the raised layers unquilted. When your work is complete, simply wash your project or spray with water and brush with a toothbrush to remove the Rinse ‘n Gone.

6.png

Slashed textured fabric:
Here’s an interesting texture you can give your fabric. Using three layers of fabric, with the top two rights sides facing up, and the bottom right side facing down, hand baste it all together with big stitches using Rinse ‘n Gone.

7.png

When it’s all secure, load your sewing machine with a permanent sewing thread and sew straight lines across one end of your fabric to the other, about a half inch apart or following the edge of your presser foot.

8.png

When you’re finished, take a pair of scissors and snip only the top layer of fabric between the lines of stitching. Wash your project and give the raw edges of the fabric a brush, resulting in this textured fabric you can use on anything from quilts to bags, to clothing and accessories.

9.png

Perfect appliqué:
Take two pieces of the fabric, one you want to appliqué with and the other a scrap piece that can be discarded later. Place the appliqué fabric right side down. Load your machine with Rinse ‘n Gone in the bobbin and a regular sewing thread in the top. I’ll be using DecoBob, an 80wt cottonized polyester thread, since it will allow my appliqué to lay flat and make my miters sharper. Trace your appliqué shape on the fabric and sew along the lines. You won’t need to backstitch at the beginning or end.

10.png

Once you’ve gone all the way around, make sure you trim the excess fabric close to the sewing line. Remember to snip around all curves and into corners so you can have sharp, mitered lines.

Now you’ll have a piece that will need to be turned right side out. Snip an X through the middle of your scrap fabric to make a turning hole, being careful not to cut the fabric on the other side.

11.png

Take a hot iron and make sure the steam setting is as high as it will go. Press your appliqué with steam to make the soluble thread disappear. If that doesn’t remove all of the water soluble thread, you can also scrub it away with a wet toothbrush. The remaining top thread can be pulled out and discarded.

12.png

Now pull the fabric pieces apart, discard the scrap fabric, and you have a perfectly turned piece of appliqué that can be sewn onto your project. Choose either a decorative stitch with a medium to thick thread if you want the thread to show, or a fine thread with a zigzag stitch if you want the thread to disappear.

13.png

Stitching together small pieces of wash away stabilizer:
Do you have lots of smaller pieces of wash away stabilizer that you want to use in your embroidery machine, but they won’t fit in the larger hoop? Rinse ‘n Gone is the perfect way to sew those smaller pieces of stabilizer together because it will wash away with the stabilizer when you’re finished the embroidery. You can choose to use this as a top thread and bobbin thread in your machine, or stitch it by hand.

14.png

Holding down a design in a large embroidery hoop:
Sometimes when doing a smaller design in a large embroidery hoop, your project will end up shifting. Adding some basting stitches with Rinse ‘n Gone will prevent your embroidery from moving while the machine is stitching, and you can easily wash or brush away the stitches once it’s completed. By preventing the layers from shifting, your embroidery designs will be much less likely to pucker, especially with small or highly detailed designs.

Embroidery design without basting with Rinse ‘n Gone.

Embroidery design without basting with Rinse ‘n Gone.

Embroidery design with basting using Rinse ‘n Gone.

Embroidery design with basting using Rinse ‘n Gone.

Embroidery design after Rinse ‘n Gone is washed out.

Embroidery design after Rinse ‘n Gone is washed out.

Let us know how you like to use wash away thread in the comments, or share a project you made using Rinse ‘n Gone! Inspired to add Rinse ‘n Gone to your sewing room? Find it in one of your local stores at www.shopwonderfil.com or to order online.

5 Tips to Avoid Thread Breaks

Maura Kang

It’s a problem every sewist can relate to! We’ve all been there, but how do you know what’s causing your threads to break? Here are 5 tips to quickly help identify and resolve this common sewing issue!

Tip #1: Needle size and type

As a general rule it is always an important routine to check your machine needles. Oftentimes a thread break problem occurs when you have the incorrect needle. Before you sew, make sure your needle is the correct size for the thread you’re sewing with in the project. In both American and European sizes, the smaller the number shown on the package, the smaller the needle. The same goes for larger numbers. Smaller needles are good for finer threads, such as 80wt, and larger needles are designed for heavier threads such as 12wt. For reference, medium thread like 40wt or 50wt will often use an 80/12 size needle.

1.png

You should also make sure you have the correct needle type for the fabric you are sewing. For instance, you would use a denim needle when sewing heavy denim fabric. Or a ball point needle with jersey fabric. All needle types serve a purpose, so be sure to research what you need to achieve optimal results!

2.png

It is good to note the importance of the proper needle as the size and type will have a huge impact on the success of your project. Using an incorrect needle could be the cause of skipped stitches and tension issues that will also result in thread breaks.

3.png

Tip #2: Bobbin thread

Another cause of thread breakage could be your bobbin thread. Some bobbin thread of a lesser quality will either leave lint, fluff, or have adhesive residue which can interfere with the machine’s functionality. You should check out the bobbin’s casing and surroundings as the thread could be caught, tangled or running improperly as a result of it. As a result, we always highly recommend using a bobbin that doesn’t have any glue or residue applied to it. Threads that have residues applied will feel slightly tacky to the touch. For example, side-less bobbins are held together by glue to keep them together.

4.png

If you wound the bobbin yourself, be careful not to overwind the bobbin. This can happen easily with finer bobbin threads as the machine’s self-stopping mechanism doesn’t always detect the finer thread right away. If you wind your own bobbin, we recommend stopping slightly before the edge of the bobbin to avoid this.

5.png

We always recommend using a finer bobbin thread, such as DecoBob 80wt, to achieve better tension results. Because the bottom thread is smaller, it will reduce the bulk in the fabric and also always give way to the top thread, meaning your threads won’t be fighting for tension in the machine.

Tip #3: Tension

This is always an important factor to consider when sewing. Thread breaks can happen if the tension is too tight on either the top or the bottom. We always recommend sewing a test strip on a scrap fabric to check the quality of your tension before starting your project. If you see the bobbin thread pulling through to the top, it means the top tension is too tight and should be loosened.

6.png

If you see the top thread pulling through to the bottom, it means the bobbin tension is too tight and the bobbin tension should be loosened. Every machine is different, as are factors such as the type and weight of thread you’re using, the fabric you’re using, the batting and stabilizer. With so many different considerations at play, it’s best to always sew a test piece and adjust your tension as needed.

7.png

Tip #4: Cross Wound or Stack Wound Thread

If you’ve ever taken a close look at your thread spools, you may have noticed there are two different ways the thread is wound onto the spool. Stack wound thread is when the thread is wound on the spool in a straight and even pattern. Cross wound thread is the more common of the two and will be wound in an angled pattern. If you are sewing with a stack wound spool, your thread will need to draw off the side of the spool. This is easily done by placing it on the vertical spool pin of your sewing machine. If you are sewing with a cross wound spool, then you will need to draw the thread from the top of the spool. You can do this by placing it on the horizontal spool pin of the machine. Placing the spool on the wrong pin will cause the thread to drag across the spool, which will cause tension problems and can result in thread breaks.

8.png

Tip #5: Accessories

If you’re sewing with a specialty thread, it’s best to consider how some sewing accessories can enhance your sewing experience. If you have a slippery thread that tends to pool around the base of your spool, we highly recommend using a Wonder Guard™. Wrap this thread guard around the spool to stop the slippery thread from sliding down around the base of the cone, which can get caught, tangled, and change the tension of your thread and cause thread breaks.

9.png

In addition to this, a Thread Tamer is also great idea for slippery threads or threads that curl, such as metallic thread. Drawing the thread through the multiple slots will help pull those curls out of a metallic thread and also give the thread a chance to relax before it enters the machine. This is a huge benefit to slippery threads and metallic threads that tend to have these problems.

10.png
11.png

We hope this helps you understand the causes of thread breaks and the ways you could prevent them! Tell us in the comments if you have a question about thread breaks. Ready to start sewing? You can find a list of stores that carry WonderFil threads on www.shopwonderfil.com/shop-local/. You can also sign up to receive weekly sewing tips, free patterns, and tutorials in our newsletter. Register by clicking here! You can unsubscribe at any time by clicking the unsubscribe button on the footer of every email you receive. We respect your information.

5 Simple Sewing Tips for Your Sewing Room

Maura Kang

Sometimes it’s those simple things that can make your sewing room run more efficiently. Here’s 5 easy time-saving solutions that everyone can keep in mind to improve their sewing, all while working smarter, not harder!

1. When you are cutting several of the same size blocks, place a piece of masking tape on the ruler along the exact measurement. This way you can easily find the measurement each time and make your cutting a lot more efficient.

1.png

2. (This applies if you don’t have a built in needle threader.) When threading your sewing machine needle, hold a piece of white fabric or batting behind the needle so you can see the hole better. This will help you see where the hole is and make it easier and faster to thread your needle.

2.png

3. Heavy weight threads like our 8wt Razzle or Dazzle can be hard to thread in your hand sewing needle. Here's a handy tip! Take a strand of finer thread, like an 80 or 60wt, and tuck it part way through the eye in a loop. Run the larger 8wt strand through this loop and pull it straight through. Threading a heavy thread has never been this easy!

3.png

4. If you have trouble sewing a straight line, try placing a piece of painters tape or removable masking tape on the line where you want to sew. This will act as a guide to position your fabric and make it easier to sew a straight line.

4.png

5. When cleaning off your cutting mat, try using a piece of scrap batting to wipe across the surface your mat. The batting will catch all the thread strands and fabric bits and will clean faster than trying to pick up each individual piece.

5.png

Looking for more sewing tips? Join our newsletter for weekly tutorials, free patterns, and instructional videos! Sign up by clicking here. You can unsubscribe by clicking the “unsubscribe” button on the footer of every email.

How to Set up Your Embroidery Machine for the Best Results

Maura Kang

Machine embroidery can be addictive because it’s so easy to sew gifts, personalize your home, and make your plain clothes into something totally unique. An embroidery machine is an expensive but worthwhile investment. We’re sharing a few of our best tips to make sure your embroidery designs look better, sew easier, and ensure you get the most out of your embroidery machine.

1. Basting with water soluble thread

You may have heard about water soluble thread, but did you know it could make a huge difference in your machine embroidery? We stitched out this design with two layers of stabilizer on the backside of the fabric. However, because the design has a lot of sharp points, it creates a lot of puckering around it.

Embroidery design without water soluble thread.

Embroidery design without water soluble thread.

To stop this from happening, we’re going to stitch a circle of Rinse ‘n Gone water soluble thread through the fabric and stabilizer before stitching out the design. This holds the layers together much more tightly than the embroidery hoop will and stop the fabric and stabilizer from shifting.

Embroidery design with a ring of Rinse ‘n Gone water soluble thread stitched around the edge of the design.

Embroidery design with a ring of Rinse ‘n Gone water soluble thread stitched around the edge of the design.

Once the design is stitched out, the thread can be scrubbed out with a wet toothbrush if you don’t want to wash the whole embroidery. After a quick press, you can see how flat it looks in comparison to the embroidery design without the water soluble thread.

3.png

2. Using the best bobbin thread

Machine embroidery uses a lot of dense stitching in a small area, meaning your choice of bobbin thread will make a huge difference in how flat your embroidery design sits, as well as how much the bobbin thread will show through. We highly recommend using a finer bobbin thread, such as DecoBob 80wt, because the fine thread doesn’t add any extra bulk to the dense stitching and blends into the fabric better than a 40 or 50wt thread will. In the left part of this embroidery, we used a white 50wt bobbin thread. You can actually see the bobbin thread showing through the design. However below, we switched to a white DecoBob 80wt bobbin thread. Even though the thread is white, it can’t even be seen in the design.

4.png

Simply changing your thread can make a huge difference in the quality of your machine embroidery, but you can still take it one step further. In the left half of this embroidery we used a bobbin self-wound with DecoBob 80wt thread. On the right side, we used a pre-wound DecoBob bobbin. You can actually see how the left side has larger breaks in the embroidery while the right side lays flatter with tighter stitches. These pre-wound bobbins are wound perfectly evenly at the factory. This gives you a consistent machine tension that noticeably affects the quality of your machine embroidery.

5.png

To find out what bobbin size your machine takes, you can consult our Bobbin Guide by clicking here.

3. Apply a Wonder Guard™ for even tension and prevent unravelling

A Wonder Guard is this handy little thread guard that can be used on any spool of thread that requires a vertical feed. To apply it to your spool, wrap it around the spool snuggly but not tightly, with the feed of the thread coming from the top. This is a perfect tool for slippery threads that tend to pool around the base of the spool. It will also even the tension of the thread which will make a huge difference in the quality of your machine embroidery stitches.

6.png

If you’re embroidering with metallic threads that have a curl to it, also known as having a high memory, it will also help pull out those curls out before it even comes off the spool. And as an added bonus, the wonder guard will keep your threads tidy, clean, and even prevents it from drying out when you’re not sewing with it.

4. Using a Thread Tamer for perfect tension.

A Thread Tamer is a multi-purpose thread stand that offers a number of features to give you the best results in your stitching. If you’re sewing with a metallic thread that carries a lot memory, you can weave the thread through the extender slots to help pull out the tangles before the thread even reaches your machine.

7.png

At the same time, it’s tall enough to clear the top of the machine so it doesn’t drag along the side, changing the thread’s tension. It also allows the thread to relax before entering the machine, which is beneficial for finnicky threads or metallic threads. This combination of things will give your machine embroidery better tension, resulting in higher quality stitches.

8.png

Follow these tips for gorgeous, professional looking machine embroidery with any home embroidery machine!

Let us know in the comment section below if you have any machine embroidery tips you always follow, or share with us if these tips are things you’re already doing in your embroidery projects. Inspired to sew? Find WonderFil products in a store near you at shopwonderfil.com/shop-local.

6 Reasons to Always Use a DecoBob Pre-Wound Bobbin

Maura Kang

Ever wondered why you should bother using a pre-wound bobbin when you could always wind your own? These handy sewing accessories are absolutely not just for the lazy; they can make a HUGE difference in your stitch quality! We’ll demonstrate first-hand why you should always keep these 80wt DecoBob pre-wound bobbins in your sewing room.

They’re our little secret to effortlessly better tension, flatter seams, a beautiful stitch quality, and a bobbin thread that never seems to run out. If that sounds incredible to you, the secret is this little bobbin.

1. They’re Basically Invisible

Being an 80wt thread, it’s incredibly fine. You can see how the thread blends into the fabric behind it. Since it’s so small, it basically disappears. However, since this is a polyester thread, it’s also incredibly strong and can be relied on to construct your quilts and projects.

1.png

DecoBob is called a cottonized polyester. This is a 100% polyester thread that has been treated so that it no longer carries a stretch and has more of a matte finish, helping it blend into the fabric so it can’t be seen. That’s a great feature for a bobbin thread as an imperfect tension will help the bobbin thread hide if it pokes through to the top.

2. They Last Forever

Because the thread is so fine, the bobbin can fit way more thread in it. They also come wound with a much higher density of thread from the factory, so you can sew for far longer before you need to interrupt your sewing to replace it with a fresh one. Depending on the density of your stitching, you could piece and quilt an entire bed quilt with only 2 to 3 bobbins.

3.png

3. They Are Wound Perfectly Evenly

DecoBob pre-wound bobbins come wound perfectly evenly from the factory. If you’ve ever wound your own bobbin, you can see it filling a clump on one side before flowing back to fill the other side.

4.png

This unevenly self-wound bobbin will actually change the tension on your machine. To demonstrate, we embroidered one half of this tear-shaped embroidery using a self-wound bobbin with the same DecoBob thread on the left, and on the right we used a DecoBob pre-wound bobbin. You can visibly see larger gaps on the self-wound side than on the right side, which lays flatter with a higher top stitch quality.

5.png

4. Super Flat Seams

You may have heard a common sewing myth that states to always use the same weight of thread on the bobbin as you are in the needle. We’re here to tell you this is completely untrue. A finer bobbin thread will always benefit your sewing no matter what size your top thread is, however this is especially true when using thicker top threads like a 12wt. 

To demonstrate, we pieced three small blocks. On the left we used a medium 50wt construction thread on the top and the bottom. In the middle we used a 50wt in the top and the 80wt DecoBob in the bottom. And on the right, we used 80wt DecoBob in both the top and bottom. You can see how much flatter the seams are with the finer weight thread used. Using a finer weight in the top and bobbin will make your piecing look more professional and make it easier to match patterns and line up quilt blocks accurately. All of this from simply changing your thread!

6.png

5. Free of Glues & Residues

If you take a close look at the DecoBob thread, you can see its basically free of any lint. But here’s a dirty little thread industry secret to look out for: even if your thread looks like it’s low on lint, it may actually have a glue or residue applied to the thread to stick the lint down, only giving the illusion that it’s low lint. This sticky residue will come off inside your machine as you’re sewing and is even more difficult to clean out than regular lint.

We promise all of our DecoBob pre-wound bobbins come 100% totally free of any glue or residue. You can count on a clean, quality thread that will leave your sewing machines healthy and happy.

A sideless bobbin with glue applied to hold it together.

A sideless bobbin with glue applied to hold it together.

6. Re-Use It or Recycle It

All DecoBob pre-wound bobbins are wound on plastic sided bobbins. Re-use these bobbins again, use it to take some hand stitching with you while you travel, or check to see if your local recycling depot will take them.

8.png

Tell us in the comments your experience using pre-wound bobbins! Let us know if you still have questions about DecoBob pre-wound bobbins, or tell us where you love to use them. Ready to start sewing? You can find a list of stores that carry these threads on www.shopwonderfil.com/shop-local/.

How to Successfully Sew With Heavy 12wt Threads

Maura Kang

12wt thread is actually the thickest thread you can safely fit through the eye of your machine needle and can be absolutely stunning to use in any project. These bold stitches are perfect for eye catching designs, accents, and quilting that can really change the look of your sewing. However, since most sewing machines are calibrated for medium 50-40wt threads, sometimes you’ll need to make a few adjustments so you can sew with these thick threads.

1.png

You may not need to follow everything on our list to sew successfully with 12wt, in fact your thread will probably sew beautifully without much trouble. We’ve just compiled a list of helpful tips to help those who run into trouble, as well as easy adjustments to help your 12wt thread run through the machine smoothly.

Needles

The first and most important thing you’ll need to do is change the needle. If you’re using a 12wt thread in 100% cotton or rayon, we recommend a size 90/14 or 100/16 topstitch needle. If you’re using a specialty thread such as GlaMore™, a 12wt rayon that has a strand of metallic running through it, you can even use a 100/16 or 110/18 topstitch needle. Because of the metallic in the thread, having even more space in the eye of the needle for the thread to move around in will greatly reduce shredding and breakage problems.

2.png

We recommend using topstitch needles for heavier threads as they have a larger size eye and a deeper groove along the needle shaft. This helps the thread to sew more smoothly and reduce shredding.

An alternative to topstitch needles are super non-stick needles. If you’re sewing with 12wt thread through a layer of fusible, these needles will greatly reduce friction and help the thread glide through the material, which will also do a lot to prevent shredding and breakage issues.

3.png

Tension

Depending on your machine, you may also need to lower or increase the top tension slightly. Lowering the tension means to loosen it, and increasing the tension means to tighten it. It might be intuitive to lower the tension as the thread is thicker, and in some cases this will be true. However, we find that on other machines, you’ll actually need to tighten the tension for these thicker threads. The only way you’ll be able to tell which direction to go is to sew a test strip on a scrap piece of fabric.

4.png

You can tell if the tension is too tight if the bobbin thread is pulling through to the top. Alternatively, if you’ve loosened your tension too much, then your top thread will pull through to the bottom. A perfect stitch will have the top and bobbin threads nested in the center, between the fabric layers. You may also end up with a bird’s nest of thread on the bottom if the tension is set too tightly.

5.png

What you put in your bobbin will greatly impact your stitch quality and seam bulk. We always recommend pairing your 12wt top thread with a super fine bobbin thread. This is DecoBob™, an 80wt cottonized polyester thread that we recommend as your primary bobbin thread. You can see that this thread is a lot thinner than the 12wt. If you were to sew with 12wt in your bobbin as well as in the top, you’ll find that your seams will be very bulky and won’t look good. Your machine may also struggle to run both of these large threads, increasing the likelihood of shredding, and your stitch quality could also suffer.

6.png

Putting this thinner thread in the bobbin will help keep your seams flatter, reduce tension problems, and keep your stitch quality looking beautiful.

If do plan on using 12wt thread in the bobbin, such as for bobbin work, take extra precautions. All bobbin cases come calibrated for 40 – 60wt threads, so if you put a 12wt thread in there, the thread will be thicker than what the tensions are set for. It will be difficult to change the settings perfectly back to where they are set for medium weight threads, so we recommend purchasing an extra bobbin case where you can play with the tension settings.

7.png

You’ll want to loosen the tension slightly so the thread lays flat like its supposed to. Otherwise the stitches can look very tight, or you’ll pull the thread from the bottom to the top, or even pull the thread from the top to the bottom. Check out our video on changing bobbin case tensions to learn how to do this for yourself.

Stack Wound vs Cross Wound Thread

Check the direction your spool of thread is wound. All 12wt threads from WonderFil will look like this, which is referred to as cross wound thread. Other companies might wind their thread in a straight direction called stack wound thread. The general rule of thumb is that stack wound threads should go on your vertical spool pin, while cross wound threads should be used on the horizontal spool pin.

8.png

The reason for this is the direction the thread comes off the spool depending on how its wound. If you were to put the cross wound thread on the vertical pin, you can see that the thread drags coming off the side of spool. This adds an extra inconsistent tension to the thread, which will impact the stitch quality. When you place the same spool on the horizontal pin, you can see the thread draws from the top of the spool in a smooth motion with no extra pull.

Stitch Length

We suggest lengthening your stitch length to 2.5 – 3 to help reduce the density of the stitches. Because the thread is thicker, it will look dense with a regular stitch length. Increasing the stitch length will make it look more like a normal stitch. Keep in mind your normal stitch length is usually set at around 2.

9.png

Here’s some issues that might come up, and how to resolve them:

If you find the thread is shredding, it can be caused by a few different things. One reason could be the needle is too small. Too small of an eye, or the needle shaft not being thick enough, will cause a lot of friction on the thread which can lead to shredding and breakages.

A needle that is too small can also cause the thread to ball up and turn into a bird nest.

Another reason you might experience thread breaks could simply be that you’re sewing too fast. Slow the speed on your machine. This will also give the thread a chance to lay down smoothly in the stitches. Slowing down is especially important for decorative stitches because of the density of the thread.

Your top tension may also be too tight or too loose. If it is, this can lead to thread breaks and the bobbin pulling up through the fabric, or the top thread pulling under the fabric. Play with your top tension settings on a scrap fabric until you find the ideal setting for your machine. 

Keep in mind that not all of these problems will come up when sewing with 12wt threads. As every machine is different, you’ll find that in most cases, the thread will sew beautifully with minimal adjustments. This is just a comprehensive list of everything that could happen, and how to solve them in case they come up. 

What Kind of 12wt Threads Are There?

12wt threads can be used for all kinds of beautiful, bold stitching. It’s perfect for adding textural effects as you can see in this thread painting done with a 12wt Egyptian cotton called Spagetti™. Cotton gives you a beautiful matte finish paired with the natural look and texture of cotton. Because we used the thicker 12wt thread, you can see the thread stands out from the fabric, making it ideal for bold designs that you can touch.

Spagetti.jpg

You’ll also find 12wt threads in rayon, such as this 100% rayon thread called Accent™. Rayon is a smooth, soft, and glossy material with a lot of shine. We love using it for decorative designs and highlighting because of its light reflecting properties.

Accent1.jpg

Some other fun 12wt specialty threads can be used, such as this rayon and metallic thread called GlaMore™. GlaMore™ has a strand of metallic running through it, giving it the gloss and soft finish of the rayon mixed with the eye-catching sparkle of metallic. These are the threads you want to make an impact with your stitching!

GlaMore-threadpainted quilt-2.jpg

Consider using 12wt thread for any decorative machine stitching, bobbin work, couching, machine appliqué, machine quilting and big stitch hand quilting, or even run it through the loopers on your serger for decorative edging effects. These threads can give you a look you can’t achieve with regular medium weight threads, so don’t be afraid to experiment outside the thread box!

Have you used 12wt threads in your sewing machine? Let us know if you still have questions about these threads, or tell us where you love to use them. Ready to start sewing? You can find a list of stores that carry these threads on www.shopwonderfil.com/shop-local/.

Rayon vs. Polyester – What’s the Difference?

Maura Kang

Both rayon and polyester are an excellent choice depending on what you want to achieve in your project, but we’ll discuss when to choose one over the other as they both have their own unique qualities and benefits. We’ll discuss the finish, tactility, purpose, and additional factors to consider when sewing with each type.

WonderFil manufactures both rayon and polyester threads. We’ll be looking at the two with the most similar uses: Splendor™, a 40wt rayon, and Polyfast™, a 40wt trilobal polyester.

1.png

While rayon and polyester are used in many of the same techniques, they both have very different origins. Rayon is manufactured from wood pulp that is chemically dissolved and undergoes a multi-step process resulting in the soft, lustrous rayon fibres. Polyester on the other hand, is a synthetic material with long, stable fibres that gives it the strength it is best known for. It’s resistant to abrasion and many common household chemicals, including bleach, making it a reliable choice for almost any application.

Rayon is fairly universal in its appearance and finish, however polyester can come in many forms. You might come across terms such as “cottonized polyester”, “wooly poly”, “all-purpose polyester”, or “trilobal polyester”. While these are all polyester threads, they vary greatly from each other in terms of where they are used and how they appear. Trilobal polyester is the most comparable to rayon in appearance and use. Both materials are (usually) colourfast and safe to iron if it comes from a reputable manufacturer.

If you’d like to learn more about the different kinds of polyester thread out there, check out our other blog: Exploring Polyester Thread: Varieties, Differences, & Where to Use Them.

2.png
3.png

Let’s take a closer look at rayon. It has a natural gloss that carries across the stitching or embroidery. Whereas polyester has an artificial gloss where the light is more fractured in appearance.

4.png

Comparing their tactility, rayon is actually softer to the touch in comparison to polyester. This leaves your fabric more flexible if you were to densely stitch with it. Polyester is rougher to the touch compared to rayon, and leaves the fabric feeling stiffer when densely stitched.

So now that you’ve learned the characteristics of each thread, which thread material should you choose?

We don’t recommend using rayon if you require the project to endure abrasion, long periods of moisture or bleach/chemicals. This is because rayon is a material that weakens when exposed to moisture. Rayon will always make a beautiful impression wherever it’s sewn and is a popular choice for this reason. It’s a gorgeous choice when used for decorative purposes, such as appliqué or decorative quilting and not for holding quits together structurally, such as edge to edge quilting. Choose it for quilting small areas or appliqué on a bed quilt, or used in projects that won’t be subjected to a lot of washing and handling. For example, quilting wall-hung quilts or art quilts.

5.png

Polyester has resistance to bleach and can handle light bleaching. It can also handle abrasion, mildew, and most chemicals it encounters. However as it does have a tendency to feel less soft and smooth to the touch, and leaves fabric a little stiffer. This material also keeps its strength even when exposed to moisture and is a reliable thread to hold your projects together when used for construction. This makes it ideal for edge to edge quilting, piecing, or other structural purposes. You can also consider it if you plan on embroidery patches on a backpack or items exposed to the elements.

6.png

We hope this video helps you understand what to consider and create quality projects that will last! If you are unsure if a thread material will work for you, save your time and money by researching and being informed before you sew with it. Ready to start sewing? You can find a list of stores that carry these threads on www.shopwonderfil.com/shop-local/.

Introducing InvisaFil™ Ultra Fine 100wt Cottonized Polyester Thread

Maura Kang

1.png

Who knew a thread could get so small? Even though this thread is ever so little, it can make a huge impact in your projects. InvisaFil™ is fast becoming a favourite staple thread for English paper piecing, quilting, and needle turn appliqué, and has even been made into packs by Laundry Basket Quilts. Let’s take a look at what makes this thread so special.

2.png

You won’t find many threads on the market that are this thin. InvisaFil™ is a 100wt thread, which is incredibly fine. This is WonderFil’s solution to monopoly threads. You know, those plastic fishing wire type threads that come in clear or smoke. While those threads can hide in the fabric, they can still be seen under bright lights, and dense stitching done with them will leave your project feeling stiff and inflexible.

Quilting with monopoly

Quilting with monopoly

InvisaFil™ was created to negate these issues found in monopoly thread. Because the thread is so small, it not only hides incredibly well in the fabric, but it also doesn’t take up a whole lot of space in the fabric either. That means you can do a whole lot of dense stitching and micro quilting, and your fabric will still be soft and flexible.

4.png

It also comes in 60 different colors to better match your project. But you don’t need to worry about matching the thread too closely. InvisaFil™ in a neutral colour knows how to blend across a huge variety of shades. We used a light grey to quilt across this entire quilt, and as you can see, it blends across every color without a hitch.

5.png

Because it disappears so easily, this is the ideal thread for wherever you don’t want the thread to show. So you’ll just see the texture of your quilting, rather than the thread in the quilting. This also makes InvisaFil™ perfect for stitch in the ditch, because you won’t even see the thread if it falls out of the ditch. If you set your machine to a tiny zigzag stitch, it does an amazing job for invisible machine appliqué. You’ll need your glasses to even see the stitching!

6.png

InvisaFil™ works great on domestic sewing machines, midarms, longarms, and even embroidery machines. And in machine embroidery, this thread really loves to show off what it can do.

Delicate, highly detailed designs, monogramming, and small embroideries look even better when used with InvisaFil™ thread. This ultra-thin thread makes it possible to keep all the details in small or highly detailed designs that a regular 40wt embroidery thread won’t be able to. This includes lettering as the fine thread will keep edges looking sharp and crisp.

7.png

But InvisaFil™ isn’t just for machines, it’s also hugely popular for hand techniques such as hand appliqué or English paper piecing. As mentioned before, InvisaFil™ doesn’t take up a lot of space in the fabric, and it’s a master at hiding. Therefore, all your EPP pieces will sit tightly together without any thread showing between them. That means you can easily get away with a simple and quick whip stitch to do your EPP with.

The same rules apply with needle turned appliqué. Not only will your pieces sit flat and tidy, but you won’t even see the thread. Sometimes choosing the best tools for the technique is all you need for better results.

8.png

If you’re stitching with InvisaFil™ by hand, we recommend using a #11 or #12 sharps needle. If you’ll be sewing with it in the machine, you can use a 60/8, 70/10, or 80/12 machine needle. Inspired to sew with InvisaFil™? Head on over to shopwonderfil.com for a list of stores and retailers you can purchase from.

Comparing Hand Embroidery Thread Weights: 12wt, #8, #5, #3

Maura Kang

When doing hand embroidery, there are a number of thread weights to choose from. We’ll show you the difference between a 12wt, #8, #5 and #3 thread and how they show up differently in your stitches so you can choose the right look for your project. Choosing a variety of weights is the perfect way to give your hand embroidered project a unique look with different textures.

1.png
2.png
8.png
9.png
10.png
11.png

The most common size of hand embroidery perle cotton is a #8. If you’re just starting out or doing any general hand embroidery, this is the recommended thread weight. It shows off beautifully with all the different varieties of stitches, and the thread will pull easily through all kinds of fibres and fabrics. With this thread you will want to use a size 3 milliners needle. Our line of perle cottons is called Eleganza™ and comes in #8, #5 and #3 sizes with Sue Spargo. Let’s take a look at the other two sizes.

3.png

#5 is a little thicker than the #8 but still thinner than the #3. Many people prefer using this size over the #8 because they like how it stands out a bit more and adds a little more emphasis to the stitching. With this size thread, we recommend using a milliners size 1 needle.

4.png

The #3 is the thickest weight of Eleganza perle cotton and its size is comparable to yarn. While this thick thread might give some stitchers pause, all of the Eleganza line of threads go through a treatment called double gassing, which removes almost all the lint from its surface. This gives it a silky smooth finish that pulls much easier through the fabric while making your stitches look clean and tidy. It’s great for adding outlining and emphasis to any hand sewing project. We recommend a size 15 milliners needle with this thread.

5.png

Finally, we have these 12wt threads called Spagetti™ and Fruitti™. Both of these threads are a long staple Egyptian cotton that has also been double gassed for a super low lint finish so your stitches will look clean and beautiful. A 12wt thread is comparable to a single strand of embroidery floss like what you would get when you split the strands. This is perfect for any small or fine detail stitching, or if you’re stitching on a fabric with a higher thread count.

6.png
7.png

These are just a few stitches to show you the difference thread weight can make in hand embroidery. Experiment with them yourself and show us what you stitched by tagging us on Facebook or Instagram! Facebook @wonderfil or Instagram @wonderfilspecialtythreads or by the hashtag: #wonderfil.

How to Sew Lightweight or Sheer Fabrics (Organza, Tulle, Chiffon)

Maura Kang

Lightweight or sheer fabrics such as organza, tulle and chiffon can often be tricky to sew with as they are slippery and don’t have a lot of stability. We’ll cover our best tips for sewing with these tricky fabrics problem-free, while achieving perfect results!

Before you even begin sewing, you’ll have to cut the fabric pieces out first. Because these fabrics can be so slippery, it’s very difficult to get a straight edge, even if you’re very careful. Should you find this is the case, you can place a sheet of tissue paper or wax paper under the fabric and pin them together using thin appliqué pins. These pins are less likely to cause snags or puckers in the fabric. Then go ahead with cutting. Because the paper has more friction on it than a cutting mat does, the fabric won’t slide around as much. The paper also acts as a stabilizer which will still help even if you’re cutting it out with scissors.

2.png

3.png

You should also consider the thread that you’ll be sewing with. Because these fabrics are so light and sheer, you can see right through it, meaning your stitches will also be visible. We strongly recommend sewing with a lightweight thread called DecoBob™. This is an 80wt cottonized polyester that’s very strong, so you can rely on it if you’re sewing gowns or any kind of structural sewing. Because it’s so fine, it will hide in the fabric a lot more in comparison to a regular weight thread.

Sewing with sheer fabrics using a regular 50wt thread.

Sewing with sheer fabrics using a regular 50wt thread.

Sewing with sheer fabrics using DecoBob™ 80wt thread.

Sewing with sheer fabrics using DecoBob™ 80wt thread.


6.png

For rolled hems or darts, you can use this even finer thread called InvisaFil™. This is a 100wt thread that’s even smaller than DecoBob™ and won’t take up a lot of space in the fabric. This allows your stitches to stay flat and won’t be visible through the sheer fabric.

7.png

The needle you use will also make a huge difference in the quality of your stitches. Switch to a sharps needle as these have a thin, sharp point that will easily pierce through fine fabrics. If you are sewing with DecoBob™ or InvisaFi™l, an 80/12 or 70/10 microtex needle will work just fine.

8.png

Leave the tissue or wax paper on while you sew. The extra layer will help stabilize the fabric as you sew so that it doesn’t get sucked down into the machine. You should also decrease the stitch length on your machine to at least 1.8. Once you’re finished sewing a seam, you can easily tear away the paper.

Keep in mind when pressing these lightweight fabrics that many of them prefer a lower heat setting. So don’t have your iron on high heat when pressing your seams open.

9.png

We hope these tips make it easier for you to sew with these lightweight fabrics! Let us know in the comment section what project you’ll be sewing, or share something you made using WonderFil threads! Instagram @wonderfilspecialtythread or on Faceback @WonderFil, or use #wonderfil to tag us.

Comparing 100wt vs 40wt vs 12wt for Quilting

Maura Kang

Did you know you can really change the look of your quilting simply by your choice of thread? We’ll compare the weight of three different thicknesses of thread when used for quilting so you can see how dramatic the difference is! This is a great way to achieve a new look in your quilted projects. 

InvisaFil™ 100wt: Blends very easily into your fabric so it can’t be seen. Awesome for keeping your quilts flexible even with dense stitching and showing just the texture of the quilting and not the thread.

Ultima™ 40wt: Your standard weight quilting thread. A strong and versatile medium weight thread that shows just a bit, and not too much.

Accent™ 12wt: A lusciously thick thread that loves to show off. This bold choice was made to stand out and make your quilting look juicy.

1.png

Here is a piece of fabric with the batting and backing layers included like you would have on a regular quilt. Before beginning, we’ll load the machine with a DecoBob™ prewound bobbin. These come already wound with an 80wt thread called DecoBob, This is an excellent bobbin thread because not only is it super strong, but it’s also super fine. This will greatly reduce the bulk in the quilting and also give a better tension, which will result in a better stitch quality. It’s also going to make a huge difference when sewing with the 12wt thread when we get there.

2.png

3.png

Let’s start with the 100wt thread. This thread is called InvisaFil™, and it’s a super fine 100wt cottonized polyester. This is perfect for blending into your fabric so it won’t be seen, making it ideal for showing the texture of your quilting without showing the thread. It’s also awesome for keeping your quilts soft and flexible even when doing dense stitching because the thread doesn’t take up a lot of space in the fabric.

Because it blends in so well, you can really just get away with just using a light grey for bright colours, darker grey for darker colours, or a beige or brown for warmer tones. Matching the colour perfectly makes it nigh invisible. However, a contrasting colour will still give you a thin stitch that shows a little. InvisaFil™ 100wt thread is your perfect choice for dense quilting or wherever you don’t want the thread to show up.

Matching colour

Matching colour

Contrasting colour

Contrasting colour


6.png

Next let’s take a look at the 40wt thread. There are a ton of 40wt quilting threads on the market, but the one I’m using here is an interesting one. This is called Ultima™, and it’s actually a cotton wrapped poly. That means it has a strong polyester core that sews easily and reliable like a polyester thread, but it’s wrapped in cotton giving you the quilted look of cotton. This is actually one of the cleanest wrapped threads on the market, meaning it won’t give off a whole lot of lint.

You may already be familiar with how a 40wt thread looks when it’s stitched out. While it’s going to be more visible than the 100wt InvisaFil™, it still isn’t going to make a huge impact if you’re using basic colours or ones that match the fabric. Choosing a contrasting colour will stand out a lot more, however. This is going to be your standard, do-all thread for every type of quilting.

Matching colour

Matching colour

Contrasting colour

Contrasting colour


9.png

For our last thread comparison, we’re pulling out this chunky 12wt. 12wt is actually the thickest size thread you can safely fit through the eye of your sewing machine needle, so you will also need to use a slightly larger needle. I’ll be using a 90/14 topstitch needle because it has a larger eye for the thread to move around in.

10.png

This thread is called Accent™ and it’s really all about going bold. It’s actually a 100% rayon thread, so if you want to do any edge-to-edge quilting with a 12wt thread, I would instead recommend a 12wt cotton instead like Spagetti™. Rayon tends to weaken when exposed to water, so this thread is great for adding accents and doing decorative elements, or for wall hanging quilts and art quilts. 

This is a truly beautiful thread because it has a soft lustrous shine to it that catches the light. It’s perfect for any decorative quilting or outlining because of how bold it is. Your quilting will really stand out. Choosing a matching colour adds a beautiful subtle textural effect, while contrasting colours will really pop.

Matching colour

Matching colour

Contrasting colour

Contrasting colour

Looking at all the weights side-by-side, you can really see what a difference your choice of thread will make in your quilting. I hope this helps give you a better idea of what choices are out there, and what thread to choose for your next quilting project!

13.png

If you use these threads, don’t forget to tag us on facebook @wonderfil or Instagram @wonderfilspecialtythreads or by the hashtag: #wonderfil to show us your quilting creations!

Exploring Polyester Thread: Varieties, Differences, & Where to Use Them

Maura Kang

Have you ever noticed all the varieties of polyester thread on the market? While it all might be made from the same base material, polyester comes in all kinds of different treatments and finishes, giving them completely different uses and appearances. In this video we’ll go through a wide variety of polyester threads you’ll come across, as well as how you should use them and how they’ll look when stitched out.

1.png

Trilobal Polyester
Trilobal polyester is a gorgeous and shiny thread that loves to show off. The word “tri” in trilobal refers to the shape of the thread which is actually triangular in shape. The flat sides of the thread reflect light much better than a round thread does, making it a shinier thread that is meant to stand out.

2.png

Use trilobal polyester in the embroidery machine for gorgeous results. It’s also a popular quilting thread when you want your quilting to have a little pop of shine. Because this thread is made to stand out, it’s a great choice for outlining, thread painting, or appliquéing a design down, such as with a satin stitch.

3.jpg

4.png

Monopoly or Monofilament Thread
This is a thread commonly used when you want to sew something without the thread showing. These threads usually come in clear or smoke and are semi-translucent to help them blend into the fabric. However due to the limited colour range of these threads, they can still be seen when sewn over contrasting patches in the fabric and under bright lights. They are also stiff and inflexible when sewn in the fabric, making it unideal for dense stitching, and are semi-reflective, showing up under bright lights. Many people use these threads for quilting, stitch in the ditch, appliqué, or couching.

WonderFil does not manufacture monopoly thread as we consider a lightweight cottonized polyester to perform the same techniques at a consistently higher quality.


6.png

Cottonized Polyester
Cottonized polyester is particularly unique because it undergoes a special treatment to take out most of the shine from the thread. This treatment also removes the stretch from it, making it incredibly easy to sew with and making it ideal for piecing and quilting when stretch in the thread is unwanted. While it might be called a cottonized polyester, there is actually zero cotton in the thread. This 100% polyester material is simply called this due to its matte finish and lack of stretch, meaning it looks similar to and sews easily in the machine like a cotton does.

Finer cottonized polyester threads keep their strength even at such a small size, which does wonders for piecing, especially foundation paper piecing and English paper piecing as the thread takes up significantly less bulk in the fabric, allowing seams to lay incredibly flat. And because the thread carries more of a matte finish, it hides in the fabric very easily, blending into the colours behind it with ease. This makes it an ideal replacement for monopoly threads that have an inflexible plastic feel and can still be seen under bright lights.

7.png

Finer cottonized polyester threads are great for quilting when you just want the texture of the quilting to show and not the thread. It’s also perfect for stitch in the ditch, bobbin thread for any top weight thread, and can even be used in the embroidery machine with better results in digitized lace and highly detailed or shrunken designs. Cottonized polyester also comes in medium weights and is a hugely popular material for longarm and midarm quilting. This easy to sew thread is recommended for beginner quilters, or those that want a strong and reliable thread that can sew in multi-directions.

8.png

WonderFil Cottonized Polyester Thread Lines:
- InvisaFil™ 100wt
- DecoBob™ 80wt
- Master Quilter™ 40wt


9.png

Wooly Poly
This fun thread is incredibly flexible, being able to stretch and shrink depending on if it’s relaxed or pulled taught. They’re designed to be used in the serger and its stretching properties make it universally adored for knits and stretch fabrics. Wooly poly thread is recommended for rolled hems, garments, dance wear, swim suits, fitness wear, napkins, and finishing the edges of stretch materials.

10.png

WonderFil Wooly Poly Thread Lines:
- SoftLoc™ tex 35


11.png

Cotton Wrapped Poly Thread
Because polyester is such a strong and easy thread to sew with, it’s highly preferred by many sewists. However, what if you want to sew with the ease of a polyester thread, but prefer the look of cotton? Thread manufacturers have come up with thread that has a polyester core but is wrapped on the outside with cotton fibre. This hybrid thread combines both materials into an ideal sewing thread with the natural look and finish of cotton. These threads are most commonly used for quilting and general sewing, and are frequently used on longarm and midarm machines.

12.png

WonderFil Cotton Wrapped Poly Thread Lines:
- Ultima™ 40wt


13.png

Enhanced Multi-Filament Polyester
An enhanced multi-filament polyester is designed for ultra-strength, best used for heavy-duty sewing on thicker materials such as leather, pleather, vinyl, cork, and upholstery fabrics. You’ll want to choose this thread when you want to give your projects more durability, such as when sewing wallets, bags, purses, or home décor. In a thicker weight, it also provides a beautiful decorative stitch on your projects.

14.png

For best results, we recommend pairing any weight of an enhanced multi-filament polyester on the top with a 60wt of the same thread in the bobbin. Because this thread is so incredibly strong, it should be used with itself top and bottom, with the lighter 60wt in the bottom to help seams lay flatter and promote better machine tension for higher quality stitches.

15.png

WonderFil Enhanced Multi-Filament Polyester Thread Lines:
- HomeDec™ 30wt, 40wt, 60wt


16.png

All-Purpose Polyester
This is the most generic and one of the most commonly found polyesters. It isn’t made to be used to show off, but rather behind the scenes in constructing garments, dresses and wedding gowns, and in sergers. This thread carries a little bit of stretch to it, which is great for clothing, as it has a little more give in the seams. No one wants to hear the dreaded “pop-popping” of stitches being snapped out. An all-purpose polyester tends to be lower in cost, versatile, and can be used for any general sewing.

17.png

WonderFil All-Purpose Polyester Thread Lines:
- Designer™ 40wt

Tell us how you like to use polyester threads in your own projects, or share something you made with us using WonderFil threads! Instagram @wonderfilspecialtythread or on Faceback @WonderFil, or use #wonderfil to tag us.

How to Sew Heavy Specialty Fabrics (Leather, Vinyl, Cork)

Maura Kang

If you’re working on a project that requires a heavy material such as pleather, vinyl, or cork, don’t fret. While these materials might seem a little intimidating if you don’t have a lot of experience sewing with them, they only require a few simple adjustments. Simply using the right needle, thread, and understanding the material is all it takes to sew with these fabrics and easily as any other!

0.png

The tools you sew with can make a big difference. Consider swapping out your regular needle for a super non-stick universal needle. These needles have a coating on them that glide through the material and is especially useful if you have a tacky stabilizer underneath. If you’re sewing through a particularly heavy pleather or vinyl material, you can also switch to a leather needle. Leather needles are designed for piercing through these particularly resistant materials.

1.png
2.png

You can also change your presser foot for a non-stick or Teflon presser foot when sewing on pleather or vinyl. These materials can stick to the bottom of a regular presser foot, which impacts your stitch quality. These non-stick feet have a super slick surface that prevents that from happening.

Pictured: Non-stick sewing foot

Pictured: Non-stick sewing foot

If you don’t have a non-stick presser foot or they aren’t available for your machine model, you can also use a walking foot. These feet are designed to provide a second set of feed dogs from the top of the fabric, which helps push these specialty materials through.

Pictured: Walking foot

Pictured: Walking foot

The thread that you sew with is also important to think about. Because cork, pleather and vinyl are much thicker, you’ll want to use a stronger thread to keep it together. Especially if the project you have in mind will require some durability. 

HomeDec™ is an enhanced polyester thread designed for extra strength. It comes in three weights: 30wt, 40wt, and 60wt. Because this thread is so strong, we don’t recommend using a normal bobbin thread with it. Always use the 60wt HomeDec™ in the bobbin with itself. The slightly lighter weight thread will help reduce the seam bulk, which is especially useful when dealing with thicker materials.

5.png
6.png

On your sewing machine, consider increasing the stitch length slightly. With pleather, vinyl, and cork, you’ll be piercing the material with permanent holes. Having the stitch length too low means the holes will be close together, causing damage to the material and compromise its durability. Since you’ll be sewing with an enhanced strength thread like HomeDec, the thread will easily compensate for holding together your seams even with the longer stitch length.

7.png

Because holes pierced through these materials are permanent, you won’t be able to use pins without leaving ugly holes behind. You can instead hold your pieces together using wonder clips. These will pinch your material together without needing to put holes in them.

8.png

But what about if you need to clip something that isn’t close to the edge, such as appliqué? Unfortunately, many pleather and vinyl materials will melt even on very low heat, making it impossible to use an iron-on appliqué. Take some scotch tape and tape over the appliqué piece so it doesn’t shift. You can then stitch through the tape and around the appliqué with a straight or decorative stitch to hold it down permanently. Afterwards pull away the bits of tape to clean it up.

9.png

Since you can’t use an iron on many pleather and vinyls, we recommend using a seam roller to help press your seams. This tool is a must for any material that can’t be ironed and is much more effective than simply finger pressing open a seam.

10.png

We hope these tips make it easier for you to sew with these heavier specialty fabrics! Let us know on on social media what project you’ll be sewing with pleather, vinyl, or cork. Instagram @wonderfilspecialtythread or on Faceback @WonderFil, or use #wonderfil to tag us!