Contact Us

Use the form on the right to contact us.

You can edit the text in this area, and change where the contact form on the right submits to, by entering edit mode using the modes on the bottom right. 

2915 19 St NE
Calgary, AB, T2E 7A2

18662506101

WonderFil Specialty Thread Blog

WonderFil brings you the latest news, events, upcoming thread lines and special tips and advice. Follow WonderFil Specialty Threads on our social media: Facebook, Instagram, Twitter, Pinterest, and Youtube.

Filtering by Tag: pattern

Free 4th of July & Canada Day Iron-On Patch Tutorial!

Maura Kang

Making your own iron-on patches is easy and full of possibilities. This is the perfect way to get creative and personalize jackets, hats, backpacks, and even suitcases. We’re celebrating Canada Day and the 4th of July with these adorable iron on patches. We’ll show you how to make your own with these embroidery designs included free for download! Once these patches are complete, you can either sew them or iron them on to whatever you like.

Free embroidery design download: https://www.wonderfil.ca/embroidery-design

We are going to use a plain white canvas type material as our base. Denim also works well for patches, but you want to choose a fabric that is fairly firm and has some body.

1.png

For the stabilizer, we have chosen this sticky stabilizer to keep our canvas nice and flat. You could also choose to hoop your fabric with a good cut- away stabilizer. If you choose a sticky stabilizer or an adhesive spray, you may want to use a super non-stick needle, so your needle runs smoothly through the fabric.

2.png

We’re choosing to stitch our design with PolyFast. Polyfast is a 2 ply trilobal polyester thread that has a brilliant sheen, and it is strong enough to withstand a fair bit of abuse, should you decide to put the patch on a bag. Polyfast is available in 210 colors, so you can easily find the right color for every design.

3.png

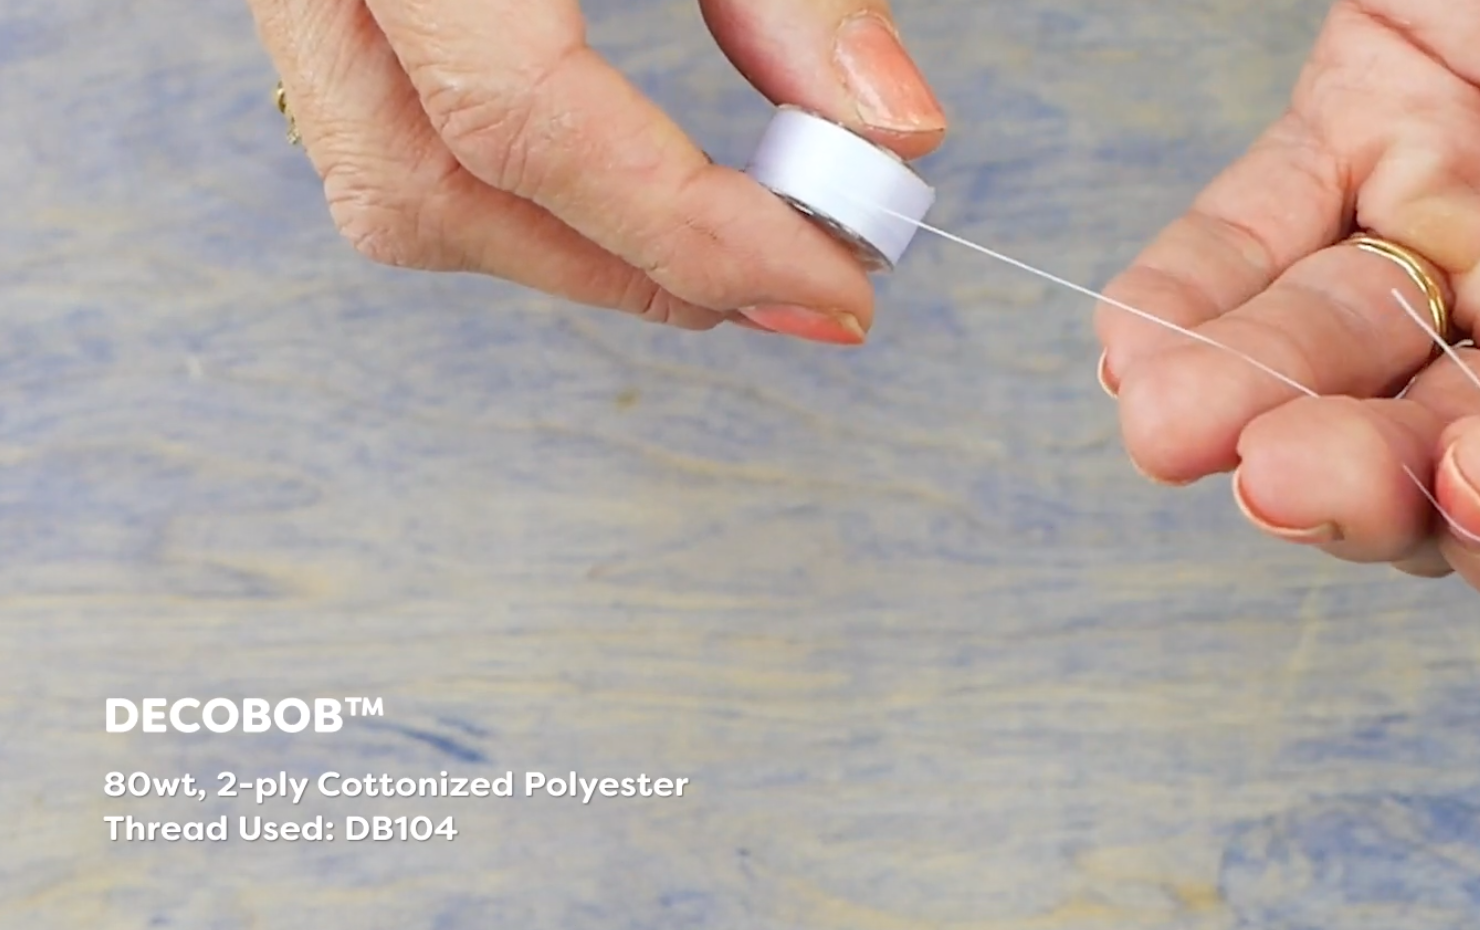
We’ll pair it with this 80 wt DecoBob prewound bobbin, to keep the design soft and the tension consistent. We always recommend a fine bobbin thread like DecoBob, especially with embroidery designs, as it will give you a better stitch consistency with all of the dense stitching involved with embroidery.

4.png

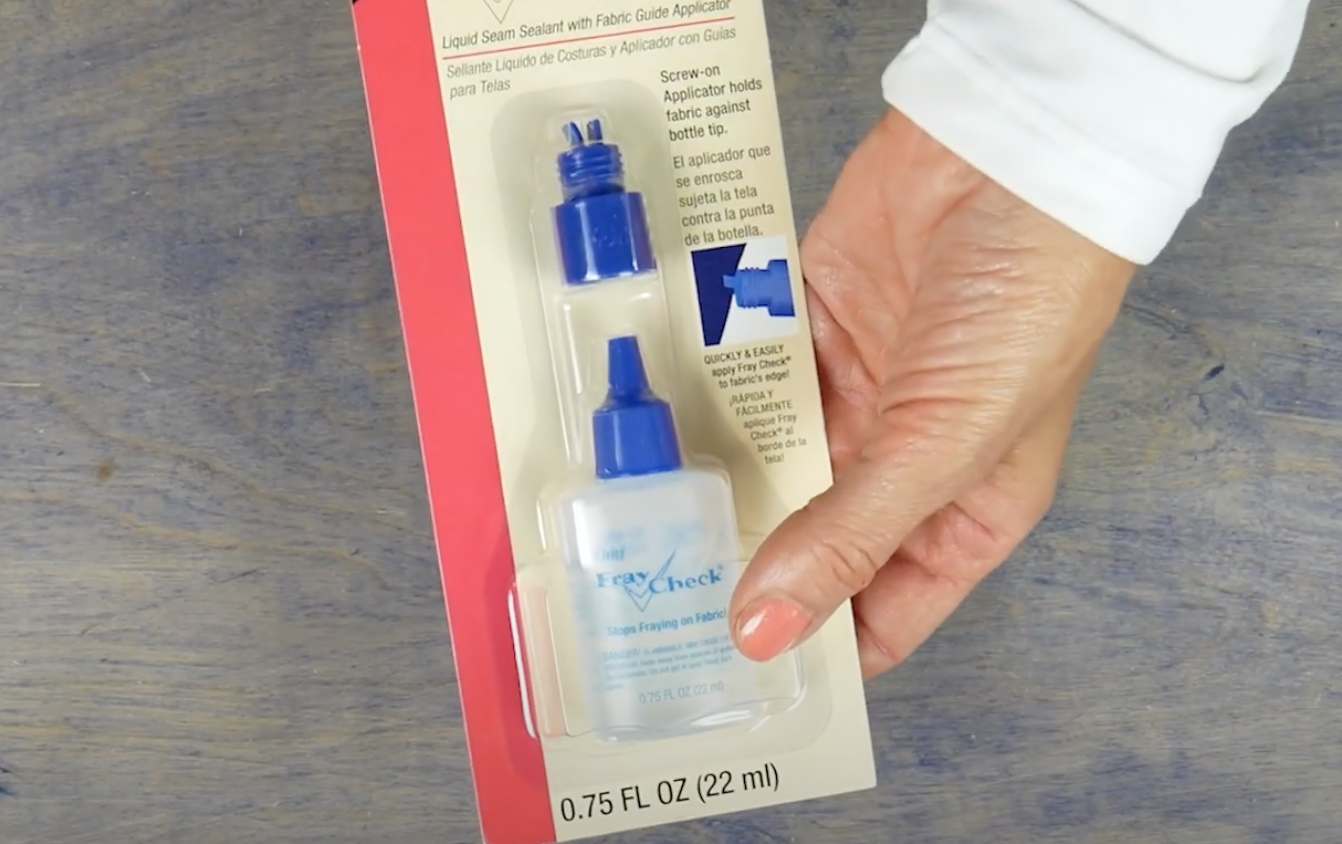
You will also need some fusible web, such as Heat n Bond, and some Fray Check.

5.png
6.png

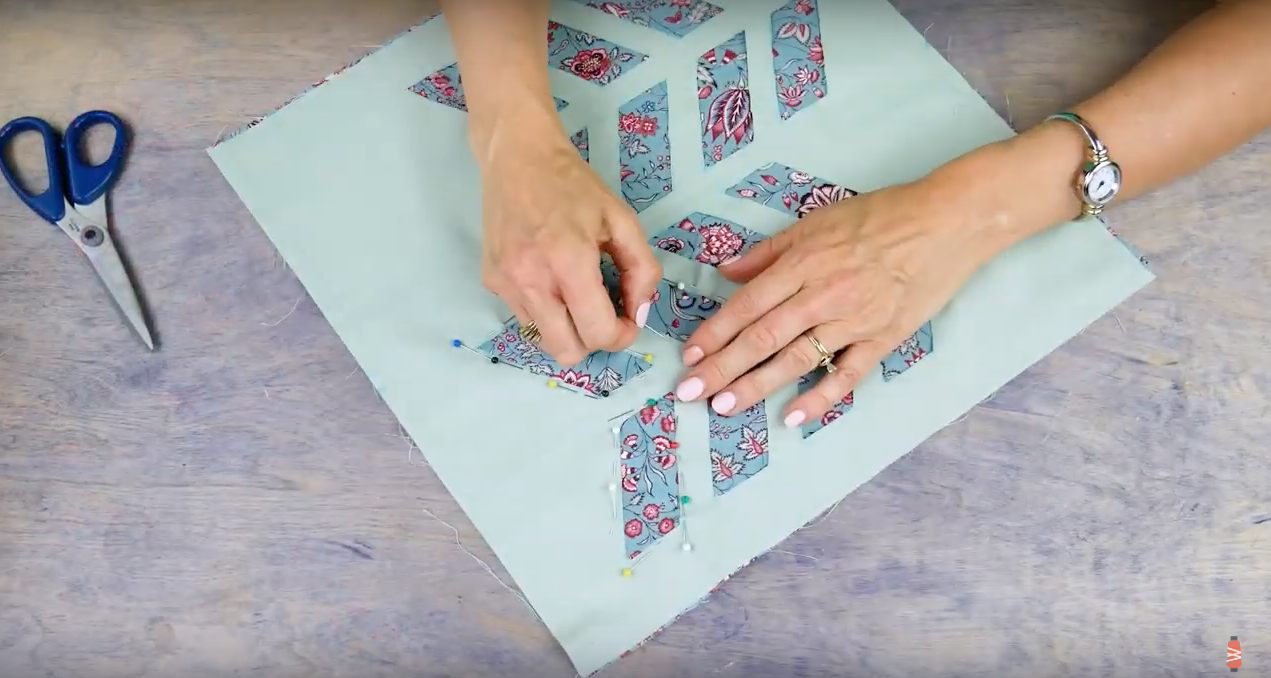
Hoop the sticky stabilizer paper side up in your hoop, then score around the edges with a pin and pull up the paper to reveal the sticky side. Smooth the base material over the center of the hoop. We are also going to float a heavier stabilizer under the hoop to give the patch a bit more body.

7.png
8.png

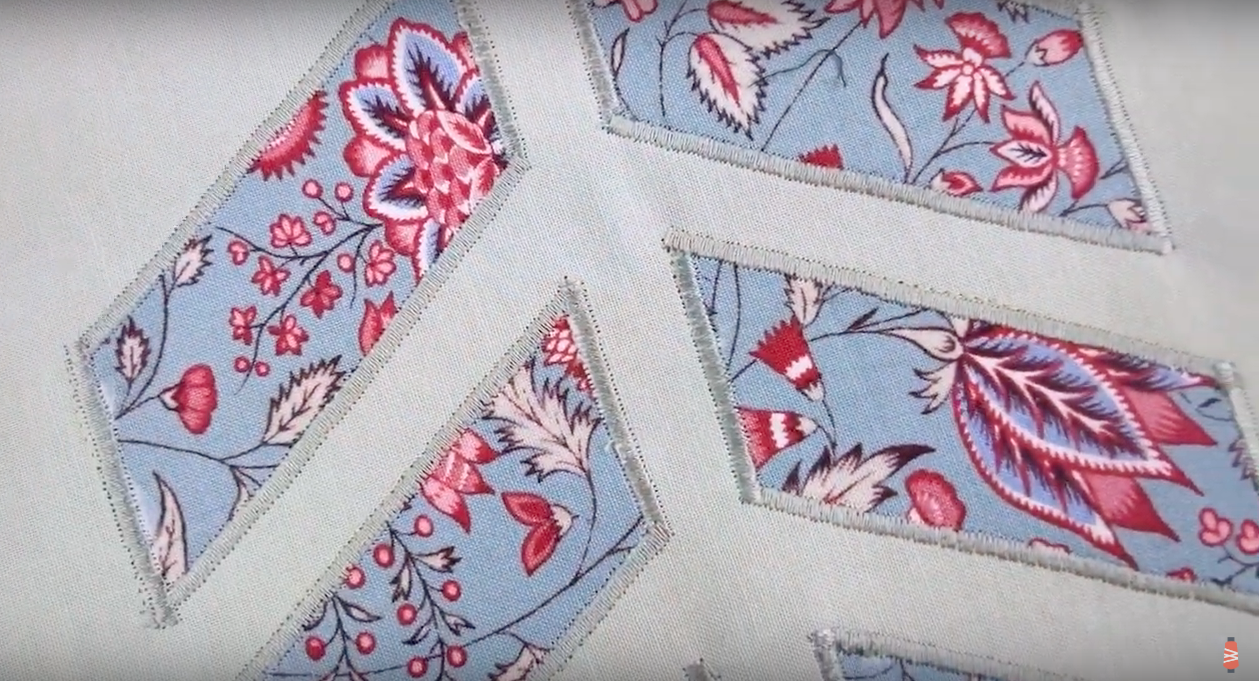
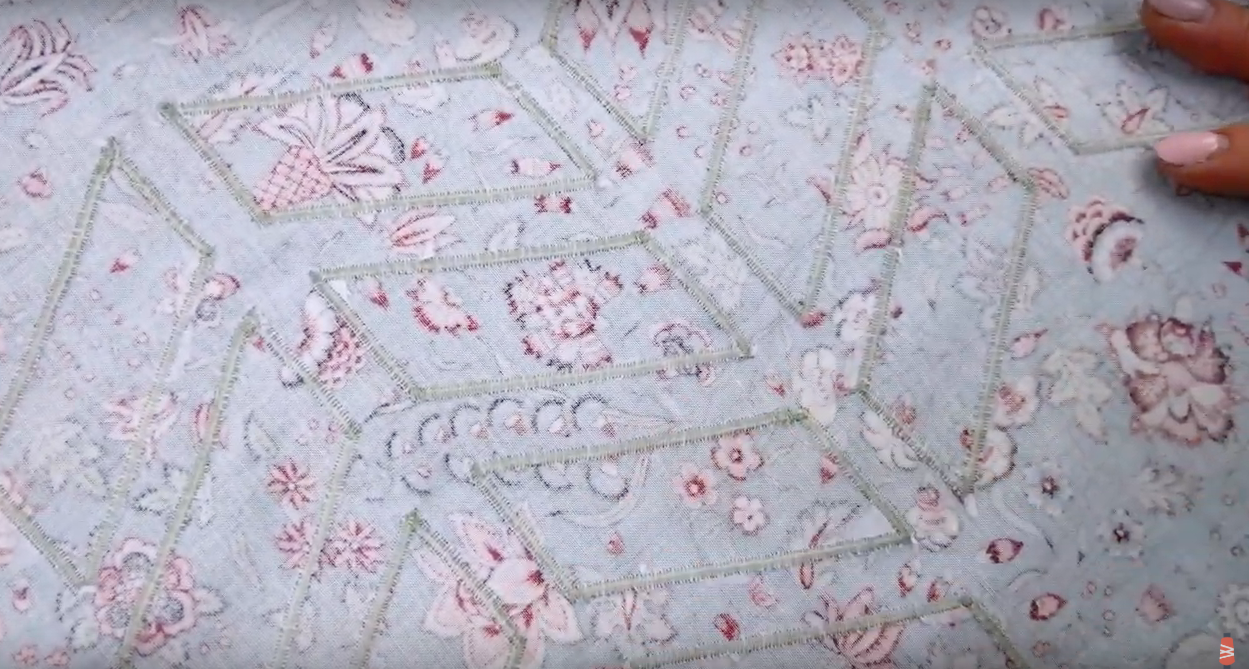
Open the design in your embroidery machine, thread your machine with the first color, then begin to stitch out the design, changing colors as indicated on the machine.

9.png

Once your design is completely stitched out, remove the fabric and stabilizer from the hoop and cut around the design, about 1/4” from the border stitching.

10.png

Turn your patch wrong side up, then place a piece of Heat n’ bond, paper side up and with the fusible side against your patch, and iron in place.

11.png

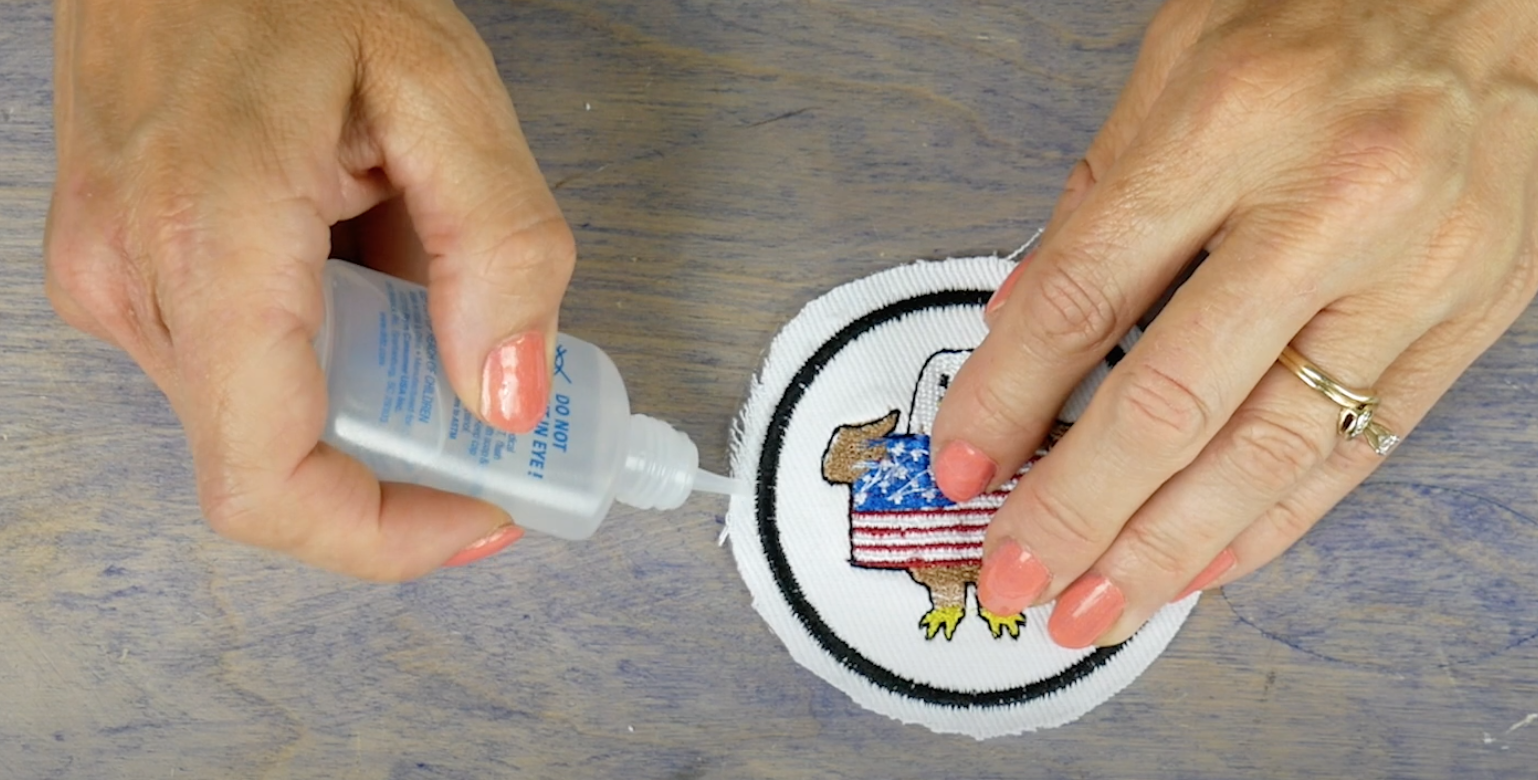
Now, with your patch right side up, run a bead of Fray check all along the border stitching line. This will help to keep the fabric edges from fraying once the patch is cut out.

12.png

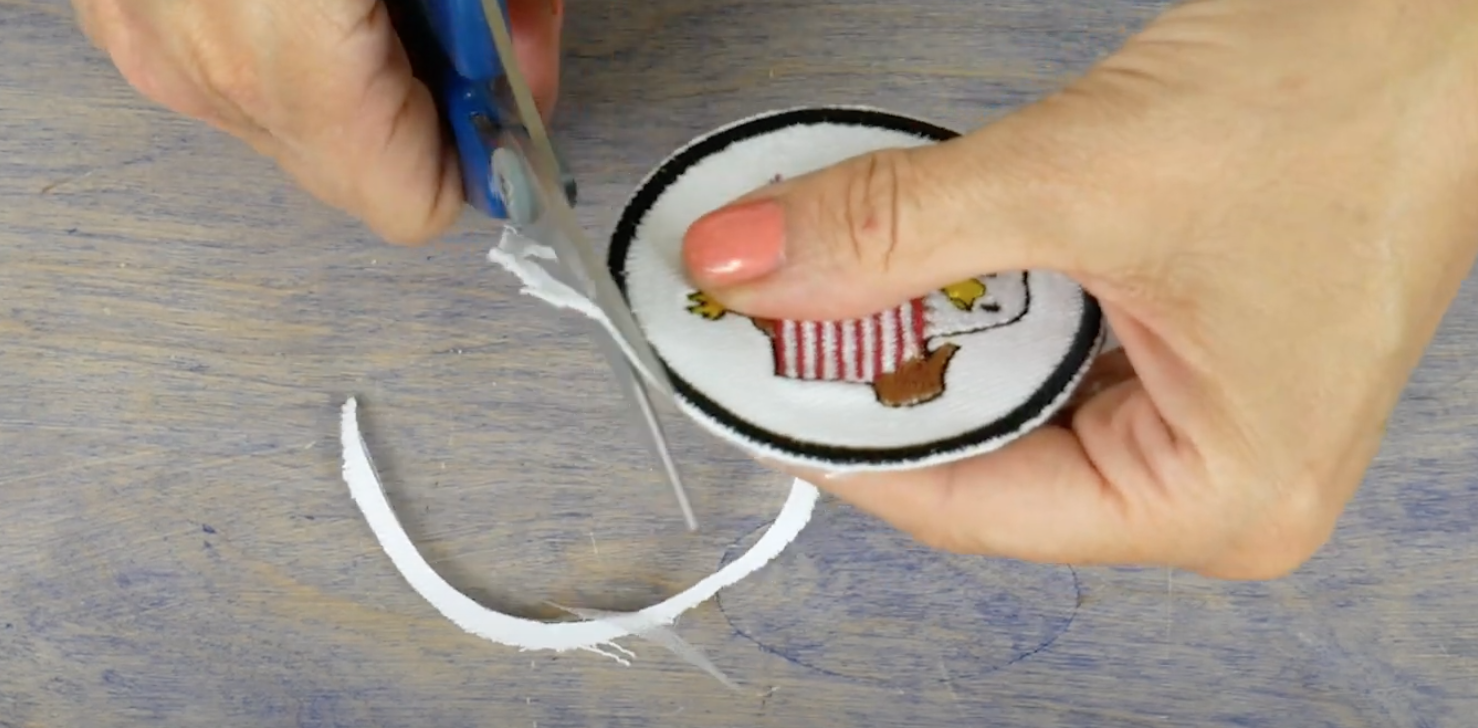
When the Fray Check has dried, use a sharp pair of scissors to trim closely to the border stitches, taking extra care not to cut into the stitches themselves. Now run a second bead of Fray check along the edges, to further weld down any stray threads.

13.png
14.png

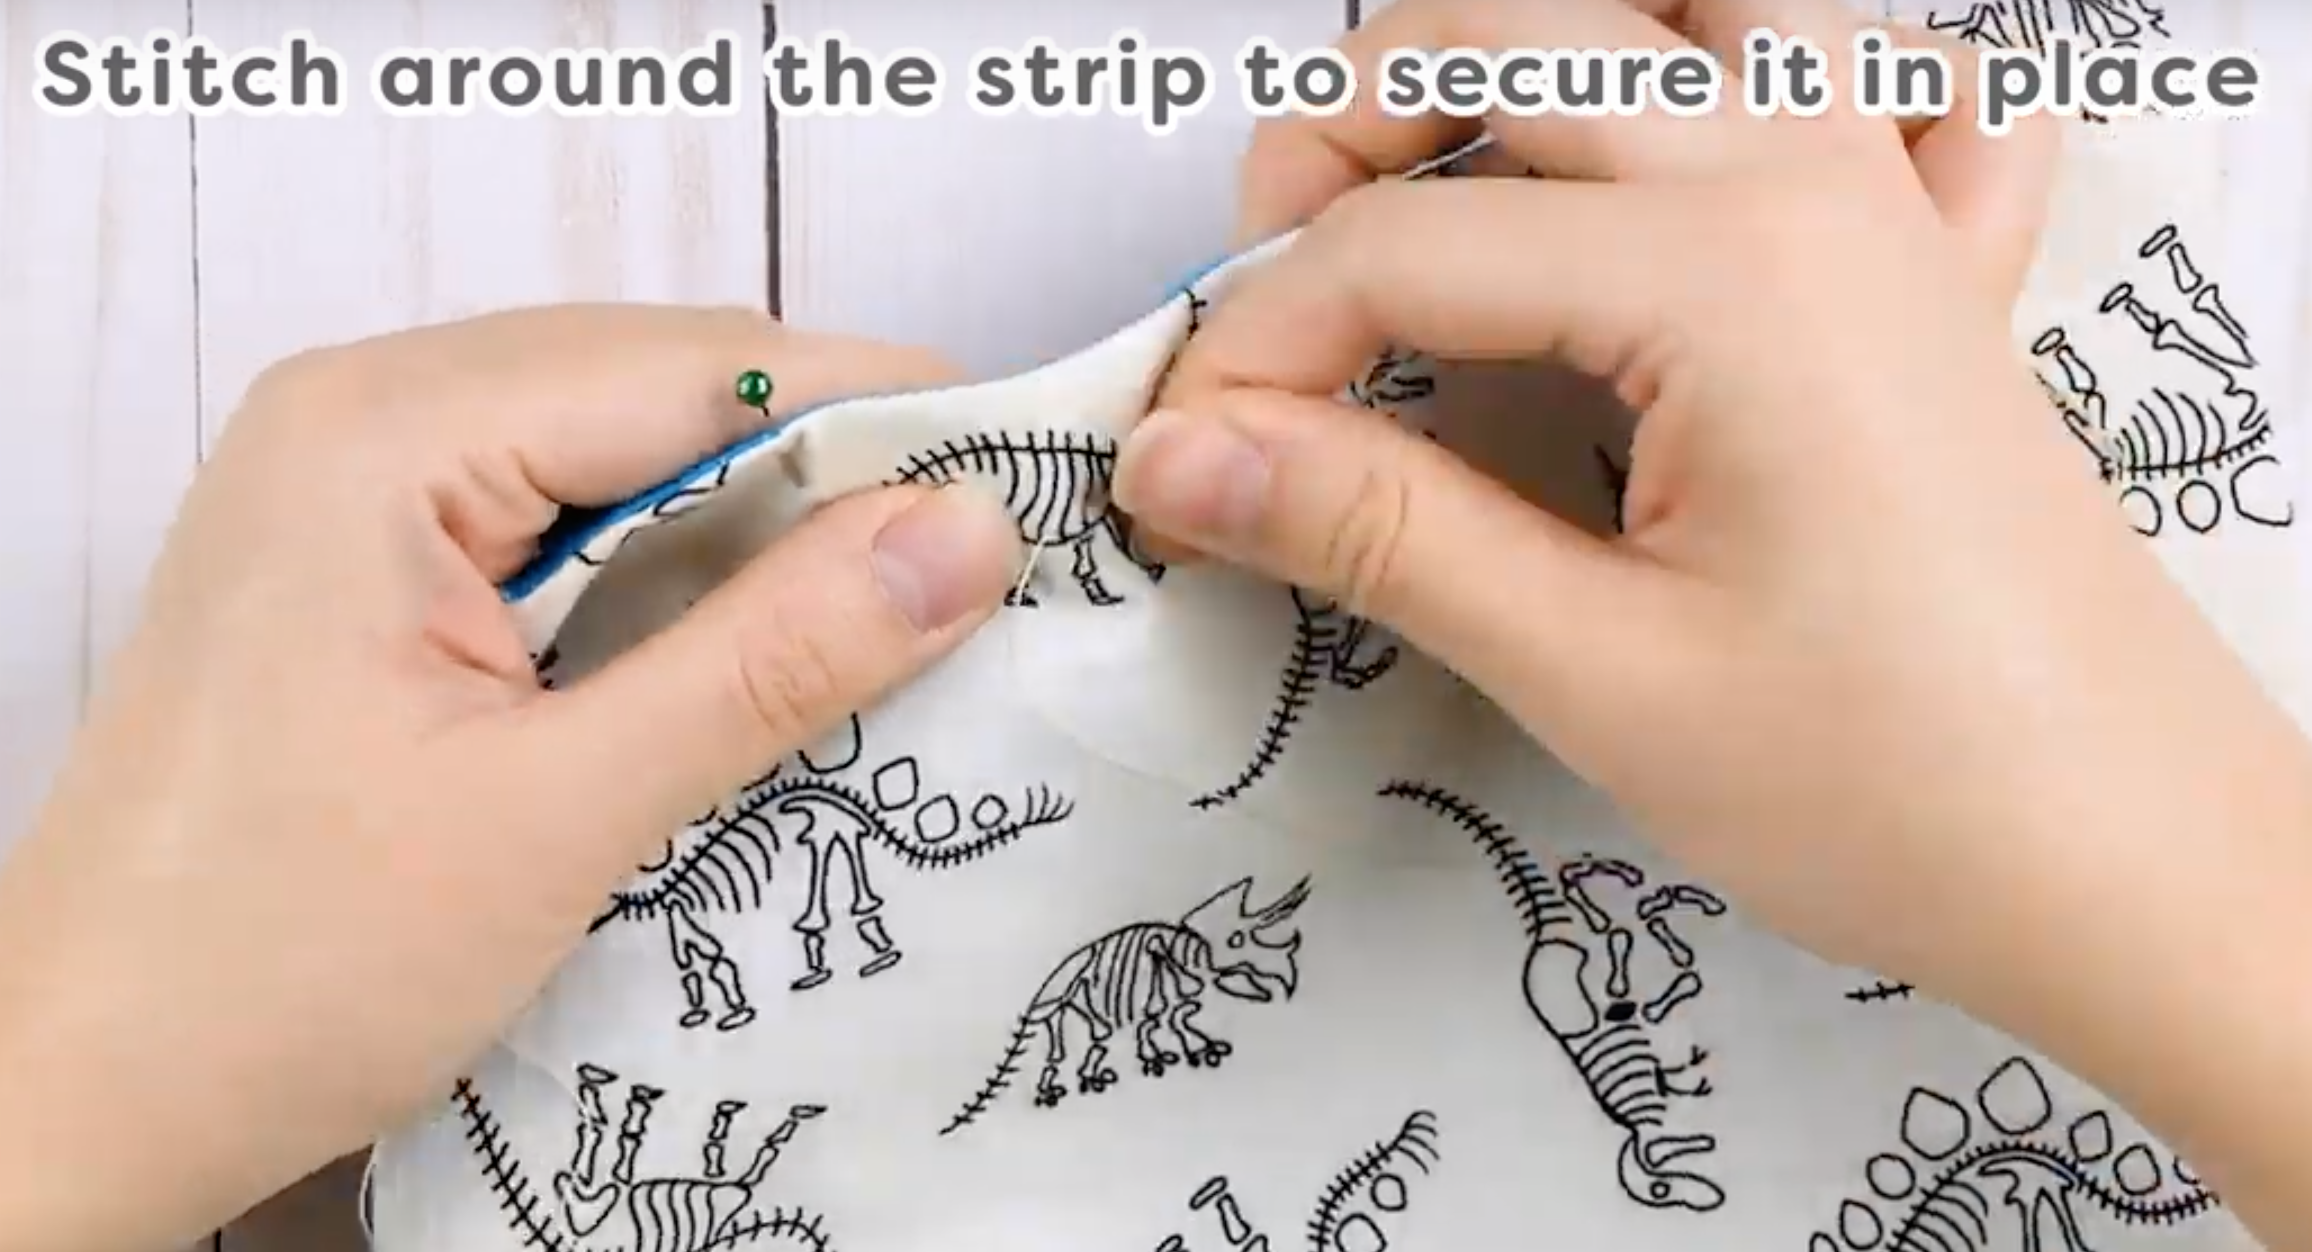
Once the Fray Check has dried, the paper backing can be peeled off the patch, so you can iron it on to your chosen article. You can then choose to stitch it down by hand for extra security, if you’re putting it on something like a bag or suitcase.

15.png
16.png

Adding patches to your clothing or bags is a fun way to add some whimsy to your style, and to show your patriotic spirit for Canada Day or Independence Day. Let us know in the comment section below what you like to dress up with patches! Inspired to sew with WonderFil threads? Find a store in your area that carries WonderFil at www.shopwonderfil.com/shop-local. You can also sign up for our free newsletter to receive more educational sewing tips, tutorials, and free patterns. Register by clicking here! We’ll see you again next time!

17.png
18.png

Getting Started With Crochet: Beginner Stitches

Maura Kang

We’re here to teach you a few basic crochet stitches that will help introduce you to crochet! This is a fun, relaxing pastime that is easy to take with you on long road trips or on the go. Once you master these basic stitches, it’s easy to create a variety of different projects.

These basic stitches can be used to create the top for this cute little girl’s dress. We’ve included the FREE crochet pattern for this top which can be downloaded and printed by clicking here. This pattern uses each of the crochet stitches shown in the video below.

2.png

The dress was created using Eleganza #3, a high quality, long staple Egyptian cotton. For the beginner crocheter, you will appreciate the quality, as it is not prone to twisting and tangling. It is the heaviest weight of Eleganza, which also makes it great for beginners. We will also be using a 3.5 mm crochet hook.

3.png

To learn these stitches, check out the video below for detailed step-by-step instructions.

1. Chain Stitch (CH)

1. Chain Stitch (CH)

2. Single Crochet (SC)

2. Single Crochet (SC)

3. Double Crochet (DC)

3. Double Crochet (DC)

4. Double Crochet in One Spot

4. Double Crochet in One Spot

5. Double Crochet, Chain 3, Double Crochet in One Spot

5. Double Crochet, Chain 3, Double Crochet in One Spot

6. Scallop Edges

6. Scallop Edges

7. Half Double Crochet (HDC)

7. Half Double Crochet (HDC)

8. Treble Stitch (TR)

8. Treble Stitch (TR)

9. Slip Stitch

9. Slip Stitch

Don’t forget, to learn how to these stitches, check out our video for details step-by-step instructions!

That’s all you need to know to create the dress pattern. It would be a good idea to practice some of these stitches before you begin to get used to the motion. One of the difficulties beginners will encounter is recognizing the skip stitch at the start of each row, so as not to unintentionally increase or decrease your stitch count in each row. So at first, practice doing a piece of either just single crochets or double crochet, to make sure you can keep your stitch count the same row to row and your piece straight and square. The stitches for the butterfly and flower addition to this top are a bit more complicated, so let us know if you would like to see another crochet tutorial for those.

Thanks for tuning in. Please send us pictures of your finished dresses; we would love to see them! Don’t forget to leave a comment in the comment section below and let us know what you would like to see next. Inspired to sew with WonderFil threads? Head on over to shopwonderfil.com/shop-local for a list of stores and retailers you can purchase from. You can also sign up to receive weekly sewing tips, free patterns, and tutorials in our newsletter. Register by clicking here! You can unsubscribe at any time by clicking the unsubscribe button on the footer of every email you receive.

Metallic Embroidered Tie Tutorial (Free Embroidery Pattern Included!)

Maura Kang

If you’re looking for that perfect gift for the father, husband, or friend in your life, this personalized embroidered tie will make a statement in any board room. We’ve even included 3 free digitized embroidery designs for you to download! All you need to do is choose your thread colours and add initials.

We have included 3 totally free digitized designs for you to download: a game controller, a fish and a bug. You can choose which you’d like to download and in what file type by clicking here. We are showing the finished product with a personalized monogram, but we leave these for you to add, so you can have the right initials.

1.png

We have chosen to use a purchased black tie as the backdrop for our embroidery. You can choose any color, but a solid color will show off the design better. To fit the included designs, the tie must be at least 2 inches wide at the point where you want your design to sit.

2.png

We have decided to stitch out the design in WonderFil’s metallic thread, Spotlite. Spotlite is a 40 wt metallic with a rayon core. Since rayon has no stretch, the core won’t stretch as a polyester or nylon core might. That stretching can cause the metallic wrap to separate, which causes the shredding and breaking that sometimes happens with metallic threads. Since the rayon core in Spotlite doesn’t stretch, that is less likely to happen, so you will have trouble free embroidery stitches, and a soft finish to the design.

3.png

We will be pairing the Spotlite with our 80wt DecoBob in the bobbin. Even very dense stitching stays soft when you have a fine bobbin thread and the evenly wound prewound bobbins will also ensure that you have no tension issues as you stitch out your design. As always, we will be using a Thread Tamer and a WonderGuard to tame the curl in the metallic thread, and a large eye 90/14 topstitch needle. As you will be using a sticky stabilizer to stabilize the tie, you can also use a universal super nonstick needle as another option. See our video on stitching trouble free with metallic thread without the headache to learn our tricks on sewing with metallic thread.

To begin, we will hoop this sticky stabilizer, paper side up, in the hoop. We are going to lightly score the paper around the edge of the hoop with a pin, and from corner to corner, so we can easily pull the paper away. Mark the center so you can easily place your tie on the right spot.

4.png

Decide where you want the center of your design to sit on the tie and mark the spot with some tailor’s chalk. With a stitch ripper, open up the back of the tie for at least 6”, so your tie can sit flat and open on the stabilizer. Using your hoop grid, place the tie centered on the hoop and smooth and press it in place so it sits flat and even.

5.png
6.png

Download the digitized design you prefer, in the format appropriate for your embroidery machine. If you choose, add the text or monogram from your machine’s text to the design before proceeding. Thread your machine with Spotlite in the first color, with a Decobob prewound bobbin in the bottom. Stitch out the design, changing colors as indicated. We have included the color numbers of Spotlite we used for our designs.

7.png

When your stitchout is complete, remove the stabilizer from the hoop and trim away on the underside of the tie. Trim all the threads, then using a hand needle and DecoBob, hand stitch the back of the tie closed again.

8.png

And there you have it. The man in your life will be proud to wear this fun, customized tie, and it is sure to be a conversation starter!

9.png

Inspired to sew with WonderFil threads? Head on over to shopwonderfil.com for a list of stores and retailers you can purchase from. You can also sign up for our free newsletter to receive more educational sewing tips, tutorials, and free patterns. Register by clicking here! We’ll see you again next time!

Sewing Reverse Appliqué: Free Pillow Pattern!

Maura Kang

Reverse appliqué is a beautiful way to add interest to any project such as quilts, table runners, bags or decorative pillow cases. This technique is easy to follow along with for beginners and is offers a little more texture than traditional appliqué. We’ll show you how to sew reverse appliqué, then turn it into a fun decorative pillow cover, free pattern included!

Screen Shot 2020-04-02 at 11.32.01 AM.png

Download and print the free pattern by clicking here.

Thread:
•DecoBob and DecoBob Pre-wound bobbins: https://shopwonderfil.com/product-category/decobob
• Splendor: https://shopwonderfil.com/product-category/splendor

Material:
At least two 15” x 15” complimenting fabrics, we chose cottons

Needle:
80/12 Schmetz : https://shopwonderfil.com/product/machine-needles

About the technique: In traditional applique you have a separate cut out piece of fabric and you sew it directly onto another piece. In reverse applique you actually cut out shapes out of the top layer of fabric to reveal the fabric beneath it.

Screen Shot 2020-04-02 at 12.05.39 PM.png

Cut out two pieces of fabric at the same shape and size, we did 15” X 15”. This pillow will be 14” when finished as the size we gave allows for ½” seam allowance around the pattern. Whatever fabric you pick for the bottom will peek through the top fabric - that is why we chose a patterned motif for this. For the pillow back we cut a rectangle that is 15” X 11”.

Screen Shot 2020-04-02 at 12.14.25 PM.png

Next we are going to start by grabbing our matching thread. We chose to use DecoBob since it is so lightweight and thin it makes the seams have very reduced bulk. We are also using and 80/20 needle for our machine to ensure a smooth stitch.

Screen Shot 2020-04-02 at 12.15.04 PM.png
Screen Shot 2020-04-02 at 12.21.06 PM.png

Place the two pieces of fabric right side up with the fabric you want contrasting on the bottom.  Make sure the top fabric is on top of the contrast fabric.

Screen Shot 2020-04-02 at 12.23.45 PM.png

Baste all the way around with a ¼” seam allowance just to hold the pieces together while we cut/appliqué them.

Screen Shot 2020-04-02 at 12.26.43 PM.png

Next you want to grab the pattern that is linked above. We printed this pattern onto cardstock just for a bit more stability.  We used a small knife to cut out the little diagonal windows so we can transfer it onto our fabric. Then trace through the windows you cut out onto your fabric. We used a disappearing marker.

Screen Shot 2020-04-02 at 12.27.57 PM.png
Screen Shot 2020-04-02 at 12.31.48 PM.png
Screen Shot 2020-04-02 at 12.40.58 PM.png

Once you have transferred the pattern, very carefully separate the fabric and cut away your shapes from only the top fabric. When all of the shapes are cut out, then you want to pin the top fabric to the bottom so that it will not move around. Pin around each cut out shape to prevent it from shifting. Or as an alternative option you can glue the top fabric to the bottom around the cut outs with a fabric glue.

Screen Shot 2020-04-02 at 12.42.47 PM.png
Screen Shot 2020-04-02 at 12.45.05 PM.png
Screen Shot 2020-04-02 at 12.46.08 PM.png

Then with your machine, you want to stitch around the cut out shape very close to the edge. This will secure the top to bottom layer so that we can appliqué it nicely.

Screen Shot 2020-04-02 at 12.48.04 PM.png
Screen Shot 2020-04-02 at 12.53.11 PM.png

You could choose to leave the edges raw and continue to make the rest of the pillowcase. We are going to use a decorative stitch on our machine to hide this edge, and it helps to enclose this way if your top fabric frays too. We decided to add a little pop and changed our thread to Splendor, which is a beautiful shiny rayon thread.  We kept the DecoBob in the bobbin.

Screen Shot 2020-04-02 at 1.03.46 PM.png

We recommend adding a stabilizer before finishing off the applique on the edges, as it will add a little bit more structure and strength to the area. We added tear away stabilizer to the wrong side of this piece and ironed it on.

We did a satin stitch around each edge (zig zag). Make sure that when you are sewing this, that the stitch will enclose the raw edge.

When finished the shapes should look something like this:

Screen Shot 2020-04-02 at 1.05.36 PM.png

Once you are happy with this stitching then you can tear away the excess stabilizer on the wrong side.

Screen Shot 2020-04-02 at 1.07.29 PM.png
Screen Shot 2020-04-02 at 1.07.37 PM.png

Now we are going to make the pillow back. Along one 15” edge of a back piece press a 1” hem to the wrong side of the fabric.

Screen Shot 2020-04-02 at 1.10.54 PM.png

Once you have ironed this 1” hem then fold it over again to enclose the raw edge of the fabric.

Screen Shot 2020-04-02 at 1.12.13 PM.png

Stitch along the pressed edge to create a 1” double hem. Sew close to the edge so that the hem lays flat and will not pop up. Repeat this step for the other back piece so that there is one finished hem edge on both.

Screen Shot 2020-04-02 at 1.12.59 PM.png
Screen Shot 2020-04-02 at 1.13.50 PM.png

Face the hemmed edges together and lay one back piece on top of the other. On one piece we used pins to mark 3” from the hemmed side. When placing one on top of the other it should line up with this three-inch mark- giving a 3” overlap. Then once they are placed with the 3” overlap, pin together so they stay in place.

Screen Shot 2020-04-02 at 1.18.31 PM.png
Screen Shot 2020-04-02 at 1.19.12 PM.png

Baste the raw edges where they overlap to help hold it in place. Baste at ¼” so that it will be hidden in the seam. Then place the right side of the back of the pillowcase ad the right side of the front pillowcase together.

Screen Shot 2020-04-02 at 1.30.02 PM.png
Screen Shot 2020-04-02 at 1.32.03 PM.png

Then you can pin around the outside, and stitch around the entire square. Use a ½” seam allowance.

Screen Shot 2020-04-02 at 1.33.52 PM.png

Once you have sewn the whole square then cut straight across the corners of the fabric - making sure not to catch any of your stitch. This will reduce bulk and let the corners come out crisper. Turn your pillowcase to the right side through the double hemmed opening made on the back.

Screen Shot 2020-04-02 at 1.34.20 PM.png
Screen Shot 2020-04-02 at 1.37.00 PM.png

Once pulled through then make sure the corners are poked out well. You can use your fingers, or something pointy but not too sharp such as a chopstick. Then you can lightly iron around the edges- this will make the seam lay better when the pillow form is inserted.

Screen Shot 2020-04-02 at 1.37.54 PM.png

Insert the pillow form through the back opening to finish!

Screen Shot 2020-04-02 at 1.40.21 PM.png

There are so many ways to use reverse appliqué. We hope that you enjoyed making this project! Whether you decided to make this pillow, or use the technique in another way we would love to see. Tag us on Facebook @wonderfil, Instagram @wonderfilspecialtythreads, or using the hashtag #wonderfil. Happy crafting!

DIY Face Mask By Hand With Filter Pocket & Fitted Nose Crimp

Maura Kang

WhatsApp Image 2020-04-09 at 11.48.47 AM.jpeg

Don’t have a sewing machine at home? No problem, you can still make your own face masks by sewing them by hand using our pattern that includes an optional nose crimp (for a better fit to your face) and filter pocket. The best part is, it can all be completed with items you likely have around your house already! If you’d like to check out our alternative tutorial on sewing this face mask using a sewing machine, click here.

Download the written instructions and pattern PDF here: https://bit.ly/2UTT1fN 

Materials needed:

• Top fabric in 100% cotton -
For Adult: 9” x 8” (22.9cm x 20.3cm)
For Kids: 8.5” x 8” (21.6cm x 20.3cm)
• Lining fabric in 100% cotton -
For Adult: 7” x 7.5” (17.8cm x 19cm)
For Kids: 6.5” x 7.5” (16.5cm x 19cm)
• (option 1) Elastic cord - Note that we found the round elastic more comfortable to wear over a longer period of time, but a flat elastic cord will still function if that’s what you have.
• (option 2) If you do not have any elastic cord at home, you can sew your own ties by cutting 2 of 12” x 1” strips of fabric, folding it in half twice lengthwise, and sewing down the center to secure them.
• Sewing thread - We used Designer™ 40wt polyester for the top thread as it is strong and flexible, and DecoBob™ 80wt cottonized polyester in the bobbin. Cotton sewing thread will also work just fine.
• (optional) Aluminum can or paper clip for the nose crimp

* Note that 100% cotton is recommended to sew your masks from as it offers both breathability while still doing an okay job filtering particles.

Filter:
• Cut to 6.5“ x 2.5” (16.5cm x 6.4cm). If you have access to a non-woven polypropylene fabric (used in the manufacturing of face masks), this would make the best filter to place in this pattern’s filter pocket and would be disposed of after use. However if you do not, you can use another piece of 100% cotton fabric as we did in this video. You can either dispose of it after use or wash it as described below.

Washing your face mask:
• It is recommended that your reusable face mask is washed in your home washing machine with the water settings on hot using regular washing detergent. It should then be completely dried in the dryer on high heat. Wash your face mask after each use.

WhatsApp Image 2020-04-09 at 11.48.47 AM (1).jpeg

Direction:

We’ve got two sizes for both adults and kids so you can make masks to help keep your whole family safe! Begin by cutting out your front and lining fabric pieces according to the size you need from the PDF pattern downloadable at the top. Demonstrated below is the adult size.

1.png
2.png

Press the hem up on both the main and lining pieces by ½” (1.3cm) along one of the long sides.

3.png
4.png

Then stitch across the hems on the main and lining pieces using a backstitch to secure them.

5.png

Place your lining and main fabrics right sides together, centered on the long edge opposite the hems. Pin together, then backstitch along this edge to secure them.

7.png
8.png

Flip the fabric pieces over so they are now facing the wrong sides together and press the seam so it lays flat.

9.png
10.png

If you wish you add a nose crimp for a better fit, you can cut a 4” x 0.5” (10cm x 1.3cm) strip out of an aluminum can, or use a cut piece of paper clip of pipe cleaner. Watch our video located above beginning at 1:50 to see how to safely cut open an aluminum can.

11.png

Place the nose crimp between the main and lining fabric, centered along the connecting seam. Then fold the fabric back over and pin around the strip to create a small pocket for it. You can use the placement of these pins to act as a guide for where you should backstitch around the nose crimp strip.

12.png
13.png
14.png

Once your nose crimp is secured in place, fold ½” (1.3cm) from the bottom of the main fabric and press it in place.

15.png

Flip your mask over to the right side and create 3 pleats by folding down from the top. Press the pleats into place.

16.png
17.png

Pin your pleats into place along the backside. You can now begin backstitching it all down on each end.

18.png
19.png

The bottom of your mask will have an opening for the filter to be placed!

20.png

Fold one of the ends over by ½” (1.3cm) and press. Then fold it over one more time and press it again to hide the raw edges. Pin it to hold it in place and then do the same on the other side.

21.png
22.png

Using a whip stitch, sew the inside edge to the lining to create a pocket for the elastic/strap to run through. Be careful not to sew through to the other side of the fabric.

23.png

Finally, take your elastics or sewn straps and attach a safety pin to the end to help feed it through the pockets you sewed on each end. If you used elastics, you can tie them in a knot and hide the knot inside the pocket. Sewn straps can be tied behind your head as you don the mask.

24.png

Simply place a filter in the pocket and your face mask is ready to be worn! Don’t forget to press the nose crimp around the contours of your nose for a better, tighter fit.

WhatsApp Image 2020-04-09 at 11.48.47 AM (1).jpeg