Contact Us

Use the form on the right to contact us.

You can edit the text in this area, and change where the contact form on the right submits to, by entering edit mode using the modes on the bottom right. 

2915 19 St NE
Calgary, AB, T2E 7A2

18662506101

WonderFil Specialty Thread Blog

WonderFil brings you the latest news, events, upcoming thread lines and special tips and advice. Follow WonderFil Specialty Threads on our social media: Facebook, Instagram, Twitter, Pinterest, and Youtube.

Filtering by Tag: machine

10 Ways to Sew with Heavy 12wt Thread

Maura Kang

Some sewers might be stumped on what to use 12wt thread for, afterall it isn’t your traditional medium sized thread. What a lot of people don’t realize is how beautiful, bold, and versatile this thicker thread can be, and what kind of effects you can create with it. We’ll also take a closer look at the different types of 12wt thread you can find and when you might want to choose one over the other.

1.png

1. Thread Painting

12wt threads are a fantastic choice for thread painting for a few reasons. Because the thread is thicker, you can actually cover more area with less thread, making it a lot more efficient to thread paint with a 12wt thread. In addition, you’ll also find that the thread sits a little higher from the fabric. This gives a bolder textural effect to your project than using a medium weight thread would.

2. Cross Stitch

These threads are thick enough for cross stitching projects, especially when you want to use a fabric or fibre with a finer weave. In this project, we used Spagetti™ and Fruitti™ 12wt cotton threads, which pull smoothly through the fabric due to their ultra low lint finish.

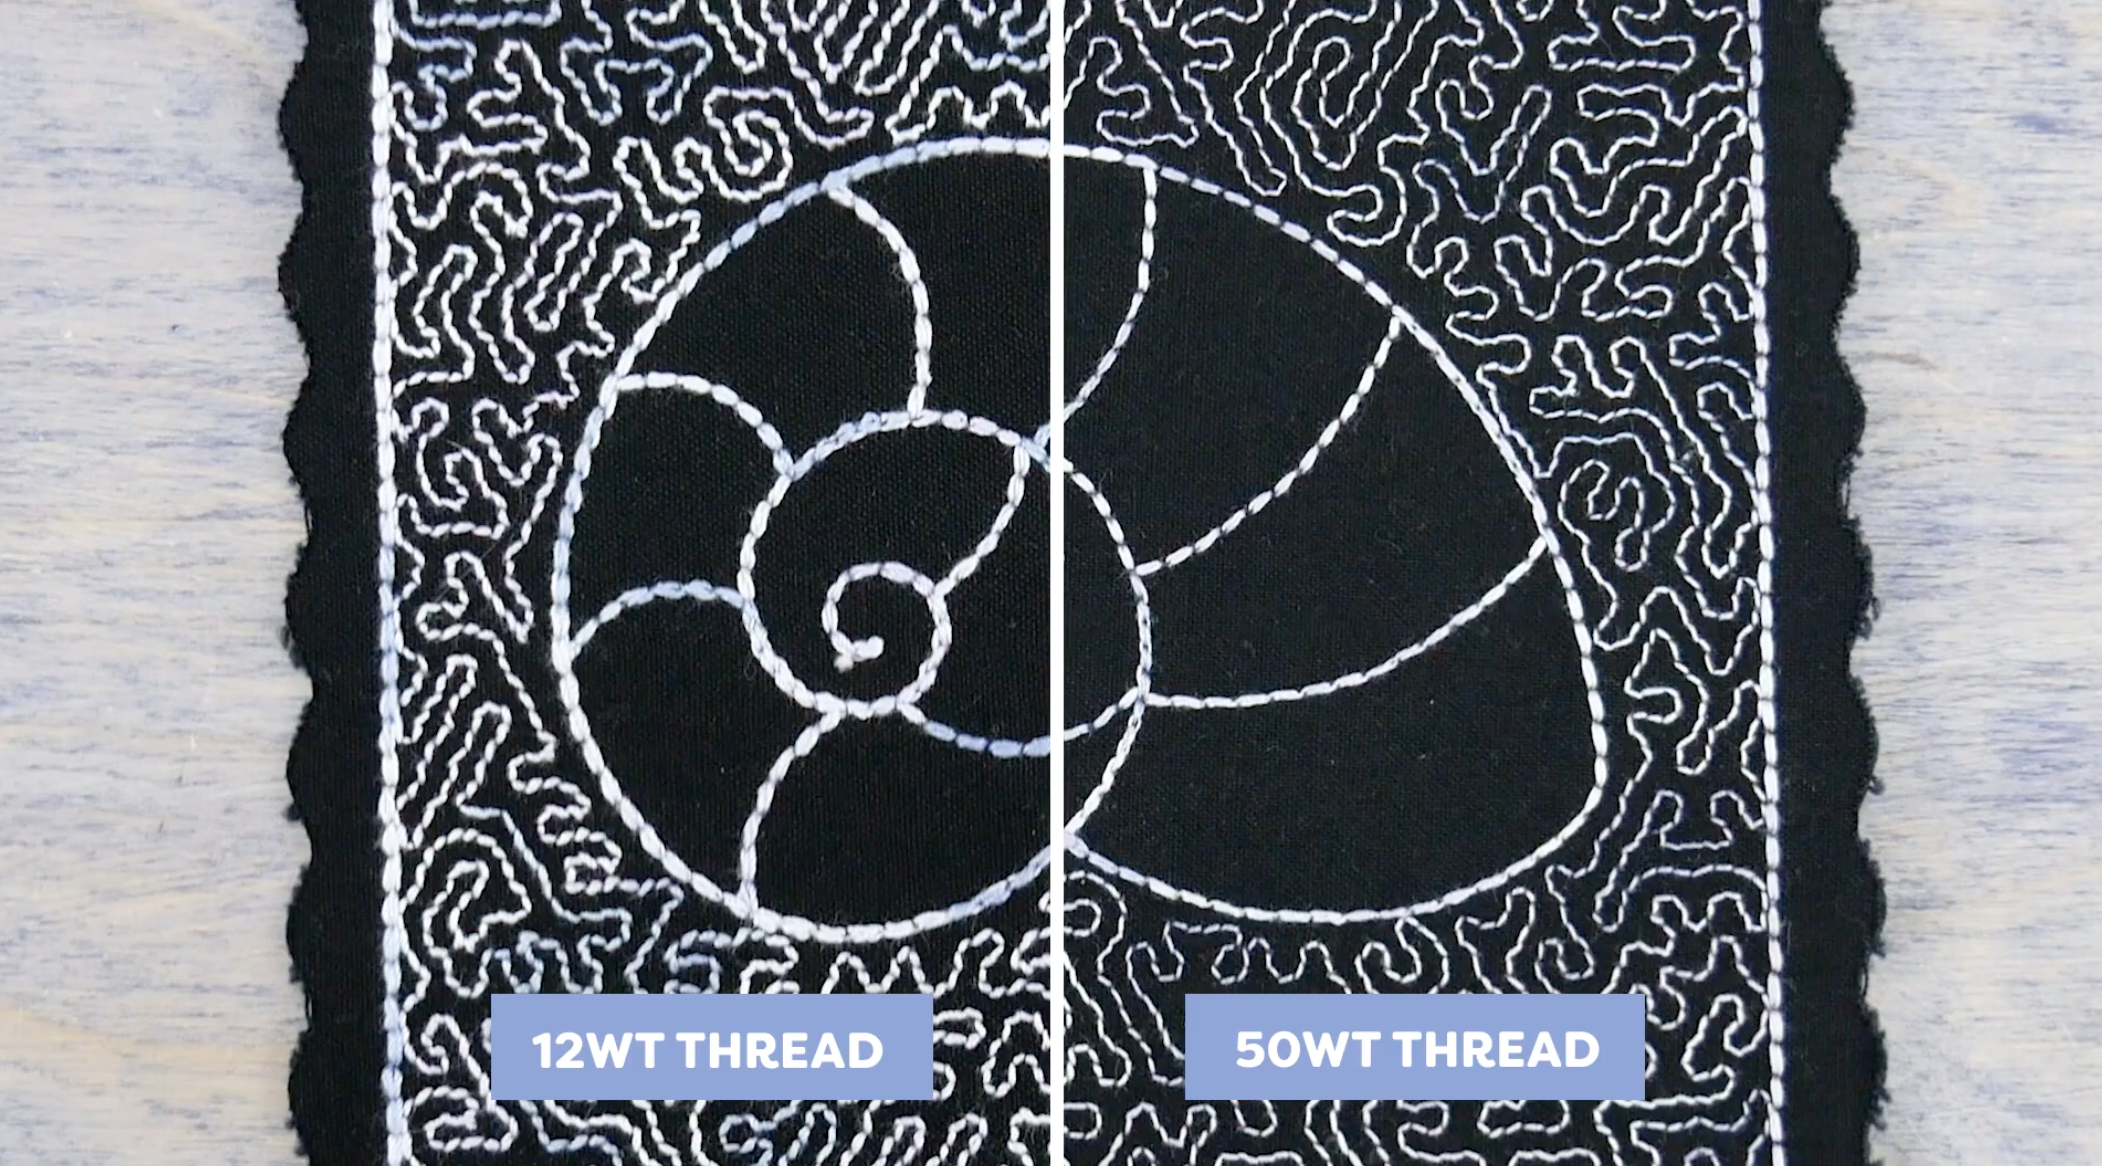
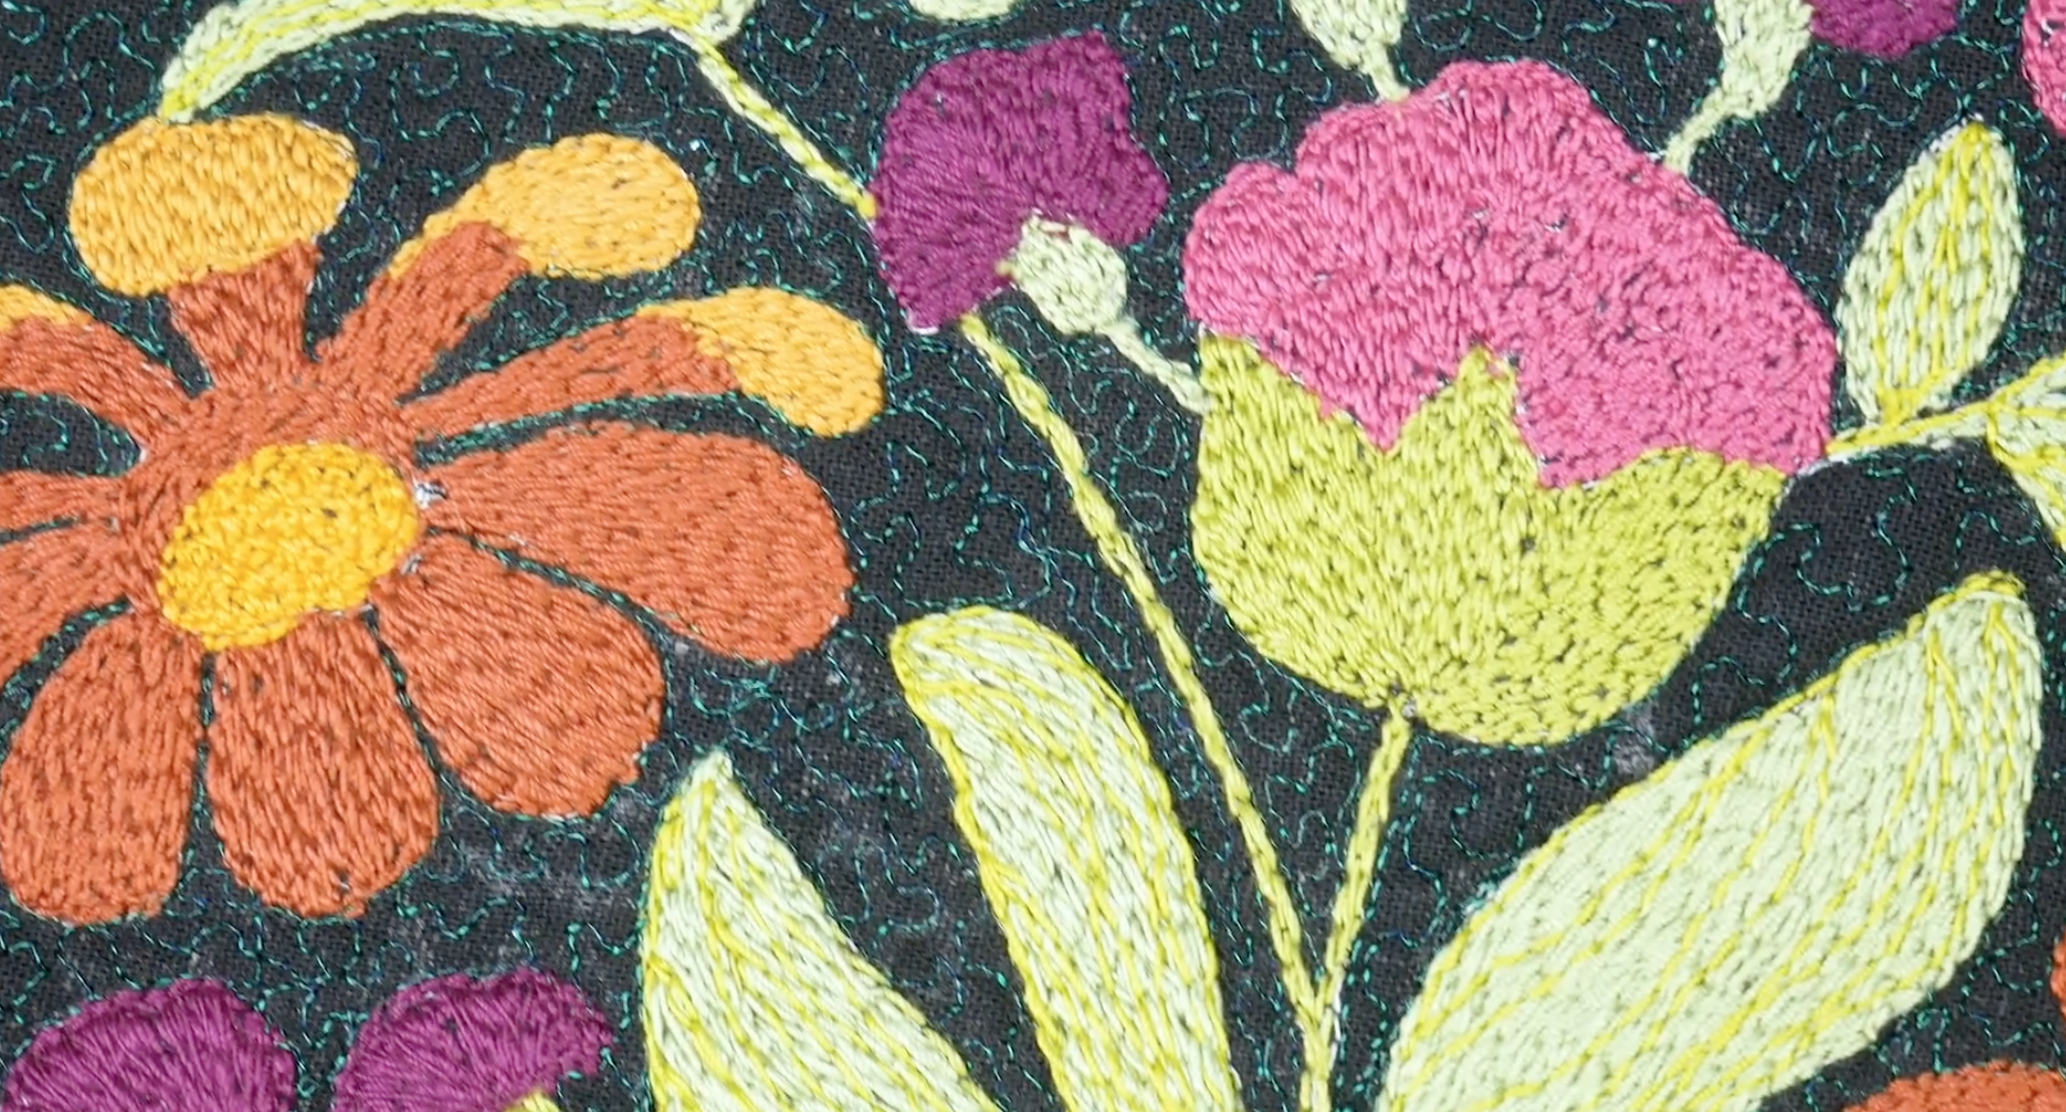
3. Machine Embroidery

40wt threads are the standard when it comes to machine embroidery, but you can create a new look by using 12wt thread in your embroidery machine. If you have a larger design, or a design that isn’t too intricate, a 12wt thread will show the pattern much more boldly without needing to double stitch the same lines. Your pattern will also show off better due to the thicker thread.

4. Hand Embroidery

If you love doing hand embroidery and sometimes split the strands of embroidery thread to make a finer thread, we would caution you against this. Splitting the strands of a thicker thread can weaken the thread while also giving it a lintier look. Instead of doing this, try using a 12wt thread which is comparable in size to an 8wt thread that’s been split in two. This way you won’t damage the thread, and you’ll keep your stitches looking clean and beautiful.

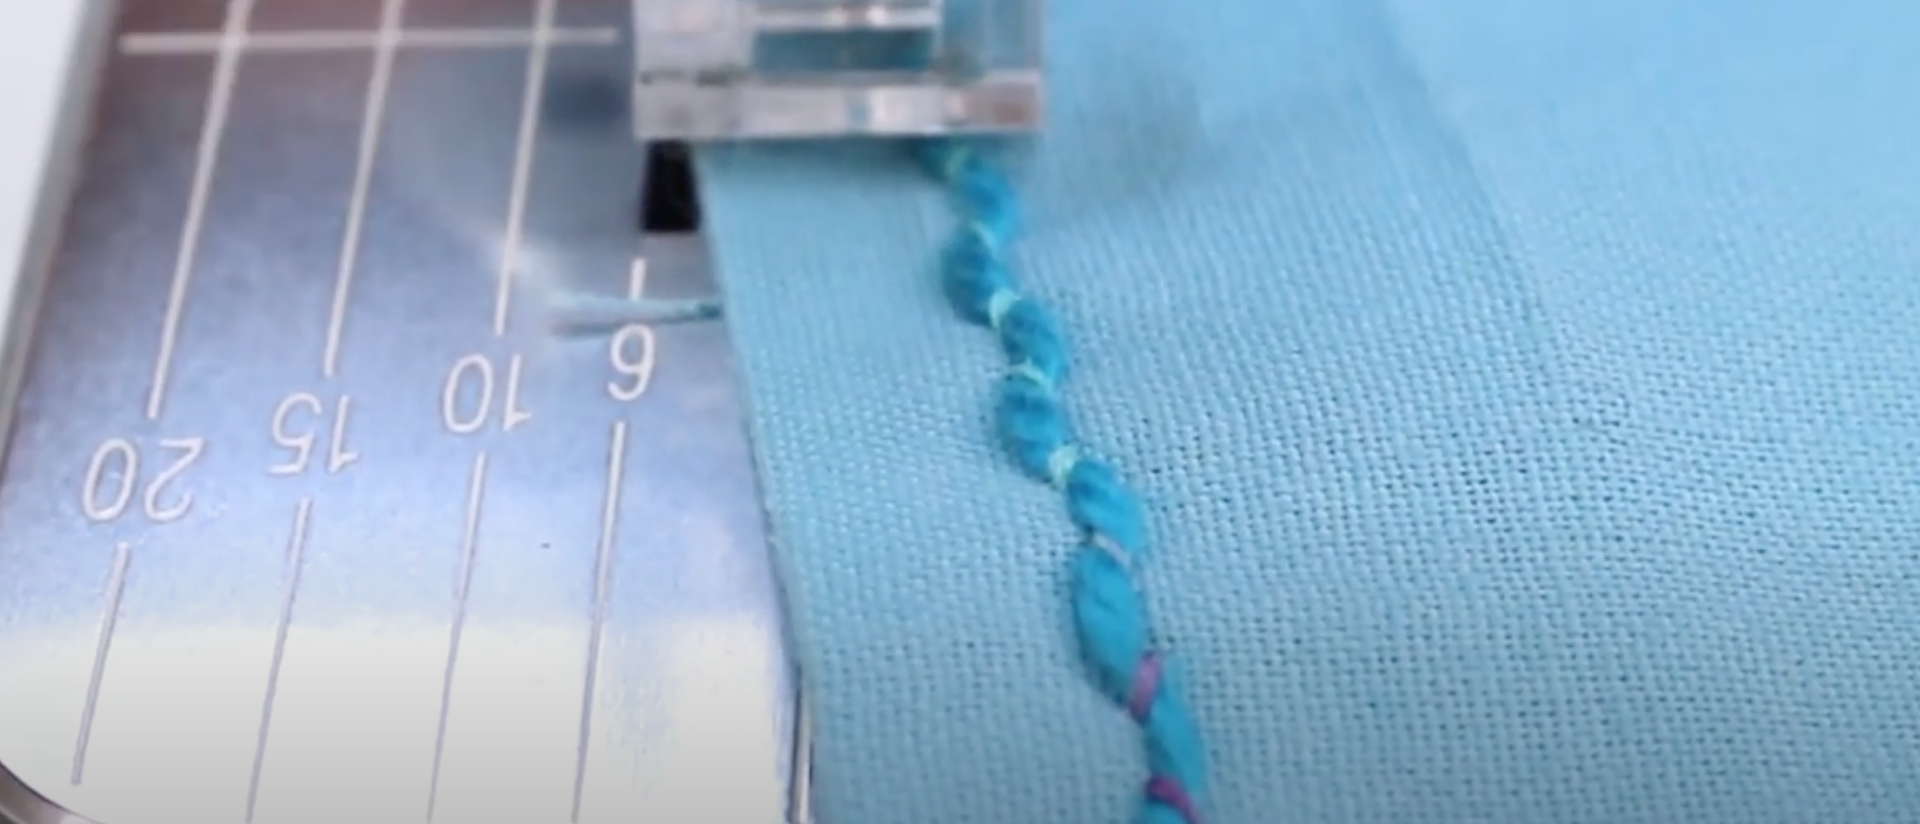
5. Decorative Stitching

The decorative stitches built into most sewing machines are perfect for utilizing 12wt threads for fun, stand-out stitches. They’re perfect for decorating any project, whether it’s a stocking for your family, adding a small decorative line of stitching to a piece of clothing, or embellishing any quilt or table runner. A 12wt thread will give every decorative stitch a little more emphasis than a regular medium weight thread would.
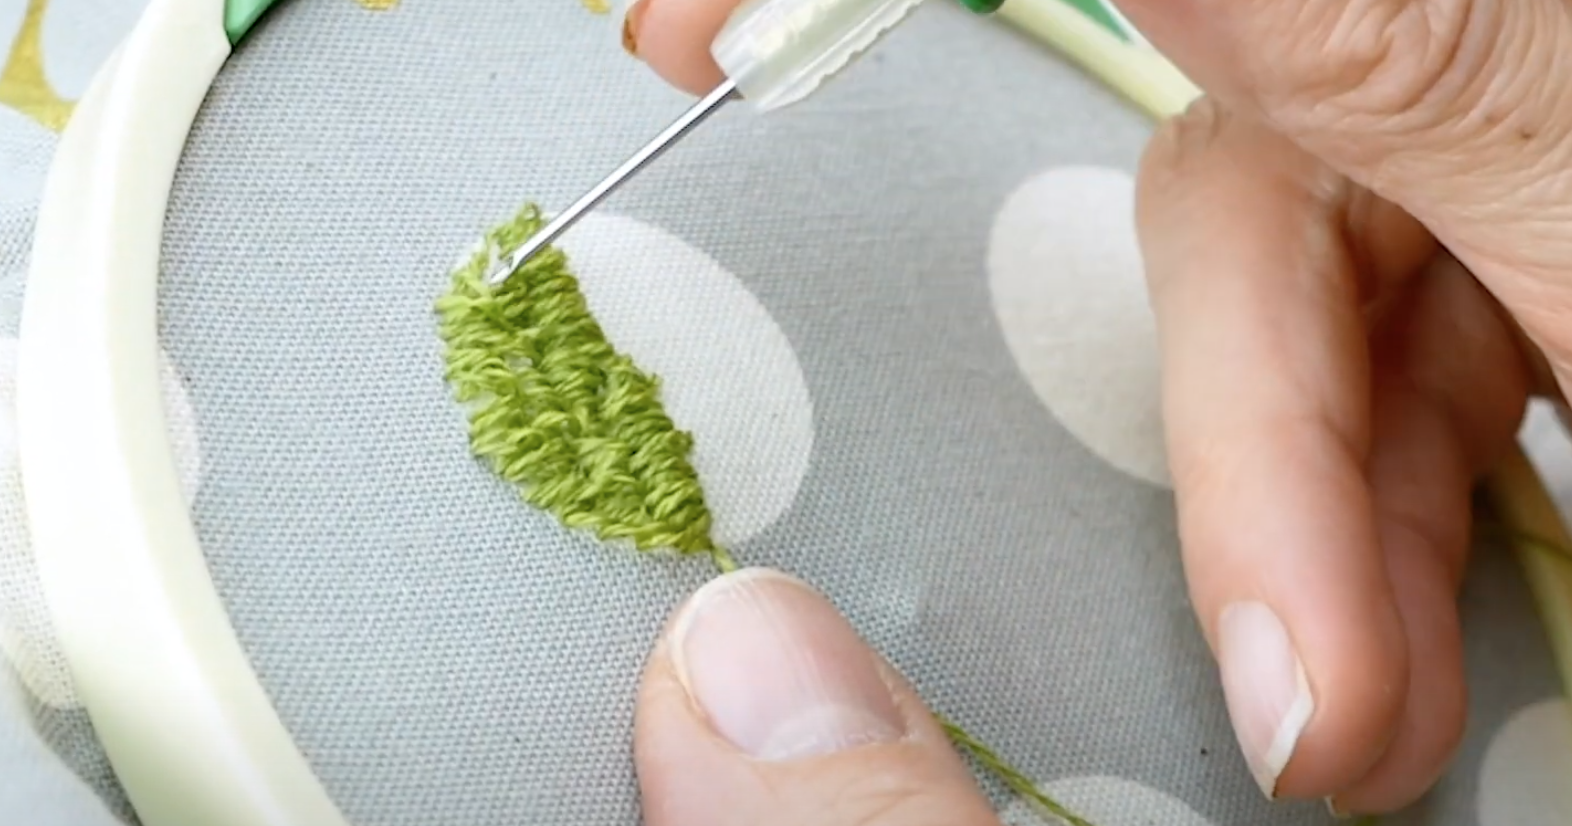
6. Needle Punch

Needle punching is a tool that can be used to create incredible textural effects, and it works best with thicker threads like 12wt. Depending on how you use the tool, you can make either dense loops or weave back and forth to fill in a space. This is a fantastic way to add a unique look to any project.

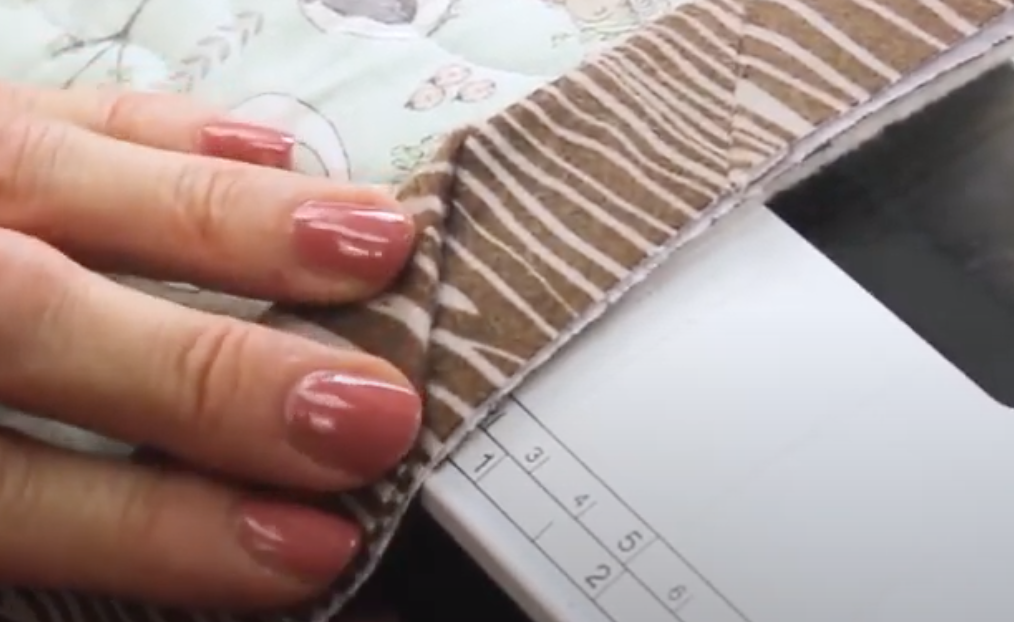
7. Big Stitch Hand Quilting

12wt is one of the best threads to use for big stitch hand quilting because the thick thread really stands out against the fabric. You’ll also find it easier to handle a 12wt thread versus a medium weight thread as it is less delicate and sits better in a wide running stitch.

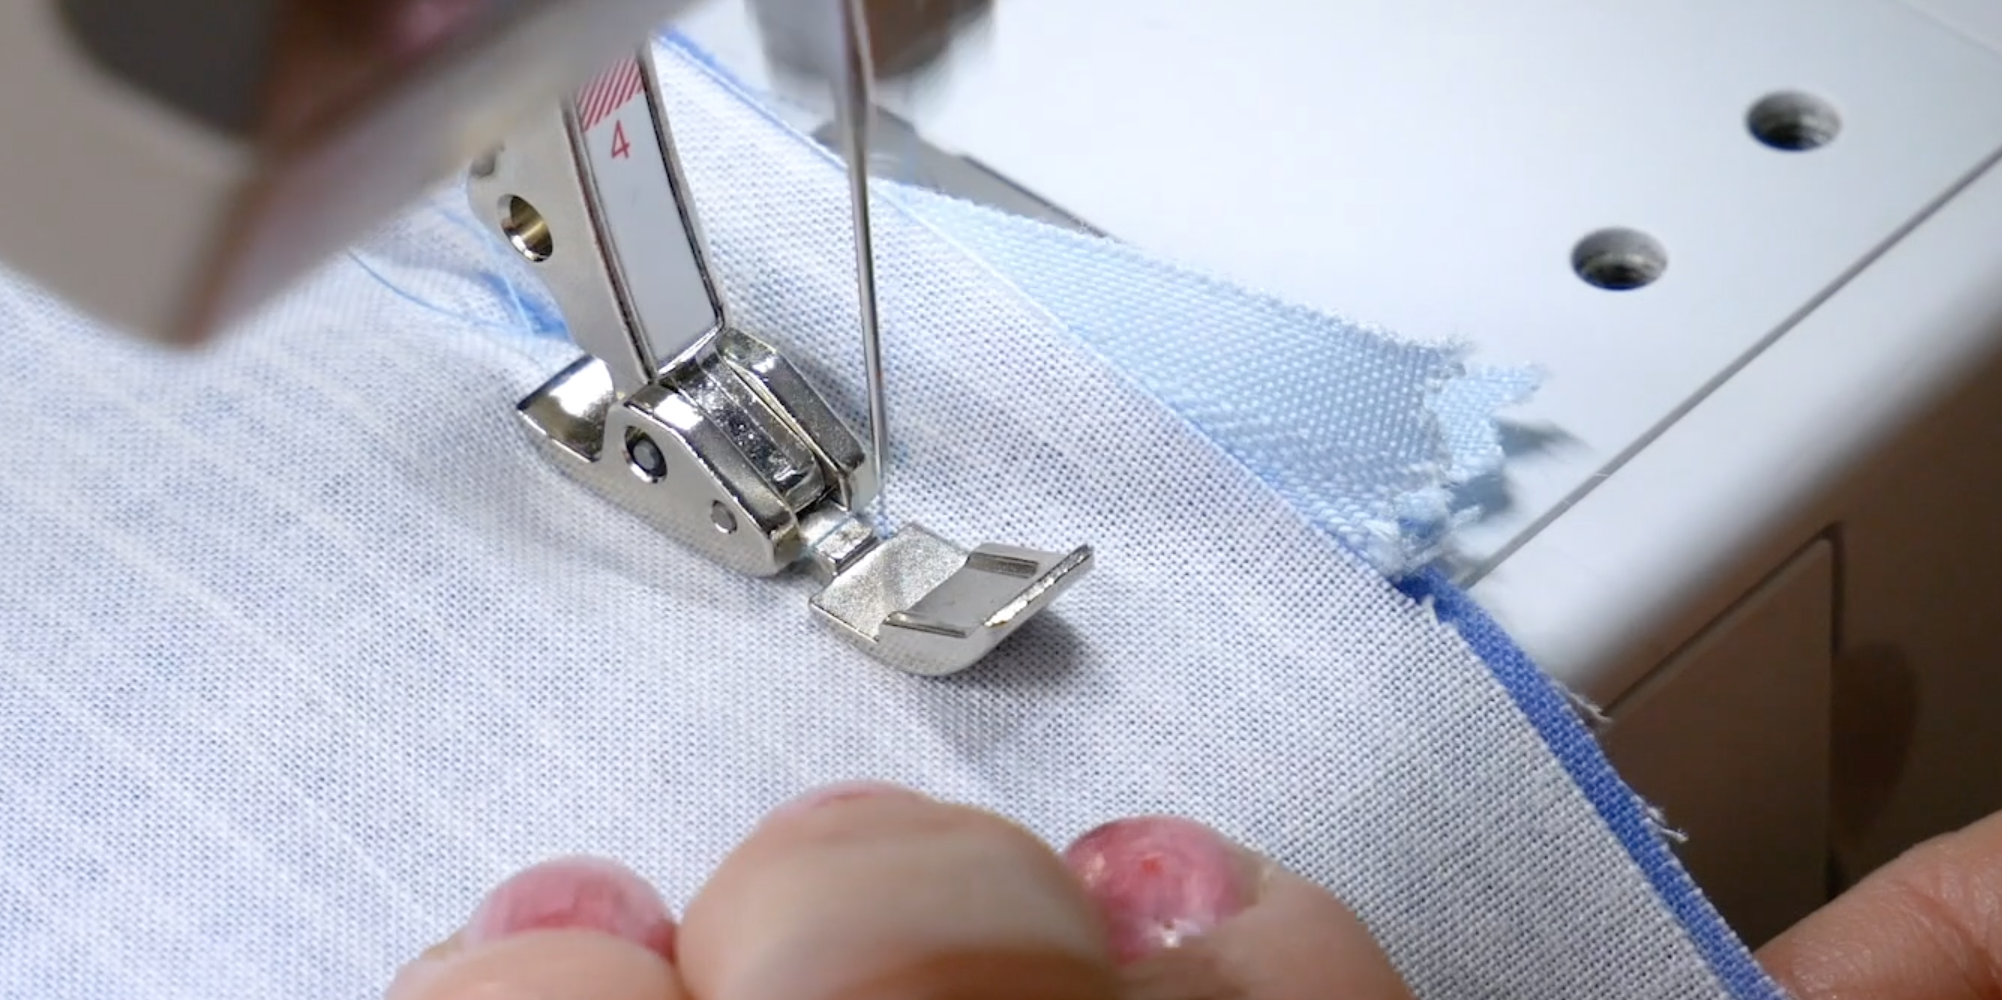
8. Machine Quilting & Longarm Quilting

If you’re not afraid of bold stitches that love to show off, a 12wt thread is the perfect choice when used for quilting. 12wt is actually the thickest thread you can put through the eye of a machine needle, so you can guarantee a quilted look where the thread adds another dimension of texture and colour.
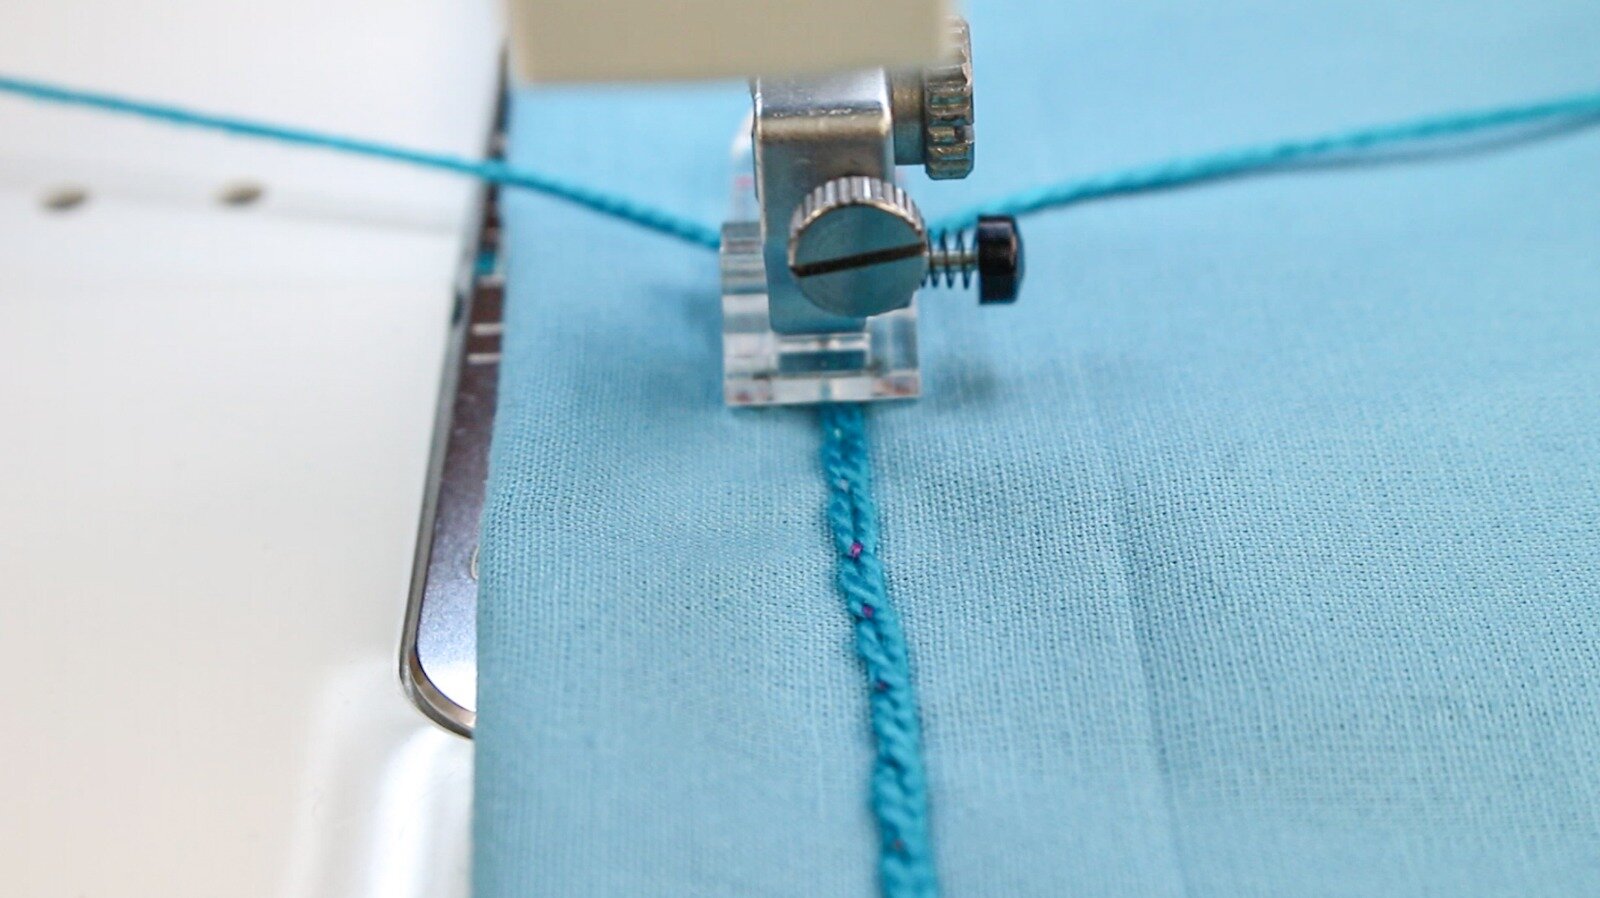
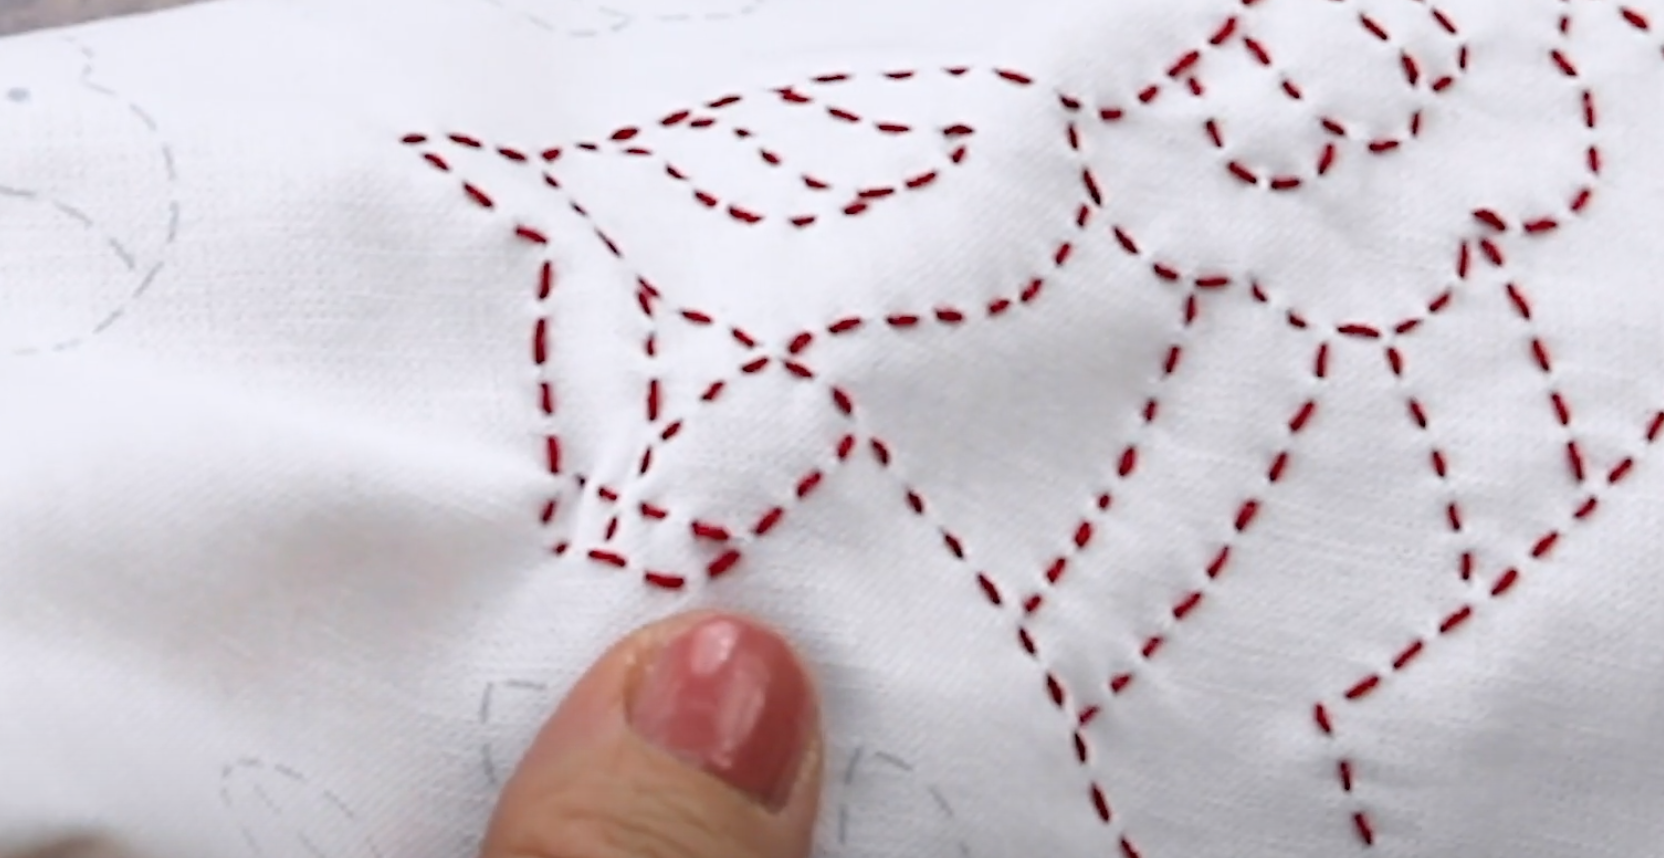
9. Red Work

Red work is a form of American embroidery that traditionally uses red thread and basic stitches to decorate household items. It can be completed with a simple backstitch following a traced pattern to create motifs that can decorate anything from dishcloths to quilts to cushion covers. A 12wt thread stands out beautifully against white fabric, making it ideal for outlining patterns.
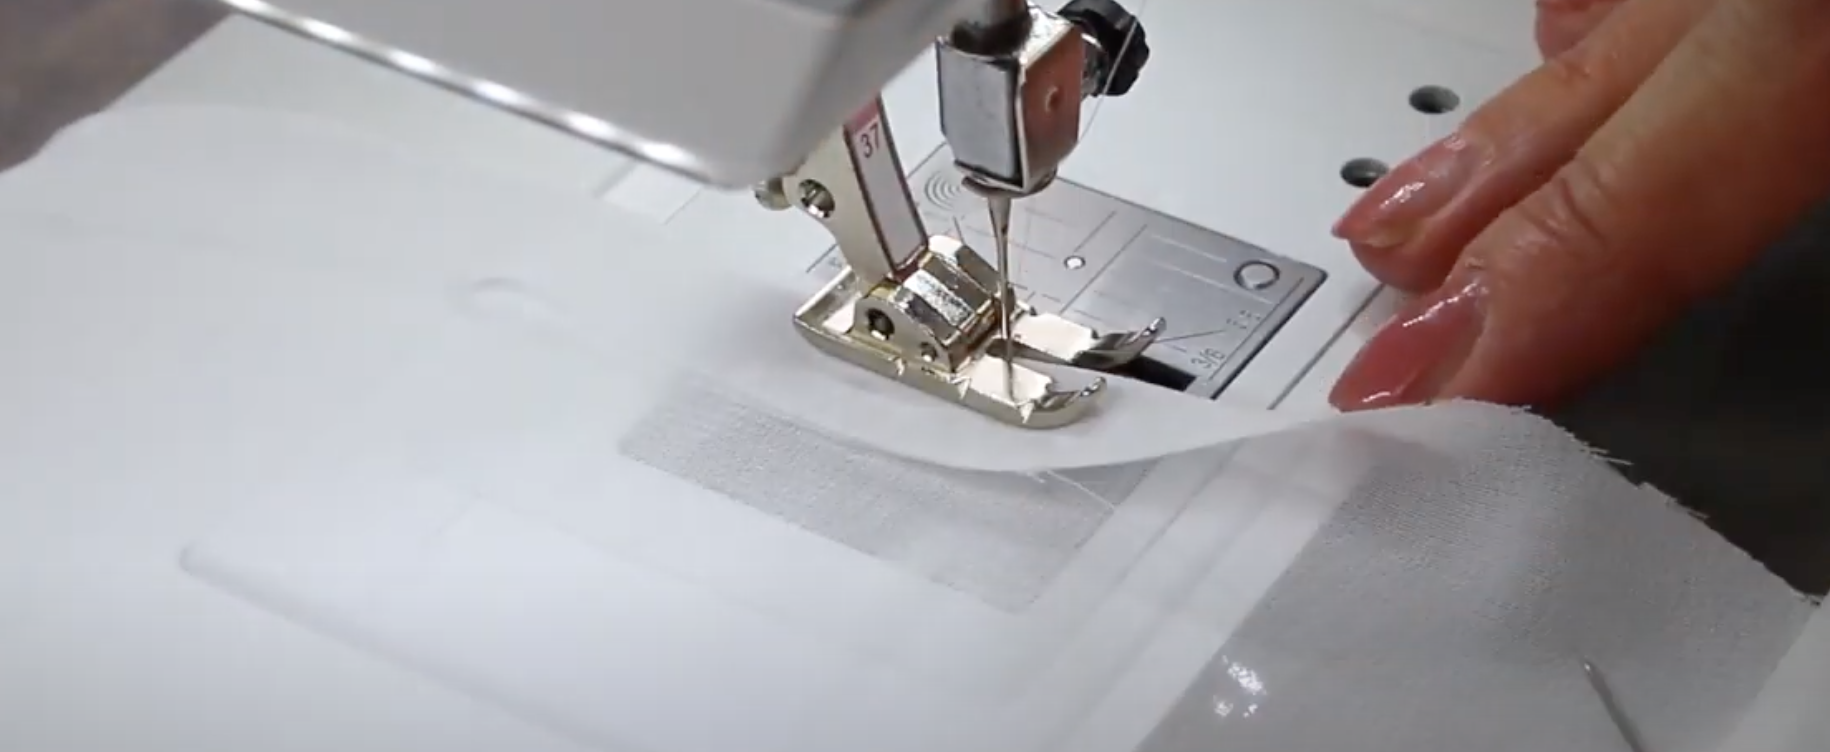
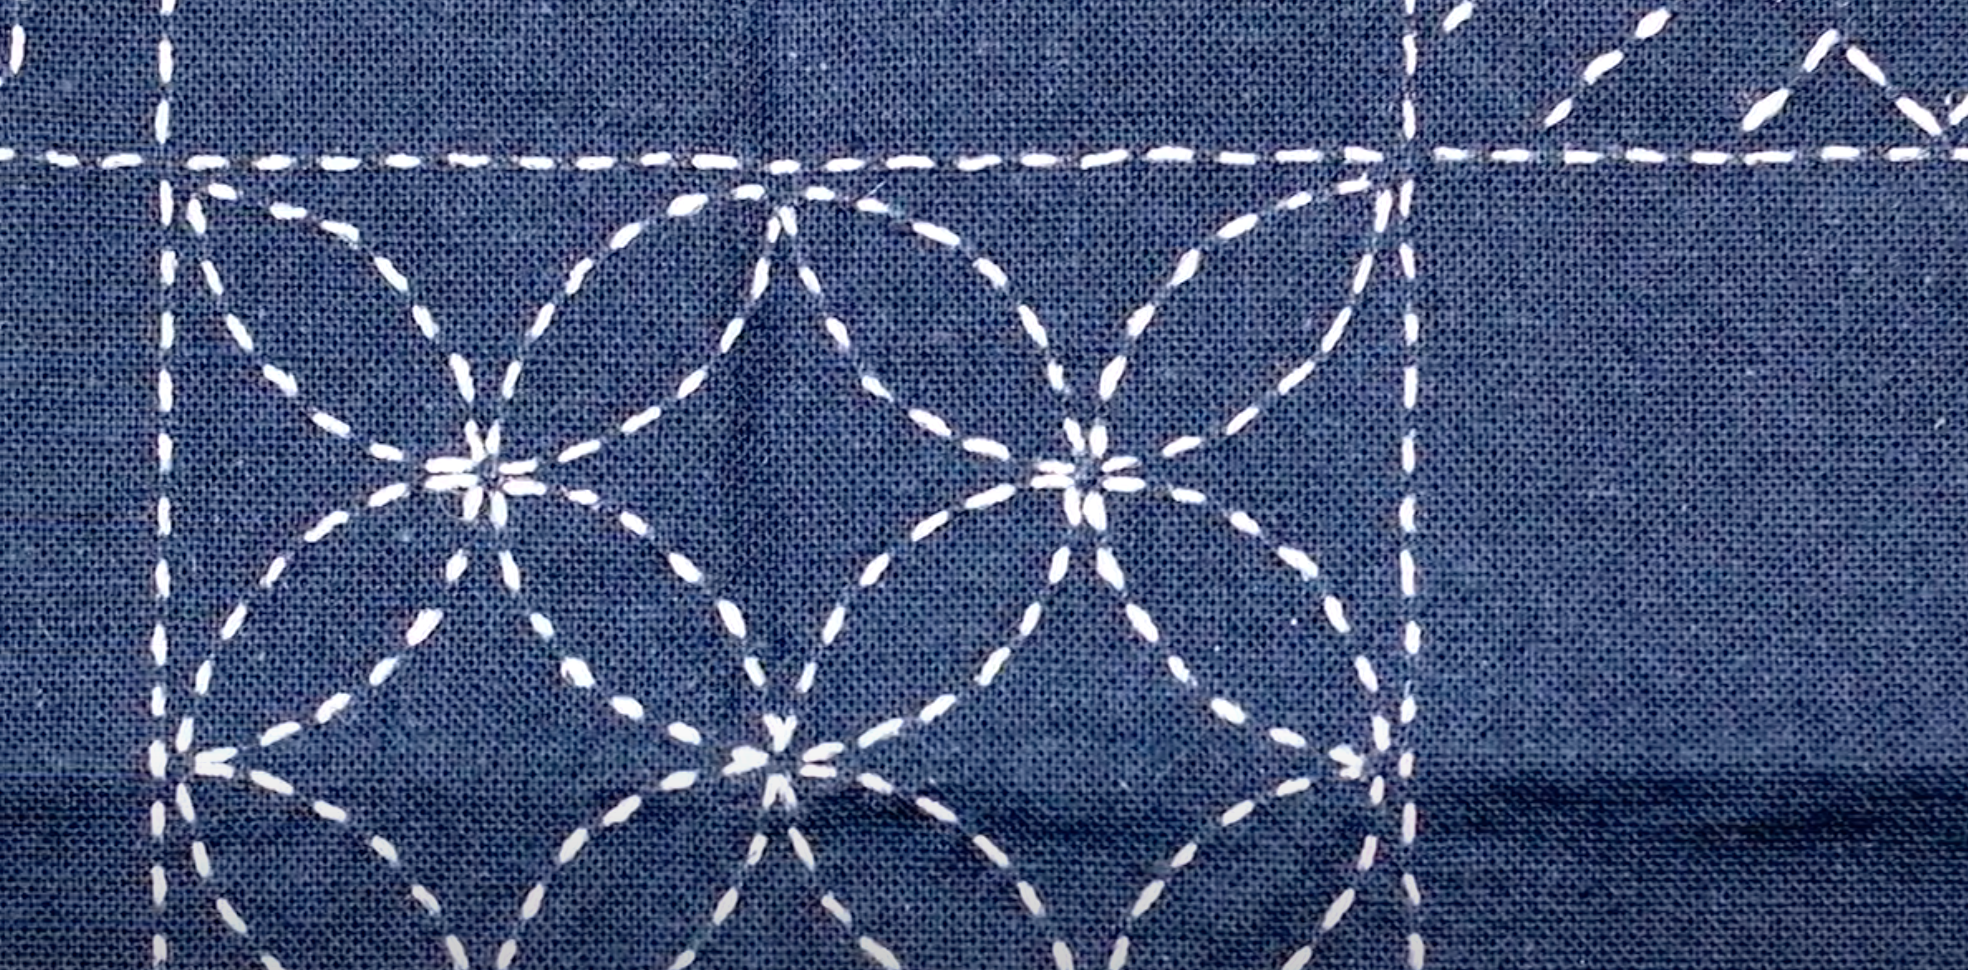
10. Sashiko

Sashiko is a Japanese embroidery technique that uses a simple running stitch to create beautiful geometric patterns or imagery. Traditionally they use white thread on an indigo dyed fabric, but these days, you can use any colours you like. Sashiko can be done by hand using a running stitch and a long hand embroidery or sashiko needle. However, you can also purchase a sashiko machine which replicates the look of a hand stitch.

Tell us in the comments where you’ve used 12wt threads, or where you would like to try them in a project! You can find a list of stores that carry WonderFil threads on www.shopwonderfil.com/shop-local/. You can also sign up to receive weekly sewing tips, free patterns, and tutorials in our newsletter. Register by clicking here! You can unsubscribe at any time by clicking the unsubscribe button on the footer of every email you receive.

Hemming Lightweight Fabrics With a Serger & Sewing Machine

Maura Kang

We’ll show you the easiest way to make a rolled hem on chiffon fabric, or any other similar lightweight material. We’ll first demonstrate it on the serger, then with a domestic machine for those who don’t own a serger. Using the recommended materials and this technique, the result will be a beautiful rolled hem that looks just as professional as if it came from the store!

A lot of formalwear uses sheer, lightweight fabrics, and this method is a good way to keep the edge looking professional like it had never been modified. Apart from your machine, you’ll only need some small but important materials:

First, you’ll want to choose the right thread. We’ll be using a 100wt poly thread called InvisaFil, which is going to blend really well in the fabric so you don’t even see it. And because the thread is so fine, it will stitch more easily through the thin fabric, resulting in fewer ruffles. It’s important to use a very fine thread like this because apart from showing less, it also won’t weigh down the lightweight fabric either.

1.png

Because the thread is so fine, we’re also going to choose a needle with a smaller eye. Choose a size 60/8 or 70/10 microtex needle which works best on light fabrics.

2.png

Finally, I’m going to use a bobbin that’s been pre-wound with DecoBob thread. This is an 80wt poly thread that comes already pre-wound on a plastic sided bobbin which will pair well with the top thread. You can alternatively wind your own bobbin with the InvisaFil thread, just remember wind it slowly since the thin thread tends to float away. If you’re going to hem your fabric on a serger, obviously you won’t use a bobbin so you’ll want DecoBob thread on a spool for your lower loopers.

3.png

On a Serger: 

We are going to use a 3 thread rolled hem, with InvisaFil in the needle and upper looper, and DecoBob in the lower looper. Consult with your serger manual and adjust the stitch length and cutting blade to get a close narrow hem.

4.png

Once your machine is threaded, do a test run on similar fabric to make sure your fabric is not puckering. You may have to adjust your differential settings to get a flat, smooth edge. 

Mark your hem with a disappearing marking pen, and serge exactly along your marked line. This is the simplest method for a quick fine hem on chiffon or similar fine fabric.

5.png
6.png

On a Domestic Sewing Machine With a Rolled Hem:

If you want to hem fine fabric on a domestic machine, this two step method will help you achieve perfect results. Mark where you want your finished hem and cut 1” below the marked line. We will trim this closer later. Be sure to spread the fabric out flat and even as these types of fabrics can easily shift during cutting. Thread your machine with InvisaFil on top and DecoBob in the bobbin. Now you’re ready to sew!

7.png

Using your fingers, tuck the edge of the fabric over 1/8” below the finished hem length and stitch very close to this folded edge. Do this all the way to the end of the fabric. If you’re hemming a sleeve or skirt, or anything where your piece is a loop, we recommend starting and ending on the seam to help hide the backstitching.

8.png

When you’re done, use a pair of sharp, fine tipped scissors to cut away the remaining fabric as close as you can to your line of stitching without snipping into the stitching itself. Exercise caution so you don’t accidentally snip over your seam. Do this all the way to the end.

9.png

Press all the way around to sink the stitches into the fabric and smooth any puckers.

10.png

Once you’ve finished trimming the excess fabric and pressing, tuck the edge 1/8” over one more time (along the finished hem marking) and stitch it down again over the original line of stitching to complete your rolled hem. If you have trouble tucking the edge over with your fingers and keeping the 1/8” length consistent, you can press the edge down with an iron before sewing.

11.png
12.png

That’s all there is to it! You can see how little the thread shows in the finished hem as well how flat the edge sits because the fine thread doesn’t add extra bulk. As most hems have a curved edge, doing the hem in two steps helps keep your hem even and consistent and eliminates any problems. These materials combined with these simple techniques are all you need for perfect, professional hemming.

(Left: done with serger. Right: done with domestic machine.)

(Left: done with serger. Right: done with domestic machine.)

Inspired to sew? Head on over to shopwonderfil.com/shop-local/ for a list of stores and retailers you can purchase WonderFil threads from. You can also sign up to receive weekly sewing tips, free patterns, and tutorials in our newsletter. Register by clicking here! You can unsubscribe at any time by clicking the unsubscribe button on the footer of every email you receive.

Introducing NEW WonderFil Wearables Series

Maura Kang

Welcome to our new series, WonderFil Wearables! We’ll show you some great ideas and techniques for creating your own unique clothing items. Together, we’ll cover ways to embellish purchased garments, creating your own garments from scratch, adjusting existing patterns, and some of our own free simpler patterns you can download for yourself.

2.png

There will be tutorials for both beginners and advanced sewers on basic sewing machines, embroidery machines, and sergers. We’ll also talk about using WonderFil threads in wearable knit and crochet projects, and even venture into the exciting world of cosplay. So, whether you are just starting to sew or looking to expand into more challenging projects, this is the place for you. Join us each week to create your own one-of-a-kind wardrobe!

Metallic Embroidered Tie Tutorial (Free Embroidery Pattern Included!)

Maura Kang

If you’re looking for that perfect gift for the father, husband, or friend in your life, this personalized embroidered tie will make a statement in any board room. We’ve even included 3 free digitized embroidery designs for you to download! All you need to do is choose your thread colours and add initials.

We have included 3 totally free digitized designs for you to download: a game controller, a fish and a bug. You can choose which you’d like to download and in what file type by clicking here. We are showing the finished product with a personalized monogram, but we leave these for you to add, so you can have the right initials.

1.png

We have chosen to use a purchased black tie as the backdrop for our embroidery. You can choose any color, but a solid color will show off the design better. To fit the included designs, the tie must be at least 2 inches wide at the point where you want your design to sit.

2.png

We have decided to stitch out the design in WonderFil’s metallic thread, Spotlite. Spotlite is a 40 wt metallic with a rayon core. Since rayon has no stretch, the core won’t stretch as a polyester or nylon core might. That stretching can cause the metallic wrap to separate, which causes the shredding and breaking that sometimes happens with metallic threads. Since the rayon core in Spotlite doesn’t stretch, that is less likely to happen, so you will have trouble free embroidery stitches, and a soft finish to the design.

3.png

We will be pairing the Spotlite with our 80wt DecoBob in the bobbin. Even very dense stitching stays soft when you have a fine bobbin thread and the evenly wound prewound bobbins will also ensure that you have no tension issues as you stitch out your design. As always, we will be using a Thread Tamer and a WonderGuard to tame the curl in the metallic thread, and a large eye 90/14 topstitch needle. As you will be using a sticky stabilizer to stabilize the tie, you can also use a universal super nonstick needle as another option. See our video on stitching trouble free with metallic thread without the headache to learn our tricks on sewing with metallic thread.

To begin, we will hoop this sticky stabilizer, paper side up, in the hoop. We are going to lightly score the paper around the edge of the hoop with a pin, and from corner to corner, so we can easily pull the paper away. Mark the center so you can easily place your tie on the right spot.

4.png

Decide where you want the center of your design to sit on the tie and mark the spot with some tailor’s chalk. With a stitch ripper, open up the back of the tie for at least 6”, so your tie can sit flat and open on the stabilizer. Using your hoop grid, place the tie centered on the hoop and smooth and press it in place so it sits flat and even.

5.png
6.png

Download the digitized design you prefer, in the format appropriate for your embroidery machine. If you choose, add the text or monogram from your machine’s text to the design before proceeding. Thread your machine with Spotlite in the first color, with a Decobob prewound bobbin in the bottom. Stitch out the design, changing colors as indicated. We have included the color numbers of Spotlite we used for our designs.

7.png

When your stitchout is complete, remove the stabilizer from the hoop and trim away on the underside of the tie. Trim all the threads, then using a hand needle and DecoBob, hand stitch the back of the tie closed again.

8.png

And there you have it. The man in your life will be proud to wear this fun, customized tie, and it is sure to be a conversation starter!

9.png

Inspired to sew with WonderFil threads? Head on over to shopwonderfil.com for a list of stores and retailers you can purchase from. You can also sign up for our free newsletter to receive more educational sewing tips, tutorials, and free patterns. Register by clicking here! We’ll see you again next time!

How to Double Fold Machine Bind a Quilt

Maura Kang

We’re going to show you how to make a double fold quilt binding on a sewing machine. If you’re like us, we’re always eager to get our quilt finished at this point, so this is our favourite way to get this final step done quickly while making sure it still looks perfect.

Apart from the quilt itself, you’ll need a few basic things. We’re going to use this 80wt thread called DecoBob to stitch the binding. It’s a very fine thread with a matte finish, so it will hide in the fabric and make the stitching less obvious. It’s also a very strong thread despite its size, so this is a great option for piecing and stitching anything down securely.

1.png

You’ll also need a cutting mat with a rotary cutter and quilting ruler to cut your binding accurately. An iron is needed to give your binding strips a quick press. We’ll also need a disappearing marking pen or a piece of fabric chalk.

Most importantly, you’ll need the fabric you want to bind your quilt with. We’ll show you how to cut and sew it together. Most patterns will tell you how much fabric you need for a binding, however if you’re doing your own quilt, you’ll have to do some math to figure out how much you need. There is an excellent binding calculator provided by Quilter’s Paradise. Alternatively, you can use the following formula to calculate how much you’ll need.

2.png

Take the width of your quilt multiplied by two and add it with the length of your quilt multiplied by two to get the circumference of your quilt. Then add another ten inches to be on the safe side so you don’t run out of binding. Take this number and divide it by the width of your fabric to find out the number of strips you need to cut to complete your binding.

So for example, we might have a 20 inch by 30 inch quilt. The width of our binding fabric is 43 inches, and we want the binding to be 2 and a half inches wide.

3.png

20 inches times two, plus 30 inches times two, plus an extra 10 inches to be safe, equals 110 inches. We’ll take the 110 inches and divide that by the width of fabric, which is 43 inches, to get 2.6 strips of binding required. We can round this up to 3 strips to make it easier.

4.png

Knowing this, we want to cut 3 strips along my width of fabric that are 2 and a half inches wide each to have enough binding for the quilt.

5.png

Now that we know how much fabric we need, we’ve gone and cut the strips to the measurements required. Next we need to sew these strips together into one long binding. To do that, we need to trim both ends of the strip to a 45 degree angle, which can be measured on the quilting ruler. Make sure they’re both trimmed facing the same direction.

6.png
7.png

Take the ends of two different strips and place them right sides together, diagonal ends matched up, and pin them together. However, if you line up the corners perfectly and are using a quarter in seam allowance, you will notice that the pieces will end up a quarter inch off.

8.png

So you will need to offset the pieces by a quarter inch when you pin them together so that after it’s sewn, your pieces will line up perfectly.

9.png

Because the thread we’re using is so fine, we’ll set the stitch length to 1.80. Using a ¼” seam allowance, sew the pieces together.

10.png

Do this for the rest of your strips until all the pieces are sewn into one long strip.

11.png

You can leave the end of the last strip squared off.

12.png

Turn the binding strips wrong sides together and press to crease it together, creating the double fold binding. However if you feel confident and don’t want to spend time pre-creasing your binding, you can fold it by hand as you sew along.

13.png

Now we’re going to open the binding up on one end and fold it over into a diagonal line so the touching edges are straight. Press the fold to create a crease. We’re now ready to start sewing it on!

14.png

We’re going to start by stitching down the end that has the diagonally folded edge. Lay the binding out completely open on the back side of the quilt, starting with the end you made the diagonal fold. We prefer to position it around the middle of the quilt on one of the long sides.

15.png

Match the edge of the binding with the edge of the quilt. Stitch it on a ¼” seam allowance using your walking foot and sew to a little bit after the raw edge of the fabric.

16.png

Snip your threads and take your quilt out of the machine. Now we’re going to fold over the binding back in half. Move your quilt about three to four inches down from where your stitching ended and start stitching your double fold binding down also with a ¼” seam allowance. That gap will create a nice pocket to tuck the tail into when you come back around.

17.png

At the corner of the quilt, we’re going to place a pin right where the quilt ends so we know where it is. Exactly ¼ of an inch away from the pin, we’re going to stop sewing. Back stitch to make sure your stitching doesn’t come out and take the quilt out of the machine.

18.png

Finger press the binding into a right angle. Then fold it back down over itself to form a tidy corner like so. Make sure the edge of the binding is lined up with the edge of the quilt. We’ll use a pin to keep it from shifting.

19.png
20.png

Put the quilt back in the machine and continue sewing at a ¼” seam allowance down the next edge. Continue doing this for the rest of the quilt.

21.png

Now we’ve come back around to where we first started. We can now join the strips together. Since we have a lot of extra binding, we’ll need to trim some off, making sure that there’s still enough to completely fit inside the pocket we made, otherwise there will be a hole in the binding.

22.png

Tuck the trimmed end into the open pocket we made earlier with the diagonal piece folded around on top. Holding it place with your fingers, continue sewing down until you reach the starting stitches. Trim your threads and now you can see the binding is completely stitched to the back side of the quilt.

23.png

We can now focus on sewing the binding to the front of the quilt. Fold the binding around to the front and use the quilting clips to hold them in place.

24.png

Just like on the other side, sew down with a ¼” seam allowance. You can start closer to the corner this time to hide your backstitch.

25.png

When you reach a corner, fold the next edge over to make a crisp diagonal mitered line and sew over it. Keep the needle down and pivot the quilt to the next edge, keeping in mind to stay at a ¼” seam allowance.

26.png

Continue sewing all around the quilt until you finish stitching it all down. There will be a small gap left where you started and ended your binding. If you wish, you can hand sew this down, however it’s up to you as we find that it doesn’t cause a problem to leave it like this.

And there we have it! One beautifully bound quilt.

27.png

We hope this tutorial made it easier for you to bind your next quilt! Let us know in the comments if you learned something new.

Ready to start sewing? You can find a list of stores that carry WonderFil threads on www.shopwonderfil.com/shop-local/. You can also sign up to receive weekly sewing tips, free patterns, and tutorials in our newsletter. Register by clicking here! You can unsubscribe at any time by clicking the unsubscribe button on the footer of every email you receive.

7 Ways to Use a Sashiko Machine

Maura Kang

Sashiko is a hand technique originating from Japan that uses a simple running stitch, however this machine replicates the look of a running stitch done by hand. This amazing machine can do all sorts of things with this one simple stitch, however they can be a little pricey to buy. We’ve compiled 8 techniques you can easily do yourself on the sashiko machine so you know how to use every advantage it brings.

The sashiko machine ensures stitches are uniform and consistent, making it easier and faster to accomplish your project. It only has one kind of stitch and threads differently from a regular sewing machine because it only uses the bobbin thread and no top thread.

1.png

Traditionally sashiko is done with white cotton thread on indigo dyed fabric, however you can choose any colour of thread and fabric you want. With a sashiko machine, you can even do more than just decorative stitching!

2.png

You’ll want to choose a medium weight thread as the sashiko machine will double up the stitches. So if you have too heavy a thread, you’ll end up with shredding and stitch consistency problems. I’ll be demoing with two threads. The first is a 35wt thread called Silco. This is a synthetic cotton thread that’s completely lint free. The second is Konfetti, a 50wt Egyptian cotton thread.

1. Quilting:
If you love the look of hand quilting but don’t have the time or patience to quilt an entire quilt by hand, you can do it with the sashiko machine instead. This is also a great solution for anyone with arthritis in their hands. The sashiko machine gives you the look of hand quilting, but at ten times the speed!

3.png

2. Appliqué:
You can use the sashiko machine for raw edge appliqué. This is a simple but beautiful way to appliqué your pieces down with a simple running stitch and combines the traditional look of sashiko with your appliqué project.

4.png

3. Adding trims:
The sashiko machine is perfect for quickly adding trims to clothing or home décor items, with the advantage of giving it the hand stitched look. I like to add it to sleeve cuffs, collars, bags, or pillows.

5.png

4.Couching:
It’s really easy to do couching without the need for a couching foot like a regular sewing machine requires, however it will look a little different. Place the ribbon or yarn you want to couch down horizontally across the needle and take one or two stitches, then pull it over to the other side of the needle and take another stitch or two. Continue this process to finish couching it down!

6.png
7.png

5. Braiding:
Another method of couching with the sashiko machine that creates a different look is by braiding two threads back and forth in front of the needle. Take your yarn or ribbon and place the center of it in front of the needle so you’re holding both of the ends in your fingers. Take one or two stitches to secure it, then weave both ends opposite across the front of the needle and take another one or two stitches. Continue doing this and you’ll end up with a woven couched thread.

8.jpeg

6. Fabric flower:
Using organza or another similar lightweight fabric, you can create a flower by scrunching up the fabric and stitching over it so that the edges flare up. Take a piece of fabric, about 5 inches wide and 25 inches long, depending on how large you want the flower to be. Position it along the centre of the fabric and push it up against the needle before taking a few stitches. Continue doing this while slowly turning the fabric clockwise. You’ll end up with a beautiful fabric flower that’s perfect for decorating a birthday party, or upcoming baby or wedding shower!

9.png
10.png

7. Pleats:
You can easily add a decorative pleat on a piece of clothing or home décor item using the sashiko machine. Position your fabric where you want the pleat to fall from and push the fabric up against the needle. Take a few stitches to secure it and continue to press and stitch as you sew straight down. The result is a beautiful gathered pleat.

11.png

There’s so many creative ways to use the sashiko machine, so please tell us what you’ve made in the comments below! Ready to start sewing? You can find a list of stores that carry WonderFil threads on www.shopwonderfil.com/shop-local/. You can also sign up to receive weekly sewing tips, free patterns, and tutorials in our newsletter. Register by clicking here! You can unsubscribe at any time by clicking the unsubscribe button on the footer of every email you receive.

How to Choose the Right Machine Needle

Maura Kang

1.png

Due to the variety of fabrics and threads available on the market, needle manufacturers have quite a selection to choose from. Every needle has its own purpose, but how do you know which is the best one to use for your project? We’ll walk you through the different categories of needles, the anatomy of a needle, and when to choose a certain type of needle. We’ll be focusing on domestic sewing machine needles as these are the most widely used.

2.png

Part 1: The Anatomy of a Needle

Every needle is made up of roughly the same parts. On the front of the needle, you’ll see the point of the needle that pierces the fabric. Above that is the eye which the top thread runs through, and the groove which runs all along the shaft of the needle. This groove allows the thread to be nestled inside, protecting it as the needle runs through the material and keeping it out of the way so it can glide through the material without protruding, thus creating smooth and even stitches.

Above the shaft is the shank which is the part of the needle that is held by the machine. The shaft of most domestic sewing machine needles usually have a rounded front face and a flat back side to make it easy for insertion. At the top of the shaft is the butt which is the part that is inserted into the machine. The shoulder is the section between the shank and shaft. This is where most needle brands will add a strip of colour indicating the type of needle it is.

3.png

On the back side of the needle you will find the scarf, an indentation that makes it easier for the bobbin thread to grab the top thread and create a stitch. The length of the scarf will vary depending on the type of needle.

Part 2: Needle Sizing System

There are two ways to measure needle size, the American and European systems. Both are usually indicated on the packaging of the needle. American sizes usually range from 8 to 19, while European sizes range from 60 to 120. For example, the sizing on this Schmetz needle case indicates the European size on the left and the American size on the right. So a 90/14 needle means it’s a 90 in the European size and 14 in the American size. The larger the number, the larger the needle.

4.png

You will want to pair a smaller size needle with a finer thread and a larger needle with a larger thread. Using too large of a needle will cause the thread to sit in a hole too large for it, which can look ugly. And a needle that’s too small for the thread will cause excess friction from the thread pulling through too small of a hole in the fabric and won’t fit well in the eye of the needle, which will lead to thread breaks.

Part 3: Types of Needles

5.png

Universal Needles

Universal needles are intended for all-purpose sewing. It is recommended to use a universal needle for woven fabrics as it is designed with rounded edges and a tapered point, meaning the needle isn’t so sharp that it will shred the fabric. The shape of the needle allows it to slip through woven fabrics easily rather than cutting through it which can wreck the fabric.

1.png
6.png

Super Non-Stick Universal Needles

A popular new needle on the market is a super non-stick needle. These universal needles are coated with a super non-stick coating like the kind you’d find on a Teflon pan. This coating allows the needle to glide through tacky materials like stabilizer, which makes a huge difference in improving the stitch quality and consistency and preventing thread breaks.

Screen Shot 2020-05-25 at 5.34.40 PM.png
7.png

Ballpoint/Jersey Needles

Similar to universal needles, a ballpoint or jersey needle has rounded edges to avoid cutting the fabric. However, it differs in that it carries a much more blunted point in comparison to the universal, allowing it to slide between the weave of the fabric and preventing holes or runs in the knit fibres. It is best used for close knit fabrics such as jersey or interlock fabrics.

3.png
8.png

Embroidery Needles

Because machine embroidery involves a lot of high-speed stitching in a dense area, embroidery needles offer a larger, elongated eye that helps protect the thread, preventing it from breaking. The scarf is also specially shaped to prevent thread breaks and keep a consistent stitch quality at high-speed.

4.png
9.png

Topstitching Needles

Topstitching needles are designed with an extra-large eye and sharper point, allowing it to accommodate larger decorative top threads. Other specialty threads that are usually considered less strong, such as metallic threads, should also be used with this needle as the larger eye allows the thread the flexibility to move around more, preventing thread breaks.

5.png
10.png

Metallic Needles

These needles are similar to an embroidery needle in that they are designed with a larger polished eye and scarf to prevent the thread from shredding. These needles are intended for metallic threads.

6.png
11.png

Quilting Needles

Quilting needles are designed with an extra-long shaft and tapered point made to penetrate several layers of fabric and batting. Its slightly rounded point prevents damage to the multiple layers of material and keeps the thread from shredding.

7.png
12.png

Microtex/Sharps Needles

These needles are more slender and much sharper than most needles. They are designed to penetrate finely woven, delicate or microfibre fabrics, or for doing appliqué or quilting with fine threads.

8.png
13.png

Denim/Jeans Needles

Denim and similarly thick cotton fabrics like canvas may cause problems with other needles due to the heavy material the needle must sew through. This needle is designed with an extra strong and sharp tip, as well as a slender eye that aids the thread in gliding through the thick material and preventing skipped stitches.

9.png
14.png

Leather Needles

Designed for heavy and dense materials such as leather, artificial leather, and thick non-woven materials such as vinyl. Leather needles have a distinct triangular shape made to penetrate through these materials with a clean, large hole.

10.png

These are just some of the most common domestic sewing machine needles on the market. Let us know in the comments if you learned something new from this video or tell us about a sewing needle you can’t live without. 

Ready to start sewing? You can find a list of stores that carry WonderFil threads on www.shopwonderfil.com/shop-local/. You can also sign up to receive weekly sewing tips, free patterns, and tutorials in our newsletter. Register by clicking here! You can unsubscribe at any time by clicking the unsubscribe button on the footer of every email you receive.

How to Sew an Invisible Zipper With a Regular Zipper Foot

Maura Kang

Do you want to elevate your sewing projects for a more refined and professional look? One way to do so is by sewing invisible zippers! Invisible zippers are the perfect way to give your projects a seamless transition by hiding the zipper in a seam. All you need is your garment, invisible zipper, regular zipper and presser foot, fabric marker, pins and a ruler.

Before we begin, let’s look at the differences between an invisible zipper foot and regular zipper foot.

To compare, both feet have very different designs, sewing steps, and ease of use. For the invisible zipper foot, there will be two grooves in the middle of the foot. This allows for a centered stitching line. (Keep in mind that you may need to also adjust your machine’s needle position if you use it).

1.png

On the other hand, the regular zipper foot has left and right notches to allow you to stitch closer to the edge of your project. Many machines do not come with an invisible zipper foot, so in this tutorial, we’ll show you how to do it with just a regular zipper foot.

2.png

Take the fabric or project you will be working on and lay it out, pulling it smooth. Iron the fabric area if necessary. Using fabric markers or pins, mark the top edges at your desired allowance where you want your zipper to be. For this tutorial, we will do a 3/4” edge. This step can be optional however, it certainly helps to indicate your zipper placement to ensure that you have aligned the pieces precisely. Next, you will mark your desired vertical seam allowance, we will be using a ¼” seam allowance.

3.png

Before you start sewing, we need to prepare your zipper to ensure it lays flat and sews well. Take your iron and set it to the lowest heat setting. Unzip your zipper, then press and iron the zipper teeth away from the zipper tape. During this step you should lift the iron periodically to avoid melting your zipper teeth or coils.

4.png

It is good to note that the following steps will be entirely different if you use an invisible zipper foot. When using a regular zipper foot, your zipper and fabric will be sewn right sides together onto the fabric. Remember to make sure your zipper is unzipped to the end/bottom stopper for this step. Then place down the right side of your zipper onto the fabric right side. Line up the zipper coils at the exact line where you’ve marked your seam allowance, pin into place.

5.png

Now you are ready to sew your zipper, but what thread should you use? For light to medium garments, we highly recommend using an 80wt thread called DecoBob on the top and bottom. This is a very fine cottonized polyester thread that will really blend into the fabric and not add any extra bulk to the seams, so your invisible zipper will look clean and tidy. I’ll also be pairing it with a size 80/12 needle.

6.png

Position the zipper teeth under the foot’s left groove and begin sewing down from the top edge. Make sure to reverse stitch and forward to keep in place. Keep stitching until you’ve reached the point where your needle is parallel to your zipper stopper. Reverse and forward at the end to keep it in place and remove from the sewing machine.

7.png

Before sewing the other side of the zipper, flip your entire project so that your sewn side lays on top of the unsewn piece. Make sure the zipper edge is lined up with the seam allowance line at the top and side, and pin into place.

8.png

Now sew the zipper to the other side of your fabric piece and repeat the steps as before. Remember to make sure your zipper coils are lying flat, then position the zipper teeth under the right groove of the foot. Sew from the top edge and stitch into place until you’re parallel to the zipper stopper. Stitch in reverse and forward in place to make sure it’s held in place.

9.png

Now that you have completed your main stitches, we need to finish off the seams below your zipper. Pull the zipper all the way closed and place the right sides of your fabric together. Adjust the zipper tail ends so it is out of the way, then place your foot as close as possible to your stitched line, then sew an additional 2 inches.

10.png
11.png

The last step you’ll need to do to complete your invisible zipper is finishing off the seam. For this you’ll just need to remove the zipper foot and install your regular presser foot. Sew your fabrics together by following your previously stitched line, and voila! You just learned and completed a proper invisible zipper.

Regular machine foot

Regular machine foot

13.png

Take a moment to tack the ends of the zipper tape to the seam allowance to make it easier to pull your zipper.

14.png
WhatsApp Image 2020-05-22 at 11.54.53 AM.jpeg

If you’ve tried this for yourself, tag us on Instagram @wonderfilspecialtythread or by the hashtag at #wonderfil. We would love to see your sewing projects and progress! Ready to start sewing? You can find a list of stores that carry WonderFil threads on www.shopwonderfil.com/shop-local/. You can also sign up to receive weekly sewing tips, free patterns, and tutorials in our newsletter. Register by clicking here! You can unsubscribe at any time by clicking the unsubscribe button on the footer of every email you receive.

How to Set up Your Embroidery Machine for the Best Results

Maura Kang

Machine embroidery can be addictive because it’s so easy to sew gifts, personalize your home, and make your plain clothes into something totally unique. An embroidery machine is an expensive but worthwhile investment. We’re sharing a few of our best tips to make sure your embroidery designs look better, sew easier, and ensure you get the most out of your embroidery machine.

1. Basting with water soluble thread

You may have heard about water soluble thread, but did you know it could make a huge difference in your machine embroidery? We stitched out this design with two layers of stabilizer on the backside of the fabric. However, because the design has a lot of sharp points, it creates a lot of puckering around it.

Embroidery design without water soluble thread.

Embroidery design without water soluble thread.

To stop this from happening, we’re going to stitch a circle of Rinse ‘n Gone water soluble thread through the fabric and stabilizer before stitching out the design. This holds the layers together much more tightly than the embroidery hoop will and stop the fabric and stabilizer from shifting.

Embroidery design with a ring of Rinse ‘n Gone water soluble thread stitched around the edge of the design.

Embroidery design with a ring of Rinse ‘n Gone water soluble thread stitched around the edge of the design.

Once the design is stitched out, the thread can be scrubbed out with a wet toothbrush if you don’t want to wash the whole embroidery. After a quick press, you can see how flat it looks in comparison to the embroidery design without the water soluble thread.

3.png

2. Using the best bobbin thread

Machine embroidery uses a lot of dense stitching in a small area, meaning your choice of bobbin thread will make a huge difference in how flat your embroidery design sits, as well as how much the bobbin thread will show through. We highly recommend using a finer bobbin thread, such as DecoBob 80wt, because the fine thread doesn’t add any extra bulk to the dense stitching and blends into the fabric better than a 40 or 50wt thread will. In the left part of this embroidery, we used a white 50wt bobbin thread. You can actually see the bobbin thread showing through the design. However below, we switched to a white DecoBob 80wt bobbin thread. Even though the thread is white, it can’t even be seen in the design.

4.png

Simply changing your thread can make a huge difference in the quality of your machine embroidery, but you can still take it one step further. In the left half of this embroidery we used a bobbin self-wound with DecoBob 80wt thread. On the right side, we used a pre-wound DecoBob bobbin. You can actually see how the left side has larger breaks in the embroidery while the right side lays flatter with tighter stitches. These pre-wound bobbins are wound perfectly evenly at the factory. This gives you a consistent machine tension that noticeably affects the quality of your machine embroidery.

5.png

To find out what bobbin size your machine takes, you can consult our Bobbin Guide by clicking here.

3. Apply a Wonder Guard™ for even tension and prevent unravelling

A Wonder Guard is this handy little thread guard that can be used on any spool of thread that requires a vertical feed. To apply it to your spool, wrap it around the spool snuggly but not tightly, with the feed of the thread coming from the top. This is a perfect tool for slippery threads that tend to pool around the base of the spool. It will also even the tension of the thread which will make a huge difference in the quality of your machine embroidery stitches.

6.png

If you’re embroidering with metallic threads that have a curl to it, also known as having a high memory, it will also help pull out those curls out before it even comes off the spool. And as an added bonus, the wonder guard will keep your threads tidy, clean, and even prevents it from drying out when you’re not sewing with it.

4. Using a Thread Tamer for perfect tension.

A Thread Tamer is a multi-purpose thread stand that offers a number of features to give you the best results in your stitching. If you’re sewing with a metallic thread that carries a lot memory, you can weave the thread through the extender slots to help pull out the tangles before the thread even reaches your machine.

7.png

At the same time, it’s tall enough to clear the top of the machine so it doesn’t drag along the side, changing the thread’s tension. It also allows the thread to relax before entering the machine, which is beneficial for finnicky threads or metallic threads. This combination of things will give your machine embroidery better tension, resulting in higher quality stitches.

8.png

Follow these tips for gorgeous, professional looking machine embroidery with any home embroidery machine!

Let us know in the comment section below if you have any machine embroidery tips you always follow, or share with us if these tips are things you’re already doing in your embroidery projects. Inspired to sew? Find WonderFil products in a store near you at shopwonderfil.com/shop-local.