Contact Us

Use the form on the right to contact us.

You can edit the text in this area, and change where the contact form on the right submits to, by entering edit mode using the modes on the bottom right. 

2915 19 St NE
Calgary, AB, T2E 7A2

18662506101

WonderFil Specialty Thread Blog

WonderFil brings you the latest news, events, upcoming thread lines and special tips and advice. Follow WonderFil Specialty Threads on our social media: Facebook, Instagram, Twitter, Pinterest, and Youtube.

Filtering by Tag: invisible

Sewing the BEST Stitch in the Ditch Tutorial

Maura Kang

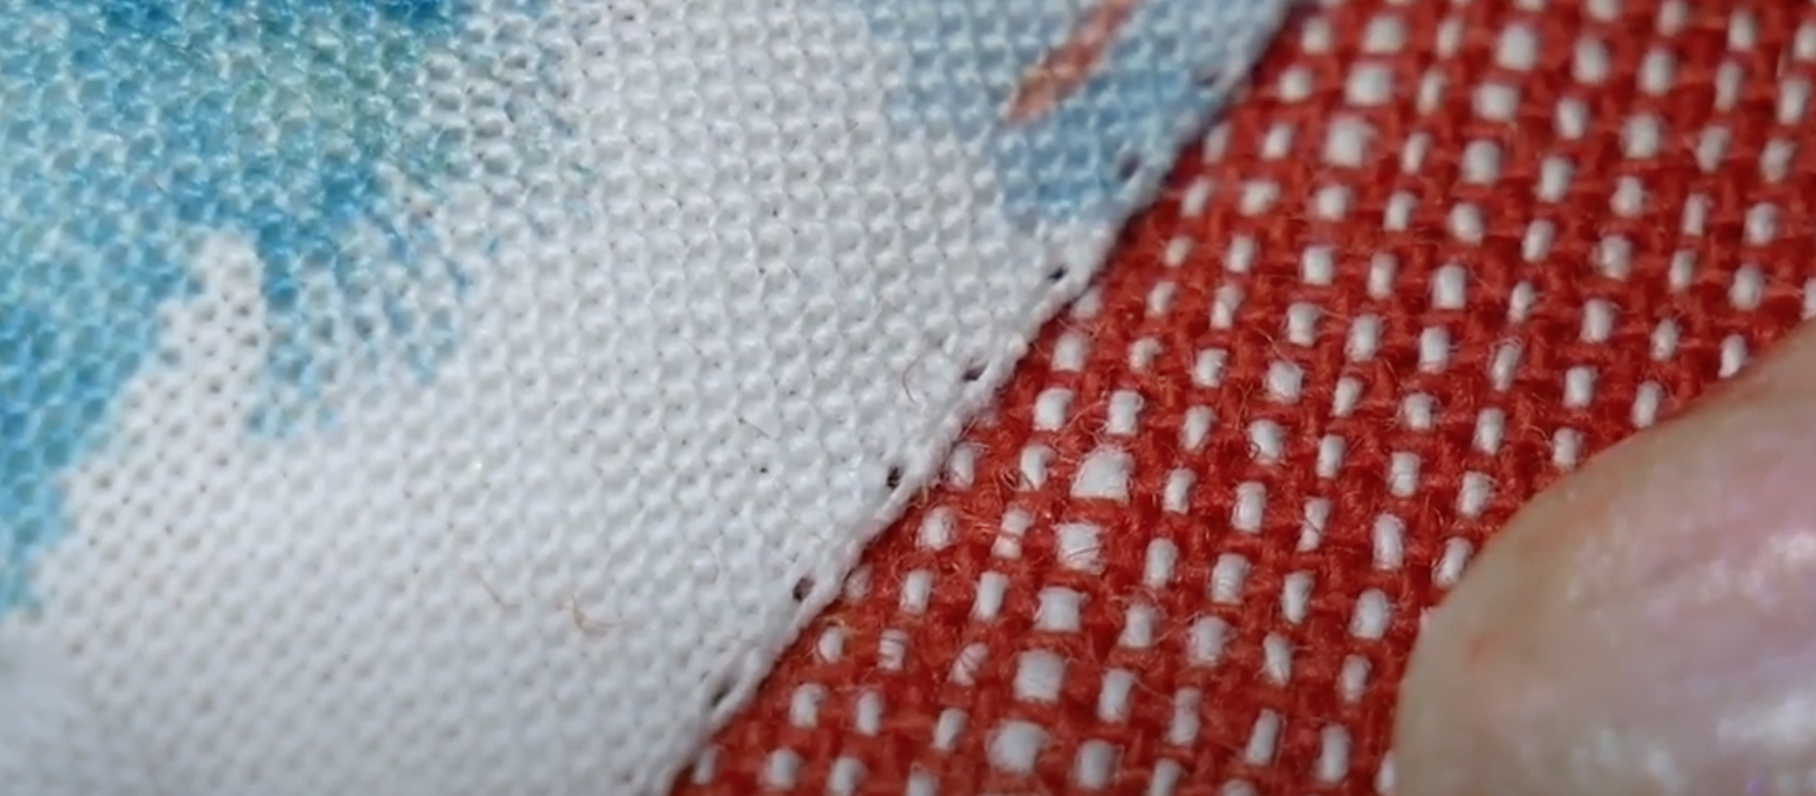
Stitch in the ditch is a technique where you sew directly in the fold of a seam to hide your stitching, while securing your quilt block down. This way you don’t see any quilting around that area of the block. If you’re looking to sew stitch in the ditch on your latest quilt or project, we have the best tips on making it look invisible and perfect. Let’s take a closer look!

The first and most important thing to do before you even begin is choosing the right thread. We recommend using InvisaFil, a 100wt cottonized polyester thread that is incredibly fine and hides in the fabric wherever it’s stitched. A basic colour such as grey, or a color that even slightly matches the fabric will be enough for it to hide almost completely. This will ensure your stitching shows as absolutely little as possible, even if you accidentally sew outside the seam.

1.png

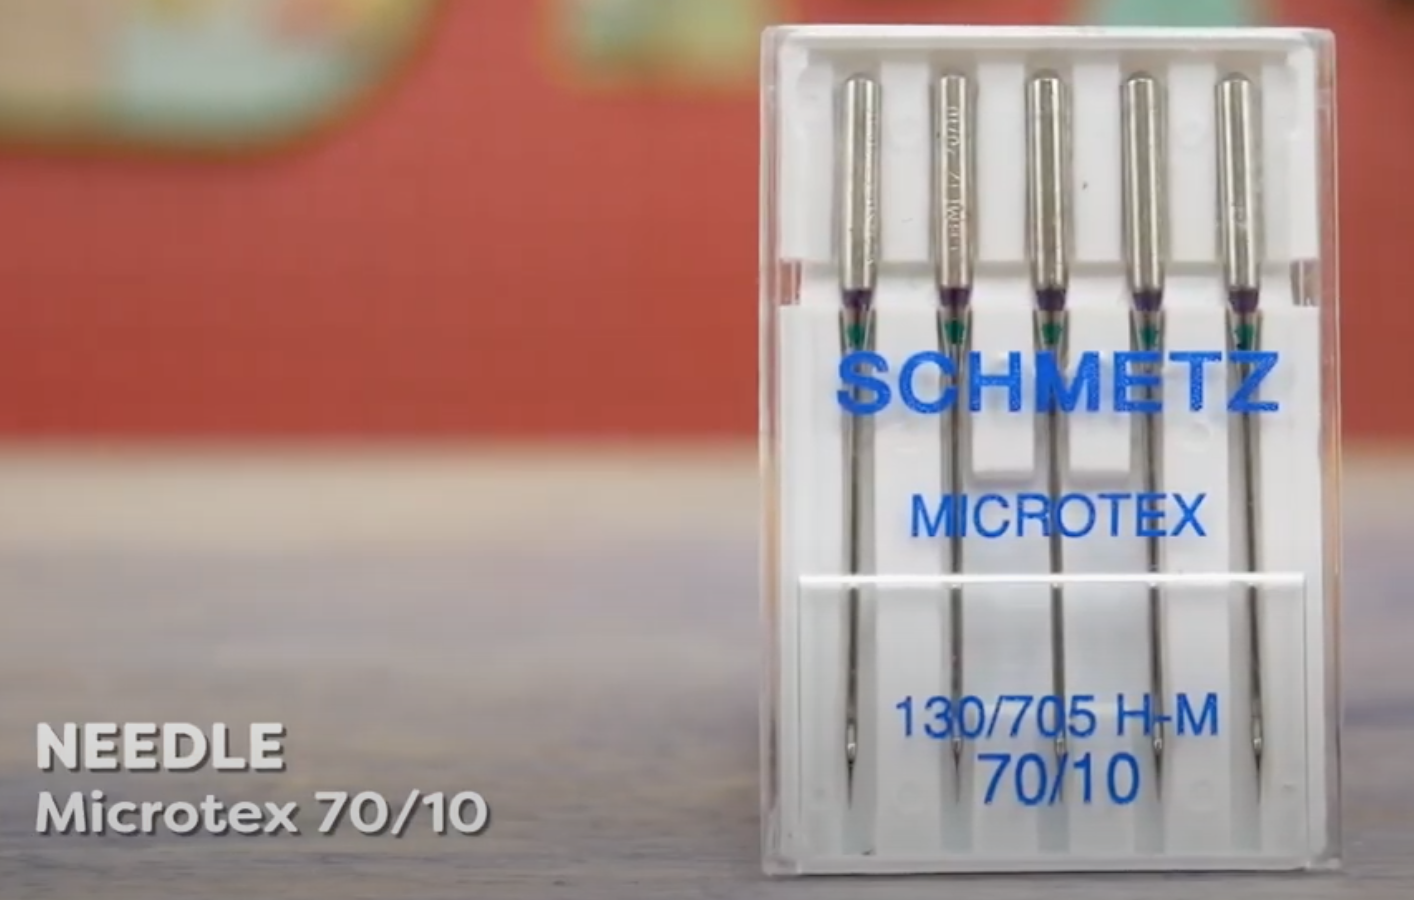
Because this thread is finer, you can choose a 70/10 or 80/12 size needle. This smaller needle will punch a smaller hole in the fabric so that the fine thread won’t be sitting in too large of a hole.

2.png

You can use the same thread in the bobbin, or alternatively a similar thread called DecoBob. DecoBob is also a cottonized polyester thread, but it’s marginally thicker at 80wt. This gives your stitching a slightly stronger hold and it also is available as convenient pre-wound bobbins. These pre-wounds will give you a better stitch consistency and even tension.

3.png

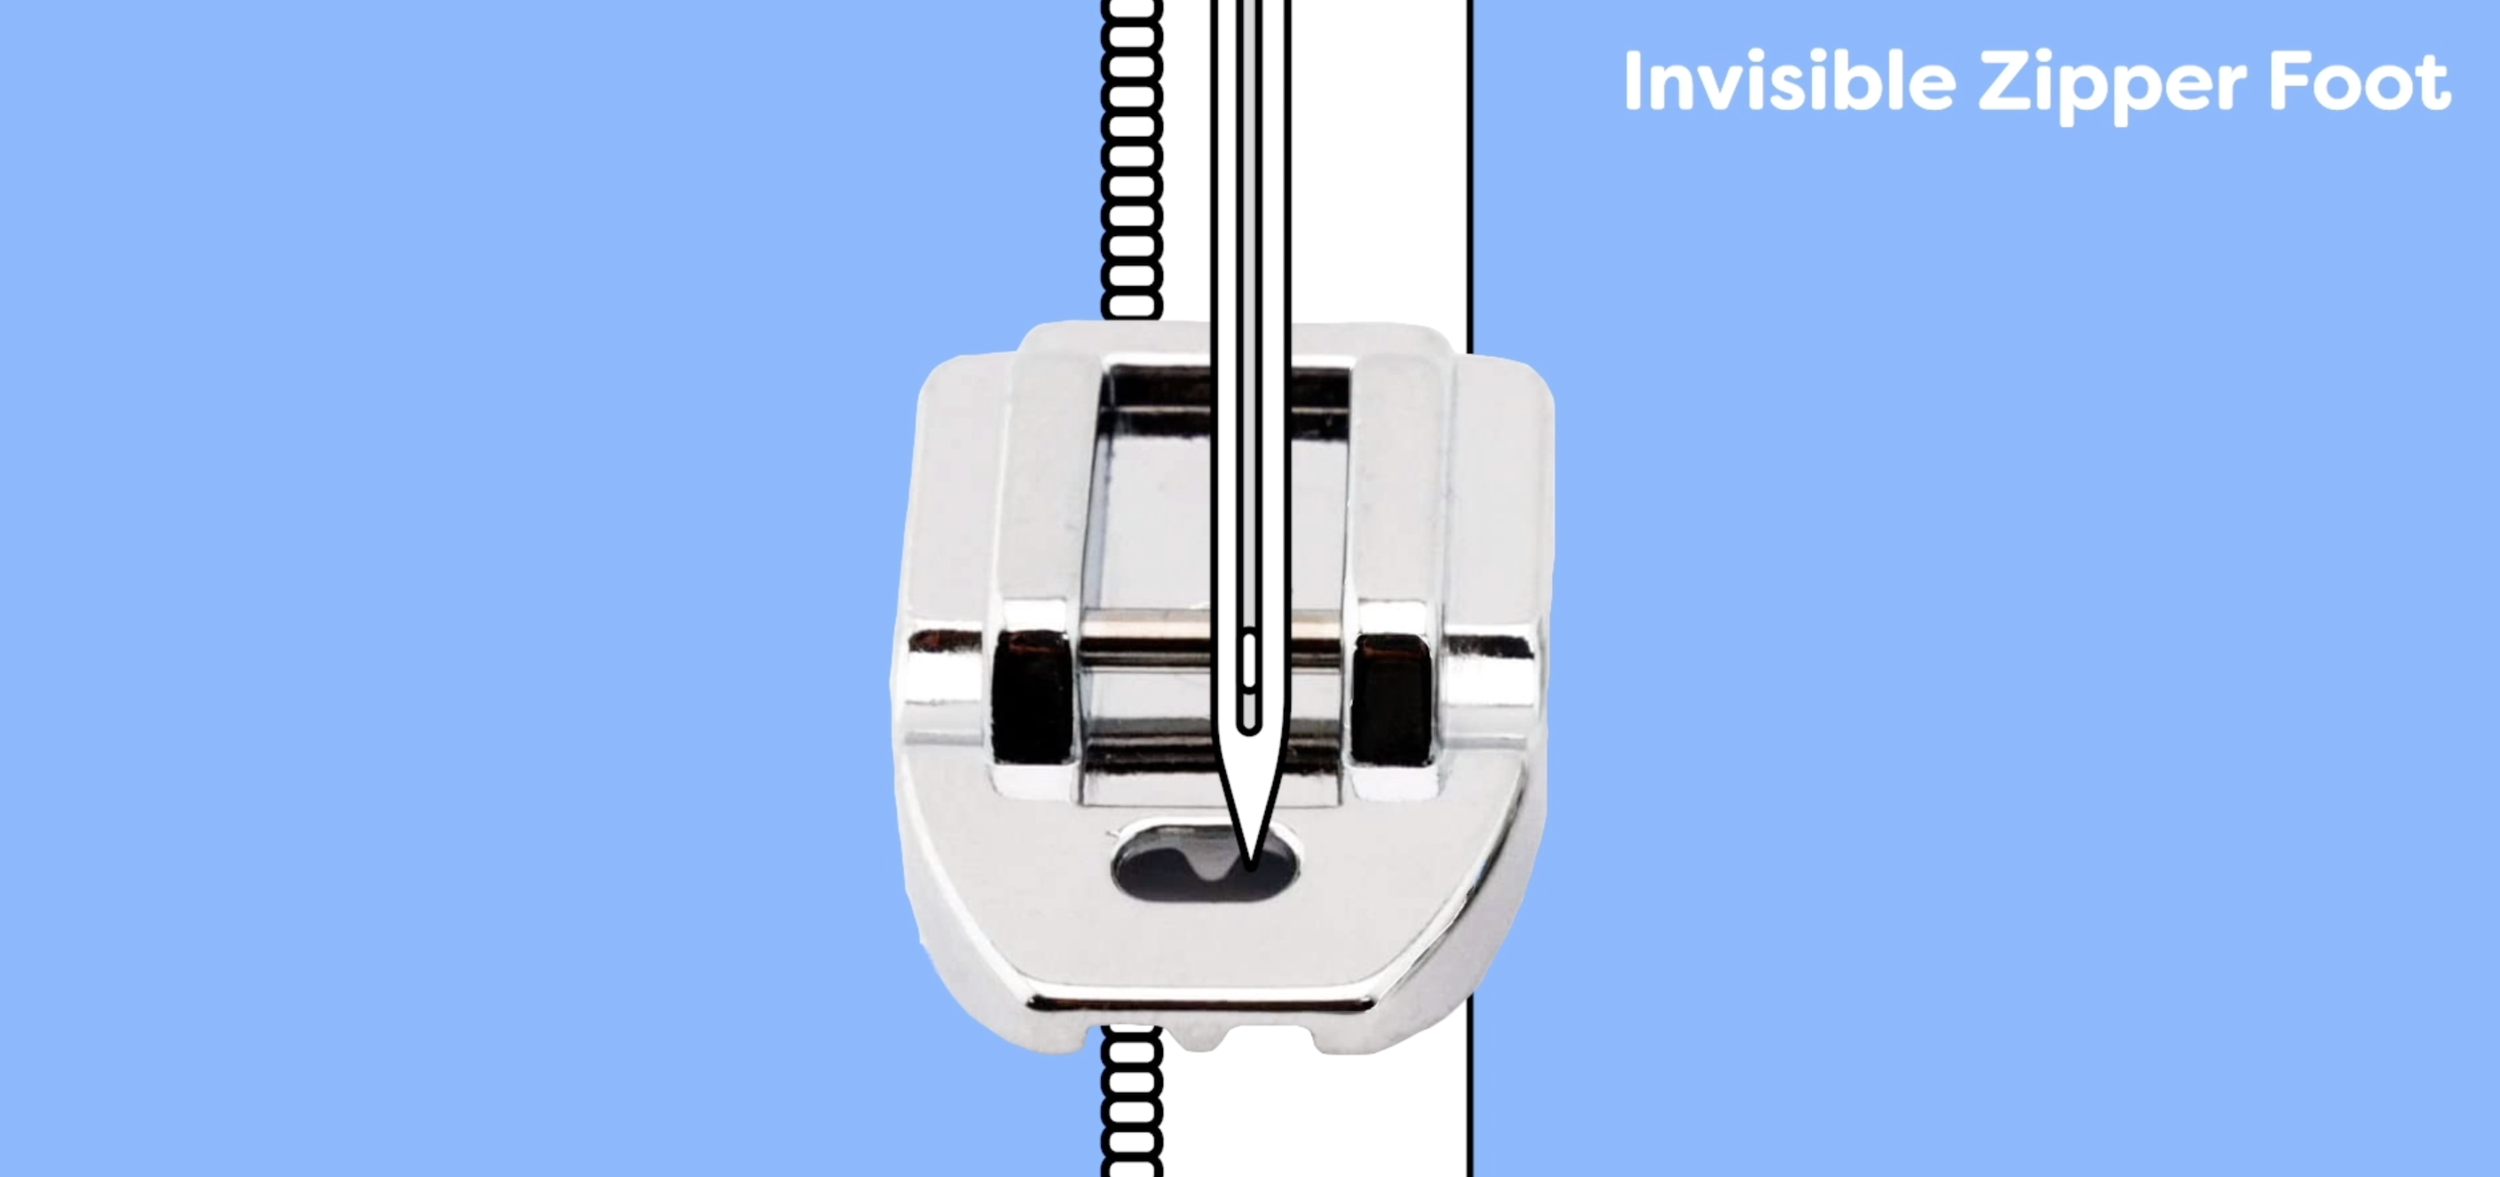
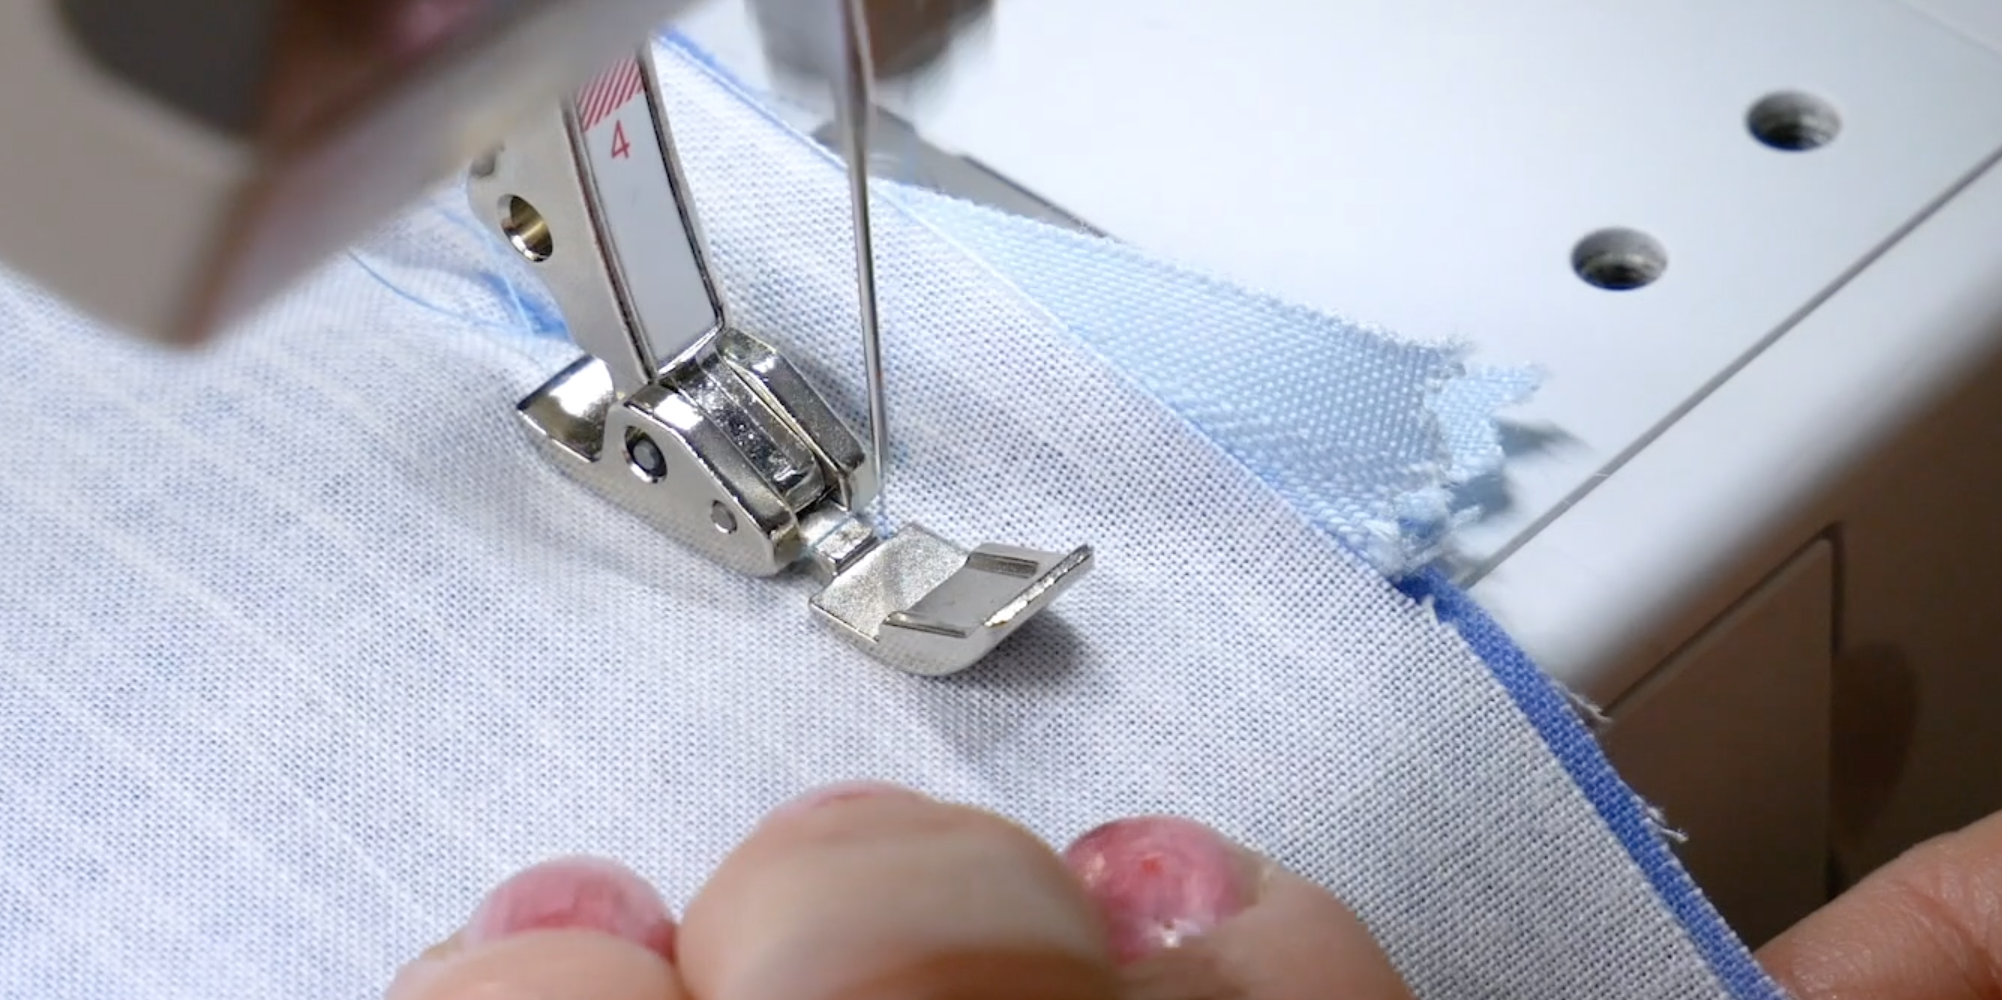
Choose a machine foot that is marks the center needle position. This makes it easier to line up the seam you’ll be stitching into.

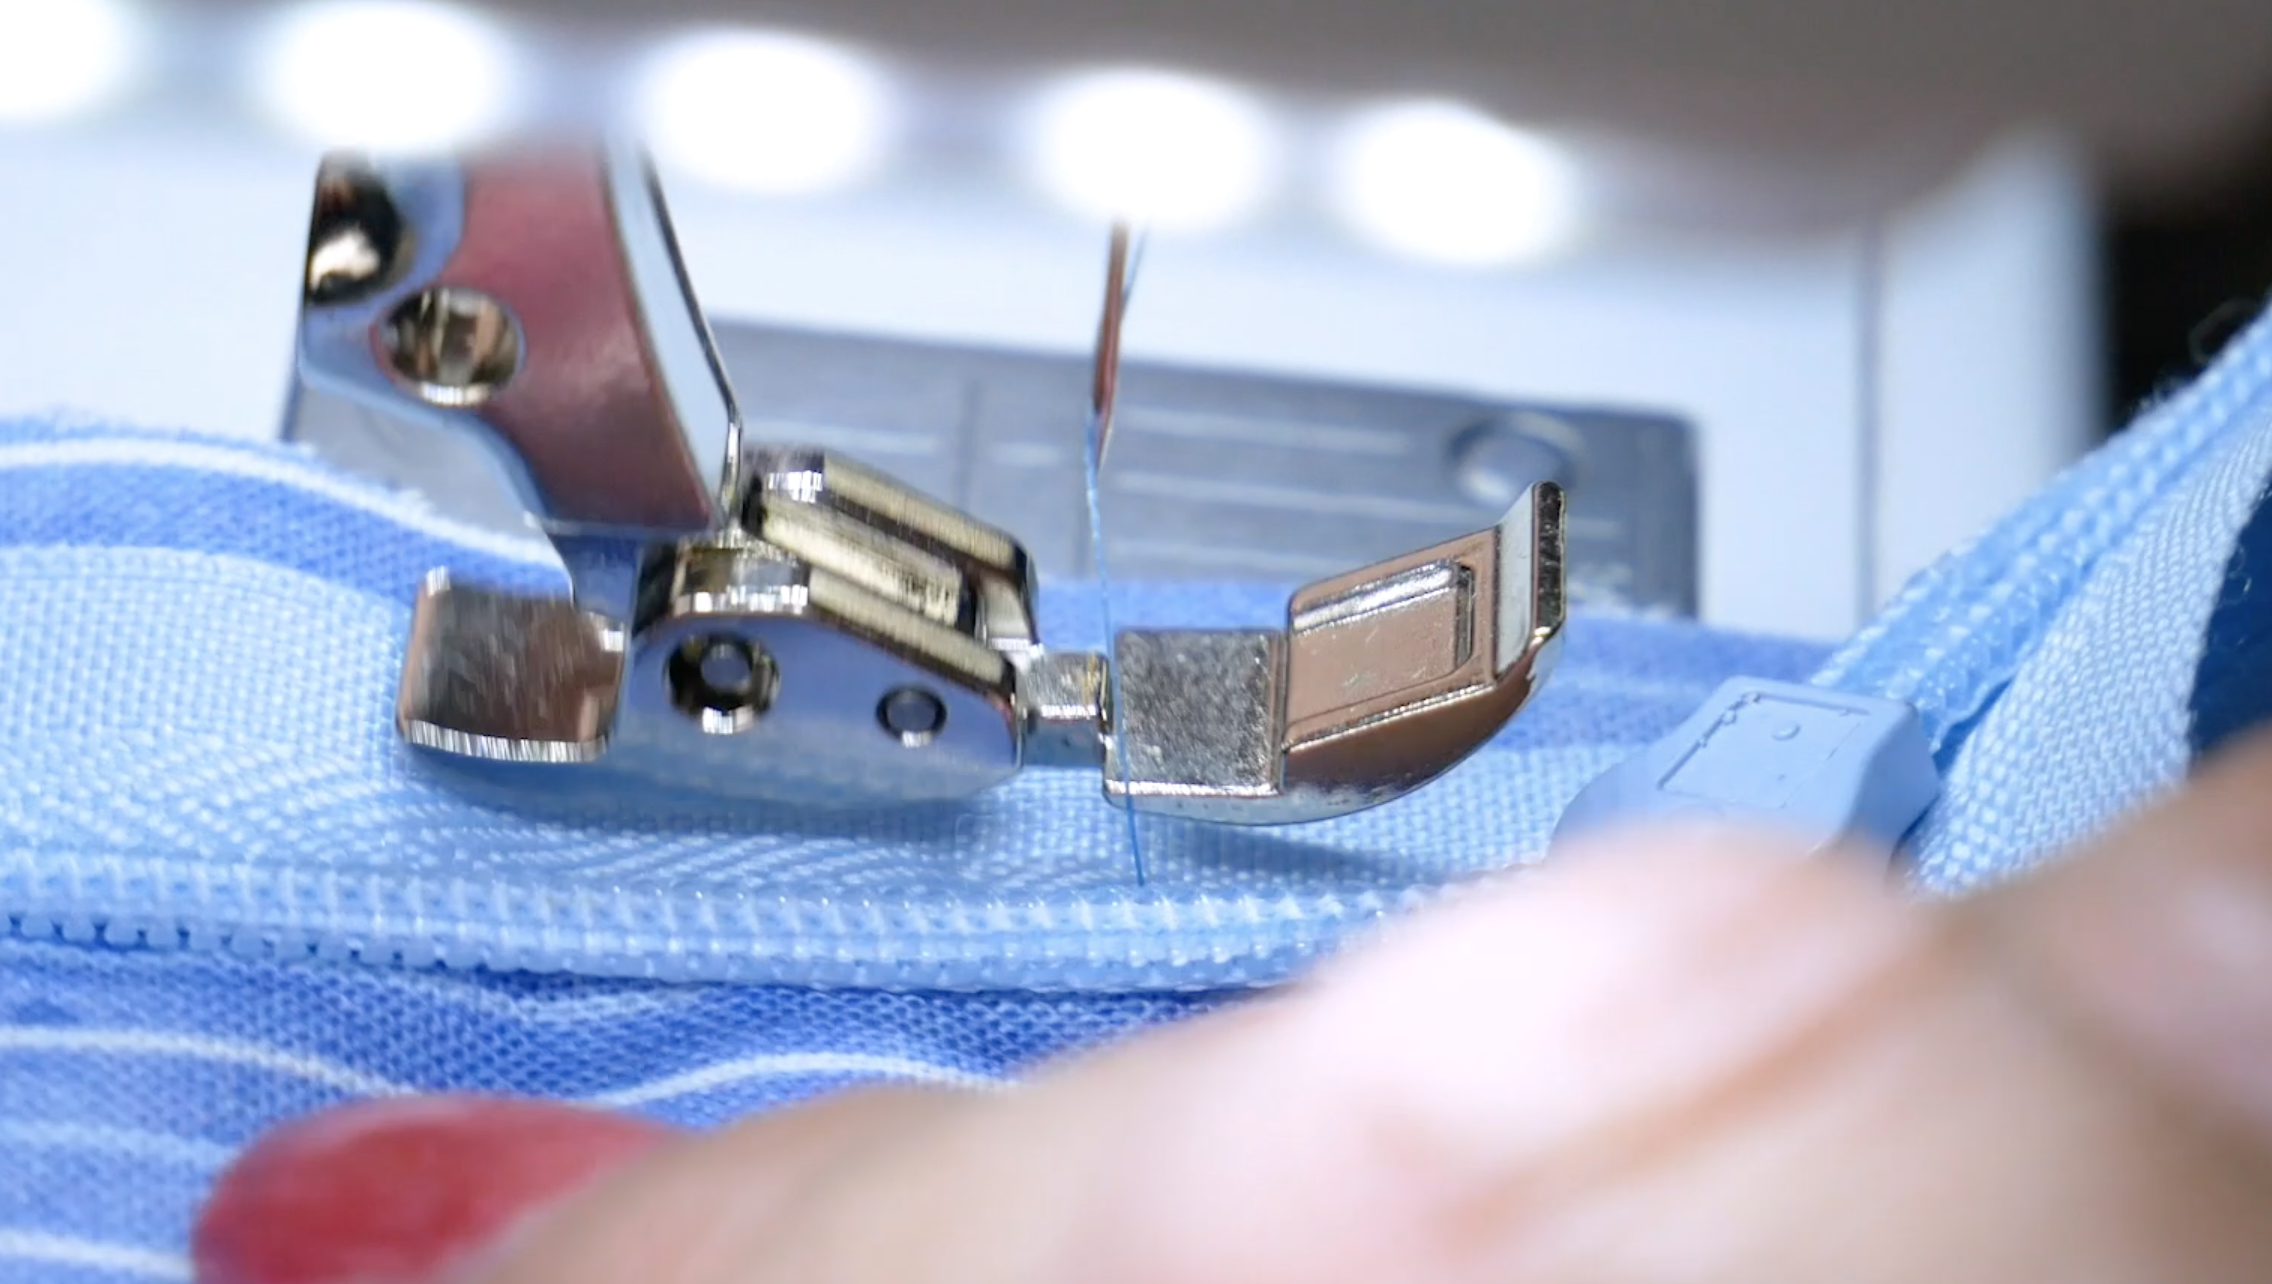
Start from one end of the seam and carefully sew all the way to the end. Don’t forget to back stitch at the beginning and end.

5.png

Don’t worry if you fall off your path a little, if you’re using the correct thread then it won’t even be visible.

6.png

That’s actually all there is to it! Simply choosing the right tools for the job is the best way to get perfect results, even if it’s your first time trying this technique.

7.png

You can find a list of stores that carry WonderFil threads on www.shopwonderfil.com/shop-local/. You can also sign up to receive weekly sewing tips, free patterns, and tutorials in our newsletter. Register by clicking here! You can unsubscribe at any time by clicking the unsubscribe button on the footer of every email you receive.

How to Sew an Invisible Zipper With a Regular Zipper Foot

Maura Kang

Do you want to elevate your sewing projects for a more refined and professional look? One way to do so is by sewing invisible zippers! Invisible zippers are the perfect way to give your projects a seamless transition by hiding the zipper in a seam. All you need is your garment, invisible zipper, regular zipper and presser foot, fabric marker, pins and a ruler.

Before we begin, let’s look at the differences between an invisible zipper foot and regular zipper foot.

To compare, both feet have very different designs, sewing steps, and ease of use. For the invisible zipper foot, there will be two grooves in the middle of the foot. This allows for a centered stitching line. (Keep in mind that you may need to also adjust your machine’s needle position if you use it).

1.png

On the other hand, the regular zipper foot has left and right notches to allow you to stitch closer to the edge of your project. Many machines do not come with an invisible zipper foot, so in this tutorial, we’ll show you how to do it with just a regular zipper foot.

2.png

Take the fabric or project you will be working on and lay it out, pulling it smooth. Iron the fabric area if necessary. Using fabric markers or pins, mark the top edges at your desired allowance where you want your zipper to be. For this tutorial, we will do a 3/4” edge. This step can be optional however, it certainly helps to indicate your zipper placement to ensure that you have aligned the pieces precisely. Next, you will mark your desired vertical seam allowance, we will be using a ¼” seam allowance.

3.png

Before you start sewing, we need to prepare your zipper to ensure it lays flat and sews well. Take your iron and set it to the lowest heat setting. Unzip your zipper, then press and iron the zipper teeth away from the zipper tape. During this step you should lift the iron periodically to avoid melting your zipper teeth or coils.

4.png

It is good to note that the following steps will be entirely different if you use an invisible zipper foot. When using a regular zipper foot, your zipper and fabric will be sewn right sides together onto the fabric. Remember to make sure your zipper is unzipped to the end/bottom stopper for this step. Then place down the right side of your zipper onto the fabric right side. Line up the zipper coils at the exact line where you’ve marked your seam allowance, pin into place.

5.png

Now you are ready to sew your zipper, but what thread should you use? For light to medium garments, we highly recommend using an 80wt thread called DecoBob on the top and bottom. This is a very fine cottonized polyester thread that will really blend into the fabric and not add any extra bulk to the seams, so your invisible zipper will look clean and tidy. I’ll also be pairing it with a size 80/12 needle.

6.png

Position the zipper teeth under the foot’s left groove and begin sewing down from the top edge. Make sure to reverse stitch and forward to keep in place. Keep stitching until you’ve reached the point where your needle is parallel to your zipper stopper. Reverse and forward at the end to keep it in place and remove from the sewing machine.

7.png

Before sewing the other side of the zipper, flip your entire project so that your sewn side lays on top of the unsewn piece. Make sure the zipper edge is lined up with the seam allowance line at the top and side, and pin into place.

8.png

Now sew the zipper to the other side of your fabric piece and repeat the steps as before. Remember to make sure your zipper coils are lying flat, then position the zipper teeth under the right groove of the foot. Sew from the top edge and stitch into place until you’re parallel to the zipper stopper. Stitch in reverse and forward in place to make sure it’s held in place.

9.png

Now that you have completed your main stitches, we need to finish off the seams below your zipper. Pull the zipper all the way closed and place the right sides of your fabric together. Adjust the zipper tail ends so it is out of the way, then place your foot as close as possible to your stitched line, then sew an additional 2 inches.

10.png
11.png

The last step you’ll need to do to complete your invisible zipper is finishing off the seam. For this you’ll just need to remove the zipper foot and install your regular presser foot. Sew your fabrics together by following your previously stitched line, and voila! You just learned and completed a proper invisible zipper.

Regular machine foot

Regular machine foot

13.png

Take a moment to tack the ends of the zipper tape to the seam allowance to make it easier to pull your zipper.

14.png
WhatsApp Image 2020-05-22 at 11.54.53 AM.jpeg

If you’ve tried this for yourself, tag us on Instagram @wonderfilspecialtythread or by the hashtag at #wonderfil. We would love to see your sewing projects and progress! Ready to start sewing? You can find a list of stores that carry WonderFil threads on www.shopwonderfil.com/shop-local/. You can also sign up to receive weekly sewing tips, free patterns, and tutorials in our newsletter. Register by clicking here! You can unsubscribe at any time by clicking the unsubscribe button on the footer of every email you receive.

6 Reasons to Always Use a DecoBob Pre-Wound Bobbin

Maura Kang

Ever wondered why you should bother using a pre-wound bobbin when you could always wind your own? These handy sewing accessories are absolutely not just for the lazy; they can make a HUGE difference in your stitch quality! We’ll demonstrate first-hand why you should always keep these 80wt DecoBob pre-wound bobbins in your sewing room.

They’re our little secret to effortlessly better tension, flatter seams, a beautiful stitch quality, and a bobbin thread that never seems to run out. If that sounds incredible to you, the secret is this little bobbin.

1. They’re Basically Invisible

Being an 80wt thread, it’s incredibly fine. You can see how the thread blends into the fabric behind it. Since it’s so small, it basically disappears. However, since this is a polyester thread, it’s also incredibly strong and can be relied on to construct your quilts and projects.

1.png

DecoBob is called a cottonized polyester. This is a 100% polyester thread that has been treated so that it no longer carries a stretch and has more of a matte finish, helping it blend into the fabric so it can’t be seen. That’s a great feature for a bobbin thread as an imperfect tension will help the bobbin thread hide if it pokes through to the top.

2. They Last Forever

Because the thread is so fine, the bobbin can fit way more thread in it. They also come wound with a much higher density of thread from the factory, so you can sew for far longer before you need to interrupt your sewing to replace it with a fresh one. Depending on the density of your stitching, you could piece and quilt an entire bed quilt with only 2 to 3 bobbins.

3.png

3. They Are Wound Perfectly Evenly

DecoBob pre-wound bobbins come wound perfectly evenly from the factory. If you’ve ever wound your own bobbin, you can see it filling a clump on one side before flowing back to fill the other side.

4.png

This unevenly self-wound bobbin will actually change the tension on your machine. To demonstrate, we embroidered one half of this tear-shaped embroidery using a self-wound bobbin with the same DecoBob thread on the left, and on the right we used a DecoBob pre-wound bobbin. You can visibly see larger gaps on the self-wound side than on the right side, which lays flatter with a higher top stitch quality.

5.png

4. Super Flat Seams

You may have heard a common sewing myth that states to always use the same weight of thread on the bobbin as you are in the needle. We’re here to tell you this is completely untrue. A finer bobbin thread will always benefit your sewing no matter what size your top thread is, however this is especially true when using thicker top threads like a 12wt. 

To demonstrate, we pieced three small blocks. On the left we used a medium 50wt construction thread on the top and the bottom. In the middle we used a 50wt in the top and the 80wt DecoBob in the bottom. And on the right, we used 80wt DecoBob in both the top and bottom. You can see how much flatter the seams are with the finer weight thread used. Using a finer weight in the top and bobbin will make your piecing look more professional and make it easier to match patterns and line up quilt blocks accurately. All of this from simply changing your thread!

6.png

5. Free of Glues & Residues

If you take a close look at the DecoBob thread, you can see its basically free of any lint. But here’s a dirty little thread industry secret to look out for: even if your thread looks like it’s low on lint, it may actually have a glue or residue applied to the thread to stick the lint down, only giving the illusion that it’s low lint. This sticky residue will come off inside your machine as you’re sewing and is even more difficult to clean out than regular lint.

We promise all of our DecoBob pre-wound bobbins come 100% totally free of any glue or residue. You can count on a clean, quality thread that will leave your sewing machines healthy and happy.

A sideless bobbin with glue applied to hold it together.

A sideless bobbin with glue applied to hold it together.

6. Re-Use It or Recycle It

All DecoBob pre-wound bobbins are wound on plastic sided bobbins. Re-use these bobbins again, use it to take some hand stitching with you while you travel, or check to see if your local recycling depot will take them.

8.png

Tell us in the comments your experience using pre-wound bobbins! Let us know if you still have questions about DecoBob pre-wound bobbins, or tell us where you love to use them. Ready to start sewing? You can find a list of stores that carry these threads on www.shopwonderfil.com/shop-local/.