Contact Us

Use the form on the right to contact us.

You can edit the text in this area, and change where the contact form on the right submits to, by entering edit mode using the modes on the bottom right. 

2915 19 St NE
Calgary, AB, T2E 7A2

18662506101

WonderFil Specialty Thread Blog

WonderFil brings you the latest news, events, upcoming thread lines and special tips and advice. Follow WonderFil Specialty Threads on our social media: Facebook, Instagram, Twitter, Pinterest, and Youtube.

Filtering by Tag: 80wt

Introducing the Bobbinator™ - A Unique Sewing Accessory

Maura Kang

Check out the Bobbinator on our Canadian online site for a closer look!

This unique item turns your bobbin into a spool of thread so that there is no need to purchase a separate top thread for small to medium sized projects! The Bobbinator includes a reserve chamber to keep 3 additional bobbins in storage, making it to easily store total of 4 bobbins.

2.png

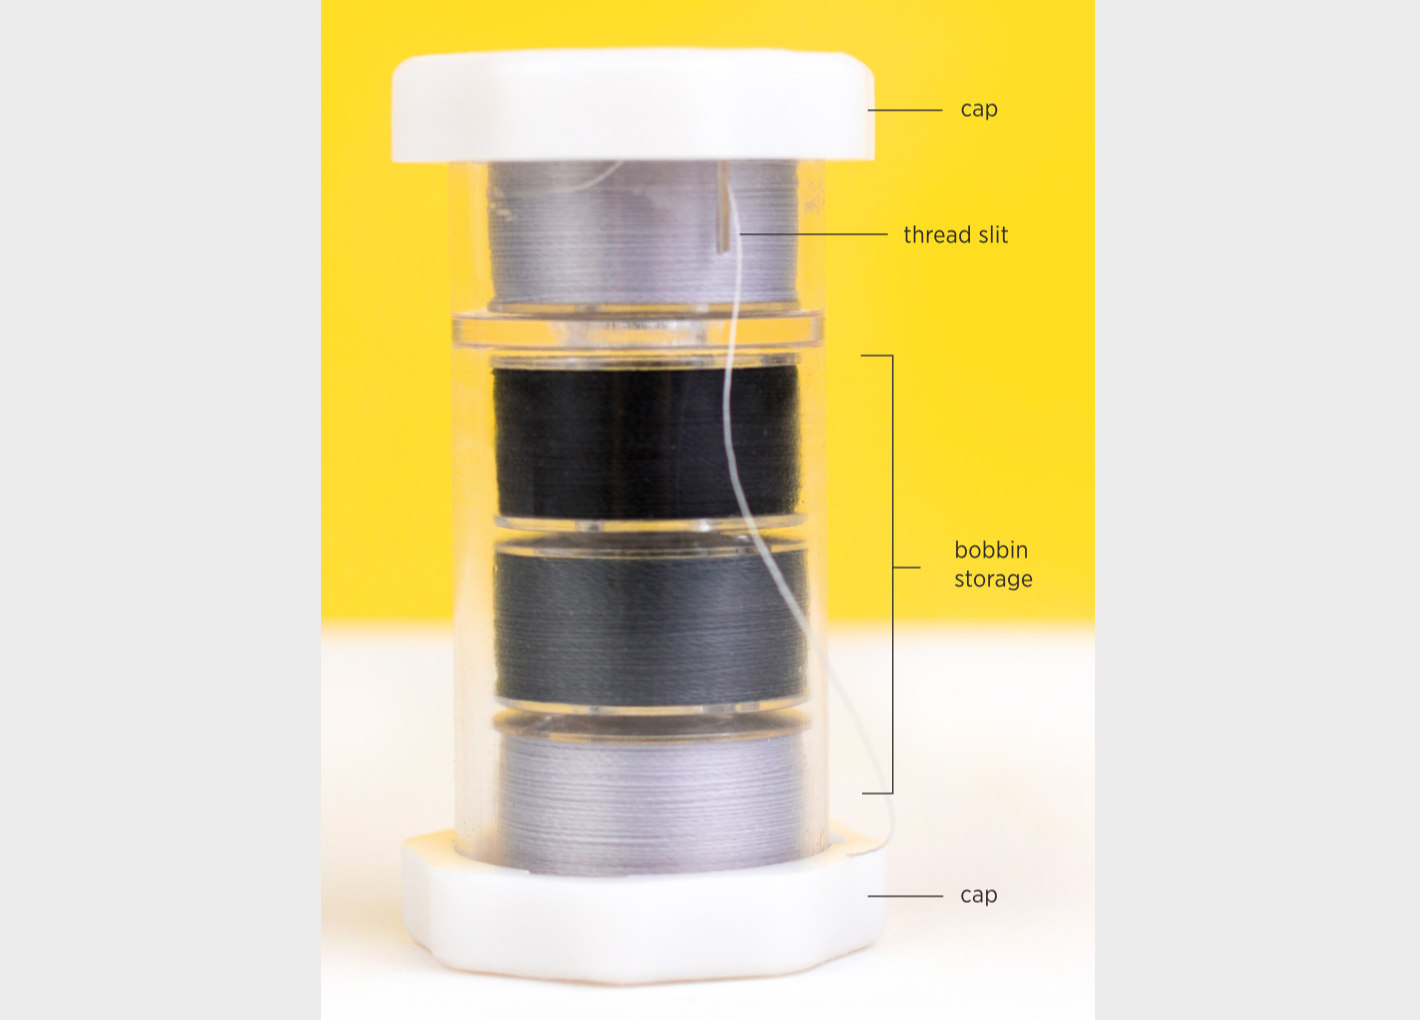
The cap on each end of the device twists off, with one end opening to the storage chamber and the other end opening to the compartment that holds the bobbin you’ll be sewing with as a top thread.

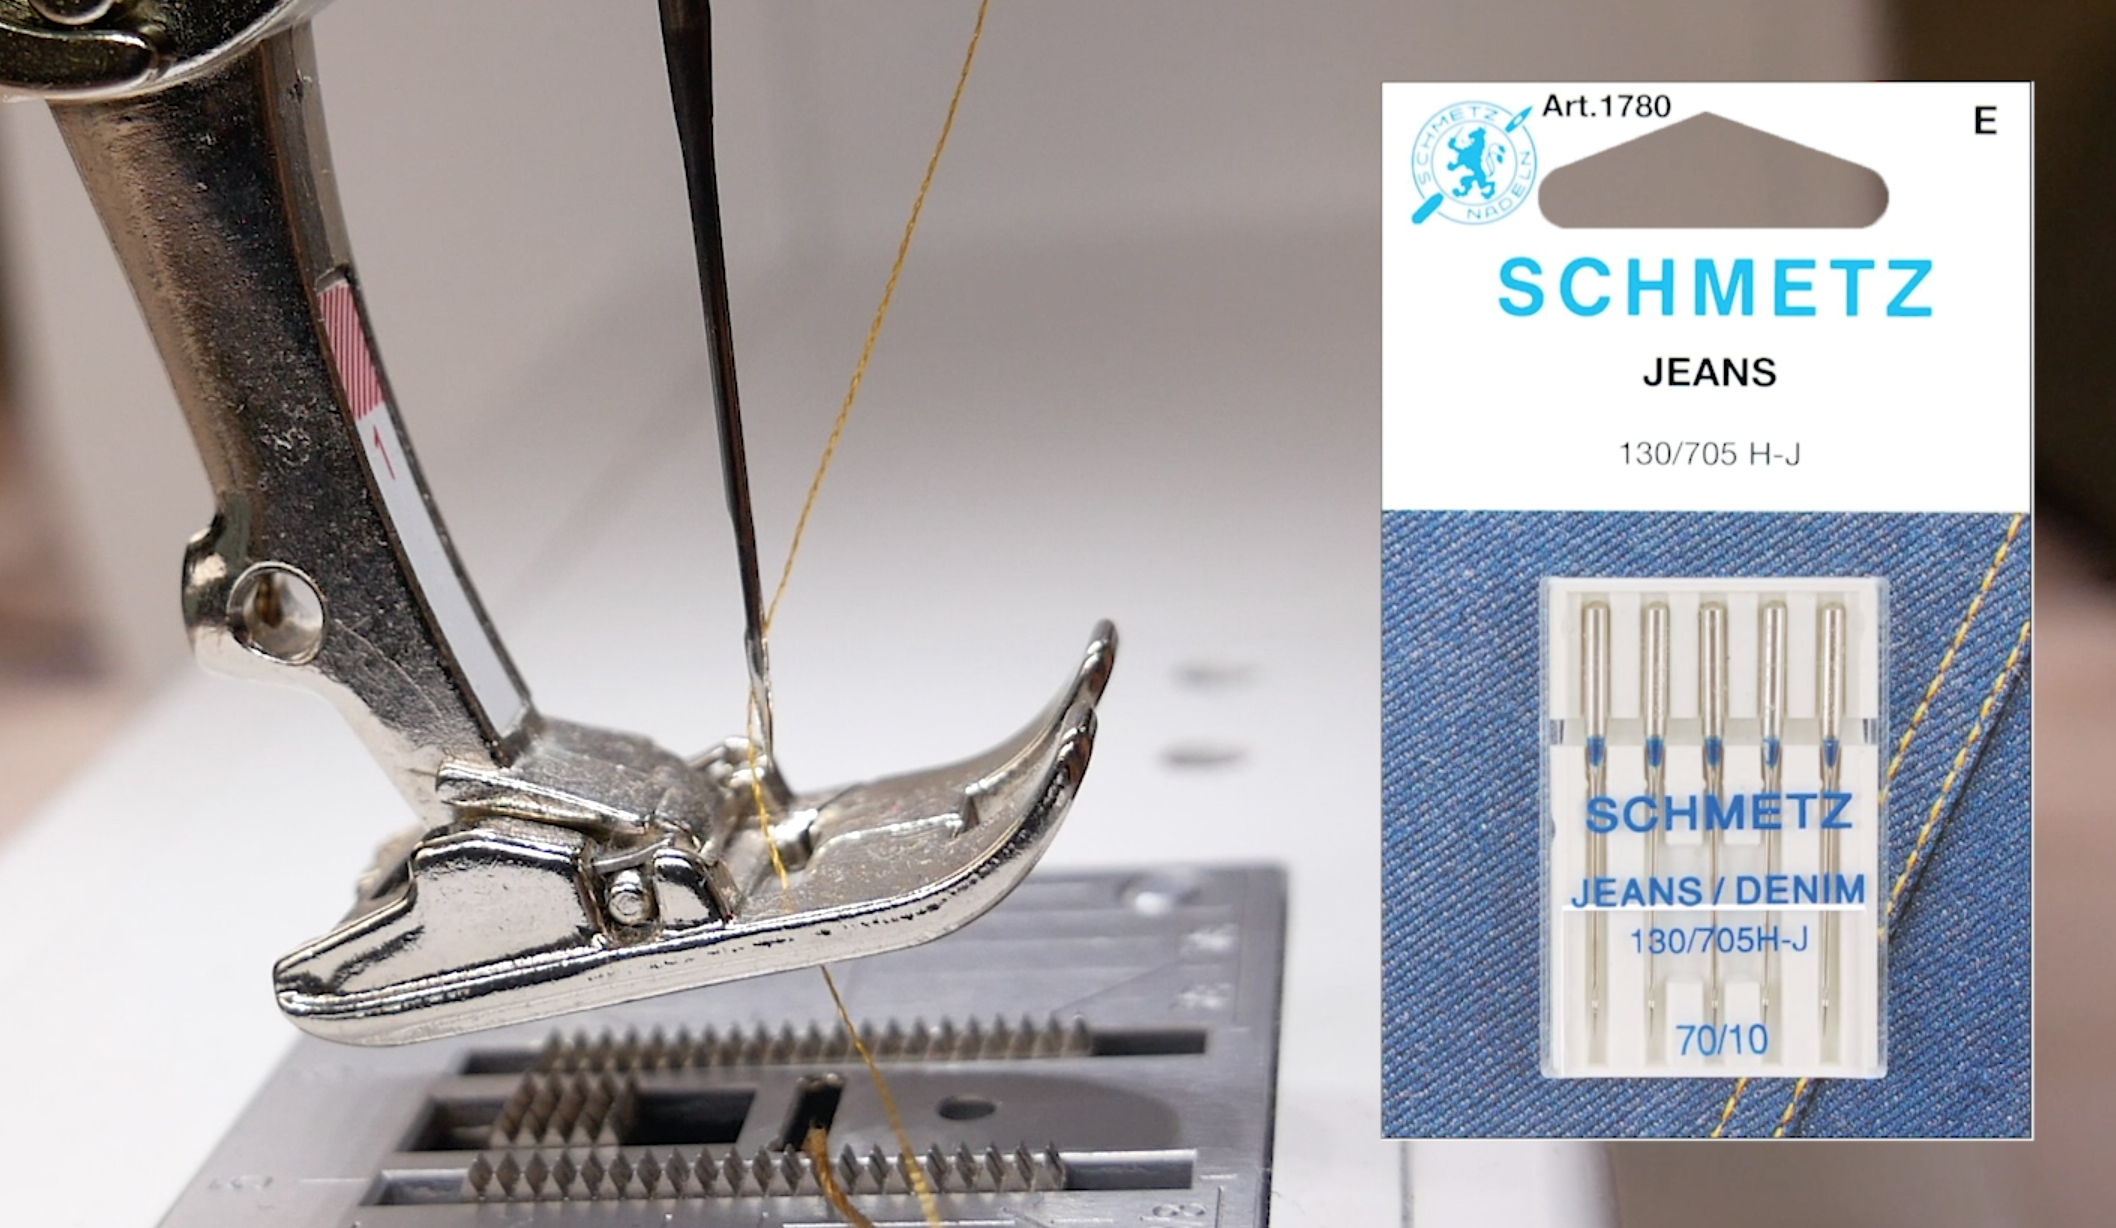
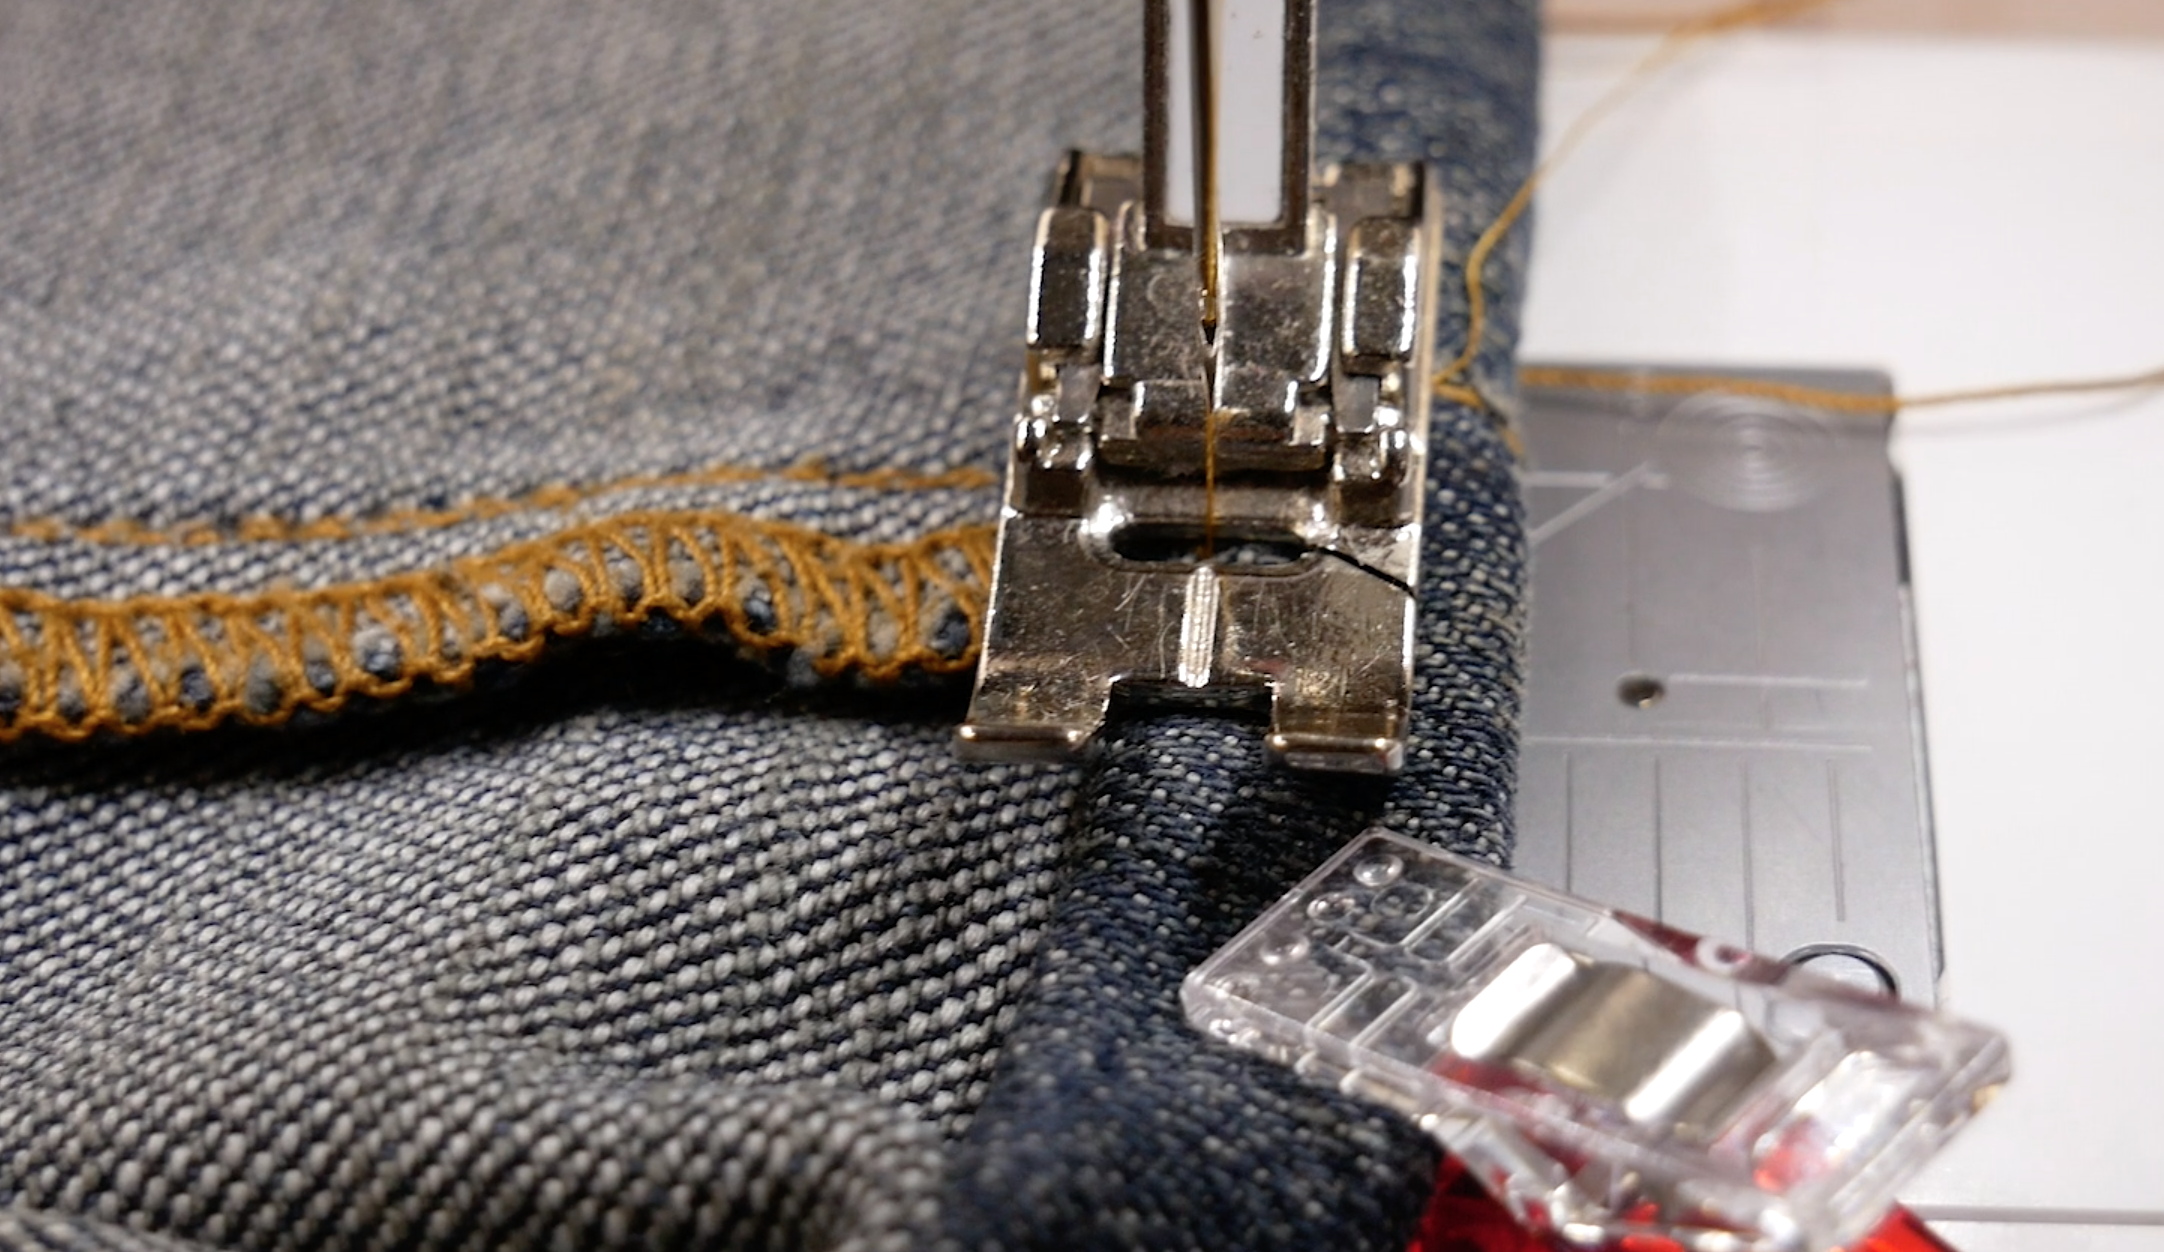
Simply drop a bobbin into the main compartment and draw the thread through the slit. Twist the cap back on and the Bobbinator device and you’re now ready to use the bobbin thread as a top thread on either the horizontal or vertical spool pin. After placing it on your thread pin of choice, simply thread your machine like normal. This handy device lifts the bobbin thread out so that it doesn’t drag against the edge of the bobbin, causing tension changes. This is perfect for bringing a few colours as needed to guild meetings, events, and classes instead of bringing your entire thread box.

3.png

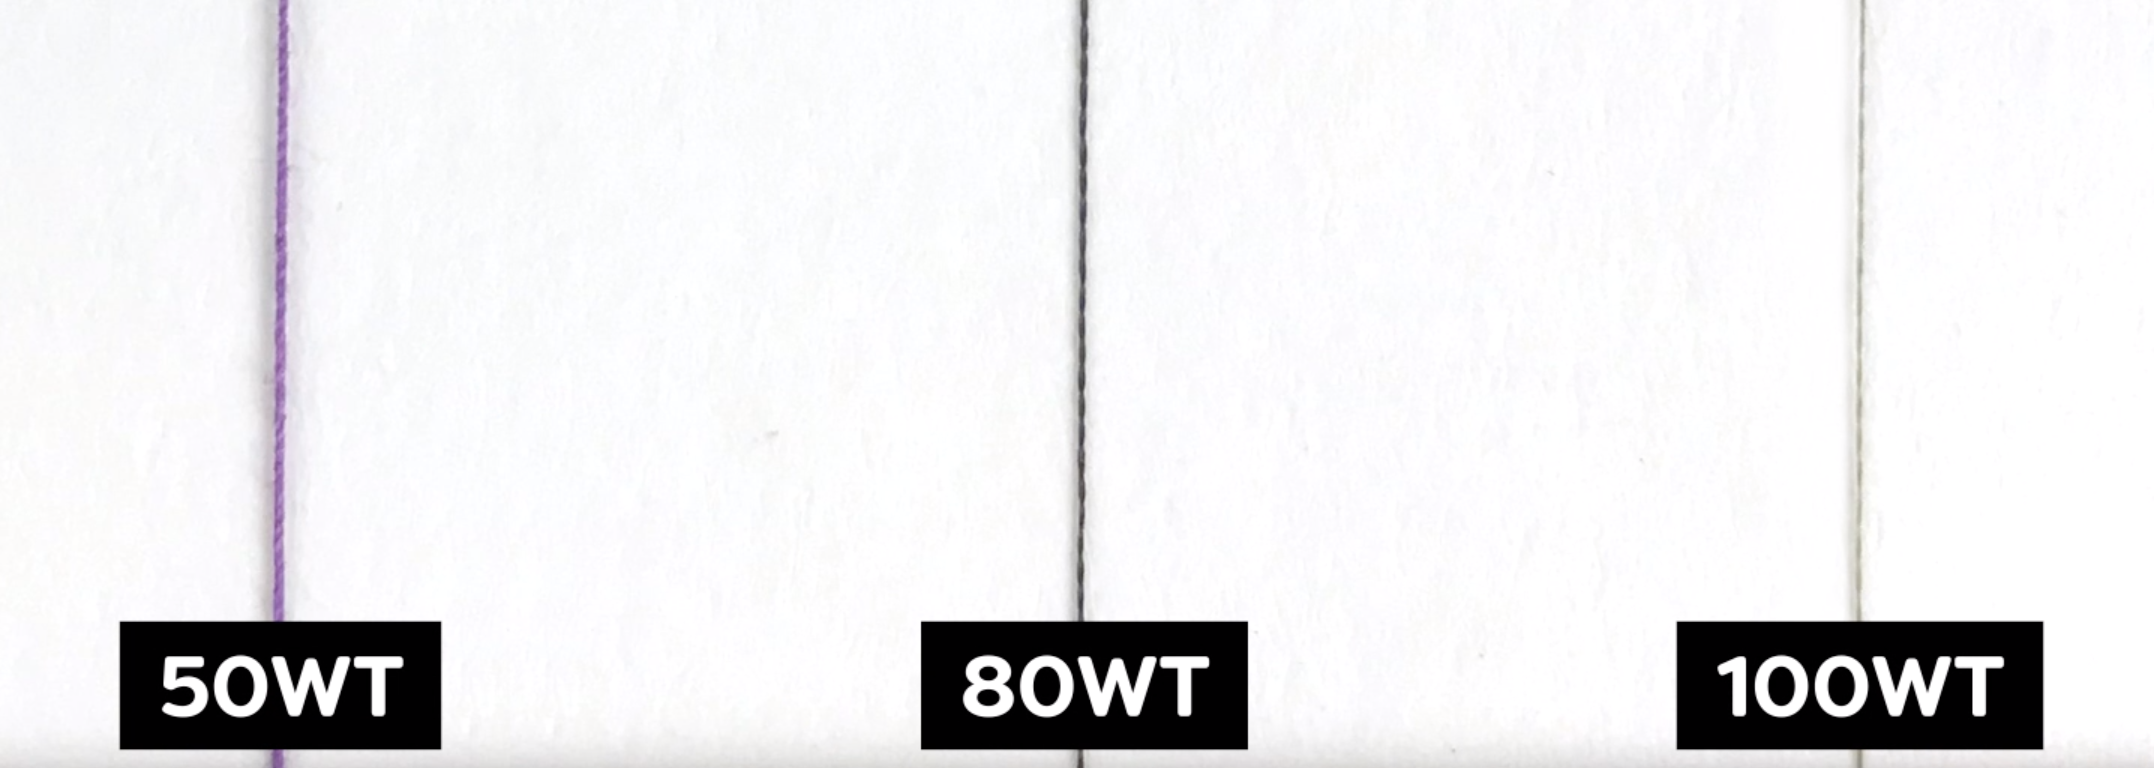
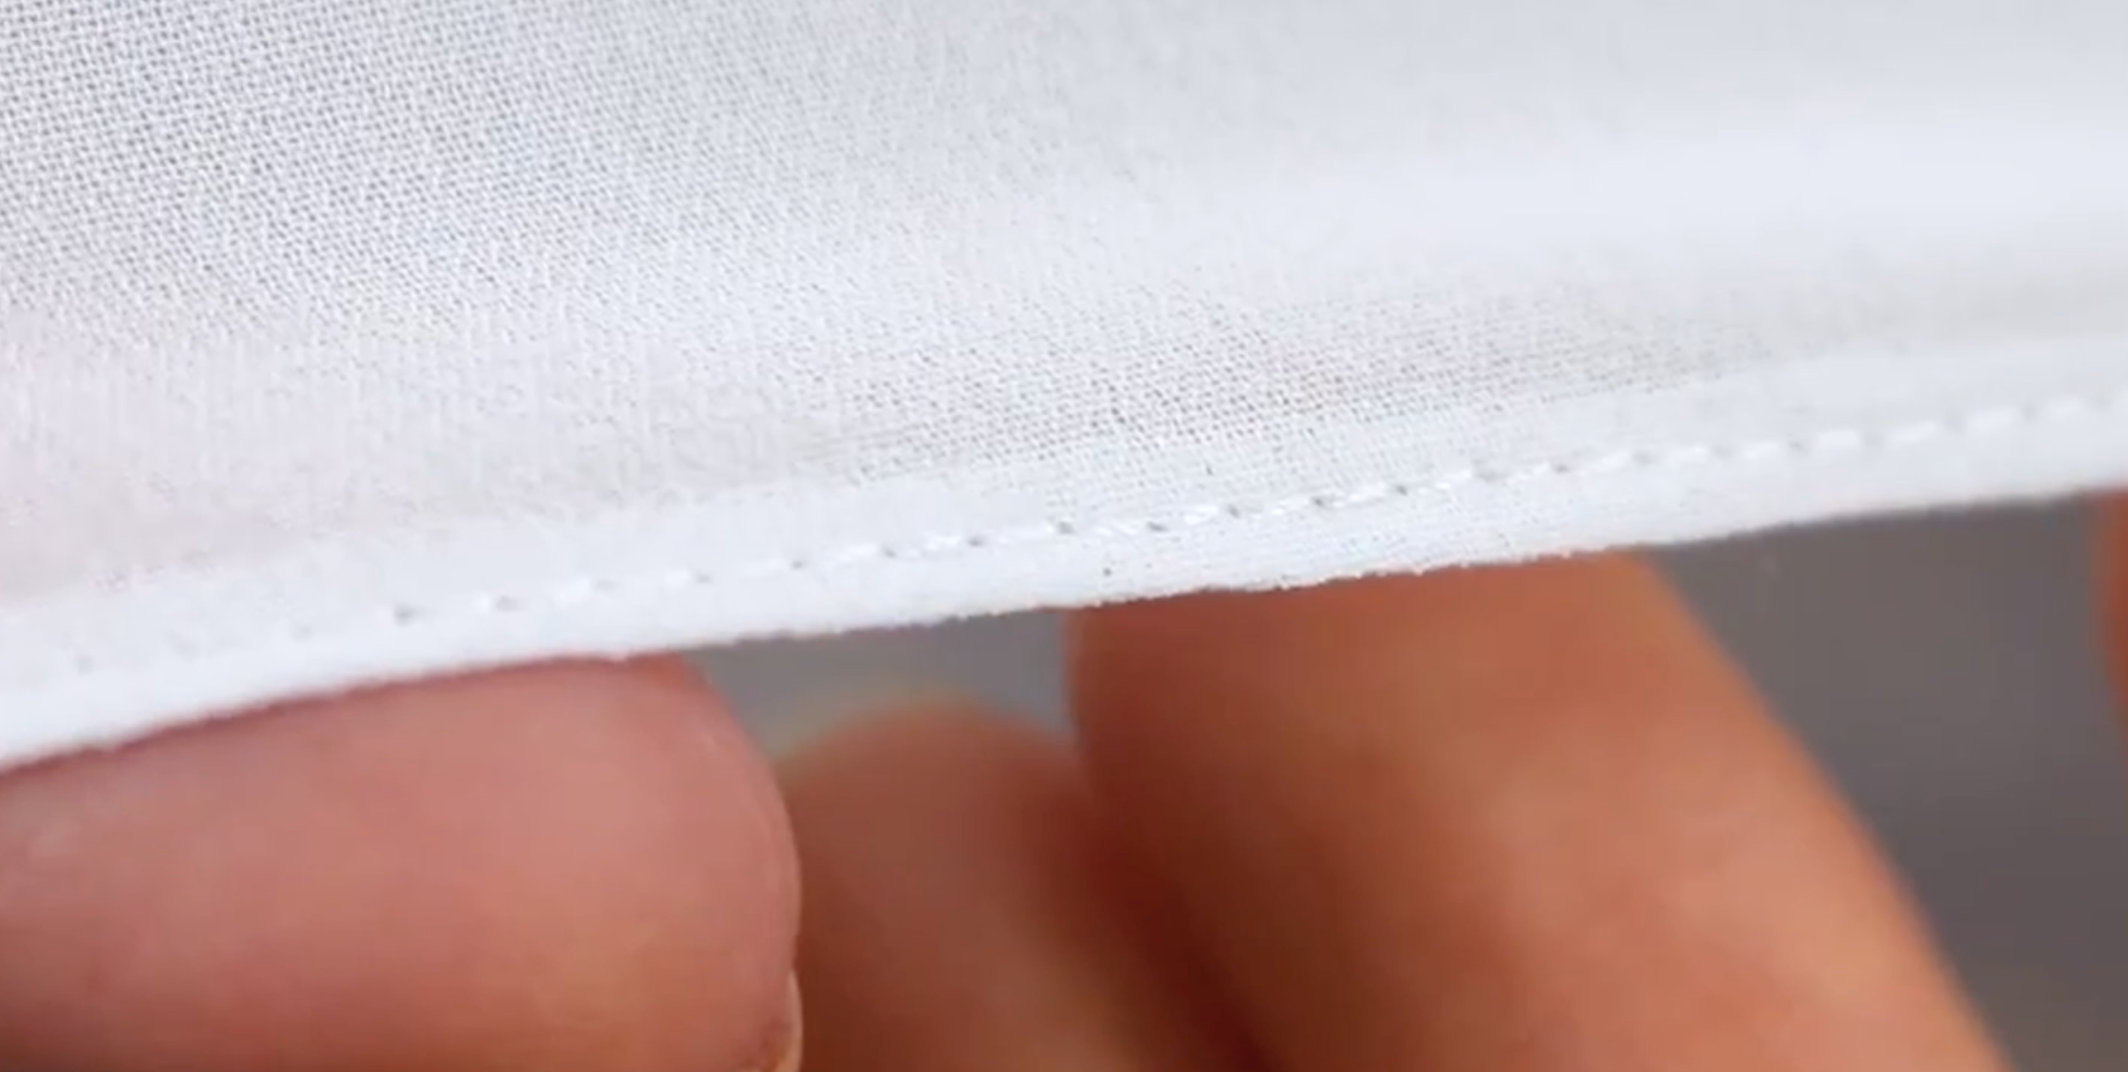
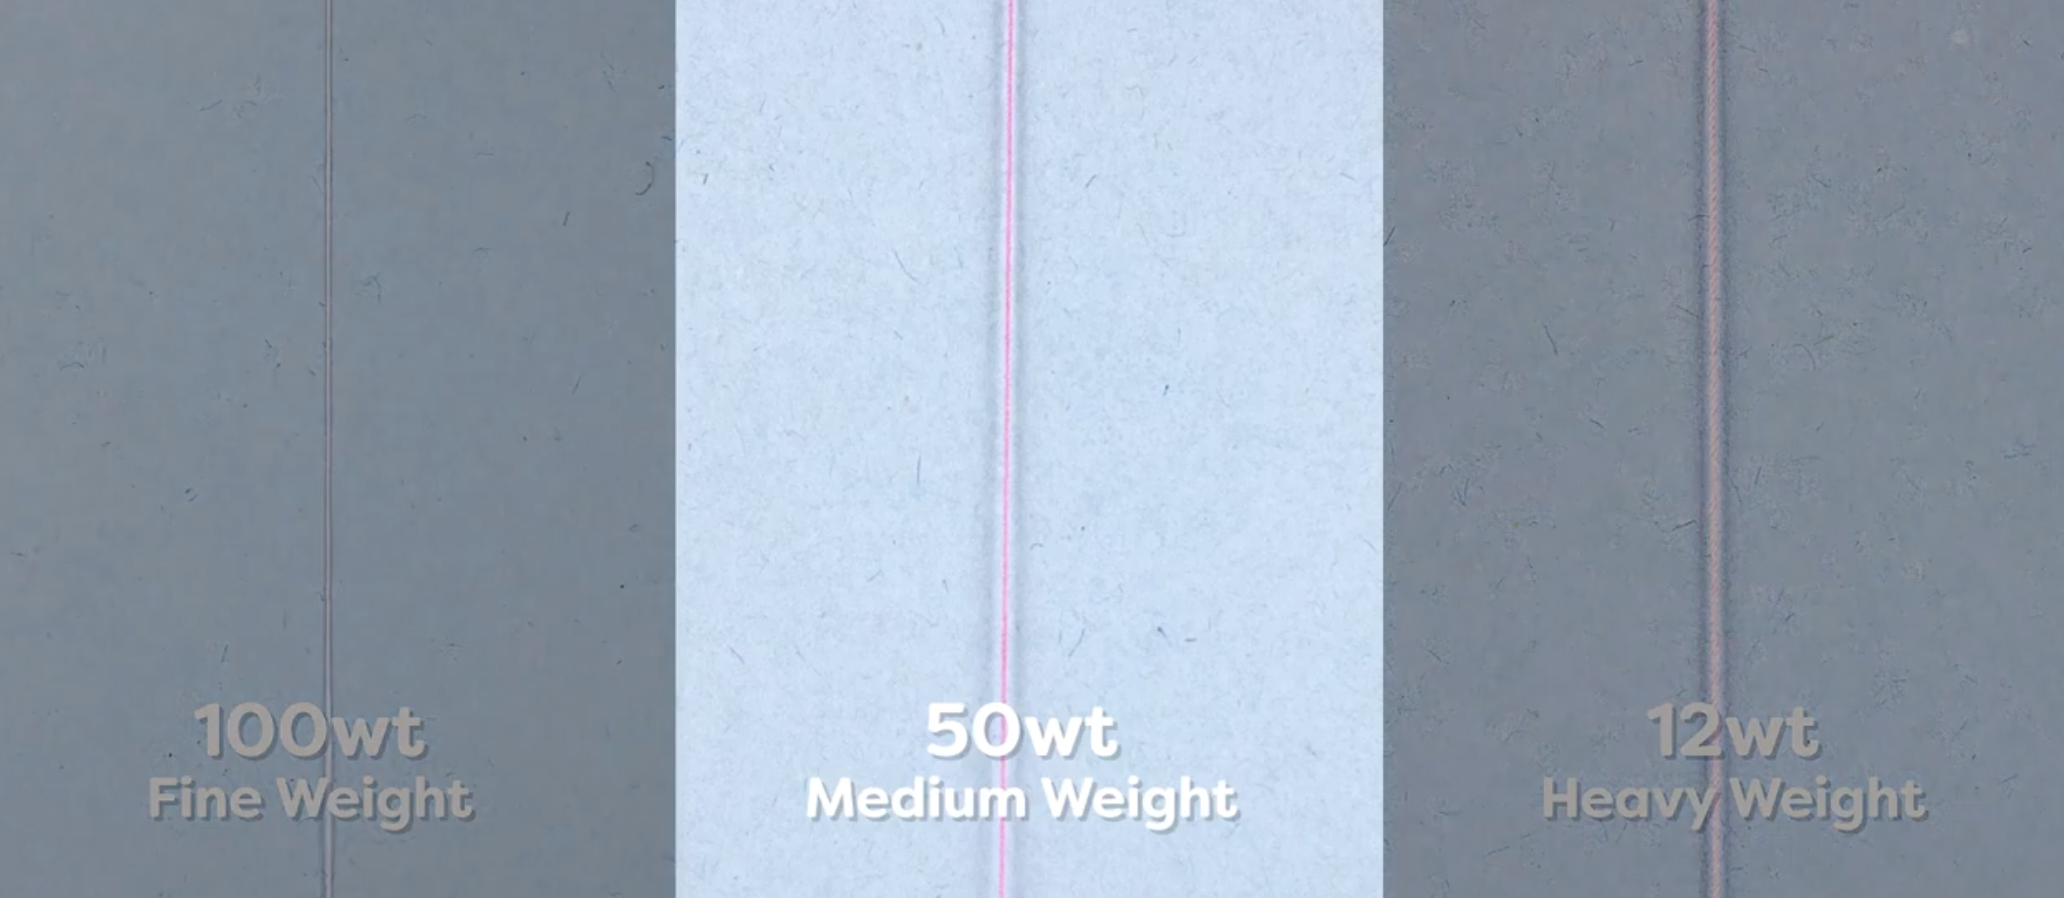
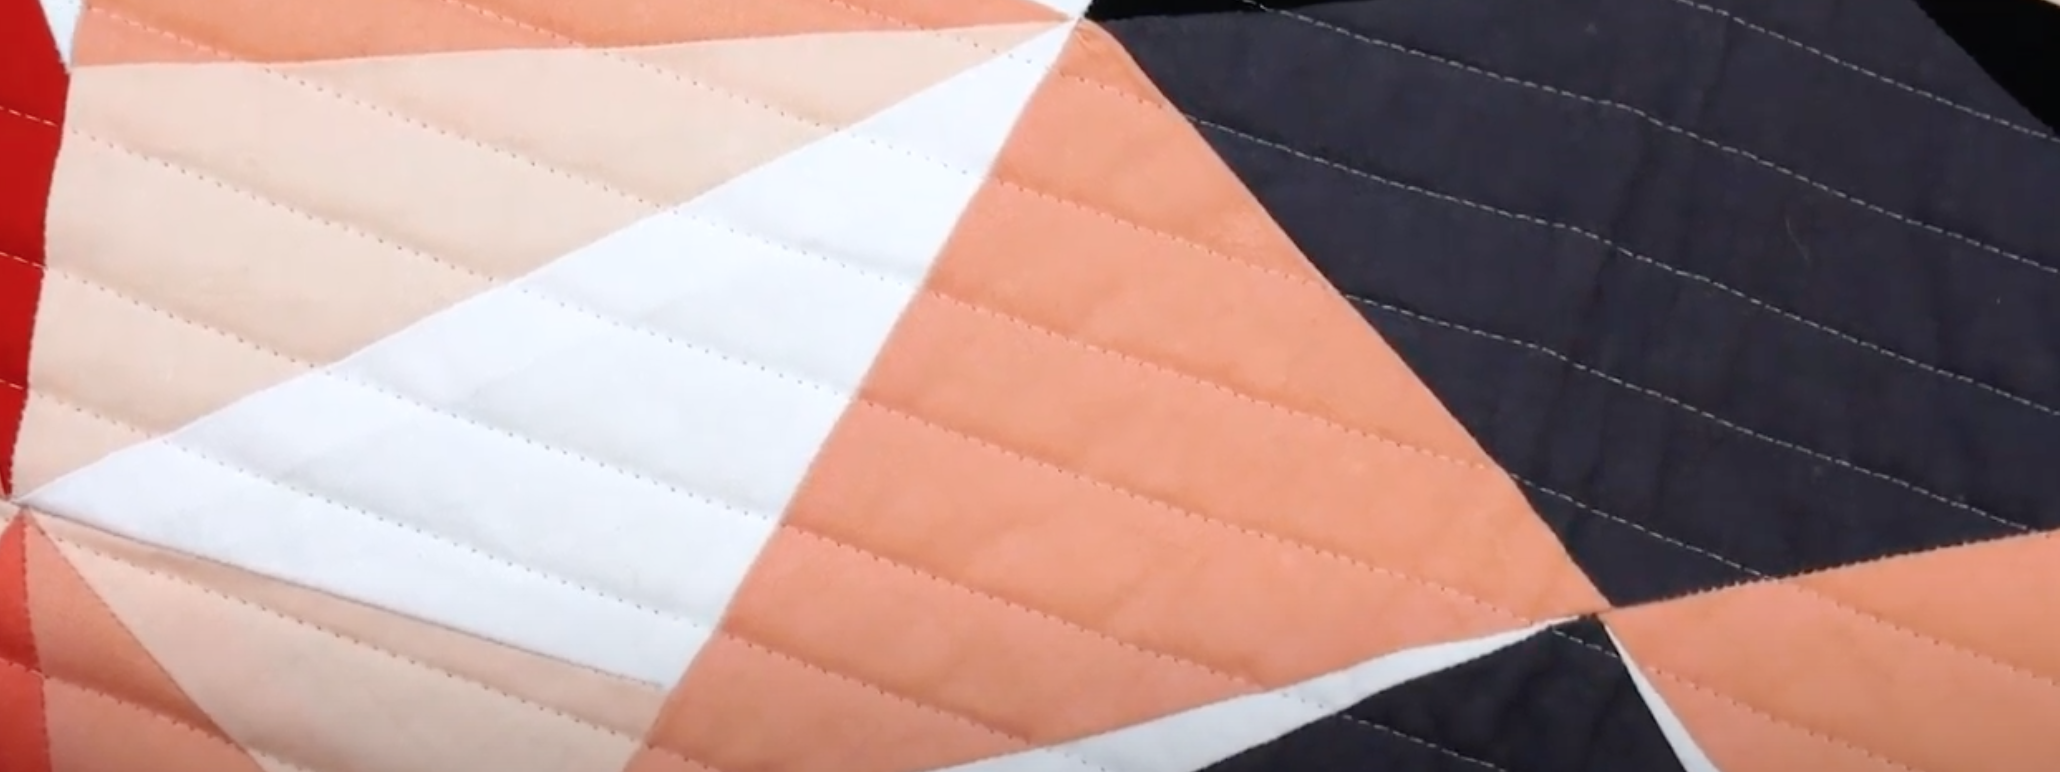
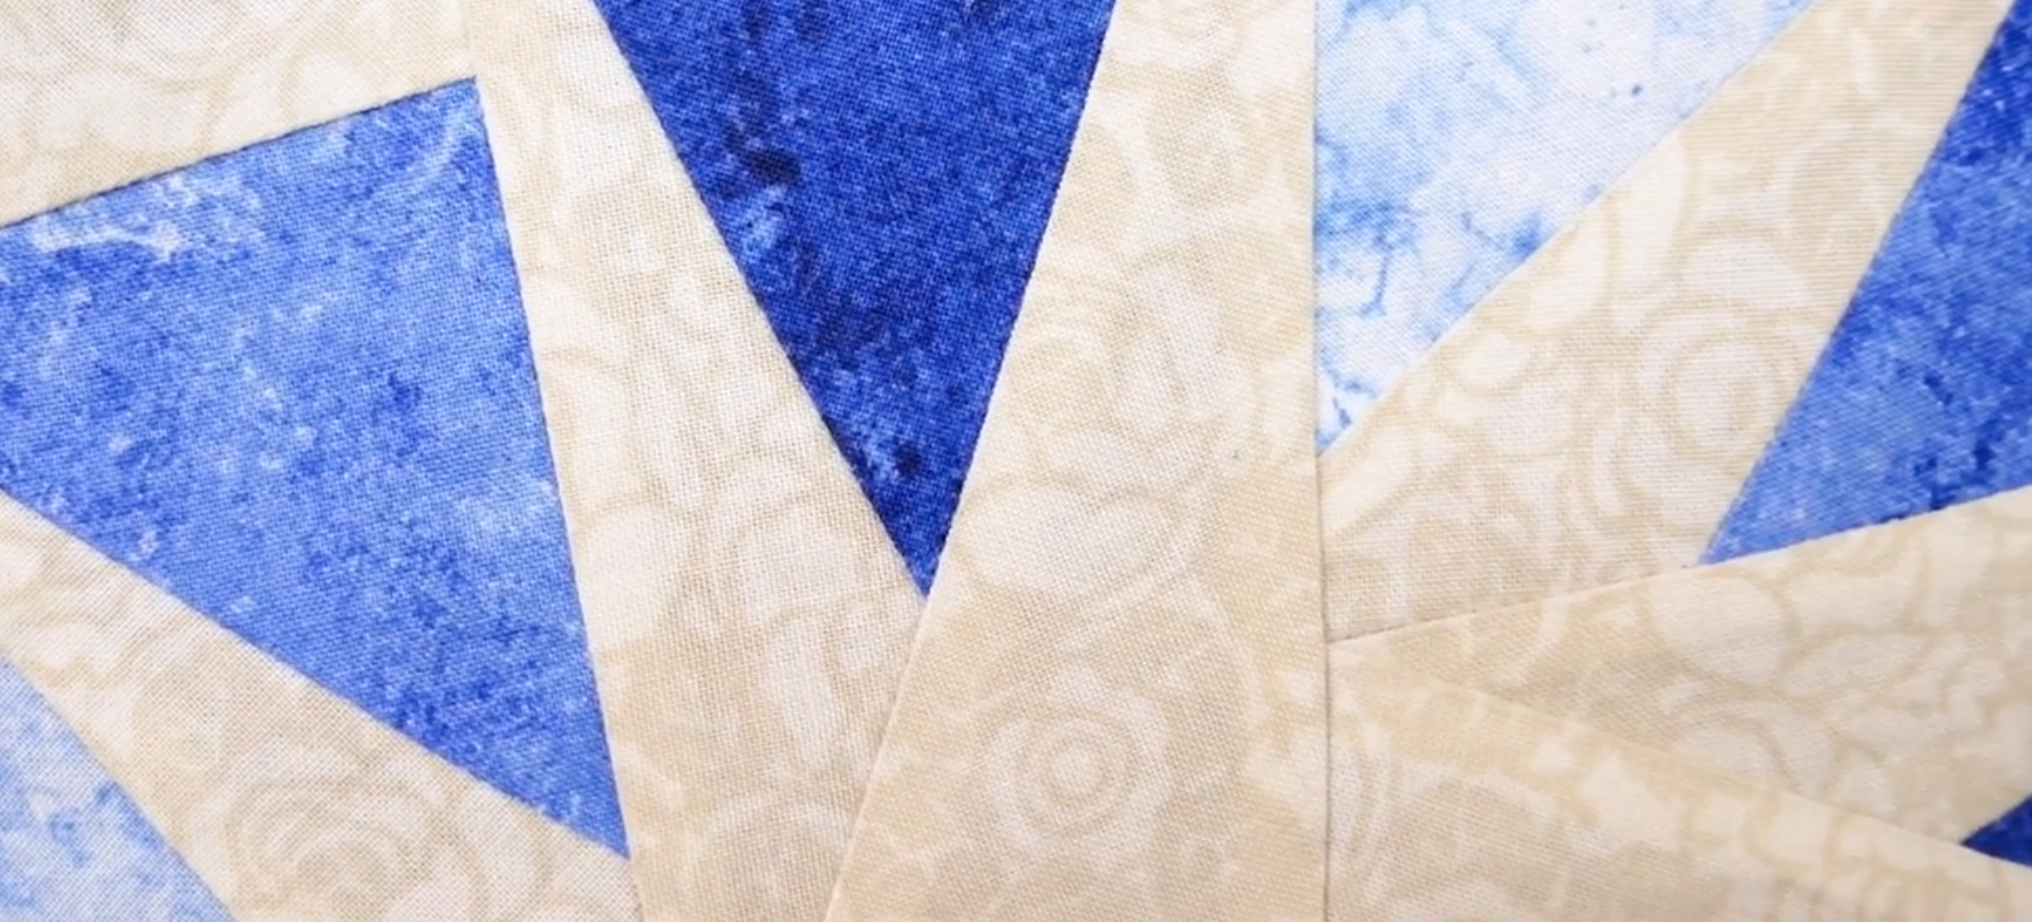
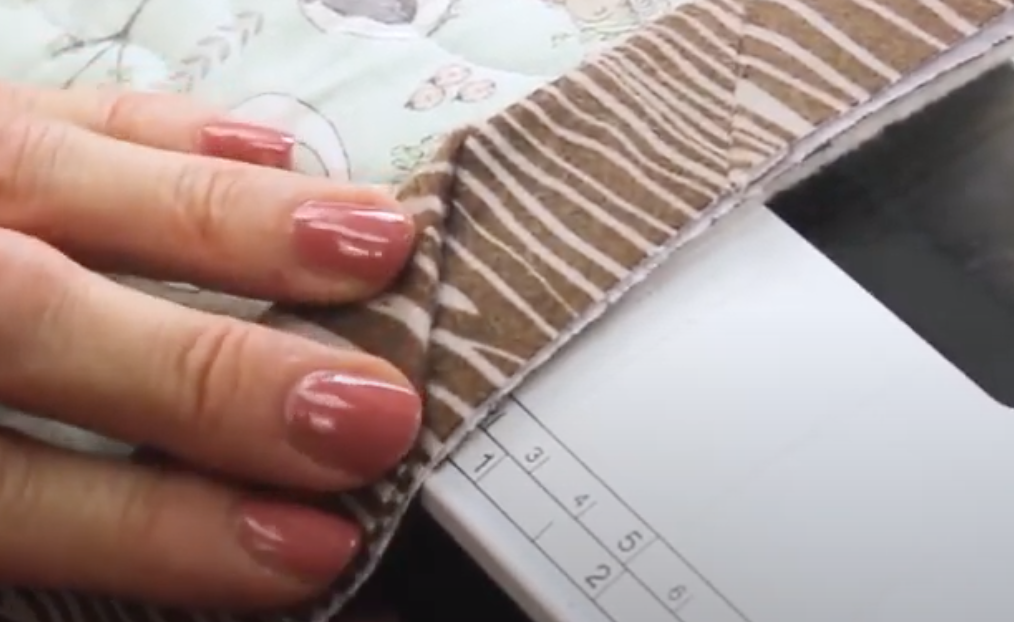
But you don’t need to just use it for machine sewing. Each bobbin included with this device is a DecoBob 80wt cottonized poly pre-wound bobbin. This thread makes for an ideal English paper piecing and hand appliqué thread as the super fine thread allows the fabric to sit tighter together and lay flatter, with the thread blending in so it won’t be seen. The Bobbinator makes it easy to keep the thread organized and tidy while you stitch at home or on the go.

4.png

DecoBob is also an excellent choice for hand and machine piecing, quilting, machine embroidery and digitized lace designs, button holes, and hidden stitches. Every Bobbinator pack includes 10 DecoBob pre-wound bobbins in your choice of grey or beige colours, as well as 1 Bobbinator device.

It also comes in a special variety made just for Sue Daley exclusively in her signature pink colour and her favourite 10 colours of DecoBob.

Screen Shot 2020-07-16 at 11.13.38 AM.png

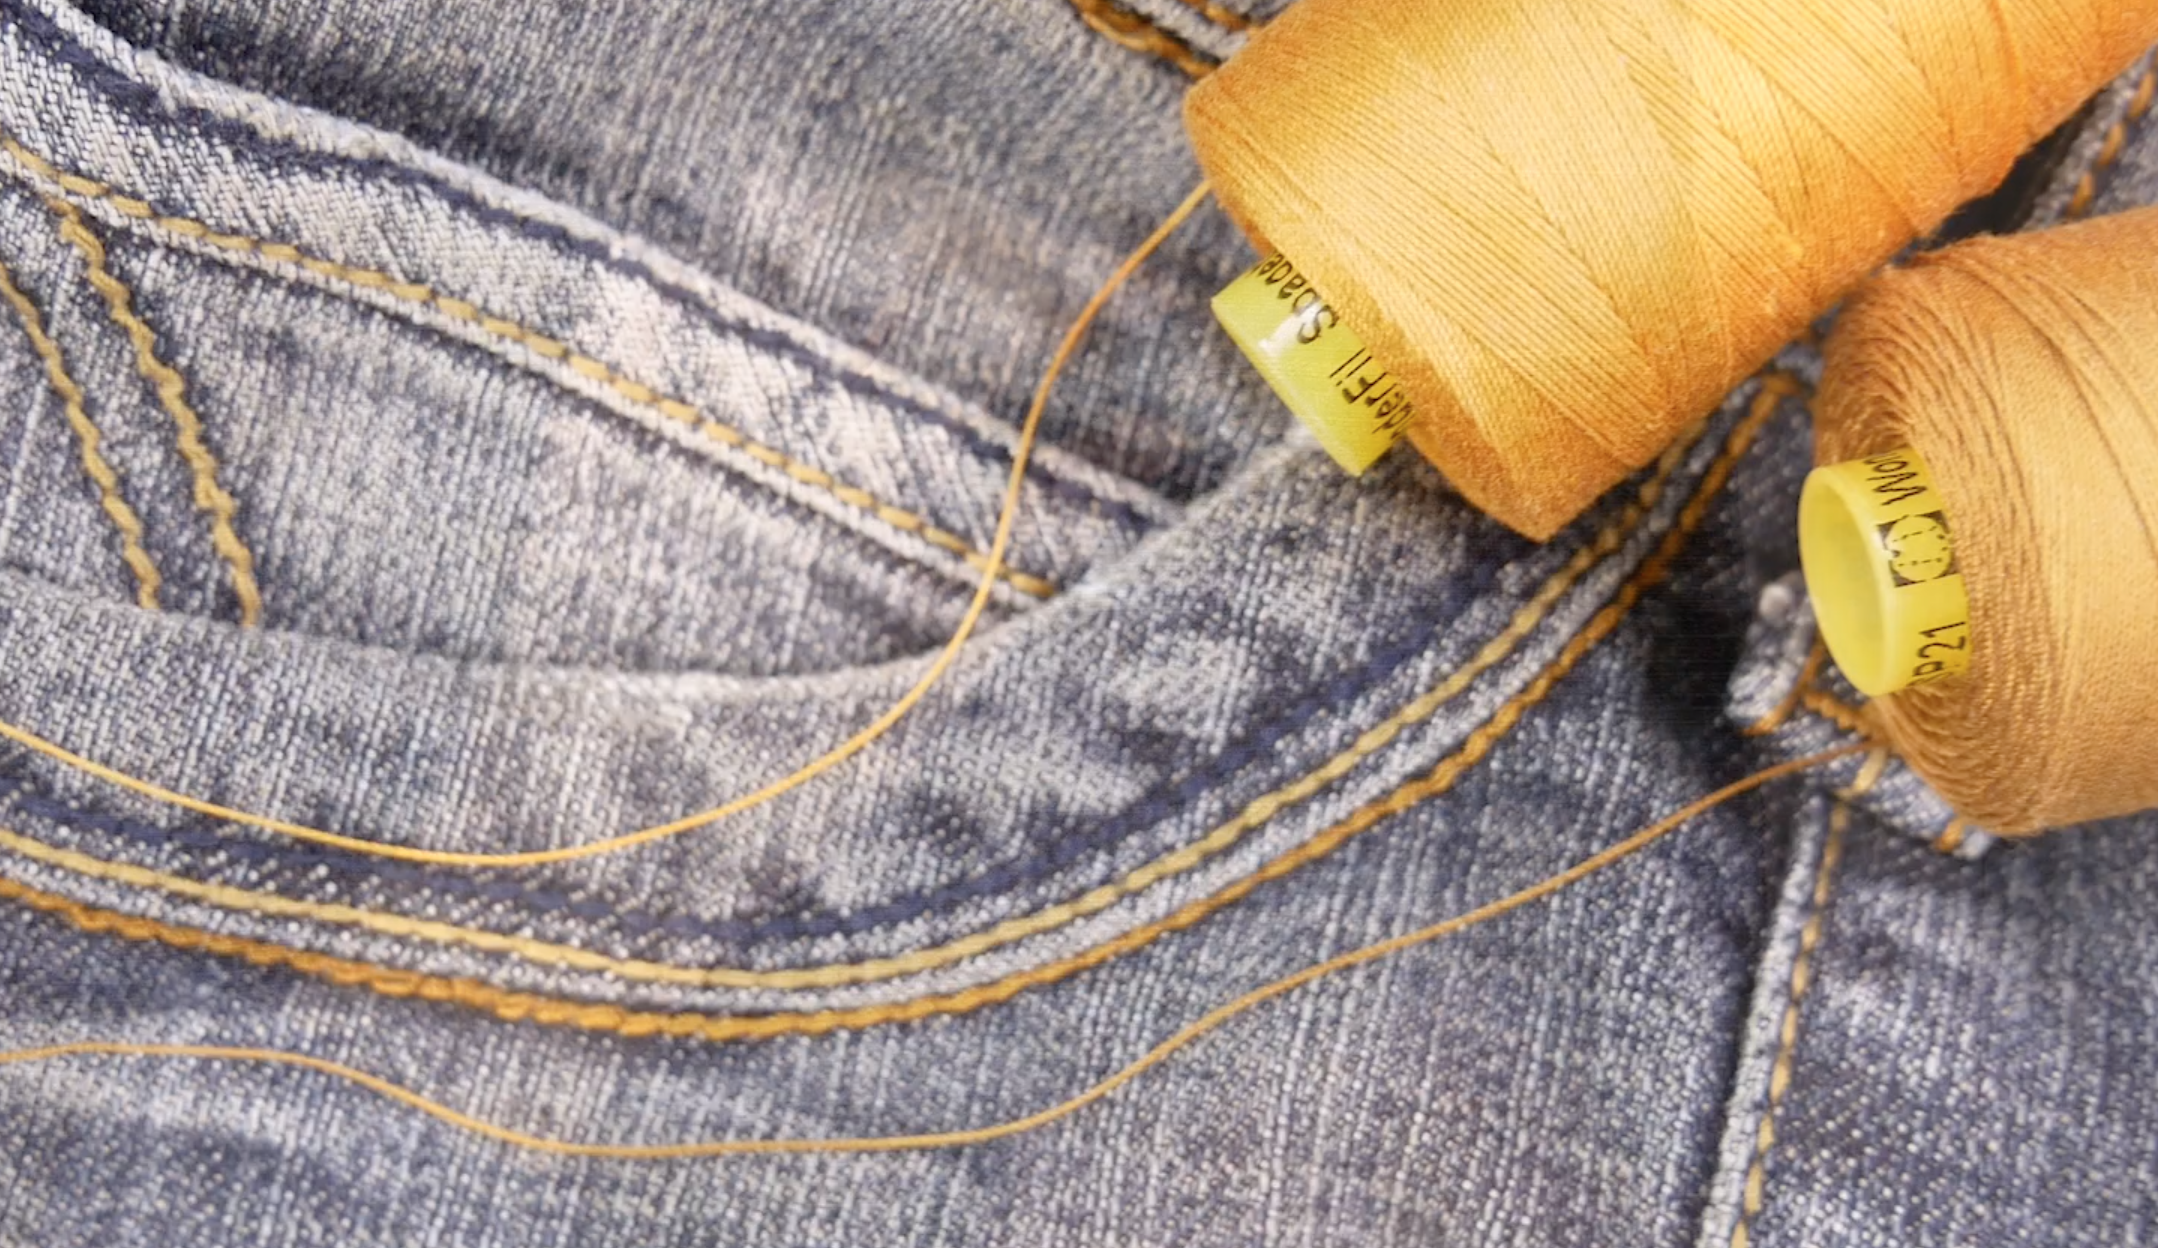
Included with every Bobbinator pack are prewound bobbins wound with our super fine 80wt DecoBob™ thread, an excellent bobbin thread that can be paired with any top thread. DecoBob™ is ideal for hand and machine piecing, quilting, machine embroidery and digitized lace designs, button holes, and hidden stitches. Enjoy with your bobbin thread as a top thread!

Want to try a Bobbinator for yourself or as a gift for that special friend? Find a store in your area that carries WonderFil at http://www.shopwonderfil.ca/shop-local. You can also sign up for our free newsletter to receive more educational sewing tips, tutorials, and free patterns. Register by clicking here! We’ll see you again next time!

Binding Quilts with Your Backing Fabric - No Binding Strips Needed!

Maura Kang

We want to show you a fabulous way of binding your quilts using just the backing fabric. It’s fast, easy, and still looks just as good as if you did it with binding strips. This is a wonderful way of simplifying your binding without sacrificing a professionally finished look!

We’re using this quilt block as an example of how to set up your own quilt to bind it with the backing fabric. This method will of course still work on a larger sized quilt, but we’ll just be demonstrating the technique on this block.

After your quilt has been quilted, you’ll have some leftover batting and backing fabric along the edges. If you plan on binding it with the backing fabric, you’ll need to leave an excess of about 2 or 3 inches of backing fabric.

2.png

Before you can begin binding, you’ll need to square up your quilt. Tuck your backing out of the way and trim the other layers with your rotary cutter. Be careful not to cut through any of your backing fabric. If you can’t get your backing out of the way enough that you won’t cut into it, you can also carefully trim your layers with a pair of scissors as long as you can get it all squared up evenly.

(Pinning the backing fabric out of the way)

(Pinning the backing fabric out of the way)

(Trimming the batting to square up the quilt)

(Trimming the batting to square up the quilt)

When your quilt is trimmed and squared up evenly, you can now trim your back fabric. You will need an inch of back fabric from the edge of your quilt, so take out your quilt ruler and trim it so that you have an even 1 inch of back fabric all the way around.

(Trimming the backing fabric to 1”/2.5cm

(Trimming the backing fabric to 1”/2.5cm

6.png

Fold your back fabric in half so that the edge of the fabric is just touching the edge of the quilt top. You don’t need it to overlap the quilt top, just have it lined up against the edge of it. Press with an iron to hold the fold in place.

7.png

Now you’re going to fold the binding over one more time. Take a glue stick and run it across your binding, then when you fold it down again it will help hold it in place. Press again with the iron to keep it stuck down snugly.

8.png

Now that you have your first folded edge, we’re going to fold the corner into a triangle making a 90 degree angle. Add another dab of glue and press it down with the iron to keep it in place.

9.png

Like before, fold the backing of the next edge down and press it in place with the iron. Take your glue stick and glue the entire edge including the folded triangle. Fold it over again and iron it down as you fold. The corner should have a perfectly mitered edge if your quilt is squared up correctly and the backing is folded evenly.

10.png

Continue these steps for the other two edges. When you come around to the last side, fold the corners on both ends of the backing into a 90 degree angle. Then fold and iron the binding down like before. Dab your glue across the entire fold including both corners and fold again, ironing it down as you go.

11.png

When you’ve finished, your quilt should have perfectly mitered corners and a binding that transitions evenly from back to front without an extra seam like you would with strip binding.

12.png

At this point you can choose to hand stitch your binding down like it’s traditionally done, or you can machine sew it which will go quicker. No matter which method you choose, we highly recommend using a finer thread in the top and bobbin. The thread we’ll be using is called DecoBob, which is an 80wt cottonized polyester thread. Because it’s so fine, it will really help to hide in the fabric so your stitches will be less visible. This is especially important if you choose to machine stitch your binding down. We recommend this thread because it’s strong enough to reliably hold your binding down without being too visible or worrying about the thread breaking.

14.png

To sew the binding down with your machine, you want to stitch as close as you can to the edge as you can. Because we tacked everything down with the glue earlier, the fabric is much less likely to shift as we sew. However, you can hold the edges down with some wonder clips if you need to. Sew all the way around your binding and don’t forget to back tack at the beginning and end.

15.png

There will be a gap at the mitered corners. These can be hand stitched close if you want to, or they can be left open if the quilt isn’t going to experience too much wear and tear. When you’re done, you have a beautifully bound quilt that smoothly transitions from back to front, and perfectly mitered corners. If you machine stitched it down with the 80wt DecoBob thread, you’ll also find that your stitches aren’t too visible either.

16.png

Inspired to sew with WonderFil threads? Find a store in your area that carries WonderFil at www.shopwonderfil.com/shop-local. You can also sign up for our free newsletter to receive more educational sewing tips, tutorials, and free patterns. Register by clicking here! We’ll see you again next time!

17.png

Hemming Lightweight Fabrics With a Serger & Sewing Machine

Maura Kang

We’ll show you the easiest way to make a rolled hem on chiffon fabric, or any other similar lightweight material. We’ll first demonstrate it on the serger, then with a domestic machine for those who don’t own a serger. Using the recommended materials and this technique, the result will be a beautiful rolled hem that looks just as professional as if it came from the store!

A lot of formalwear uses sheer, lightweight fabrics, and this method is a good way to keep the edge looking professional like it had never been modified. Apart from your machine, you’ll only need some small but important materials:

First, you’ll want to choose the right thread. We’ll be using a 100wt poly thread called InvisaFil, which is going to blend really well in the fabric so you don’t even see it. And because the thread is so fine, it will stitch more easily through the thin fabric, resulting in fewer ruffles. It’s important to use a very fine thread like this because apart from showing less, it also won’t weigh down the lightweight fabric either.

1.png

Because the thread is so fine, we’re also going to choose a needle with a smaller eye. Choose a size 60/8 or 70/10 microtex needle which works best on light fabrics.

2.png

Finally, I’m going to use a bobbin that’s been pre-wound with DecoBob thread. This is an 80wt poly thread that comes already pre-wound on a plastic sided bobbin which will pair well with the top thread. You can alternatively wind your own bobbin with the InvisaFil thread, just remember wind it slowly since the thin thread tends to float away. If you’re going to hem your fabric on a serger, obviously you won’t use a bobbin so you’ll want DecoBob thread on a spool for your lower loopers.

3.png

On a Serger: 

We are going to use a 3 thread rolled hem, with InvisaFil in the needle and upper looper, and DecoBob in the lower looper. Consult with your serger manual and adjust the stitch length and cutting blade to get a close narrow hem.

4.png

Once your machine is threaded, do a test run on similar fabric to make sure your fabric is not puckering. You may have to adjust your differential settings to get a flat, smooth edge. 

Mark your hem with a disappearing marking pen, and serge exactly along your marked line. This is the simplest method for a quick fine hem on chiffon or similar fine fabric.

5.png
6.png

On a Domestic Sewing Machine With a Rolled Hem:

If you want to hem fine fabric on a domestic machine, this two step method will help you achieve perfect results. Mark where you want your finished hem and cut 1” below the marked line. We will trim this closer later. Be sure to spread the fabric out flat and even as these types of fabrics can easily shift during cutting. Thread your machine with InvisaFil on top and DecoBob in the bobbin. Now you’re ready to sew!

7.png

Using your fingers, tuck the edge of the fabric over 1/8” below the finished hem length and stitch very close to this folded edge. Do this all the way to the end of the fabric. If you’re hemming a sleeve or skirt, or anything where your piece is a loop, we recommend starting and ending on the seam to help hide the backstitching.

8.png

When you’re done, use a pair of sharp, fine tipped scissors to cut away the remaining fabric as close as you can to your line of stitching without snipping into the stitching itself. Exercise caution so you don’t accidentally snip over your seam. Do this all the way to the end.

9.png

Press all the way around to sink the stitches into the fabric and smooth any puckers.

10.png

Once you’ve finished trimming the excess fabric and pressing, tuck the edge 1/8” over one more time (along the finished hem marking) and stitch it down again over the original line of stitching to complete your rolled hem. If you have trouble tucking the edge over with your fingers and keeping the 1/8” length consistent, you can press the edge down with an iron before sewing.

11.png
12.png

That’s all there is to it! You can see how little the thread shows in the finished hem as well how flat the edge sits because the fine thread doesn’t add extra bulk. As most hems have a curved edge, doing the hem in two steps helps keep your hem even and consistent and eliminates any problems. These materials combined with these simple techniques are all you need for perfect, professional hemming.

(Left: done with serger. Right: done with domestic machine.)

(Left: done with serger. Right: done with domestic machine.)

Inspired to sew? Head on over to shopwonderfil.com/shop-local/ for a list of stores and retailers you can purchase WonderFil threads from. You can also sign up to receive weekly sewing tips, free patterns, and tutorials in our newsletter. Register by clicking here! You can unsubscribe at any time by clicking the unsubscribe button on the footer of every email you receive.

The Easiest Way to Hem a Pair of Jeans

Maura Kang

Rather than rolling up your jeans or taking them to an expensive tailor, why not hem them yourself? This is one of those life skills that’s easy enough for anyone with a sewing machine to do themselves. Wearing jeans that are too long can wear away the denim around the heel in an ugly way. We’re here to show you our tried and true method of hemming jeans easily and quickly for a perfect fit. We’ll also show you our recommendation for notions that will give you the best look and results.

To begin, you’ll want to grab a piece of tailor’s chalk, preferably in white or another contrasting colour from your denim. Put on the pair of jeans that are too long and turn up the fabric under the wrong side of the pants until it’s at the desired length. We recommend doing this step while wearing shoes to ensure you take this extra height into consideration. It may help to have someone do this for you so you’re standing straight. Make a mark at the base of the fabric at the desired length using the tailor’s chalk.

1.png

Now measure the distance from the mark to the bottom of the original hem. You’ll want to mark the other leg at the same distance so they are the same length. Lay one of the legs flat and place a ruler straight against the line. Extend the line all the way down the fabric.

2.png

Holding the ruler in place against the line, you can flip over the pant leg over the ruler and continue drawing the line to the other side of the leg, being careful to keep it straight. You should now have a straight line running on both sides of the pant leg.

3.png

Do the same with the other pant leg. Now that both legs have been marked, you’ll want to mark your fold lines next. On the side of the line closer to the bottom of the pant leg, measure another half inch and make a new mark.

4.png

Now measure another half inch from your new mark, and make a third mark. You’ll want to once again extend these lines straight all the way around the pant leg on both legs. You should now have 3 solid straight lines travelling around both your pant legs.

5.png

Using a pair of sharp fabric scissors, cut off the pants closely following the bottom line, the one closest to the bottom of the pant leg. Do this for both pant legs. You can now begin sewing your new hem!

6.png

Most denim jeans will have a thick gold coloured thread, so it’s best to choose a thread that matches it to look consistent with the rest of the pants. We’ll be using this 12wt cotton thread called Spagetti in the bobbin. It’s a heavier than your usual 40 or 50wt thread, and closely resembles the decorative contrasting brown or golden thread used on jeans. The two Spagetti colours that tend to match most with this jean thread is SP11 or SP21. For this pair of jeans, I’ll be using colour SP21.

7.png

Because we’re using a thicker thread underneath, we want to use a finer thread in the needle. This will ensure the thread doesn’t struggle through the fabric, and it will give you a better stitch consistency and quality. But you don’t want just any finer thread up top, you want to make sure it is strong enough to hold your denim fabric together for a good long time.

We’ll be using DecoBob 80wt thread in the needle. This is a strong but lightweight polyester thread that is ideal to pair with Spagetti in the bobbin. We used a regular 80/12 size needle, however if you find your machine is struggling with the thicker denim fabric, you can also use a denim needle.

8.png

Don’t forget to increase your machine’s stitch length to 3.1. This will help with the machine’s tension when using the thicker 12wt thread, and also match the stitch length showing on the jeans.

Once the machine is set up, you can begin sewing. Roll up the hem following the remaining two lines so that the raw edge is tucked away. If you feel confident with keeping it straight you can begin sewing right away. However, we recommend beginners clip their hems in place to prevent it from moving using sewing clips. We prefer sewing clips instead of using pins because the thick denim can be difficult to penetrate with pins, and it doesn’t cause any puckering.

9.png

You’ll want to sew on the inside of the pant leg so you can follow the edge of the new hem. This way, your heavy 12wt thread in the bobbin will show on the right side of the pant leg.

We recommend starting on the bump of one of the side seams to hide your backstitching. Because of the thickness of the fabric in this area, you may need to gently turn the handle on the side of your sewing machine to manually sew the first few stitches. Sew close to the edge of the hem, being careful to keep your stitching straight and consistent. When you return to your start point, sew over the original stitching and don’t forget to backstitch again.

10.png

Trim your threads and you’re finished! You’ll have a new perfectly fitting pair of jeans that you hemmed yourself.

11.png

Inspired to sew? Head on over to shopwonderfil.com/shop-local/ for a list of stores and retailers you can purchase WonderFil threads from. You can also sign up to receive weekly sewing tips, free patterns, and tutorials in our newsletter. Register by clicking here! You can unsubscribe at any time by clicking the unsubscribe button on the footer of every email you receive.

9 Ways to Sew With Fine 80-100wt Threads

Maura Kang

You may have seen these ultra-fine 80 and 100wt threads on store shelves, but what would you want to use such a thin thread for? As it turns out, these thin threads not only have a ton of great uses, they can also perform better for certain techniques than a regular medium weight 40 or 50wt thread would. We’ll show you when to use these threads and why you should choose them.

Let’s take a quick look at these two 80 and 100wt threads by WonderFil. This 80wt thread is called DecoBob, and the 100wt thread is called InvisaFil. They are both made from cottonized polyester, which is a 100% polyester thread that has been treated to take the stretch and shine out of it, giving the thread a matte finish that hides in the fabric. Because they’re made from polyester, you’ll find they’re actually quite strong despite their size. So, how can you use them?

1.png

1.Piecing

This is one of the most common techniques that comes up for sewers, but have you ever considered what thread to use when doing it? As it turns out, the choice of thread will make a huge difference. We always recommend using an 80wt thread in the top and bottom for piecing, such as DecoBob, because the thread won’t add any additional bulk in the seams. This allows the pieced fabric to sit flatter and it makes it easier to match up your patterns. The difference is actually visible.

2.png

This thread is especially good with foundation paper piecing. We recommend lowering the stitch length to around 1.8 for added security. This also makes it easier to tear the paper out without pulling out your stitching by accident.

3.png

2.Quilting

Both 80wt DecoBob and 100wt InvisaFil are a great choice for quilting when you don’t want the thread to show. We used a light grey InvisaFil to quilt this multi-colored quilt, and as you can see, the fine thread blends into every colour. You only need to choose a basic or slightly match the color to the fabric for it to blend in, making it easy to show the texture of your quilting without showing the thread itself.

4.png

InvisaFil is especially fantastic for micro quilting or any dense quilting. Because the thread is so fine, it doesn’t add a lot of bulk to the fabric. This means you can stitch densely, and your quilt will still stay soft and flexible.

5.png

3. Machine embroidery

Most embroidery threads are a medium 40wt. However, delicate, highly detailed designs, monogramming, and small embroideries will look even better when used with InvisaFil™ thread. This ultra-thin thread makes it possible to keep all the details in small or highly detailed designs that a regular 40wt embroidery thread won’t be able to. This includes lettering as the fine thread will keep edges looking sharp and crisp.

6.png

4.Bobbin thread

We always recommend using a finer thread weight in the bobbin with any thread on top. Choosing an 80wt thread like DecoBob will greatly improve your tension and stitch quality as this finer thread won’t fight for tension in the machine with the top thread. This is especially important when you’re using a thicker thread in the top, such as a 12wt, as you really don’t want to be putting that much bulk in your seams and through the fabric. An 80wt thread like DecoBob will allow your stitching to sit flatter while staying strong enough to be used for any sewing technique.

5.Stitch in the ditch

Many sewers will reach for a monopoly thread to sew invisible stitches, you know, those threads that are translucent and often come in clear or smoke. However these threads can still be seen under bright lights and are stiff and inflexible when sewn with. This is why we recommend using InvisaFil 100wt thread instead. You only need to choose a basic color like grey, or one that slightly matches the color of the fabric for it to blend right in. So even if you sew out of your ditch, this forgiving thread won’t show up anyway.

8.png

6.English paper piecing

This hand technique relies on stitching pieces of fabric wrapped around paper pieces together. Because these pieces sit tightly against each other, a finer thread will make a big difference as to how tightly the pieces lay against one another, and also how much the thread will show up. This is why we recommend using 100wt InvisaFil as opposed to a regular medium weight 40 or 50wt thread. If you’re someone who tends to tug on their thread when you sew and frequently run into thread breaks when doing EPP, then you can use DecoBob 80wt thread instead. We also recommend DecoBob for those who have arthritis in their hands and struggle more with using the finer 100wt InvisaFil.

9.png

7.Hand and machine appliqué

If you’re doing decorative appliqué and don’t want the stitches to be seen, InvisaFil has your back. When doing needle turn appliqué, your appliqué pieces will sit a lot flatter against the background, and the 100wt thread is a master at disappearing. You can even appliqué your pieces by machine using a tiny zigzag stitch. Because InvisaFil is so small, you only need to match the colors to the fabric just slightly and they still won’t be seen. How impressive is that?

10.png

8.Buttonholes

Whether you’re making your buttonholes by hand or machine, these finer threads are a great choice. Should you be sewing your buttonholes by hand, use InvisaFil 100wt thread to stitch together the raw edges of your buttonholes, before going over them with a thicker decorative thread on top. The finer thread will disappear into the fabric so you won’t see it holding the edges together. If you’re doing your buttonholes by machine, then you can choose DecoBob 80wt thread to create nice tight stitches without the thread clumping up.

11.png

9.Sewing & serging sheer or lightweight fabrics

Chiffon, organza, and tulle are some of many lightweight and sheer fabrics you may come across. These fabrics can be difficult to work with, but using a fine 80 or 100wt thread allows the fabric to not be weighed down by the stitching, nor will the stitches show up in sheer fabrics. Whether you’re serging hems, doing construction sewing, or any kind of general sewing with these fabrics, always choose DecoBob or InvisaFil to do it with.

12.png

We hope this list gives you some insight into where you can use these threads in your projects, and why we recommend them! Inspired to sew with InvisaFil and DecoBob? Head on over to shopwonderfil.com for a list of stores and retailers you can purchase from. You can also sign up for our free newsletter to receive more educational sewing tips, tutorials, and free patterns. Register by clicking here! We’ll see you again next time!

Differences Between Thread Weights: Where to Use Them & How They Look

Maura Kang

Your standard thread will often come in a medium 40 or 50 weight. But a huge variety of other threads exist in super fine 100 weight, or super chunky 3 weight options too. In this video, you’ll learn how these different weights of thread will show up (or not be seen at all) and where they can be used for the best advantage. Sew like a pro when you understand how thread weight influences your stitching!

Whether you want the thread to blend in or sparkle and show off, choosing the right thread will make all the difference in your projects.

1.     Medium Weight Threads

These are the types of threads that you will most frequently find, most often 40 or 50wt. They can be used for most construction, quilting, machine embroidery, sergers, and general purpose sewing.

1.png

Medium weight threads can be made from all types of materials including cotton, polyester, rayon, and even metallic. This thread weight will blend or show up depending on what the material is made from. Therefore, a cotton will blend more than a metallic will. But if you really don’t want your thread to show, you may wish to consider a different weight.

2.png

2.     Fine Weight Threads

Fine weight threads run from 60wt to 100wt. These smaller threads are ideal for intricate work such as micro quilting and fine detailed machine embroidery like freestanding designs or monograming.

3.png

They can be made from cotton on the larger end to polyester on the finer end. The fine threads blend better and take up less space, so they’re ideal for hand & machine appliqué, stitch in the ditch, English paper piecing, and micro quilting. Dense quilting will also leave quilts softer, more flexible and lighter as the thread doesn’t take up as much space or add as much weight.

Quilting with InvisaFil™ 100wt, a light grey blends in with every colour.

Quilting with InvisaFil™ 100wt, a light grey blends in with every colour.

This 80wt cottonized polyester thread called DecoBob is our favourite piecing and bobbin thread. Because it’s so fine, it makes seams lay flatter and crisper when piecing. This is especially useful when it comes to foundation paper piecing or when you need to accurately match up patterns and blocks. It’s also incredibly strong, making it a reliable choice to hold your quilts and projects together.

Piecing with DecoBob™ 80wt.

Piecing with DecoBob™ 80wt.

As a bobbin thread it is unsurpassed. The fine thread can be paired with any top thread including thicker threads. It greatly reduces tension problems, lets your seams lay flatter and look more professional, and as a bonus, allows your bobbin to hold more thread since the fine thread takes up less space.

7.png

3.     Heavy Weight Threads

Heavy weight threads range from 12wt – 3wt. 12wt threads can still fit through the eye of a sewing machine needle, so you can do some incredible stitching with this thicker thread. Whereas 8wt and heavier threads are not recommended as a top thread.

8.png

Use 12wt for bold machine quilting, big stitch hand quilting, thread painting, decorative stitching, hand embroidery, sashiko, big stitch hand quilting, crafts, and even hemming jeans. When using it on the machine the thicker thread will stand up from the fabric giving you a wonderful textural effect.

Decorative stitching with Fruitti™ 12wt cotton thread.

Decorative stitching with Fruitti™ 12wt cotton thread.

8wt threads and thicker the most commonly used for hand embroidery. Even though they’re too thick to fit through the sewing machine needle, you can still do couching and bobbin work with it on a machine, or use it in the loopers of a serger. 8wt and thicker can also be used for the same things as 12wt, in addition to crochet and knitting.

10.png

Still have questions about thread weight? Let us know in the comments. Ready to start sewing? You can find a list of stores that carry WonderFil threads on www.shopwonderfil.com/shop-local/. You can also sign up to receive weekly sewing tips, free patterns, and tutorials in our newsletter. Register by clicking here! You can unsubscribe at any time by clicking the unsubscribe button on the footer of every email you receive.

How to Double Fold Machine Bind a Quilt

Maura Kang

We’re going to show you how to make a double fold quilt binding on a sewing machine. If you’re like us, we’re always eager to get our quilt finished at this point, so this is our favourite way to get this final step done quickly while making sure it still looks perfect.

Apart from the quilt itself, you’ll need a few basic things. We’re going to use this 80wt thread called DecoBob to stitch the binding. It’s a very fine thread with a matte finish, so it will hide in the fabric and make the stitching less obvious. It’s also a very strong thread despite its size, so this is a great option for piecing and stitching anything down securely.

1.png

You’ll also need a cutting mat with a rotary cutter and quilting ruler to cut your binding accurately. An iron is needed to give your binding strips a quick press. We’ll also need a disappearing marking pen or a piece of fabric chalk.

Most importantly, you’ll need the fabric you want to bind your quilt with. We’ll show you how to cut and sew it together. Most patterns will tell you how much fabric you need for a binding, however if you’re doing your own quilt, you’ll have to do some math to figure out how much you need. There is an excellent binding calculator provided by Quilter’s Paradise. Alternatively, you can use the following formula to calculate how much you’ll need.

2.png

Take the width of your quilt multiplied by two and add it with the length of your quilt multiplied by two to get the circumference of your quilt. Then add another ten inches to be on the safe side so you don’t run out of binding. Take this number and divide it by the width of your fabric to find out the number of strips you need to cut to complete your binding.

So for example, we might have a 20 inch by 30 inch quilt. The width of our binding fabric is 43 inches, and we want the binding to be 2 and a half inches wide.

3.png

20 inches times two, plus 30 inches times two, plus an extra 10 inches to be safe, equals 110 inches. We’ll take the 110 inches and divide that by the width of fabric, which is 43 inches, to get 2.6 strips of binding required. We can round this up to 3 strips to make it easier.

4.png

Knowing this, we want to cut 3 strips along my width of fabric that are 2 and a half inches wide each to have enough binding for the quilt.

5.png

Now that we know how much fabric we need, we’ve gone and cut the strips to the measurements required. Next we need to sew these strips together into one long binding. To do that, we need to trim both ends of the strip to a 45 degree angle, which can be measured on the quilting ruler. Make sure they’re both trimmed facing the same direction.

6.png
7.png

Take the ends of two different strips and place them right sides together, diagonal ends matched up, and pin them together. However, if you line up the corners perfectly and are using a quarter in seam allowance, you will notice that the pieces will end up a quarter inch off.

8.png

So you will need to offset the pieces by a quarter inch when you pin them together so that after it’s sewn, your pieces will line up perfectly.

9.png

Because the thread we’re using is so fine, we’ll set the stitch length to 1.80. Using a ¼” seam allowance, sew the pieces together.

10.png

Do this for the rest of your strips until all the pieces are sewn into one long strip.

11.png

You can leave the end of the last strip squared off.

12.png

Turn the binding strips wrong sides together and press to crease it together, creating the double fold binding. However if you feel confident and don’t want to spend time pre-creasing your binding, you can fold it by hand as you sew along.

13.png

Now we’re going to open the binding up on one end and fold it over into a diagonal line so the touching edges are straight. Press the fold to create a crease. We’re now ready to start sewing it on!

14.png

We’re going to start by stitching down the end that has the diagonally folded edge. Lay the binding out completely open on the back side of the quilt, starting with the end you made the diagonal fold. We prefer to position it around the middle of the quilt on one of the long sides.

15.png

Match the edge of the binding with the edge of the quilt. Stitch it on a ¼” seam allowance using your walking foot and sew to a little bit after the raw edge of the fabric.

16.png

Snip your threads and take your quilt out of the machine. Now we’re going to fold over the binding back in half. Move your quilt about three to four inches down from where your stitching ended and start stitching your double fold binding down also with a ¼” seam allowance. That gap will create a nice pocket to tuck the tail into when you come back around.

17.png

At the corner of the quilt, we’re going to place a pin right where the quilt ends so we know where it is. Exactly ¼ of an inch away from the pin, we’re going to stop sewing. Back stitch to make sure your stitching doesn’t come out and take the quilt out of the machine.

18.png

Finger press the binding into a right angle. Then fold it back down over itself to form a tidy corner like so. Make sure the edge of the binding is lined up with the edge of the quilt. We’ll use a pin to keep it from shifting.

19.png
20.png

Put the quilt back in the machine and continue sewing at a ¼” seam allowance down the next edge. Continue doing this for the rest of the quilt.

21.png

Now we’ve come back around to where we first started. We can now join the strips together. Since we have a lot of extra binding, we’ll need to trim some off, making sure that there’s still enough to completely fit inside the pocket we made, otherwise there will be a hole in the binding.

22.png

Tuck the trimmed end into the open pocket we made earlier with the diagonal piece folded around on top. Holding it place with your fingers, continue sewing down until you reach the starting stitches. Trim your threads and now you can see the binding is completely stitched to the back side of the quilt.

23.png

We can now focus on sewing the binding to the front of the quilt. Fold the binding around to the front and use the quilting clips to hold them in place.

24.png

Just like on the other side, sew down with a ¼” seam allowance. You can start closer to the corner this time to hide your backstitch.

25.png

When you reach a corner, fold the next edge over to make a crisp diagonal mitered line and sew over it. Keep the needle down and pivot the quilt to the next edge, keeping in mind to stay at a ¼” seam allowance.

26.png

Continue sewing all around the quilt until you finish stitching it all down. There will be a small gap left where you started and ended your binding. If you wish, you can hand sew this down, however it’s up to you as we find that it doesn’t cause a problem to leave it like this.

And there we have it! One beautifully bound quilt.

27.png

We hope this tutorial made it easier for you to bind your next quilt! Let us know in the comments if you learned something new.

Ready to start sewing? You can find a list of stores that carry WonderFil threads on www.shopwonderfil.com/shop-local/. You can also sign up to receive weekly sewing tips, free patterns, and tutorials in our newsletter. Register by clicking here! You can unsubscribe at any time by clicking the unsubscribe button on the footer of every email you receive.

6 Reasons to Always Use a DecoBob Pre-Wound Bobbin

Maura Kang

Ever wondered why you should bother using a pre-wound bobbin when you could always wind your own? These handy sewing accessories are absolutely not just for the lazy; they can make a HUGE difference in your stitch quality! We’ll demonstrate first-hand why you should always keep these 80wt DecoBob pre-wound bobbins in your sewing room.

They’re our little secret to effortlessly better tension, flatter seams, a beautiful stitch quality, and a bobbin thread that never seems to run out. If that sounds incredible to you, the secret is this little bobbin.

1. They’re Basically Invisible

Being an 80wt thread, it’s incredibly fine. You can see how the thread blends into the fabric behind it. Since it’s so small, it basically disappears. However, since this is a polyester thread, it’s also incredibly strong and can be relied on to construct your quilts and projects.

1.png

DecoBob is called a cottonized polyester. This is a 100% polyester thread that has been treated so that it no longer carries a stretch and has more of a matte finish, helping it blend into the fabric so it can’t be seen. That’s a great feature for a bobbin thread as an imperfect tension will help the bobbin thread hide if it pokes through to the top.

2. They Last Forever

Because the thread is so fine, the bobbin can fit way more thread in it. They also come wound with a much higher density of thread from the factory, so you can sew for far longer before you need to interrupt your sewing to replace it with a fresh one. Depending on the density of your stitching, you could piece and quilt an entire bed quilt with only 2 to 3 bobbins.

3.png

3. They Are Wound Perfectly Evenly

DecoBob pre-wound bobbins come wound perfectly evenly from the factory. If you’ve ever wound your own bobbin, you can see it filling a clump on one side before flowing back to fill the other side.

4.png

This unevenly self-wound bobbin will actually change the tension on your machine. To demonstrate, we embroidered one half of this tear-shaped embroidery using a self-wound bobbin with the same DecoBob thread on the left, and on the right we used a DecoBob pre-wound bobbin. You can visibly see larger gaps on the self-wound side than on the right side, which lays flatter with a higher top stitch quality.

5.png

4. Super Flat Seams

You may have heard a common sewing myth that states to always use the same weight of thread on the bobbin as you are in the needle. We’re here to tell you this is completely untrue. A finer bobbin thread will always benefit your sewing no matter what size your top thread is, however this is especially true when using thicker top threads like a 12wt. 

To demonstrate, we pieced three small blocks. On the left we used a medium 50wt construction thread on the top and the bottom. In the middle we used a 50wt in the top and the 80wt DecoBob in the bottom. And on the right, we used 80wt DecoBob in both the top and bottom. You can see how much flatter the seams are with the finer weight thread used. Using a finer weight in the top and bobbin will make your piecing look more professional and make it easier to match patterns and line up quilt blocks accurately. All of this from simply changing your thread!

6.png

5. Free of Glues & Residues

If you take a close look at the DecoBob thread, you can see its basically free of any lint. But here’s a dirty little thread industry secret to look out for: even if your thread looks like it’s low on lint, it may actually have a glue or residue applied to the thread to stick the lint down, only giving the illusion that it’s low lint. This sticky residue will come off inside your machine as you’re sewing and is even more difficult to clean out than regular lint.

We promise all of our DecoBob pre-wound bobbins come 100% totally free of any glue or residue. You can count on a clean, quality thread that will leave your sewing machines healthy and happy.

A sideless bobbin with glue applied to hold it together.

A sideless bobbin with glue applied to hold it together.

6. Re-Use It or Recycle It

All DecoBob pre-wound bobbins are wound on plastic sided bobbins. Re-use these bobbins again, use it to take some hand stitching with you while you travel, or check to see if your local recycling depot will take them.

8.png

Tell us in the comments your experience using pre-wound bobbins! Let us know if you still have questions about DecoBob pre-wound bobbins, or tell us where you love to use them. Ready to start sewing? You can find a list of stores that carry these threads on www.shopwonderfil.com/shop-local/.

Successfully Sew with Fine 80-100wt Threads

Maura Kang

Have you ever heard about 80 and 100wt thread? These ultra-fine threads are totally game changers when it comes to piecing, appliqué, quilting, and even as a bobbin thread. However, since most sewing machines are calibrated for medium weight thread, such as a 40 or 50wt, sometimes you may need to make some minor adjustments to your machine when sewing with this thread.

You probably won’t need to follow everything on our list to sew with 80 and 100wt thread. Most of the time these threads will sew beautifully without any trouble. However not all sewing machines are made alike, so what may work on one machine will need a setting adjustment on another. This is a list of suggestions and what issues can come up when sewing with 80 and 100wt thread, so you can sew with beautiful results.

Let’s take a closer look at these 80 and 100wt threads in comparison to a regular 50wt thread. You can see that they’re much finer, however WonderFil manufactures these threads from a cottonized polyester. This means the threads are strong and have the stretch removed from them, making them as easy to sew with as cotton thread does in the machine. They also take on more of a matte finish so they hide in the fabric a lot better.

1.png

We always recommend a needle size of 70/10 or 80/12 when working with these threads. A bigger needle will punch a hole that’s too large for the thread, so the thread will be sitting in a hole that’s too large for it to fill, resulting in an ugly stitch. The thread will also move around more in the larger eye, so a smaller eye will give you more control of the thread.

2.png

Choose a needle depending on the technique you’ll be using, or the fabric choice. For most general sewing, a universal needle works just fine. If you’re quilting, opt for a quilting needle. Or if you’re sewing with fusibles, choose a super non-stick needle, as these needles will help the thread glide through the sticky material and reduce friction.

3.png

You won’t normally need to adjust your tension with these threads and can often leave your machine on its regular tension settings. However, if you find that your bobbin thread is pulling to the top, that means you’ll need to loosen your top tension. If your top thread is pulling to the bottom, it means the bottom tension is too tight. Always sew a test piece on a scrap piece before sewing on your actual project.

Using a needle that’s too large for the thread will result in ugly holes that the thread won’t fill.

Using a needle that’s too large for the thread will result in ugly holes that the thread won’t fill.

If your bobbin thread is pulling through to the top, you’ll need to loosen the top tension. If the top thread is pulling through to the bottom, you’ll need to loosen the bobbin tension.

If your bobbin thread is pulling through to the top, you’ll need to loosen the top tension. If the top thread is pulling through to the bottom, you’ll need to loosen the bobbin tension.

Consider your bobbin thread when sewing with super fine threads. We recommend DecoBob™, an 80wt cottonized polyester, as your ideal bobbin thread, due to the fact that it greatly reduces tension problems and helps seams lay flatter since the thread doesn’t take up a lot of space. While we recommend DecoBob in the bobbin with any top thread, this is especially important if you’re using a super fine thread in the top. Using a much thicker thread in the bobbin can lead to bulky seams, tension problems, and a poor stitch quality.

6.png

There are some instances where it’s okay to use 100wt both in the top and bobbin. This is InvisaFil™, a 100wt cottonized polyester thread, and it’s just a little finer than DecoBob. Because it’s thinner, it won’t be quite as strong as DecoBob, but that’s okay if you’re stitching something decorative like a machine embroidery design. For anything that will require more utility, for example free motion quilting using InvisaFil™ in the top, then we suggest using DecoBob™ in the bobbin since your quilting will hold up better.

When winding these threads on a bobbin, try to go slower if you can. Because these threads are so fine and light, they tend to fly away a little and can cause tension issues when sewing. If you can, choose bobbins that come pre-wound with DecoBob™. These are available in standard sizes class 15, size L, and size M. They always come perfectly wound at the factory and fit more thread than when you wind a bobbin yourself, so you’ll have the benefit of a long-lasting bobbin that always has perfectly consistent tension.

7.png

If you are sewing anything with a single stitch, we recommend using a single stitch plate on your machine. Single stitch plates have just one little hole in the middle and is not made for any side to side stitching. This will give you more control over your thread because it will only be directed through this hole.

Single stitch plate.

Single stitch plate.

Side-to-side stitching plate.

Side-to-side stitching plate.

A thread plate made for decorative stitches, or any side to side stitching, will allow the thread to move around more, so the backside of your stitching can sometimes turn out not looking as nice. This can be true for any thread but is more noticeable with finer threads. This is especially important if you’re doing machine embroidery because of the speed it moves at. Single stitch plates don’t always come with a machine but can be purchased separately. These are just as easy to change and replace as a needle.

When setting the stitch length on your machine, the number displayed is in units of millimeters. So, if your stitch length is set at 2, it means you’ll have a 2 millimeter stitch length. When working with these super fine threads, we recommend you drop the stitch length down to 1.8, especially if you’re doing foundation paper piecing. Because the thread is smaller, a shorter stitch length will help a great deal for making strong, firm stitches. You’ll notice the difference with foundation paper piecing as pulling the paper out won’t distort your stitching as much as it would if you had a regular stitch length.

10.png

DecoBob™ and InvisaFil™ both come on cross-wound spools. Cross-wound refers to the direction the thread is wound in, in this case you can see they are wound around the spool at an angle. Cross-wound threads should always go on your machine on the horizontal spool pin as the thread draws best as it is pulled from the direction at the top of the spool.

If you were to put a cross-wound spool on your vertical spool pin, you can see the thread now draws from the side of the spool. But because the thread is cross-wound, it creates an extra drag as it draws, which will give you tension changes and affect the quality of your stitch. Only stack wound threads should be placed on the vertical spool pin, which is when the thread is wound straight across.

16.png

Here’s some issues that might come up, and how to resolve them. 

If you find the thread is shredding or breaking, it can be caused by a few different things. If you’re already using the correct size needle, think about when you last changed it. Most regular needles need to be changed after 8 hours of sewing. A dull needle will not pierce correctly and will need to be replaced.

A needle that has a burr on it can also cause thread breaks. You can also check that the needle is pushed in all the way as otherwise, it will be too long and caused skipped stitches or thread breaks. A bent needle can also knock out the timing on your machine as the bobbin won’t grab the top thread properly and miss. This will also result in skipped stitches.

11.png

Another reason you might experience thread breaks could simply be that you’re sewing too fast. Slow the speed on your machine. If you continue to experience thread breaks, play with your tension settings and check your needle for any of the issues we just mentioned.

Because DecoBob™ is polyester, it’s a very strong thread that is actually stronger than a 60wt cotton. This is why we recommend it as your go-to utility piecing and bobbin thread. As the thread is much finer, it reduces tension problems and makes piecing look flatter, more professional, and makes it easier to line up your patterns.

12.jpg
13.png

InvisaFil™ is our solution to monopoly invisible threads. You know, that fishing wire thread that’s often a pain to sew with. InvisaFil™ is WonderFil’s finest thread line at 100wt, and because it’s so thin, it brings in a lot of other benefits that monopoly invisible thread won’t.

Because it’s so thin, it makes appliqué lay super flat. The thread also just disappears into the fabric, which is great for any application where you don’t want the thread to show. Apart from appliqué, it’s also amazing for stitch in the ditch where if you fall off your path, you won’t even see it. And also for any quilting where you need a thread to blend across multiple colours. On this quilt, we used a light grey InvisaFil™ colour to quilt the entire piece, but it just blends into every colour.

You can also use DecoBob™ and InvisaFil™ for machine embroidery, and you’ll find that these threads make a noticeable difference. We embroidered the same lace pattern using a 50wt thread and then again with DecoBob™ 80wt. Because the thread takes up less space, you’ll see that the pattern is less thick and more visible when using DecoBob.

14.png

InvisaFil is also fantastic for any smaller, detailed embroidery. You can see the difference when using a 40wt embroidery thread, then how much more detail you can keep at a much smaller scale when using 100wt InvisaFil™. It’s also fantastic for any embroidered lettering as the thread is able to give you straight, crisp edges that can’t be achieved with 40wt thread.

15.png

Have you used 80 or 100wt threads in your sewing machine? If you want to share how you used DecoBob™ or InvisaFil™ in your projects, let us know on social media! Message us on Instagram @wonderfilspecialtythread or on Faceback @WonderFil, or use #wonderfil to tag us.

Introducing DecoBob 80wt Cottonized Poly Thread

Maura Kang

This thread line has been around for some time and it’s been making waves in the sewing community. Designers Violet Craft, Sue Daley, and Laundry Basket Quilts have even made their own packs to include it. So, what’s the fuss about? Let’s take a closer look at how this thread can visibly improve your projects and its unique properties.

1.png
2.png

This thread is veeeeery fine, 80wt fine to be exact. As the rule goes, the higher the thread weight number, the thinner the thread. So an 80wt thread is actually quite small. But don’t worry, this little ant knows how to hold its own. Giving the thread a tug will show you that this little thread is surprisingly strong for its size! This is because it’s created using cottonized polyester.

3.png
4.png

Don’t let this name fool you, a cottonized polyester is actually 100% polyester, which is well known as a strong material to make thread from. But when it’s cottonized, it undergoes a treatment where all the stretch and shine is taken out of it, allowing it to not only sew really easily through your machine, but it also hides in the fabric a lot better. This matte finish in addition to its small size really helps make it blend in. And because it’s really strong, you have the ultimate bobbin thread. So even if your bobbin pulls through to the top, you don’t have to worry about it showing up.

5.png

WonderFil puts this thread on all its prewound bobbins because of these ideal properties. There’s a lot of really great reasons to use a prewound bobbin, so don’t forget to check that out in our other video, “6 Reasons to ALWAYS Use a DecoBob Prewound Bobbin”.

But it’s not only great in the bobbin, you’ll want to use DecoBob in the needle to improve a variety of techniques. Even something as simple as piecing.

Pretty much every sewer is going to piece a project at some point, but you can improve your results simply by changing the thread to use DecoBob in the top and bobbin. Because the thread is so fine, it allows the seams to sit flatter and tighter, which in turn makes it easier to match your patterns and line up your project pieces. It will also look and feel noticeably flatter. And if you’re piecing something with a lot of small, intricate pieces (we’re looking at you, Courthouse Step), this thread will make a huge impact on allowing the fabric to sit flatter. It’s amazing how much space the thread will take up in the fabric, and it shows!

Alison Glass + Giucy Giuce Mini Series Courthouse Step Block

Alison Glass + Giucy Giuce Mini Series Courthouse Step Block

This thread isn’t just limited to sewing machines. DecoBob makes a gorgeous machine embroidered lace. Because the thread is so fine, you can show off all those pretty little details found in lace designs. The lace will be additionally extra soft and supple to the touch.

7.png

You can find DecoBob in 36 colours. If you’re sewing with it by hand, we recommend using a #10 or #11 sharps needle, or a #9 or #11 short darner needle. In the machine we recommend using a 70/10, 80/12 microtex needle, a 75/11 or 80/12 quilting needle, an 80/12 topstitch needle, or a size 16 longarm needle.

Let us know if you used DecoBob thread in one of your projects! Instagram @wonderfilspecialtythread or on Faceback @WonderFil, or use #wonderfil to tag us.